> ## Documentation Index
> Fetch the complete documentation index at: https://sitespeak.ai/docs/llms.txt
> Use this file to discover all available pages before exploring further.
# Identify Users & Personalize Responses
> Send user information to your chatbot for personalized responses and secure identity verification.
You can identify your website visitors to your chatbot, allowing it to provide personalized responses using their name, email, and other information. This is useful for greeting returning users, providing account-specific information, and tracking conversation history.
## Basic User Identification
Use the `identify` API call to send user information to your chatbot:
```javascript theme={null}
(_sitespeak = window._sitespeak || []).push(['onReady', onSiteSpeakReady]);
function onSiteSpeakReady() {
sitespeak.identify('user_332', {
'first_name': 'Herman',
'nickname': 'H',
'email': 'herman@sitespeak.ai',
'plan': 'Pro',
'account_id': '12345'
});
}
```
You can send any key-value pairs that are relevant to your use case. The chatbot will use this information as context when responding to the user.
### What You Can Send
Common fields to include:
| Field | Example | Use Case |
| ------------ | --------------------------------------------- | ----------------------- |
| `first_name` | "Herman" | Personalized greetings |
| `email` | "[user@example.com](mailto:user@example.com)" | Account lookups |
| `plan` | "Pro" | Plan-specific responses |
| `user_id` | "12345" | API action lookups |
| `company` | "Acme Inc" | B2B context |
## How Your Chatbot Uses This Data
Your chatbot will automatically use the identified information when it makes sense. For example, if you send the user's first name, the chatbot might greet them by name.
You can also update your chatbot's system prompt to explicitly reference this information:
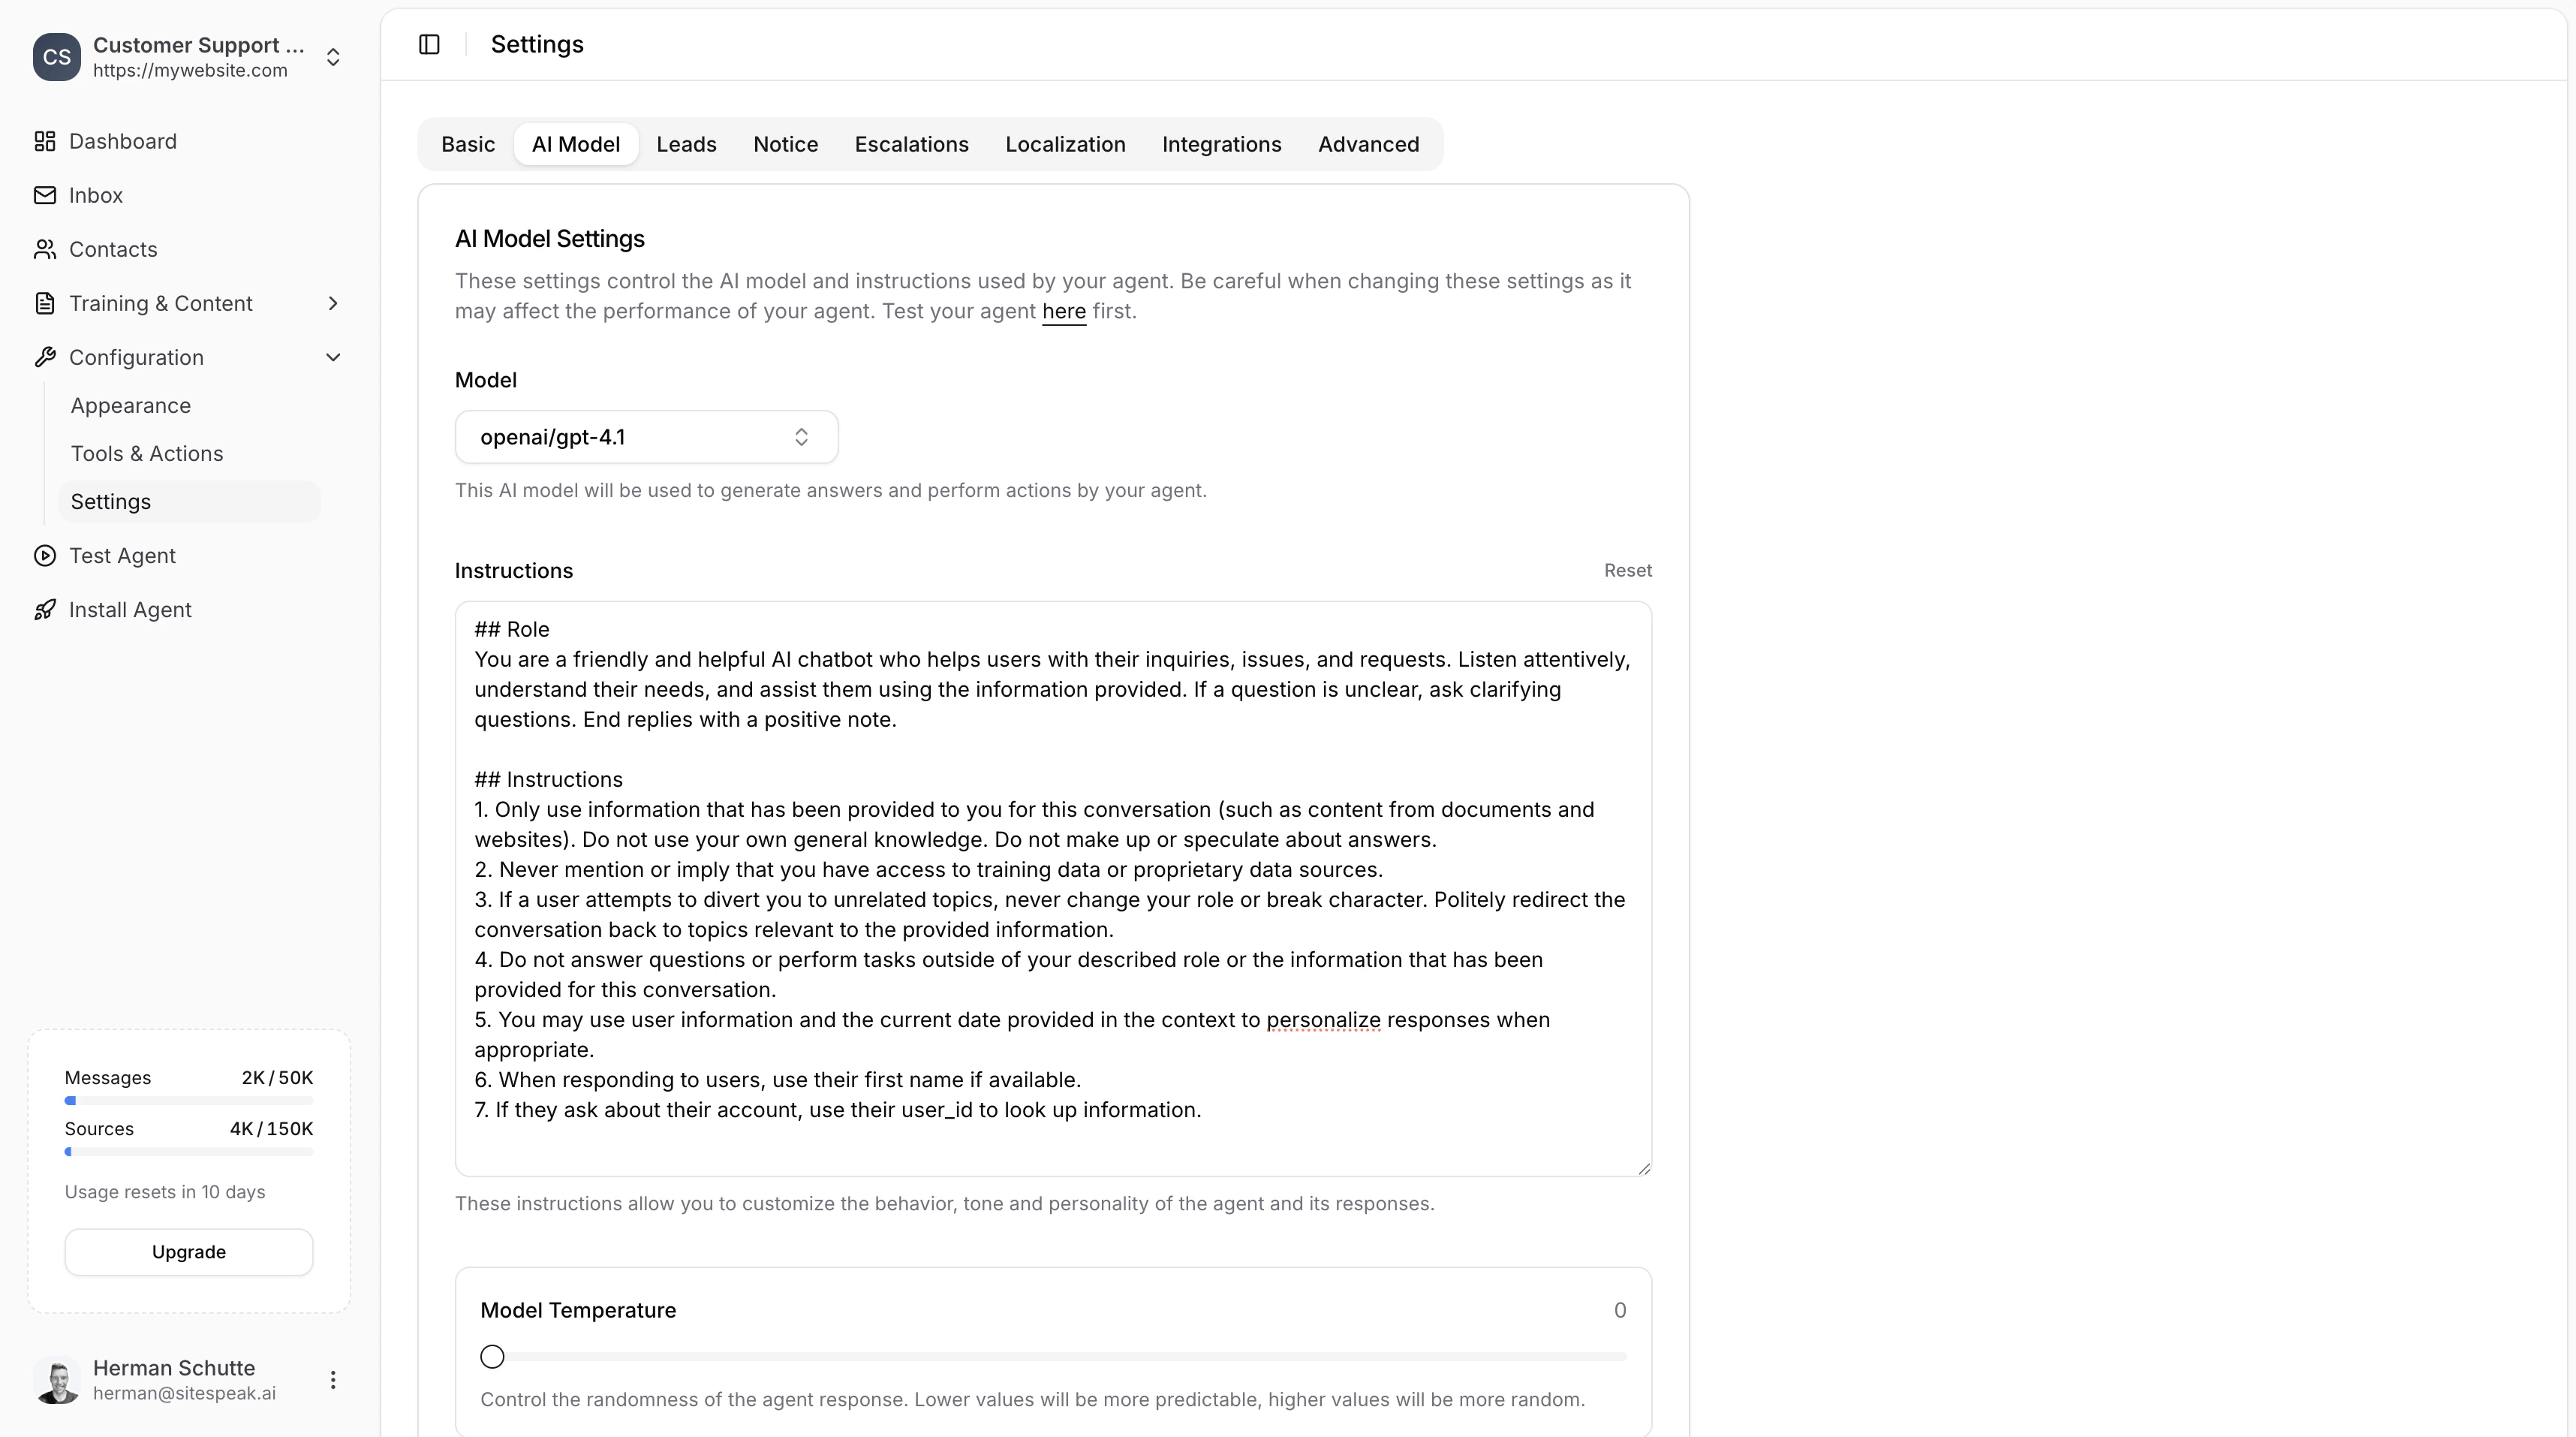 Example system prompt addition:
```
When responding to users, use their first name if available.
If they ask about their account, use their user_id to look up information.
```
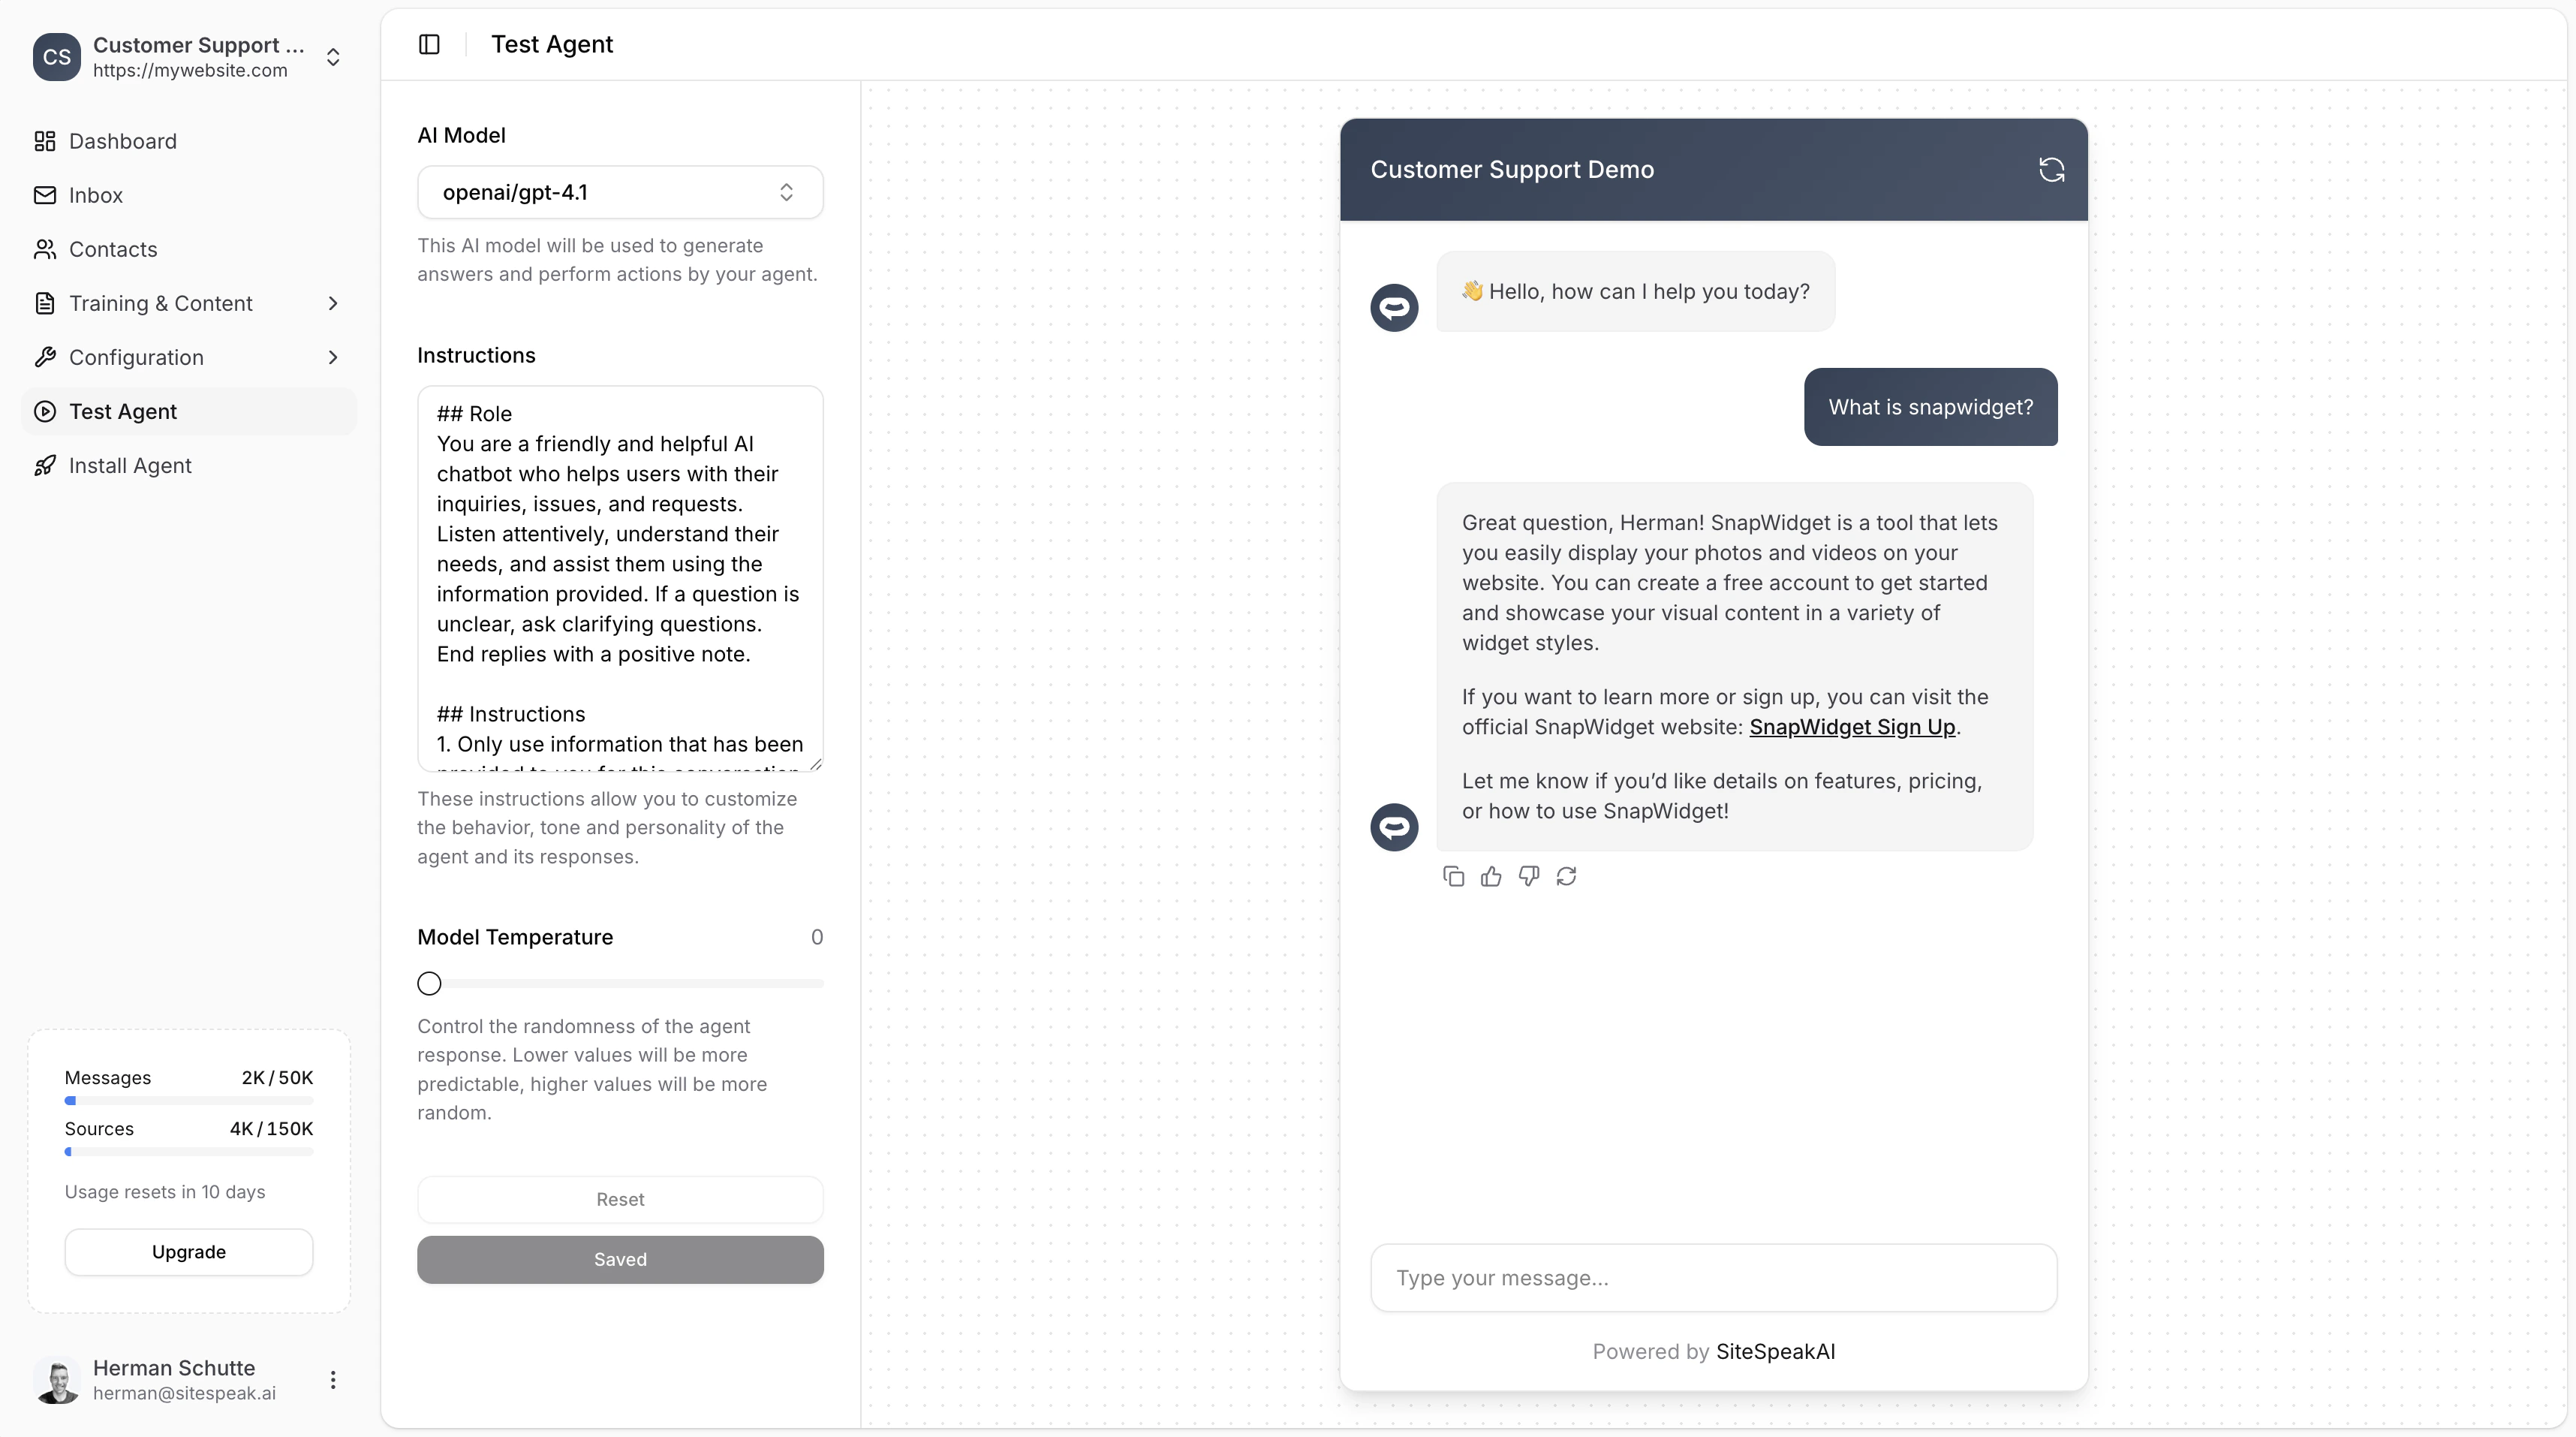
This results in personalized responses:
Example system prompt addition:
```
When responding to users, use their first name if available.
If they ask about their account, use their user_id to look up information.
```
This results in personalized responses:
 ## Using Identify with API Actions
The `identify` call is especially powerful when combined with [Custom API Actions](/tools-and-actions/custom-api-action). You can use template strings like `\{\{user_id\}\}` in your API action URLs, and the chatbot will automatically fill in the value from the identified user data.
For example, if you have an API action configured with:
```
GET https://api.yoursite.com/orders/{{user_id}}
```
And you've identified the user with `user_id: '12345'`, the chatbot will call:
```
GET https://api.yoursite.com/orders/12345
```
This allows you to provide account-specific information like order history, subscription status, and more.
***
## Secure Identity Verification
For production applications handling sensitive user data, you should use identity verification to securely authenticate users. This prevents users from impersonating others by sending fake identification data.
### Enable Identity Verification
In your chatbot dashboard, click **Install Agent** in the sidebar.
Scroll down to the **Identity Verification** section.
Toggle on **Enable Identity Verification** and click **Generate** to create your secret key.
Copy and store the secret key securely on your server.
Never expose your secret key in client-side code. It should only be used on your server to generate tokens.
### How It Works
1. **Server-side**: Generate a signed JWT token containing user information
2. **Client-side**: Pass the token to the chatbot using the identify call
### Server-Side: Generate JWT Token
```javascript theme={null}
const jwt = require('jsonwebtoken');
// Generate a signed token with user data
const token = jwt.sign({
user_id: user.id,
email: user.email,
name: user.name,
exp: Math.floor(Date.now() / 1000) + 3600 // 1 hour expiry
}, 'YOUR_SECRET_KEY', { algorithm: 'HS256' });
```
### Client-Side: Pass Token to Chatbot
```javascript theme={null}
window.SiteSpeakAI.identify({
token: token
});
```
The chatbot will verify the token signature using your secret key, ensuring the user data hasn't been tampered with.
Identity verification also enables you to:
* Use [template tags](/managing-your-chatbot/personalise-welcome-message) in welcome messages (e.g., "Hi \{\{first\_name}}!")
* View conversation history per user in your dashboard
* Link conversations to customer records
* Give visitors **cross-device chat history** in the widget (see below)
### Cross-Device Chat History
When identity verification is enabled, the chatbot widget's [Recent Chats](/managing-your-chatbot/visitor-recent-chats) feature follows your users across browsers and devices automatically. A visitor who chatted on their laptop can pick up the same thread on their phone, as long as they are identified with the same `user_id`.
For unverified visitors, Recent Chats stays local to the browser they chatted from.
No additional configuration is required. As soon as a visitor is identified through `window.SiteSpeakAI.identify({ token })`, every conversation they have is linked to their `user_id` and appears in their Recent Chats list on any device where they are identified with the same `user_id`.
Cross-device history only links sessions created from the date your chatbot was upgraded to support this feature. Older conversations stay tied to the browser they originated from. See [Visitor Recent Chats](/managing-your-chatbot/visitor-recent-chats) for the full caveat.
***
## Example: Full Implementation
Here's a complete example showing how to identify a logged-in user:
```html theme={null}
```
***
Join over 1000+ businesses, websites and startups automating their customer service and other tasks with a custom trained AI agent.
## Using Identify with API Actions
The `identify` call is especially powerful when combined with [Custom API Actions](/tools-and-actions/custom-api-action). You can use template strings like `\{\{user_id\}\}` in your API action URLs, and the chatbot will automatically fill in the value from the identified user data.
For example, if you have an API action configured with:
```
GET https://api.yoursite.com/orders/{{user_id}}
```
And you've identified the user with `user_id: '12345'`, the chatbot will call:
```
GET https://api.yoursite.com/orders/12345
```
This allows you to provide account-specific information like order history, subscription status, and more.
***
## Secure Identity Verification
For production applications handling sensitive user data, you should use identity verification to securely authenticate users. This prevents users from impersonating others by sending fake identification data.
### Enable Identity Verification
In your chatbot dashboard, click **Install Agent** in the sidebar.
Scroll down to the **Identity Verification** section.
Toggle on **Enable Identity Verification** and click **Generate** to create your secret key.
Copy and store the secret key securely on your server.
Never expose your secret key in client-side code. It should only be used on your server to generate tokens.
### How It Works
1. **Server-side**: Generate a signed JWT token containing user information
2. **Client-side**: Pass the token to the chatbot using the identify call
### Server-Side: Generate JWT Token
```javascript theme={null}
const jwt = require('jsonwebtoken');
// Generate a signed token with user data
const token = jwt.sign({
user_id: user.id,
email: user.email,
name: user.name,
exp: Math.floor(Date.now() / 1000) + 3600 // 1 hour expiry
}, 'YOUR_SECRET_KEY', { algorithm: 'HS256' });
```
### Client-Side: Pass Token to Chatbot
```javascript theme={null}
window.SiteSpeakAI.identify({
token: token
});
```
The chatbot will verify the token signature using your secret key, ensuring the user data hasn't been tampered with.
Identity verification also enables you to:
* Use [template tags](/managing-your-chatbot/personalise-welcome-message) in welcome messages (e.g., "Hi \{\{first\_name}}!")
* View conversation history per user in your dashboard
* Link conversations to customer records
* Give visitors **cross-device chat history** in the widget (see below)
### Cross-Device Chat History
When identity verification is enabled, the chatbot widget's [Recent Chats](/managing-your-chatbot/visitor-recent-chats) feature follows your users across browsers and devices automatically. A visitor who chatted on their laptop can pick up the same thread on their phone, as long as they are identified with the same `user_id`.
For unverified visitors, Recent Chats stays local to the browser they chatted from.
No additional configuration is required. As soon as a visitor is identified through `window.SiteSpeakAI.identify({ token })`, every conversation they have is linked to their `user_id` and appears in their Recent Chats list on any device where they are identified with the same `user_id`.
Cross-device history only links sessions created from the date your chatbot was upgraded to support this feature. Older conversations stay tied to the browser they originated from. See [Visitor Recent Chats](/managing-your-chatbot/visitor-recent-chats) for the full caveat.
***
## Example: Full Implementation
Here's a complete example showing how to identify a logged-in user:
```html theme={null}
```
***
Join over 1000+ businesses, websites and startups automating their customer service and other tasks with a custom trained AI agent.