> ## Documentation Index
> Fetch the complete documentation index at: https://sitespeak.ai/docs/llms.txt
> Use this file to discover all available pages before exploring further.
# How to add a ChatGPT AI support agent to b2evolution
> How to add your custom ChatGPT trained chatbot to your b2evolution website.
You want to embed your custom trained AI support agent in your **b2evolution** website page. Here's how to add an AI support agent to b2evolution with SiteSpeakAI.
**b2evolution** is a content management system (CMS) - basically, a tool for building and managing websites. It's a bit different from popular platforms like WordPress or Wix. Instead of relying heavily on themes and plugins, b2evolution is built around a unique "document-centric" approach. Think of it like this: you create individual "documents" (articles, pages, etc.) and then organize them into categories and sections. It's known for being very flexible and powerful, allowing for a lot of customization without needing to code. It's also quite robust and reliable, often praised for its stability.
**Website URL:** [b2evolution](https://www.b2evolution.com/)
## Add your AI support agent to your **b2evolution** website
### In SiteSpeakAI
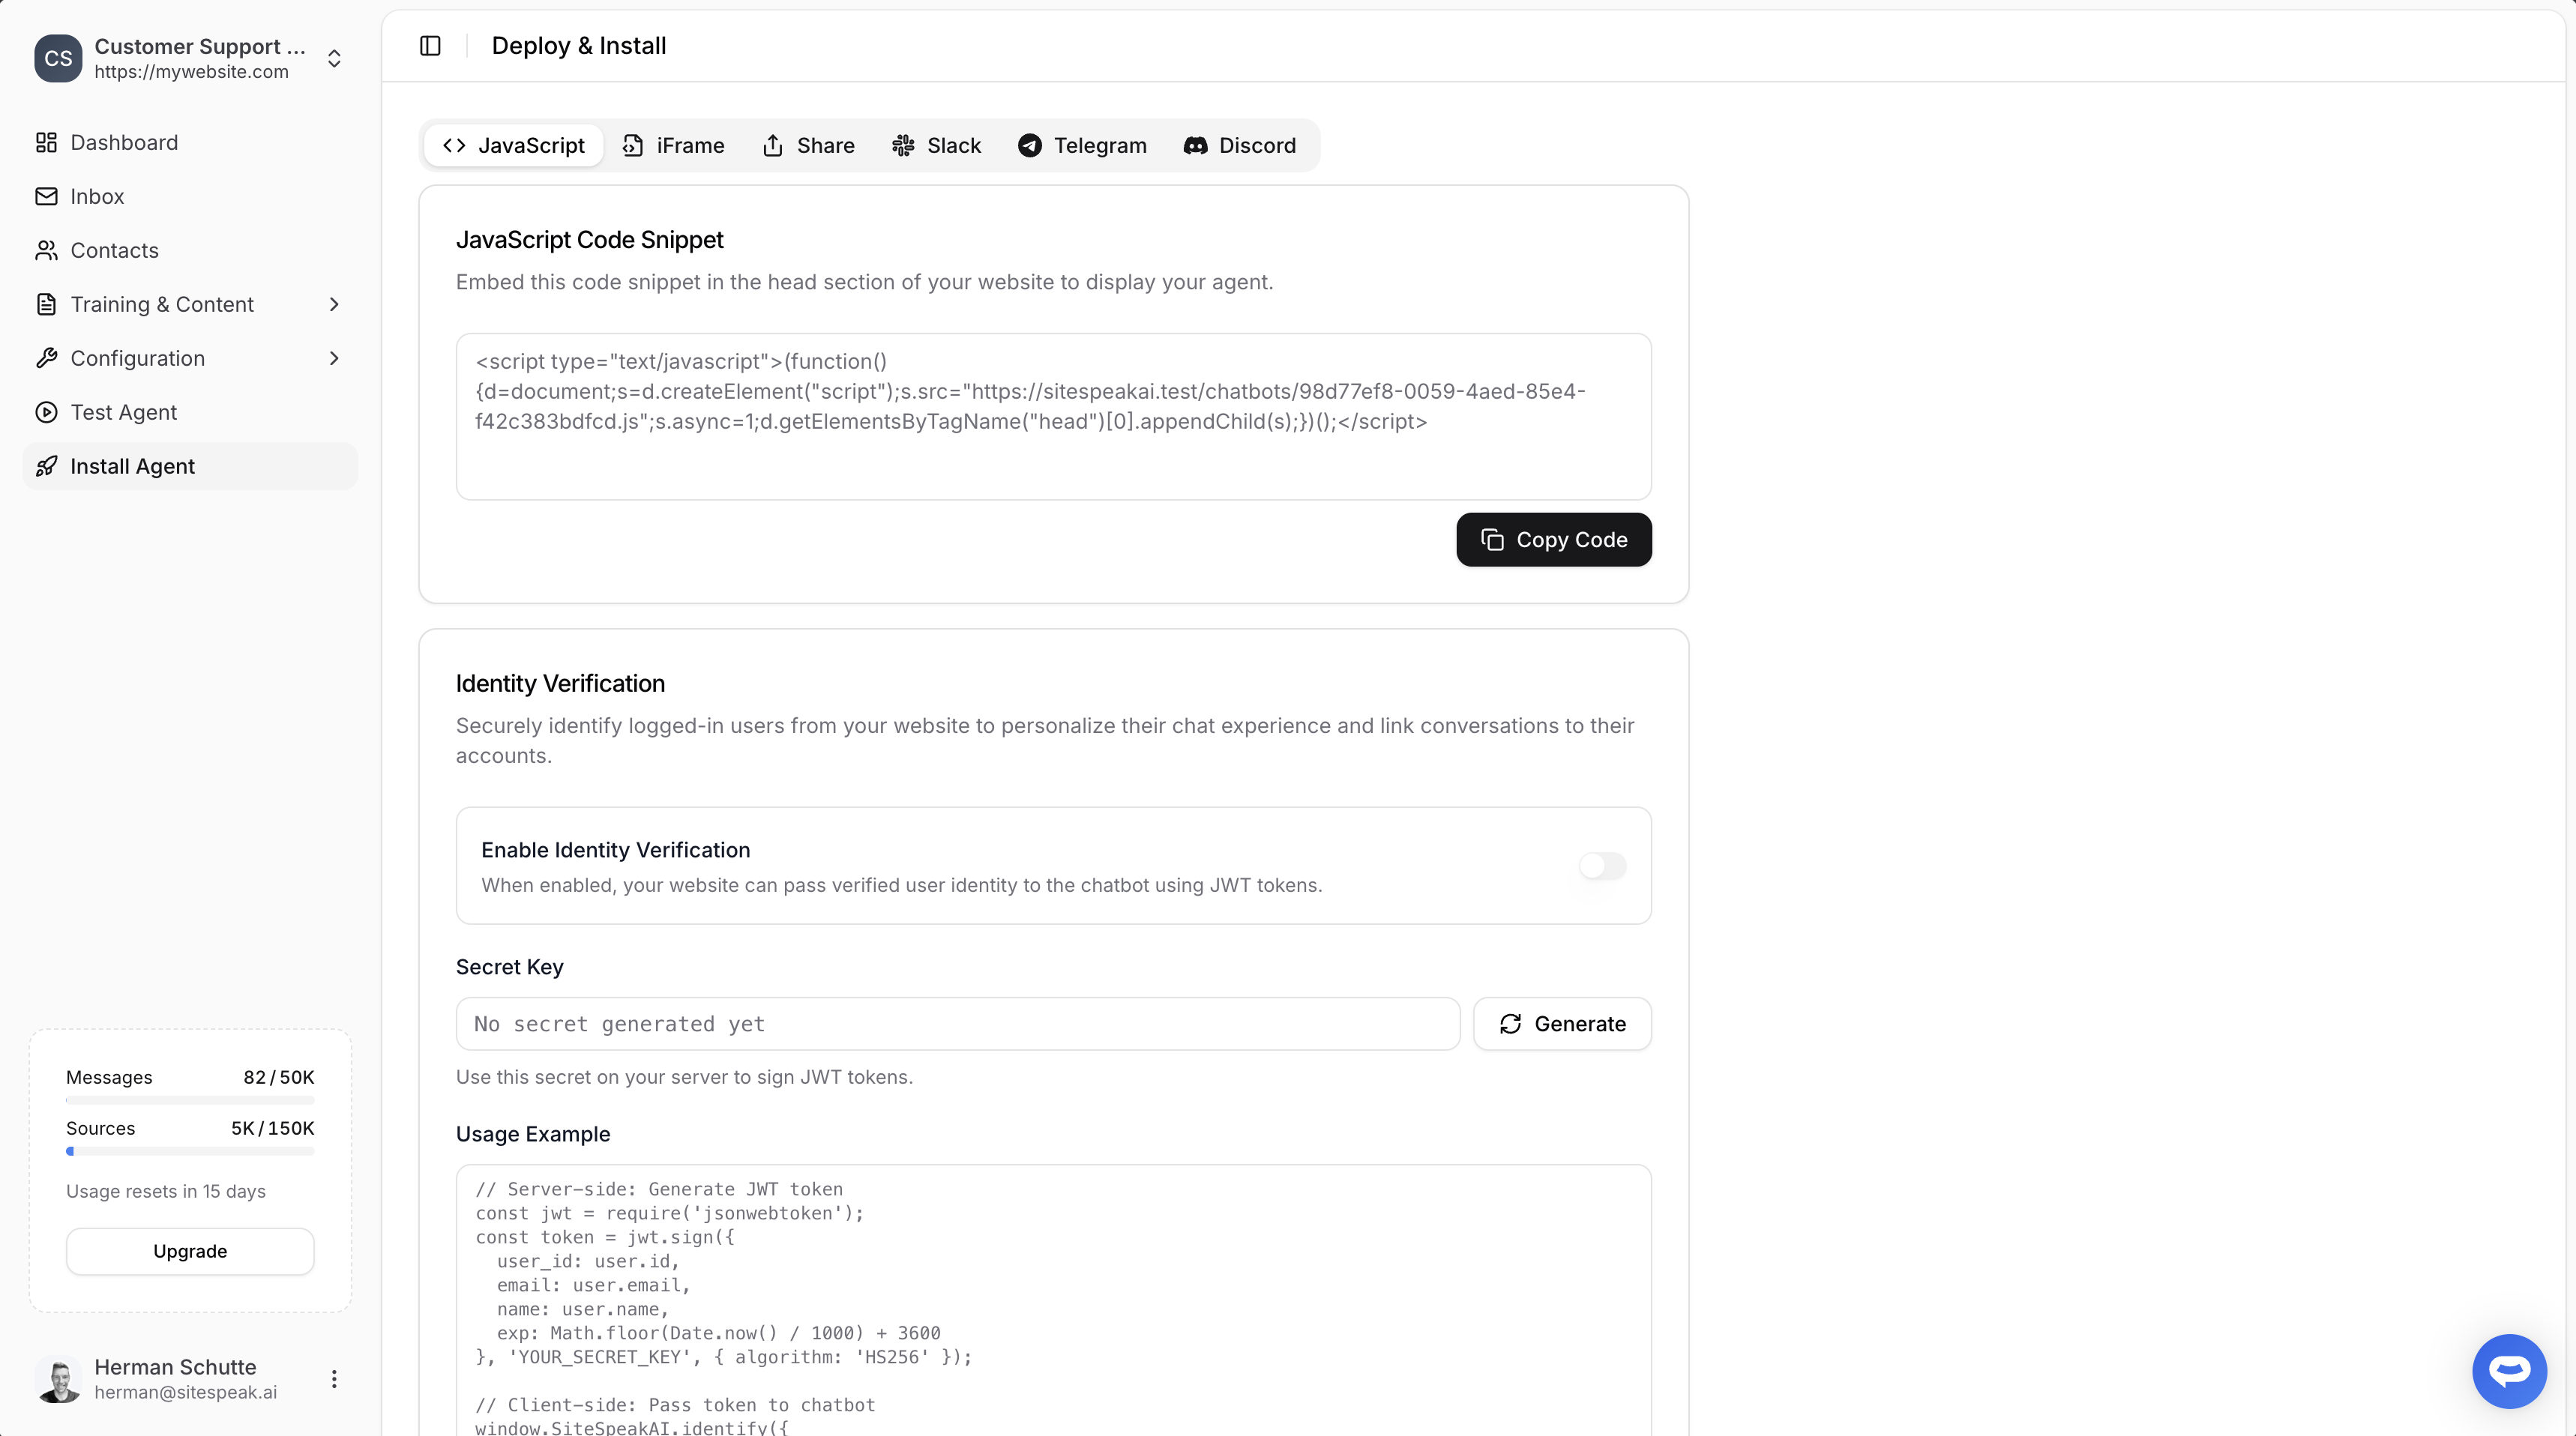
Select your chatbot from the dropdown menu at the top, click on the **Install Agent** section in the sidebar, then click on the **Copy Code** button to copy your code snippet.
 ### In b2evolution
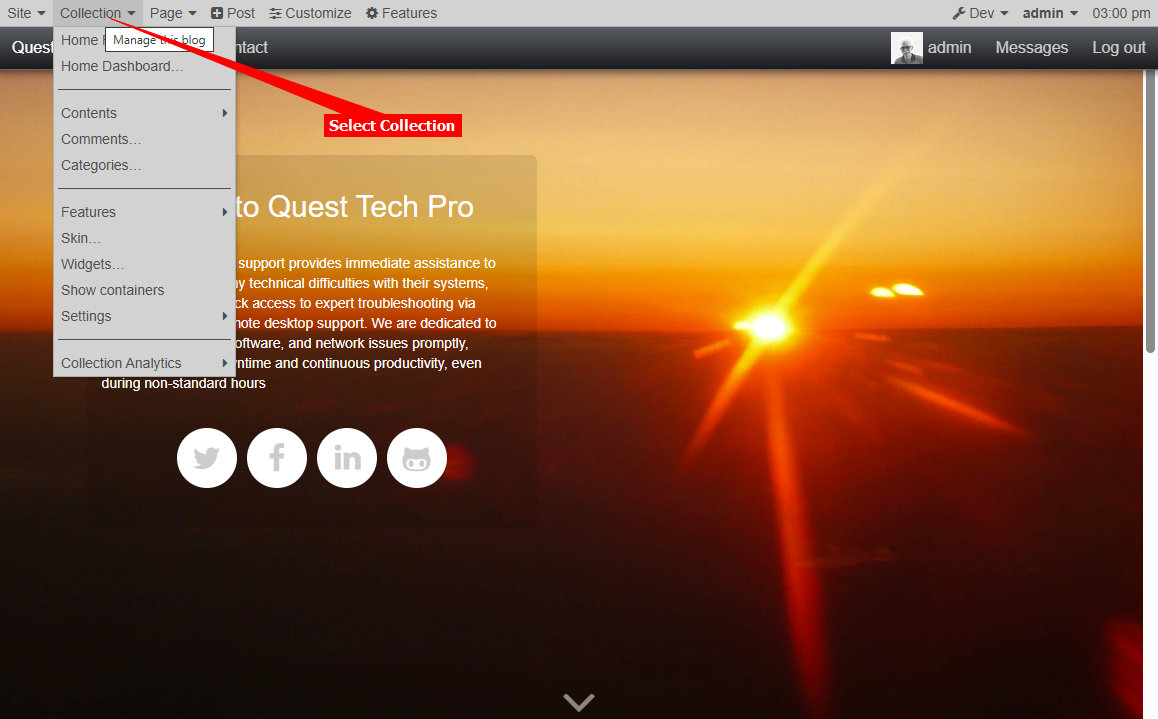
1. Log in to your **b2evolution** acount and on your dashboard select **Collection** to manage your blog/website
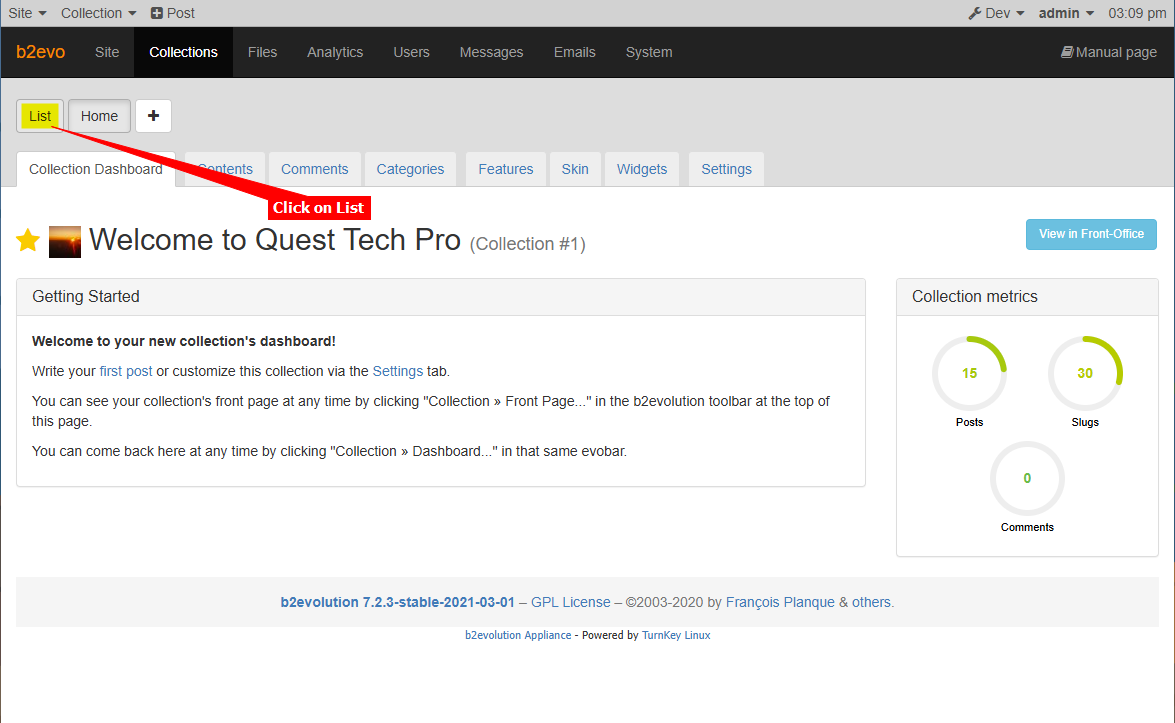
2. Click on **List** to display a list of your **Collections**
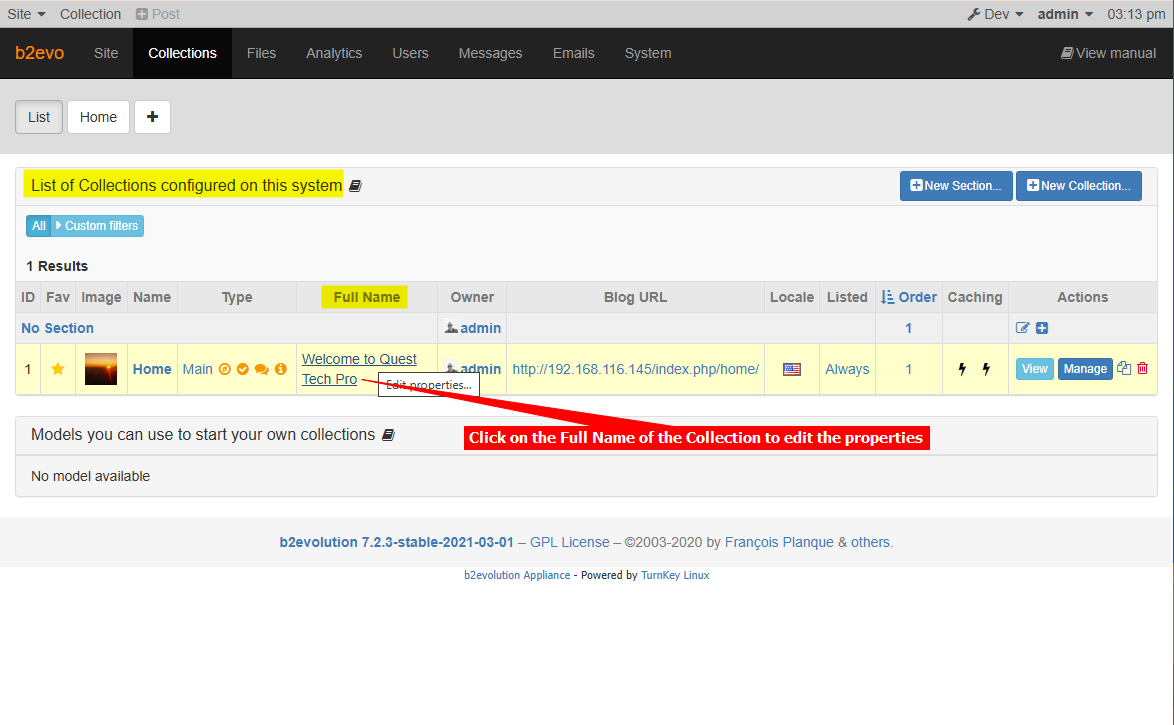
3. Click on the **Full Name** of the Collection to edit the properties
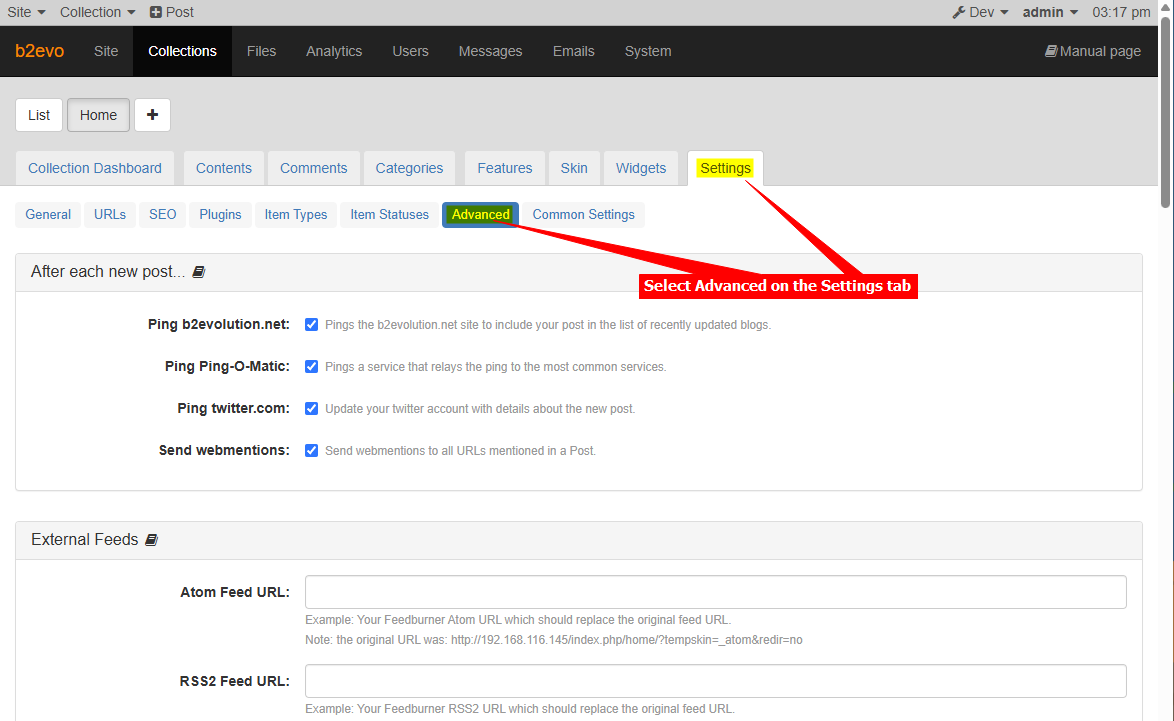
4. Select **Advanced** on the **Settings** tab
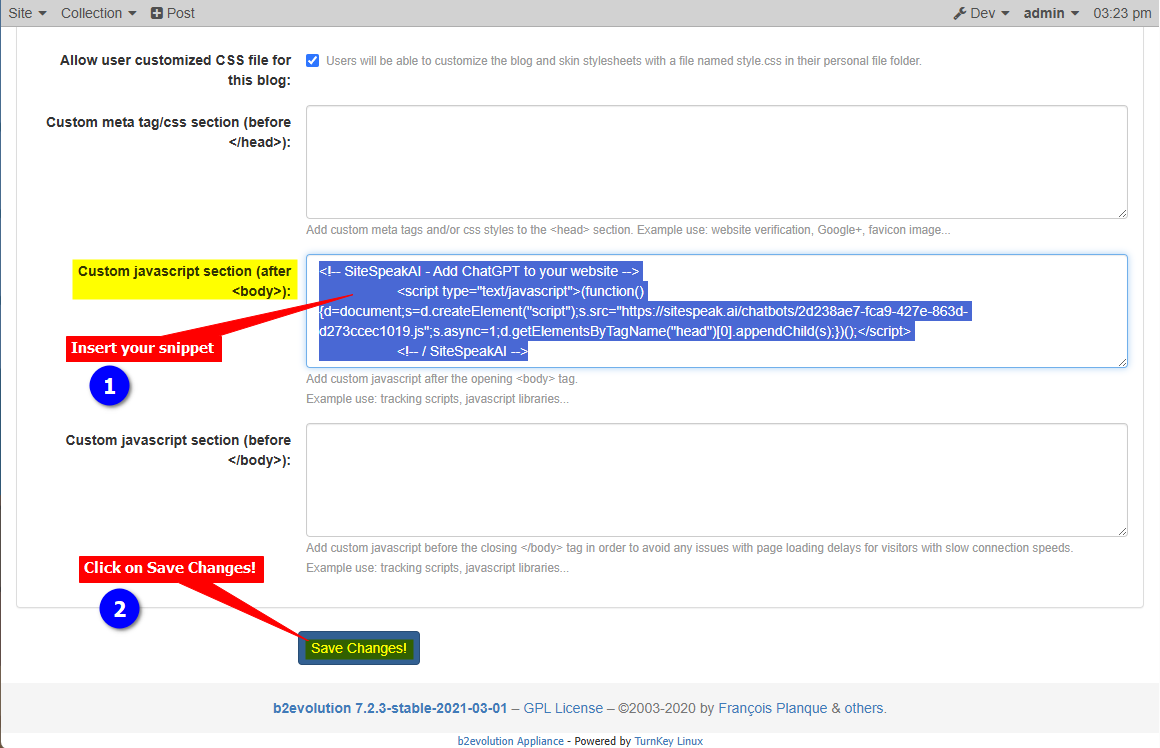
5. Scroll down on the **Advanced** list and insert your snippet in the **Custom javascript section (after \)** text box. Click on **Save Changes!** when done
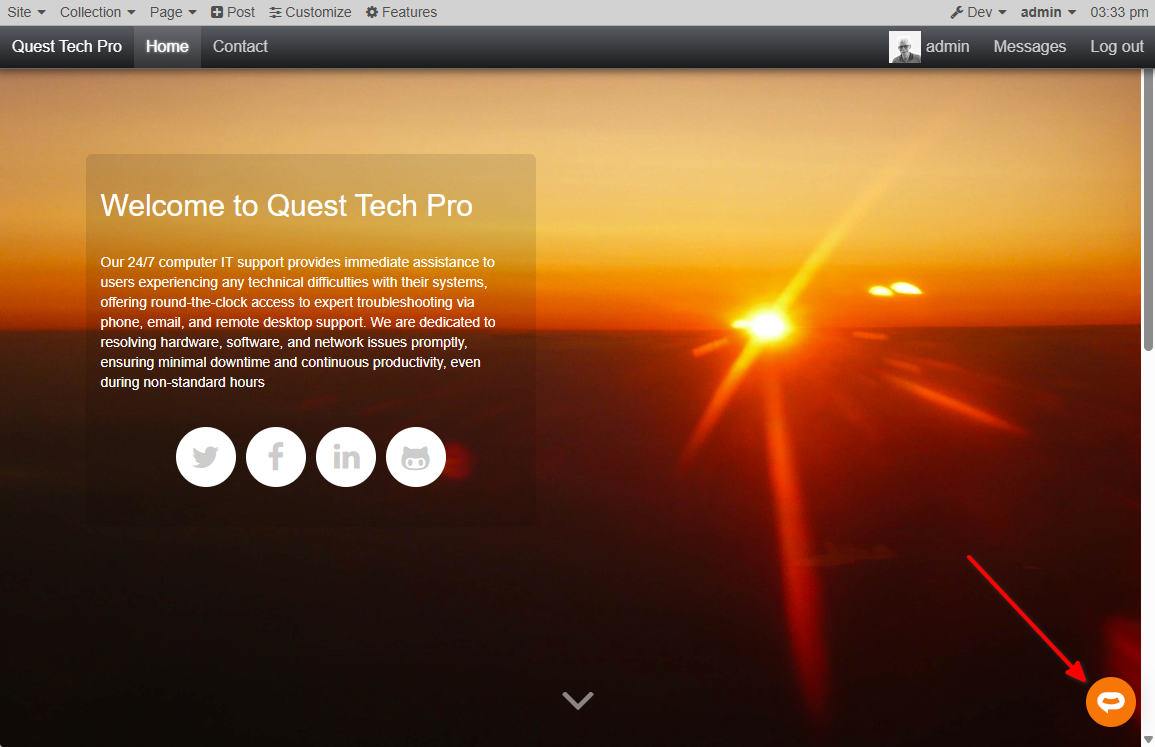
6. Your AI support agent button will now be displayed on your **b2evolution** website page
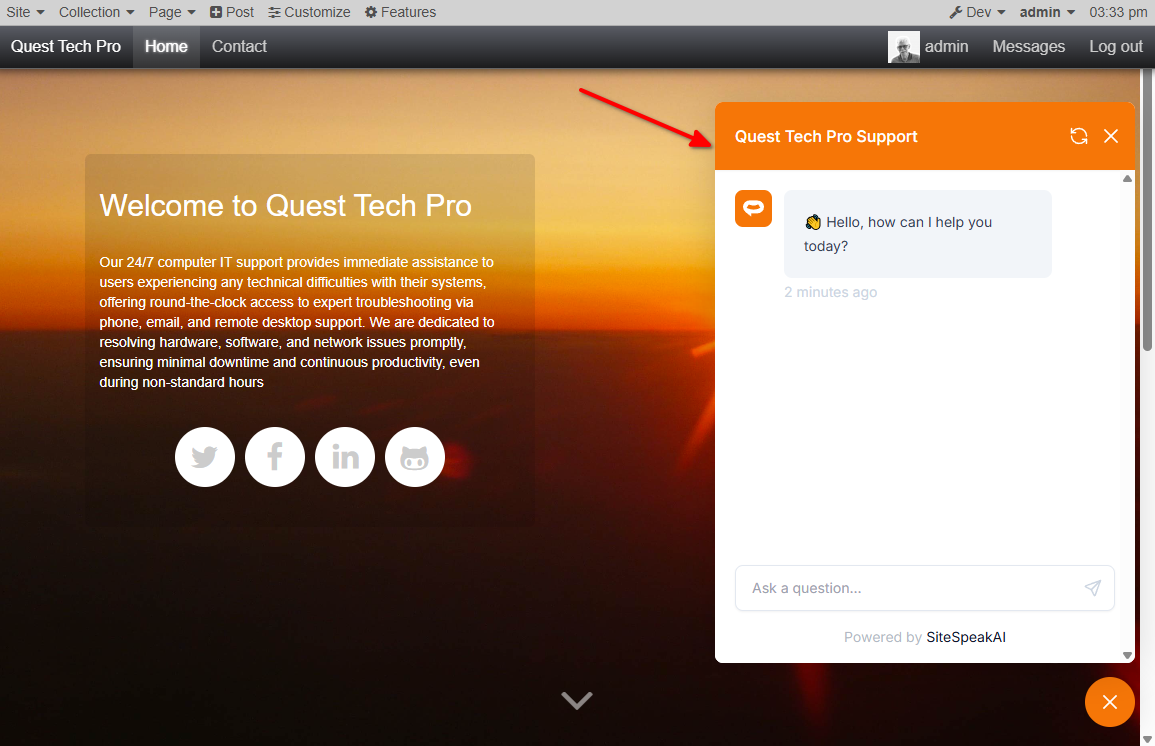
7. If you click on the button it will display the AI support agent dialogue
Your AI support agent has now been added to your **b2evolution** website and your visitors/customers can start interacting with it!
***
Join over 1000+ businesses, websites and startups automating their customer service and other tasks with a custom trained AI agent.
### In b2evolution
1. Log in to your **b2evolution** acount and on your dashboard select **Collection** to manage your blog/website

2. Click on **List** to display a list of your **Collections**

3. Click on the **Full Name** of the Collection to edit the properties

4. Select **Advanced** on the **Settings** tab

5. Scroll down on the **Advanced** list and insert your snippet in the **Custom javascript section (after \)** text box. Click on **Save Changes!** when done

6. Your AI support agent button will now be displayed on your **b2evolution** website page

7. If you click on the button it will display the AI support agent dialogue

Your AI support agent has now been added to your **b2evolution** website and your visitors/customers can start interacting with it!
***
Join over 1000+ businesses, websites and startups automating their customer service and other tasks with a custom trained AI agent.