> ## Documentation Index
> Fetch the complete documentation index at: https://sitespeak.ai/docs/llms.txt
> Use this file to discover all available pages before exploring further.
# How to add a ChatGPT AI support agent to Blogger
> How to add your custom ChatGPT trained AI support agent to your Blogger website.
You want to embed your custom trained AI support agent in your **Blogger** website page. Here's how to add an AI support agent to Blogger with SiteSpeakAI.
**Blogger** (now known as Blogger by Google) is a free, web-based blogging platform. Think of it as a really simple way to create and publish your own website or blog without needing to know a lot about coding or web design. You write posts, add pictures, and it automatically puts them on your website. Google handles all the technical stuff like hosting and security.
**Website URL:** [Blogger](https://www.blogger.com/)
## Add your AI support agent to your **Blogger** website
### In SiteSpeakAI
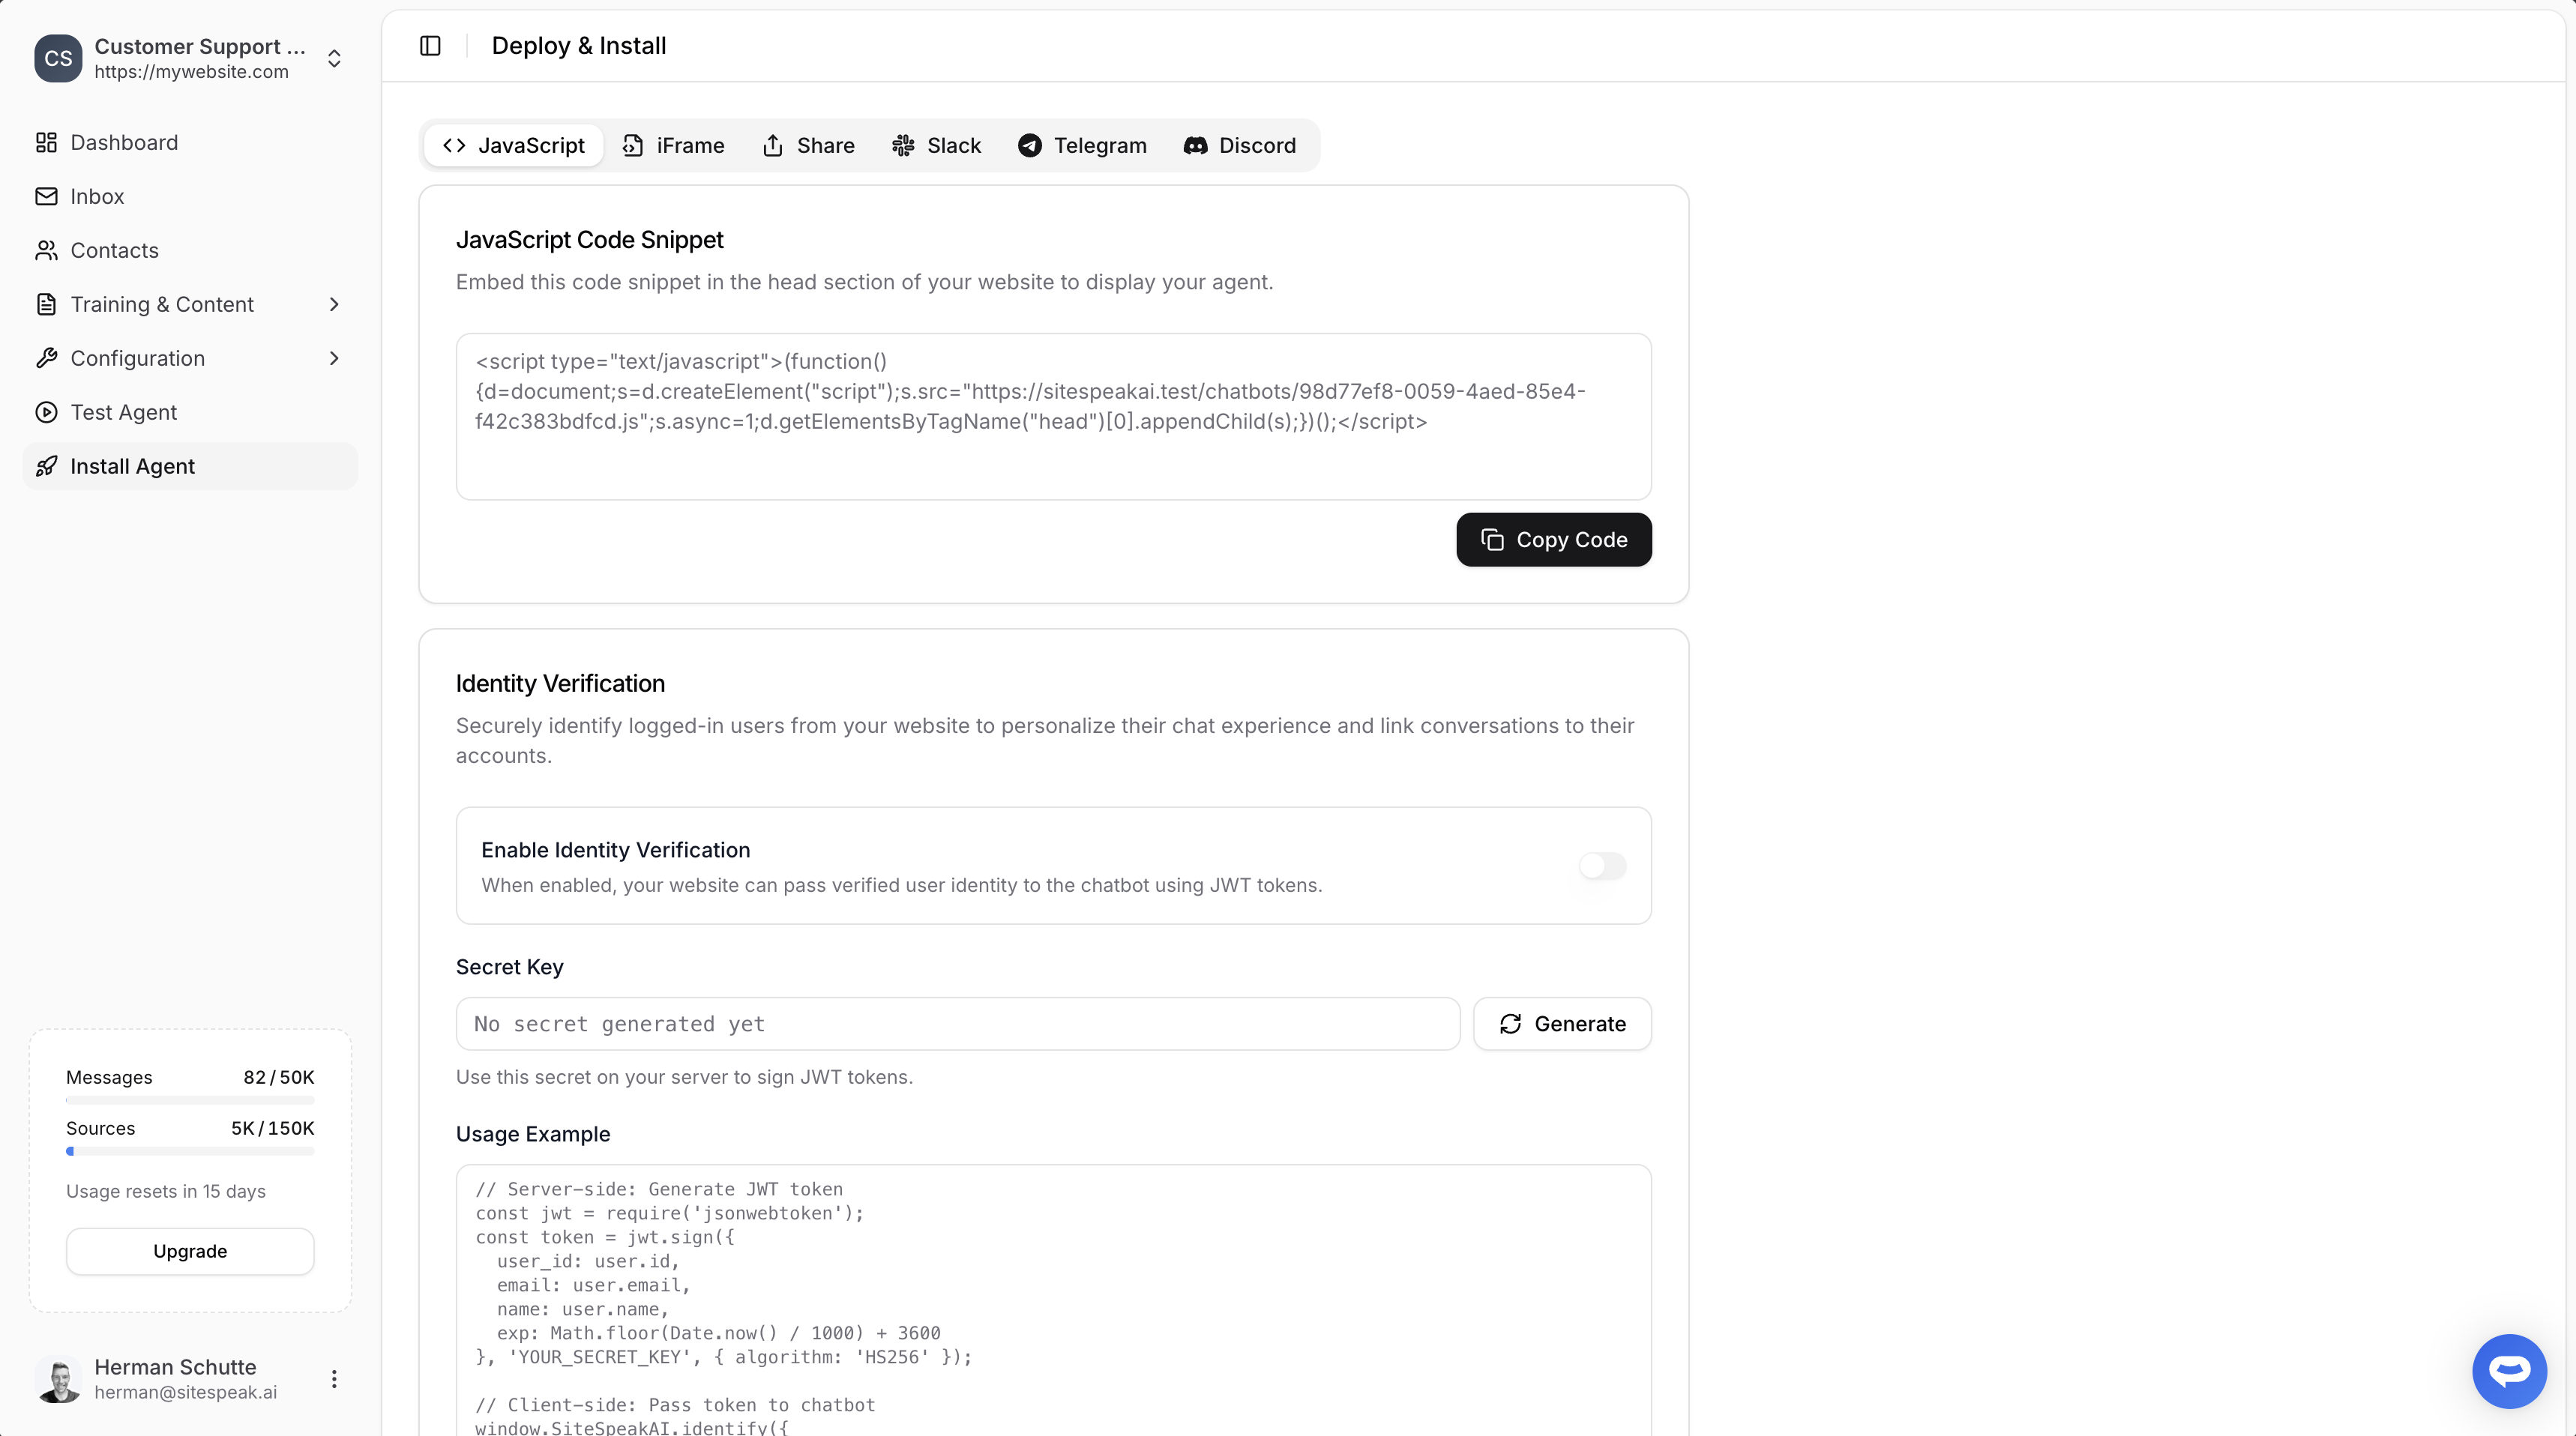
Select your chatbot from the dropdown menu at the top, click on the **Install Agent** section in the sidebar, then click on the **Copy Code** button to copy your code snippet.
 ### In Blogger
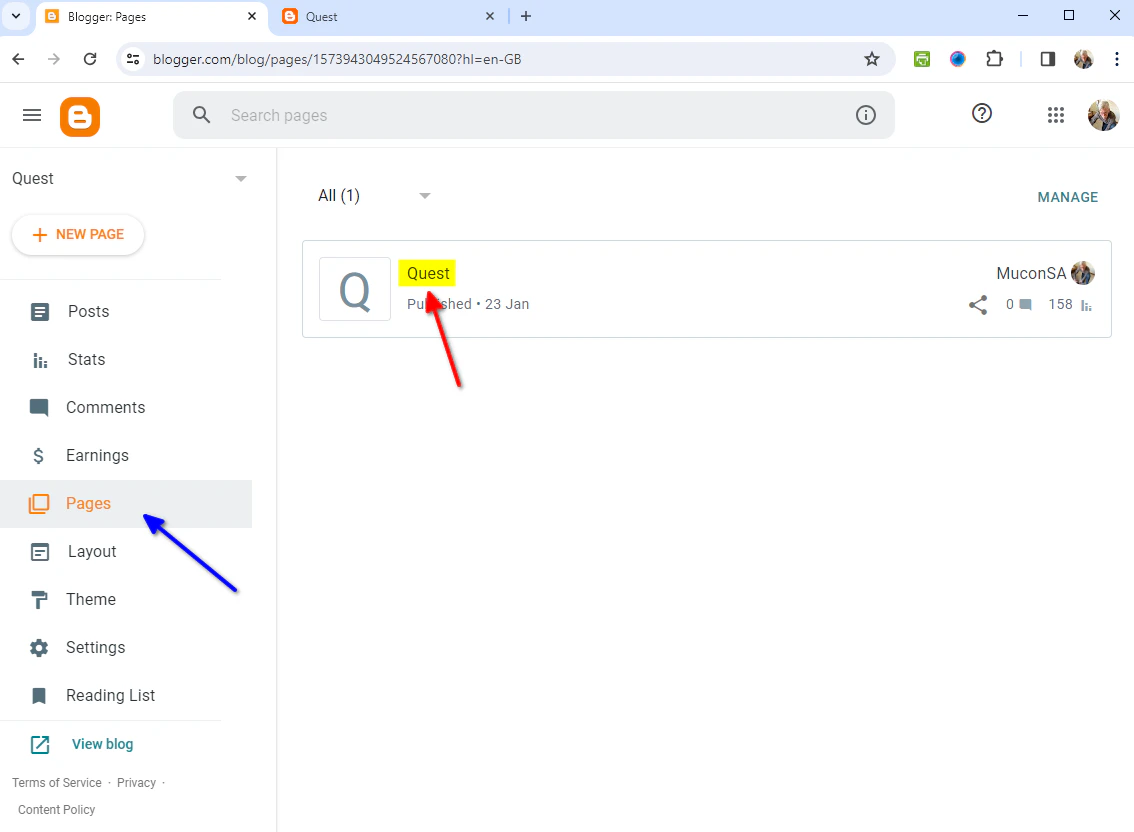
1. On your dashboard, click on **Pages** and select the page you want to edit
### In Blogger
1. On your dashboard, click on **Pages** and select the page you want to edit
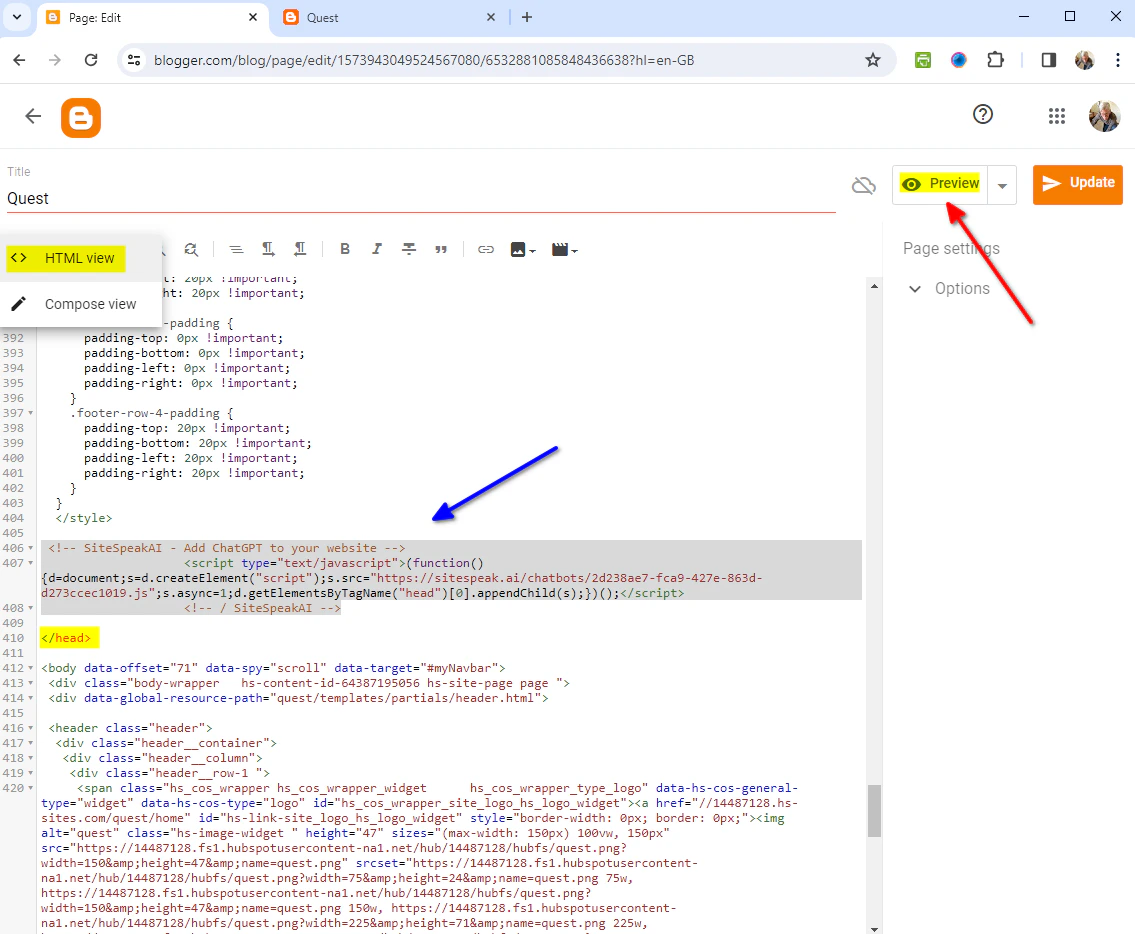
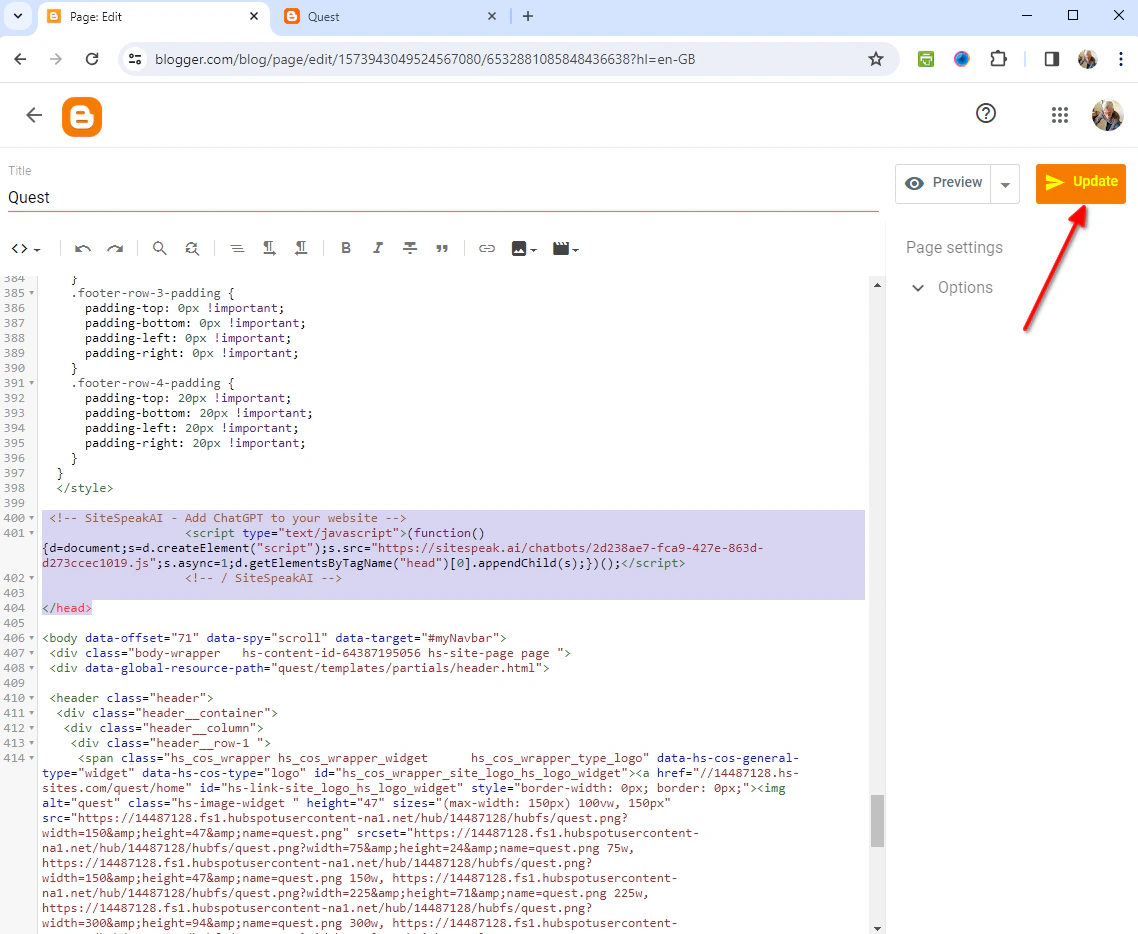
 2. In the editor dialogue, make sure **\ HTML view** is selected and insert your snippet just above the closing `` tag. Click on **Preview** to display a preview of your page
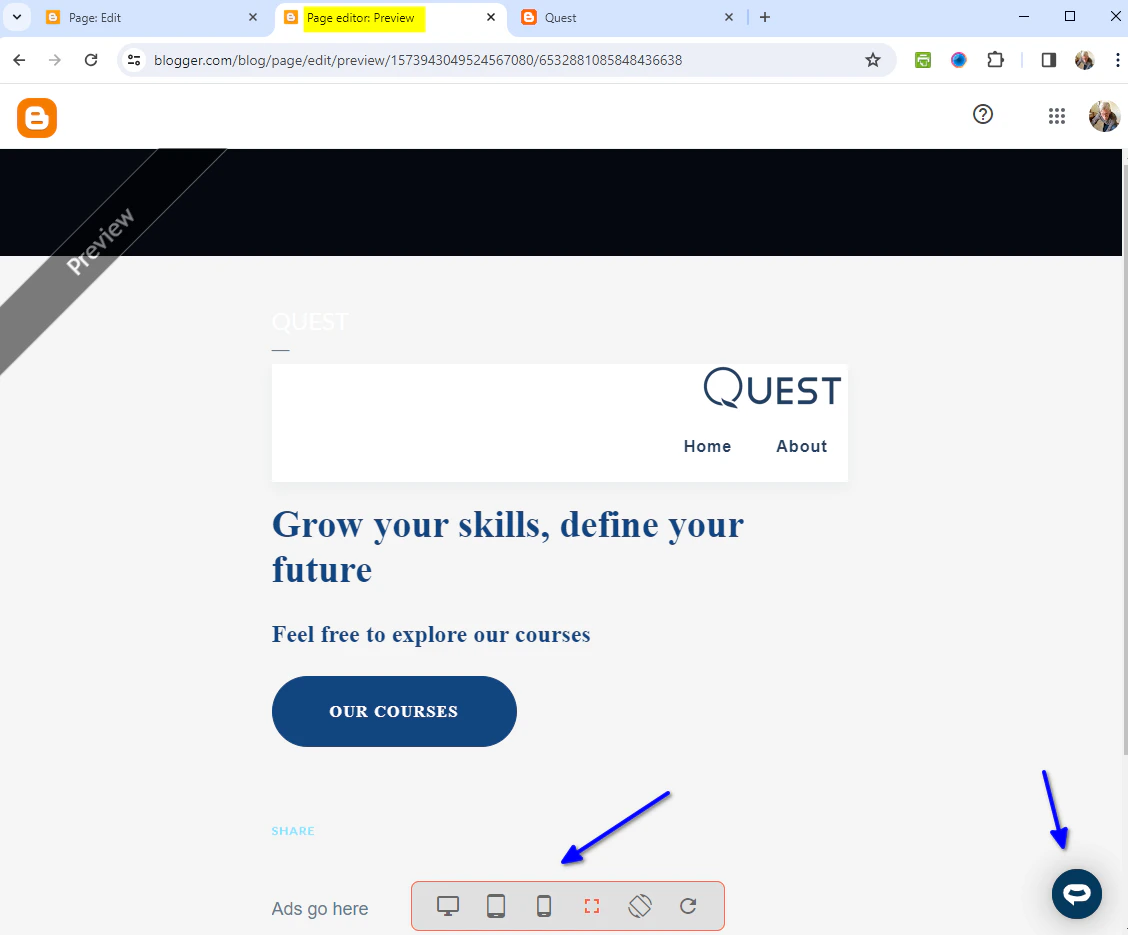
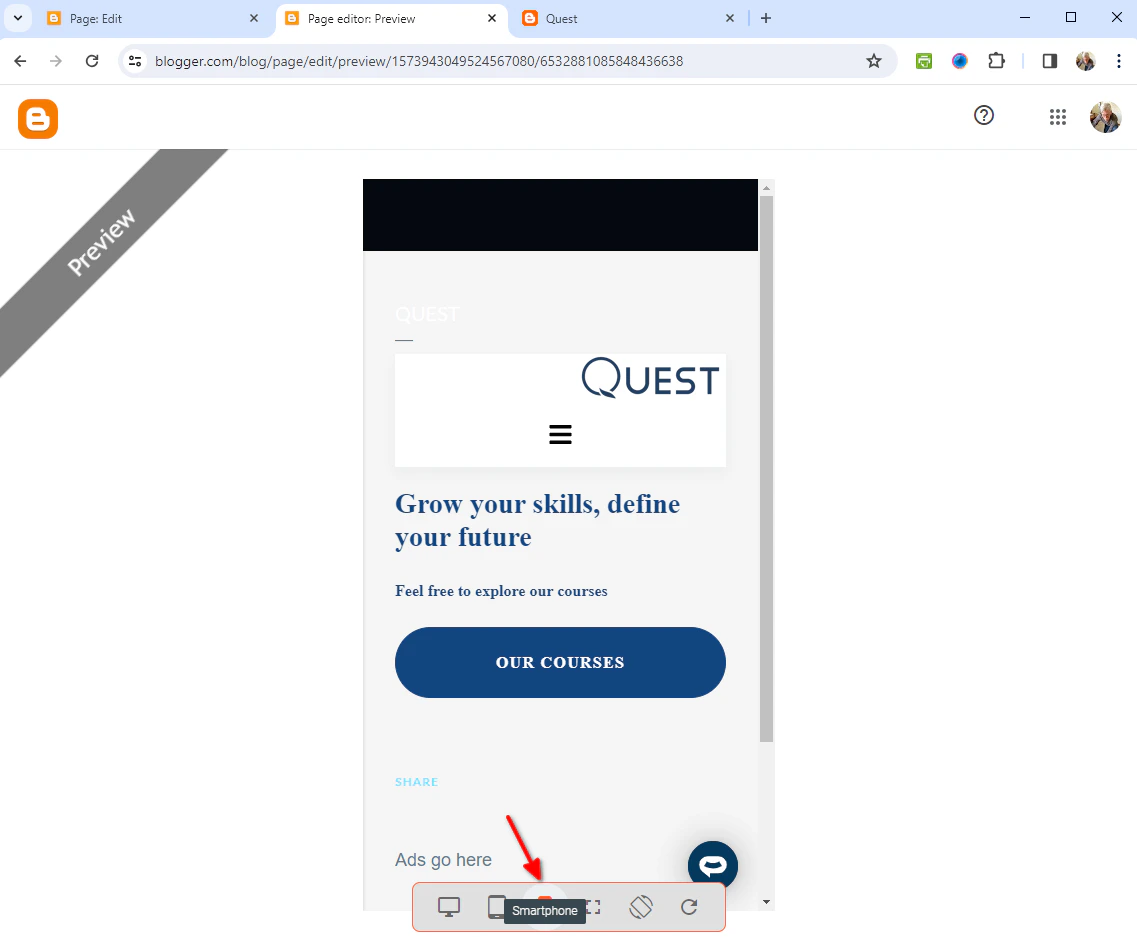
 3. The preview display allows viewing on different media sizes (**Desktop**, **tablet** as well as **smartphone**). It also displays your Chatbot button but note that the button is not active and cannot be clicked on
 4. Preview viewing on a tablet
 5. Preview viewing on a smartphone
 6. Return to the editor and click on **Update** to update your live page
 7. Your AI support agent button will now be displayed on your live **Blogger** website page
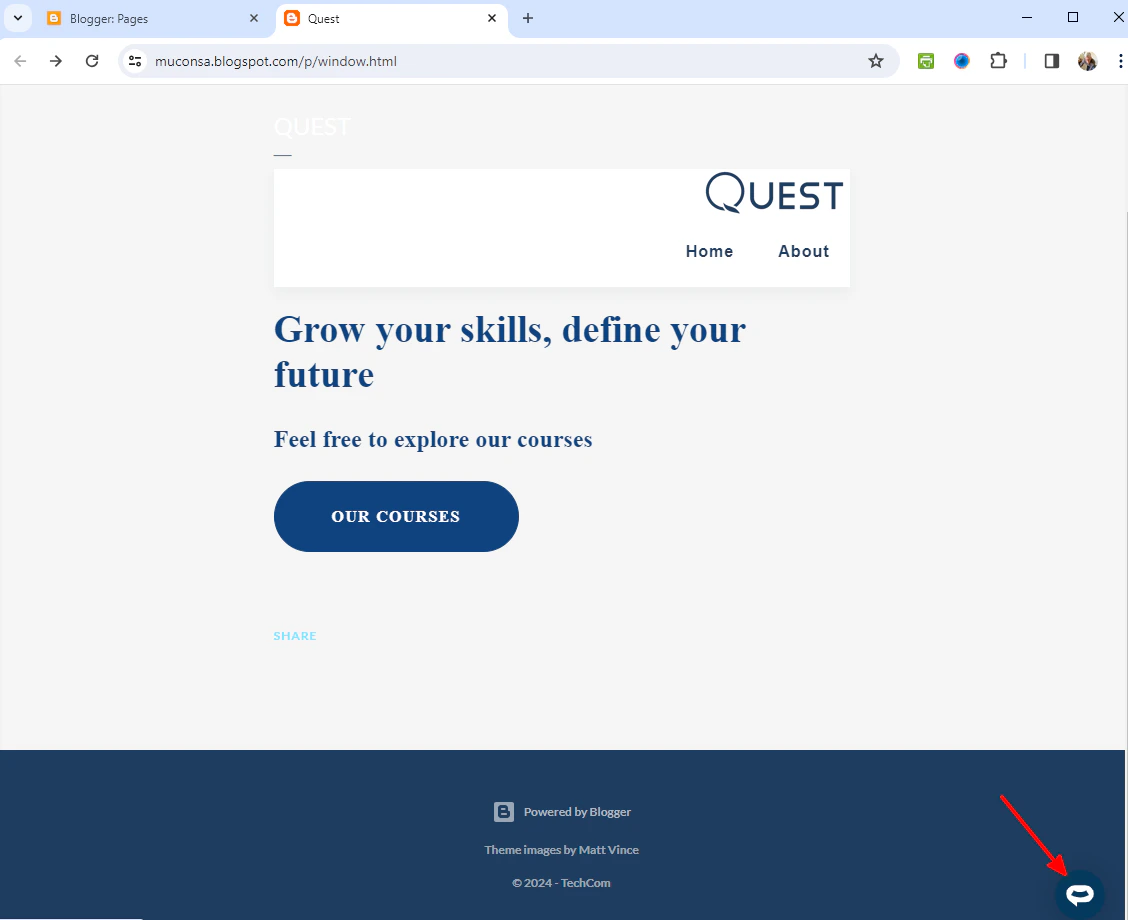 8. If you click on the button it will display the AI support agent dialogue
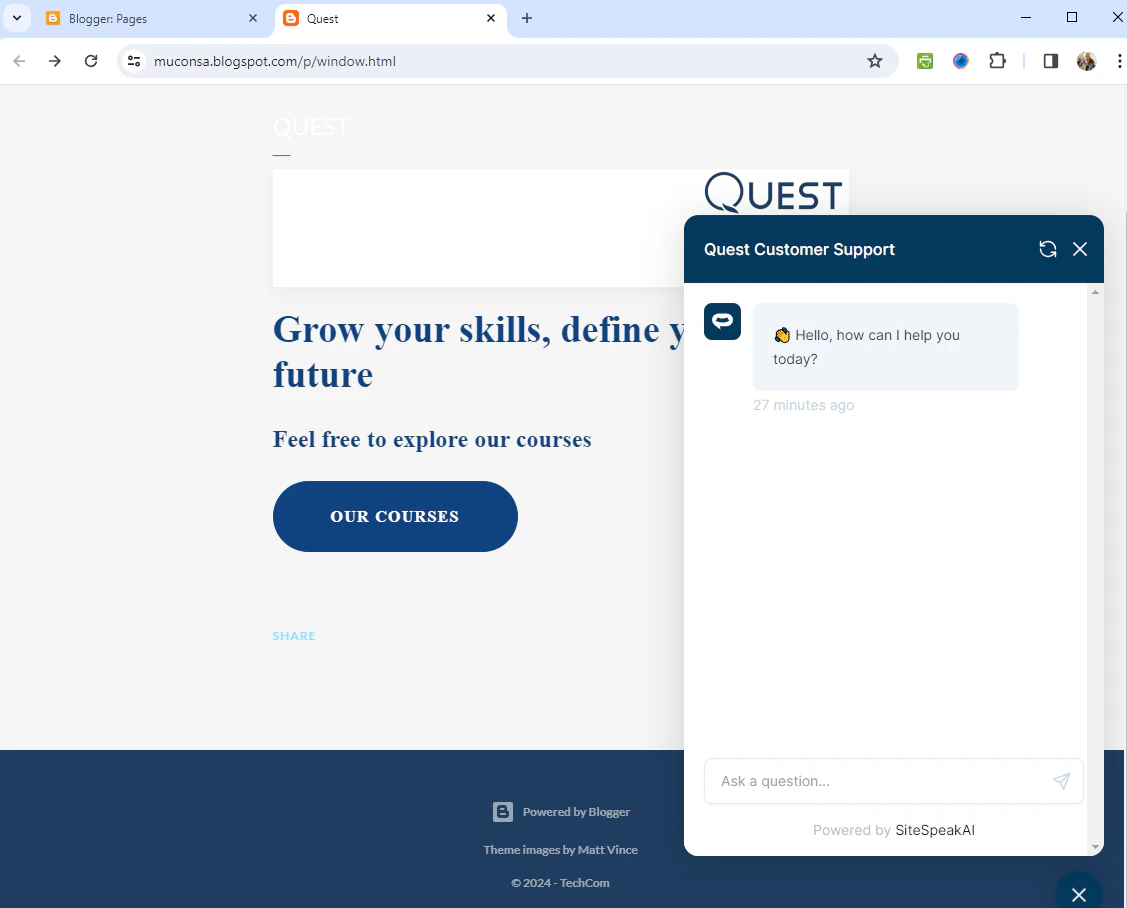 Your AI support agent has now been added to your **Blogger** website and your visitors/customers can start interacting with it!
***
Join over 1000+ businesses, websites and startups automating their customer service and other tasks with a custom trained AI agent.
Your AI support agent has now been added to your **Blogger** website and your visitors/customers can start interacting with it!
***
Join over 1000+ businesses, websites and startups automating their customer service and other tasks with a custom trained AI agent.