> ## Documentation Index
> Fetch the complete documentation index at: https://sitespeak.ai/docs/llms.txt
> Use this file to discover all available pages before exploring further.
# How to add a ChatGPT AI support agent to BookStack
> How to add your custom ChatGPT trained AI support agent to your BookStack web-based application.
You want to embed your custom trained AI support agent in your **BookStack** website page. Here's how to add an AI support agent to BookStack with SiteSpeakAI.
**BookStack** is a simple, self-hosted, easy-to-use application/platform for organising and storing information. Being a self-hosted application means that you choose where you want to host it. The main point to keep in mind here is that you need access to the BookStack **installation files** on the server.
By default, BookStack doesn't allow iframes. You can however edit the .env file to allow specific iframe sources. In our case we will add the appropriate command to the .env file to allow the SiteSpeakAI AI support agent to function with your **BookStack** installation -
see [https://www.bookstackapp.com/docs/admin/security/#iframe-source-control](https://www.bookstackapp.com/docs/admin/security/#iframe-source-control) for a description of what we are going to do next.
## A. Setting up *BookStack* to allow iframes
1. If you have installed **BookStack** with **Docker**, then the **.env** file will be located in the **/config/www/** folder.
* Open the **.env** file and add the following line just below the **APP\_URL= line** (make sure the URL, ***[https://chatbot.sitespeak.ai](https://chatbot.sitespeak.ai)***, is spelled correctly).
ALLOWED\_IFRAME\_SOURCES="[https://chatbot.sitespeak.ai](https://chatbot.sitespeak.ai)"
* Note that if you already have iframe sources added to the .env file, then you can just add the *[https://chatbot.sitespeakai.ai](https://chatbot.sitespeakai.ai)* to the line (seperated by a space)
* Save the file and restart the server
2. If you have installed **BookStack** on a Linux server (or Linux desktop) then the **.env** file will be located in the **var/www/bookstack** folder. The file is a hidden file, so to make sure that you do find the file, run a **ls -a** command in the **bookstack** folder to show hidden files.
* Open a **Terminal** and change to the **var/www** folder
* Run a **ls** command to display the sub-folders in the var/www folder
* Change to the **bookstack** folder
* Run a **ls -a** command to show all files and sub-folders in the bookstack folder (including hidden ones)
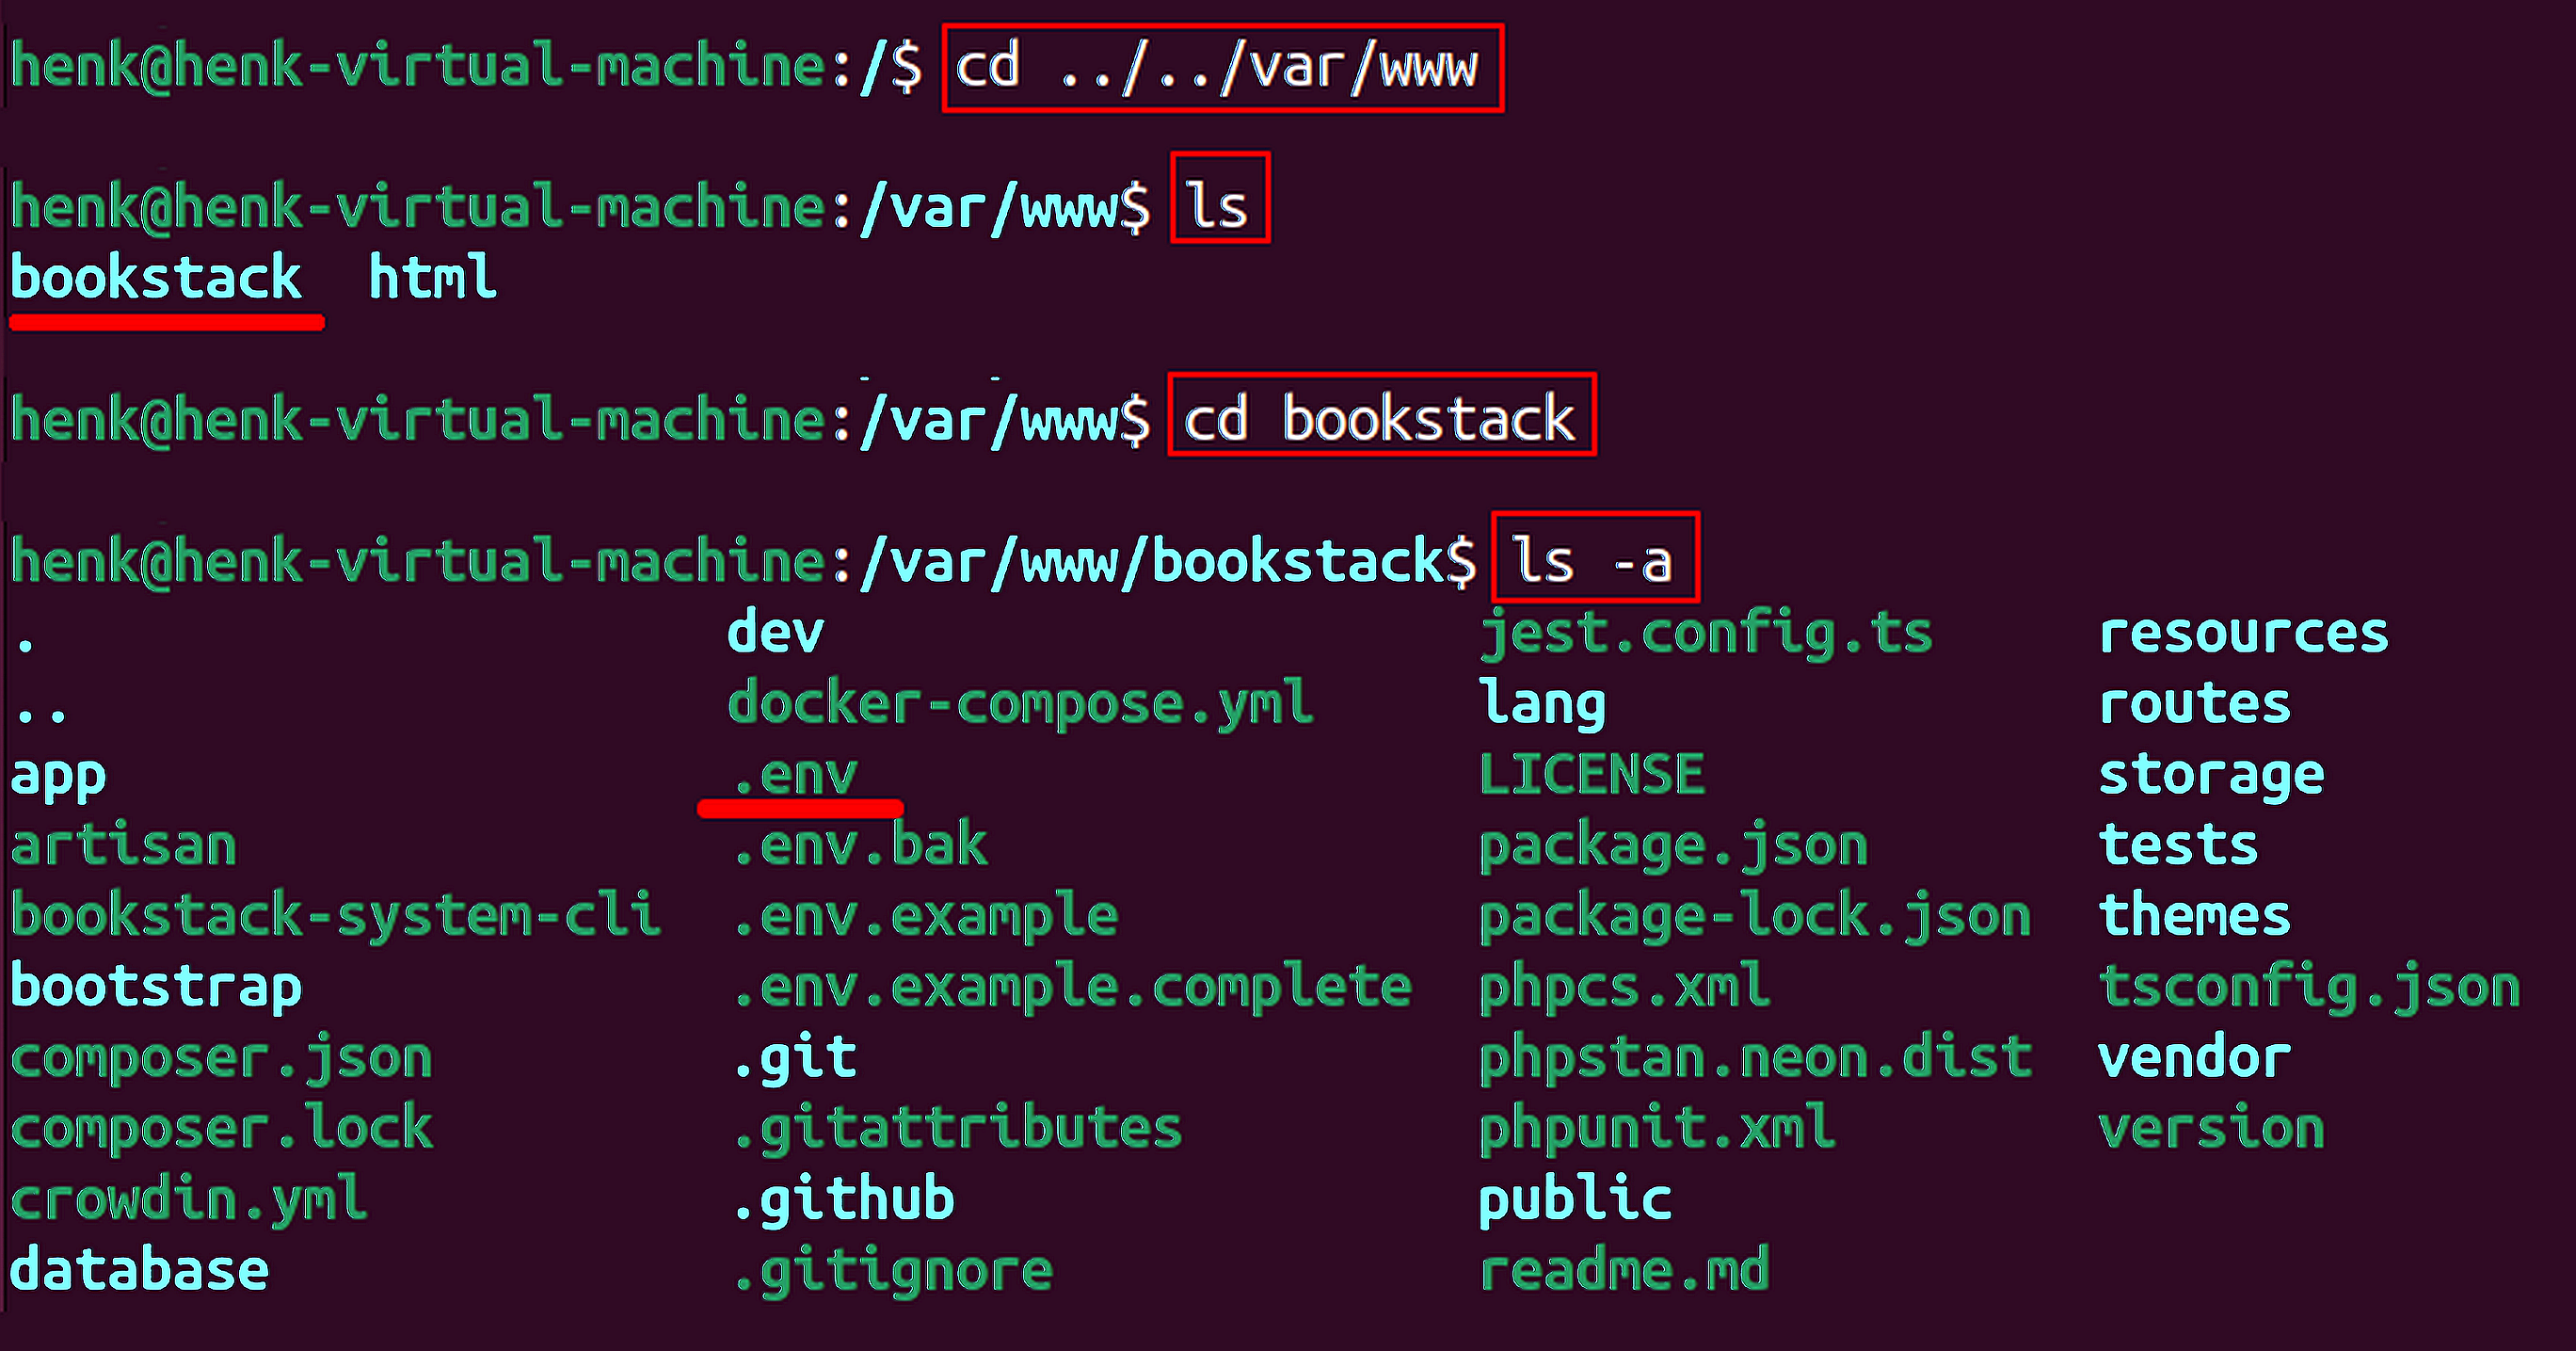
* Open the **.env** file with **vi** or **nano** (or whatever command line editor you prefer)

* Insert the following line into the file just below the **APP\_URL= line** (make sure the URL, ***[https://chatbot.sitespeak.ai](https://chatbot.sitespeak.ai)***, is spelled correctly).
ALLOWED\_IFRAME\_SOURCES="[https://chatbot.sitespeak.ai](https://chatbot.sitespeak.ai)"
* Note that if you already have iframe sources added to the .env file, then you can just add the *[https://chatbot.sitespeakai.ai](https://chatbot.sitespeakai.ai)* to the line (seperated by a space)

* Save the file (**^O - Write Out**) and then exit the editor (**^X - Exit**). These commands could of course differ if you use a different editor.
* Restart the webserver (in this case **Apache**) to allow BookStack to reread the .env file

Your BookStack installation will now be able to display your ChatGPT AI support agent properly.
**Website URL:** [https://www.bookstackapp.com/](https://www.bookstackapp.com/)
## B. Add your AI support agent to your *BookStack* application
### In SiteSpeakAI
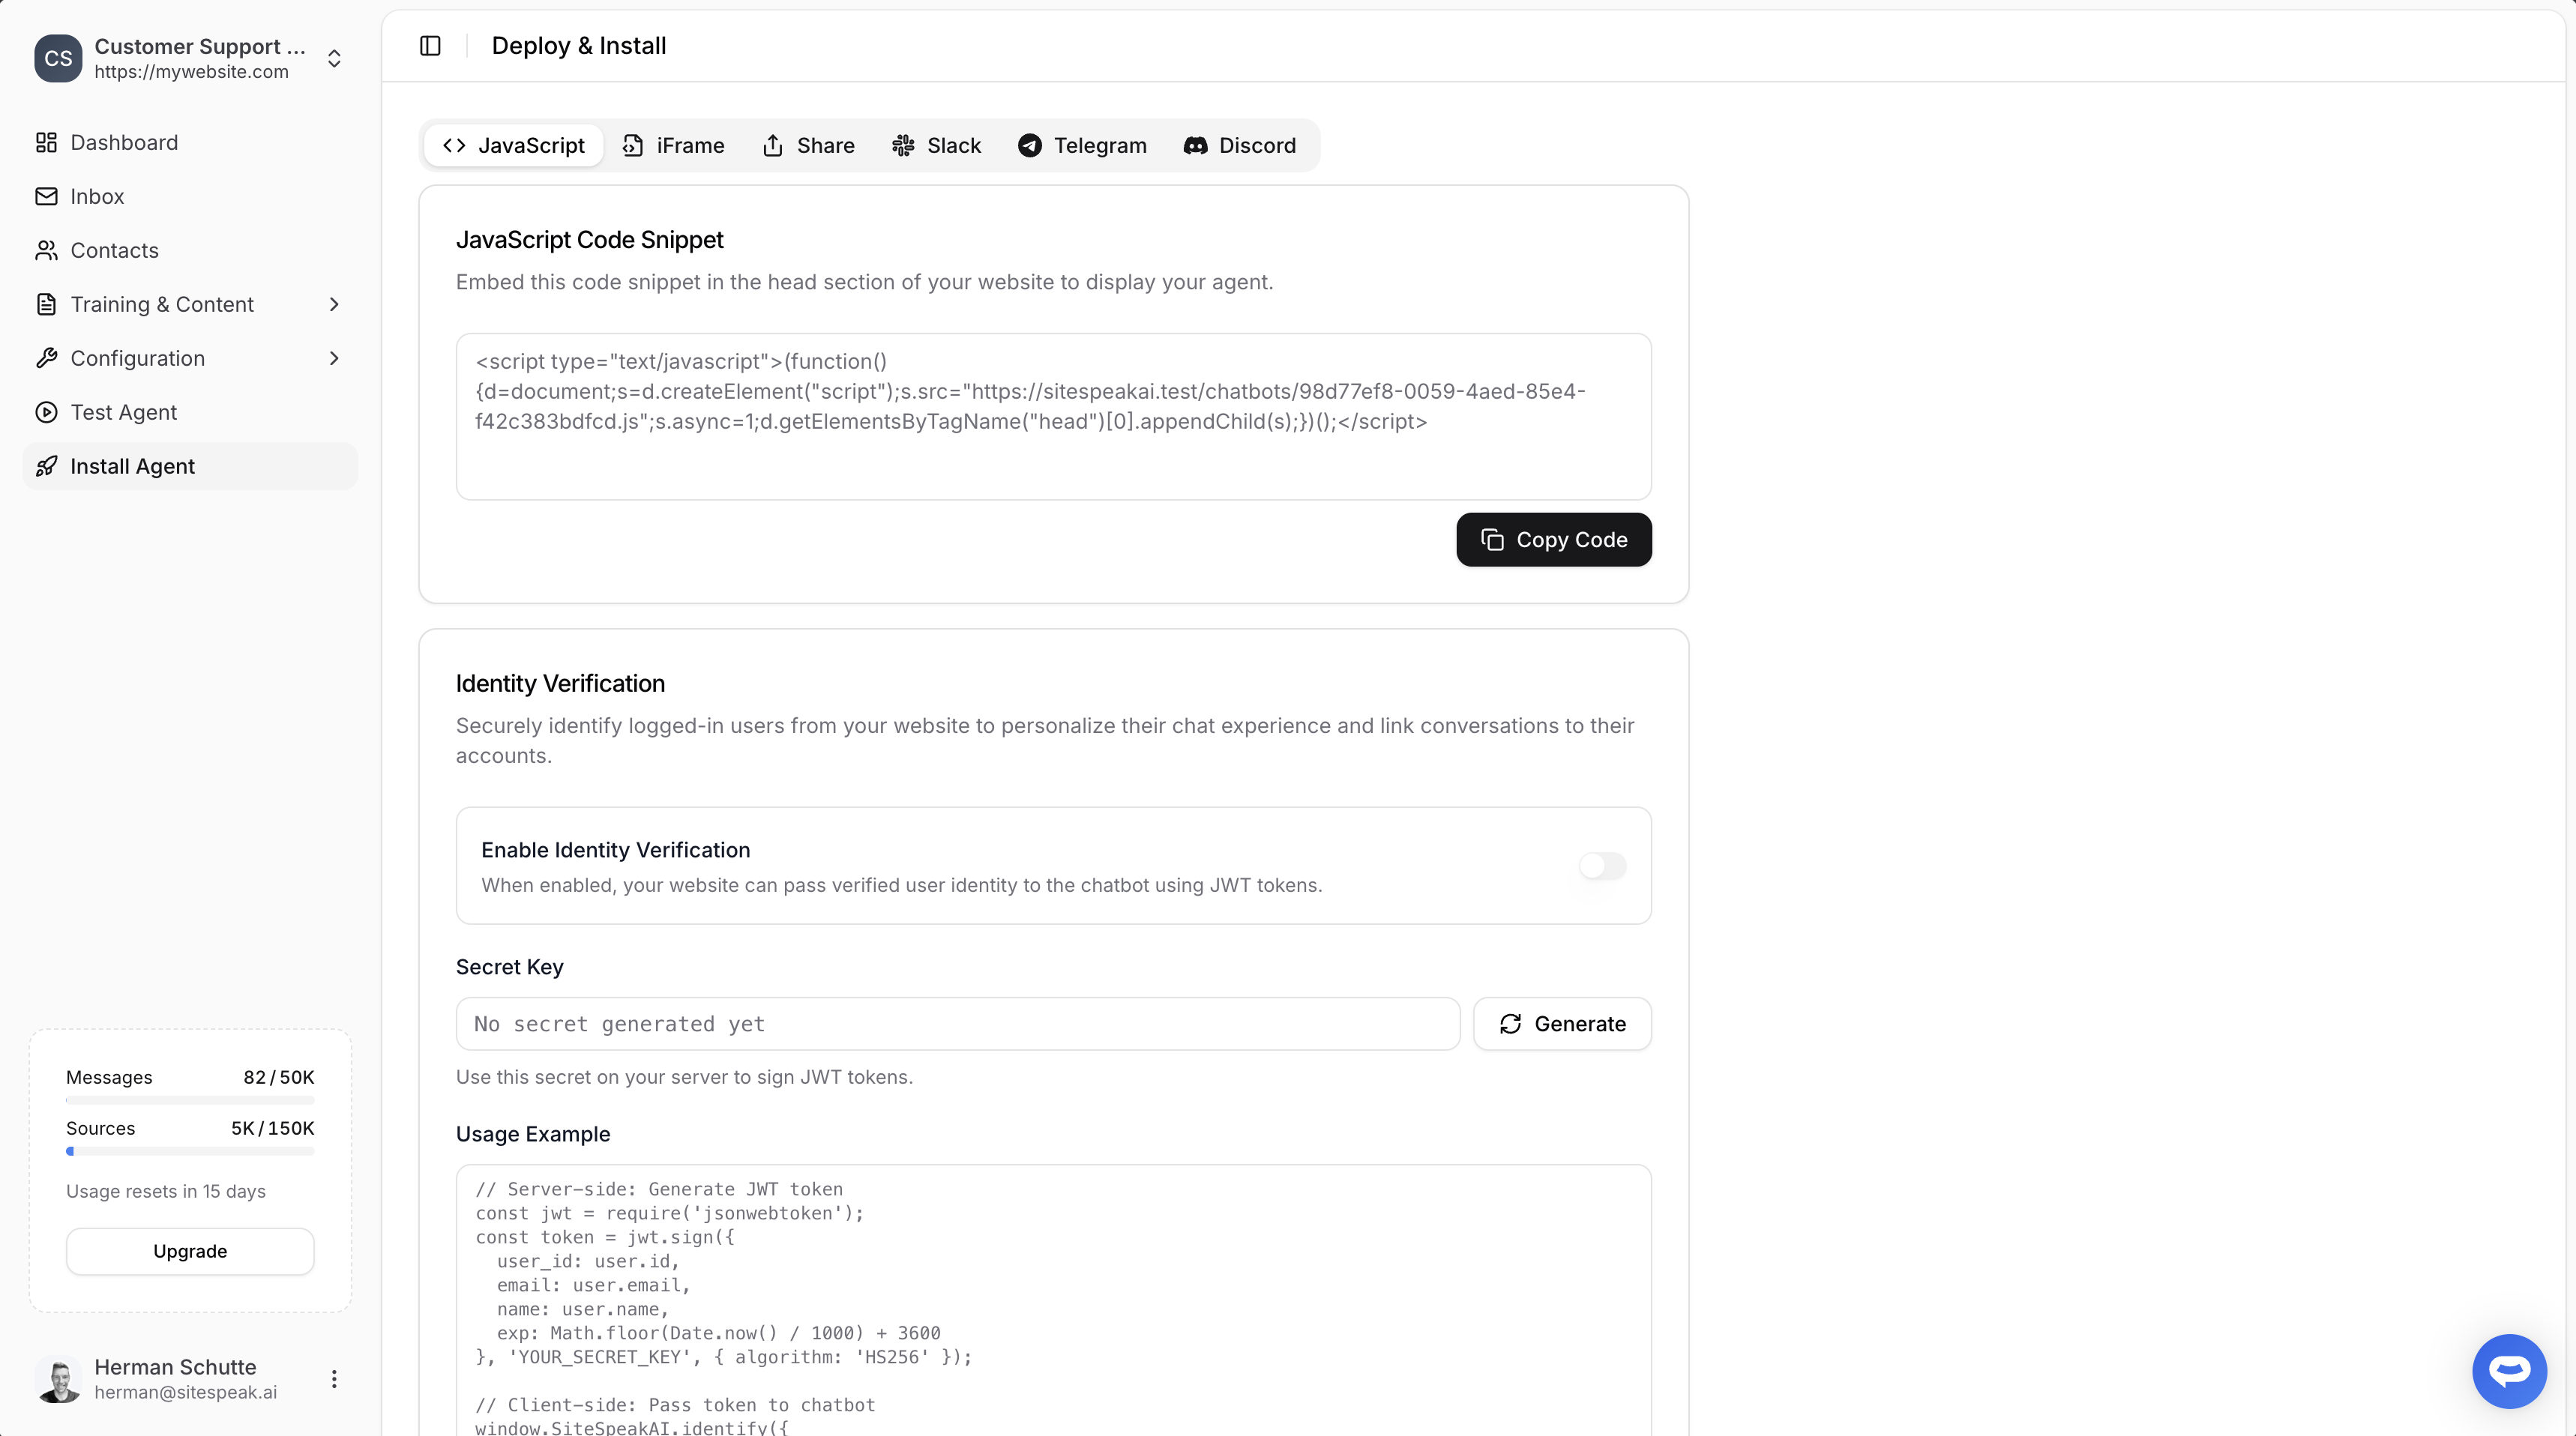
Select your chatbot from the dropdown menu at the top, click on the **Install Agent** section in the sidebar, then click on the **Copy Code** button to copy your code snippet.
 ### In BookStack
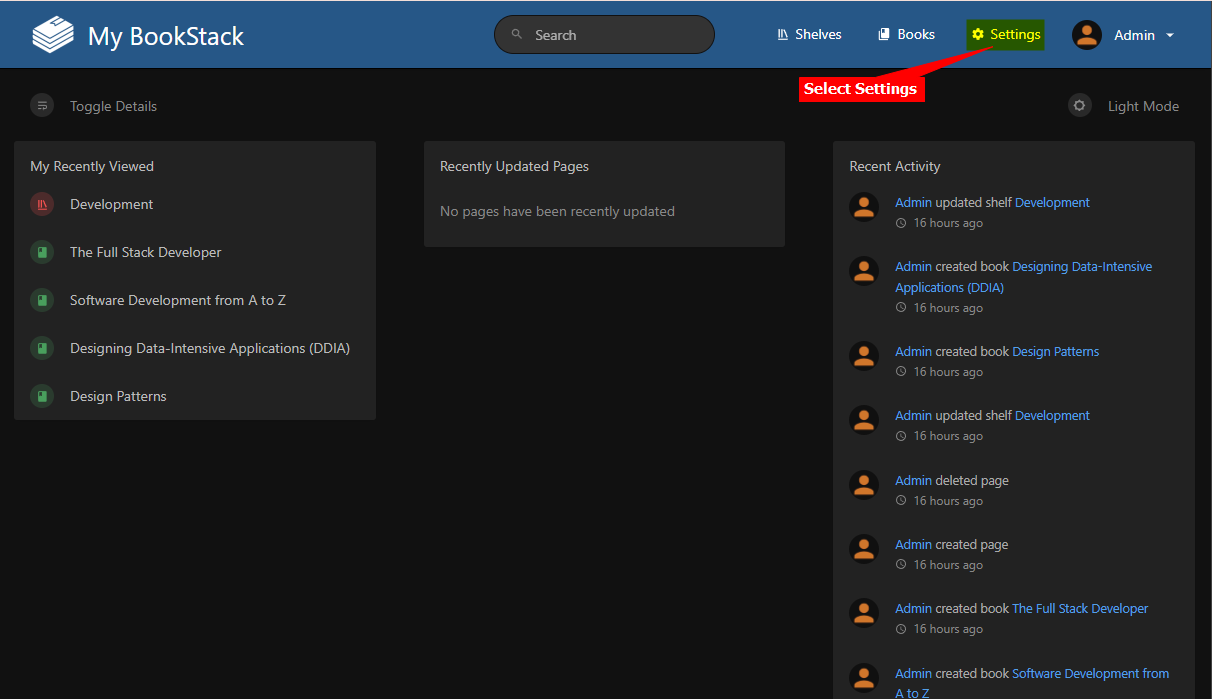
1. Log into your **BookStack** account and select **Settings** on the top right menu
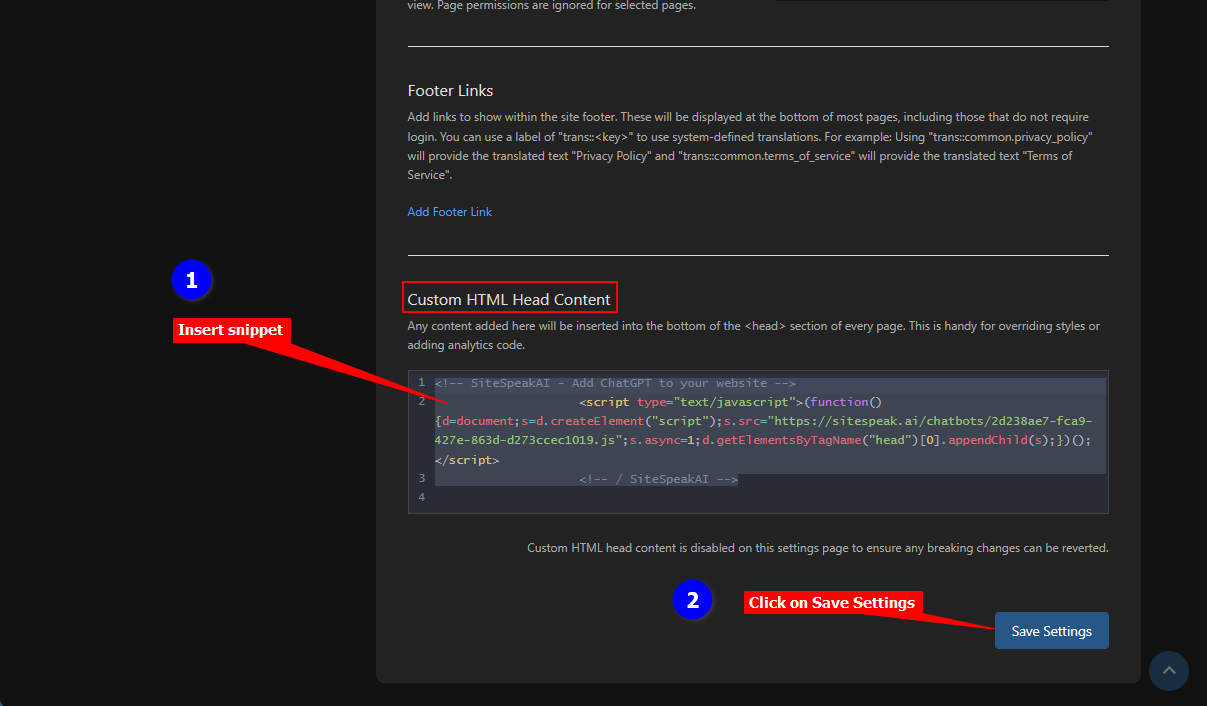
2. Select **Customization** on the left side menu
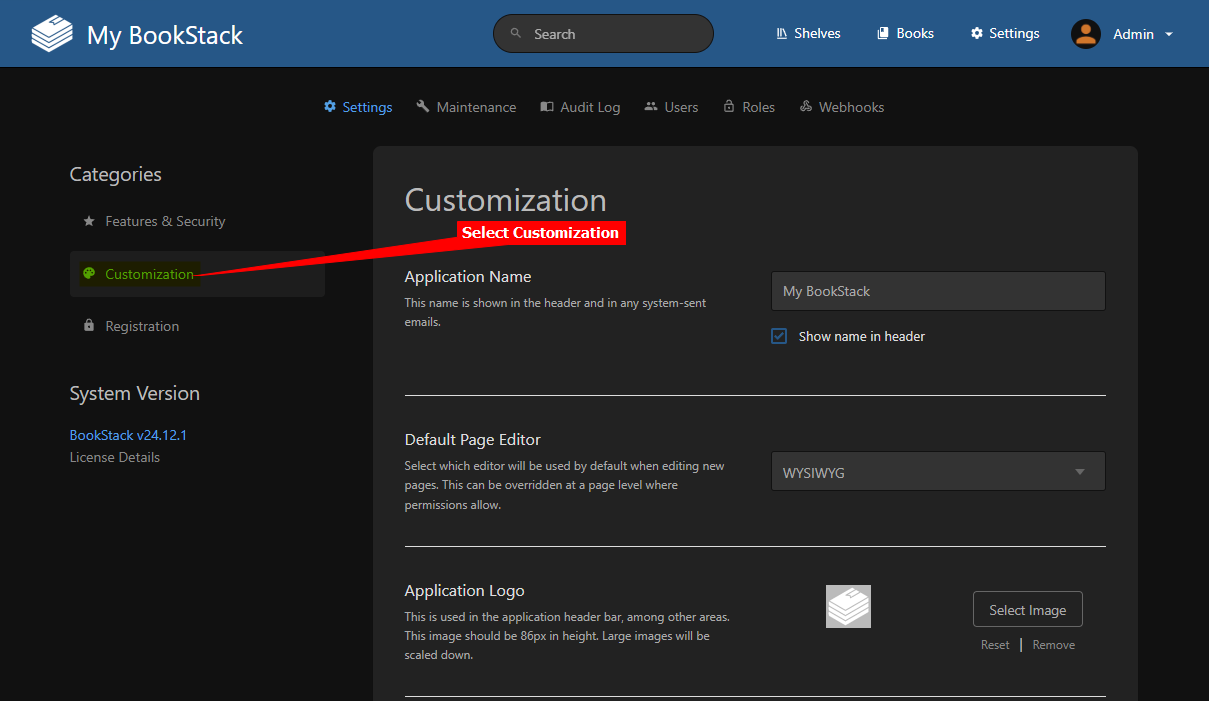
3. Scroll down on the list of Customizations, insert your snippet in the text box under **Custom HTML Head Content** and click on **Save Settings**
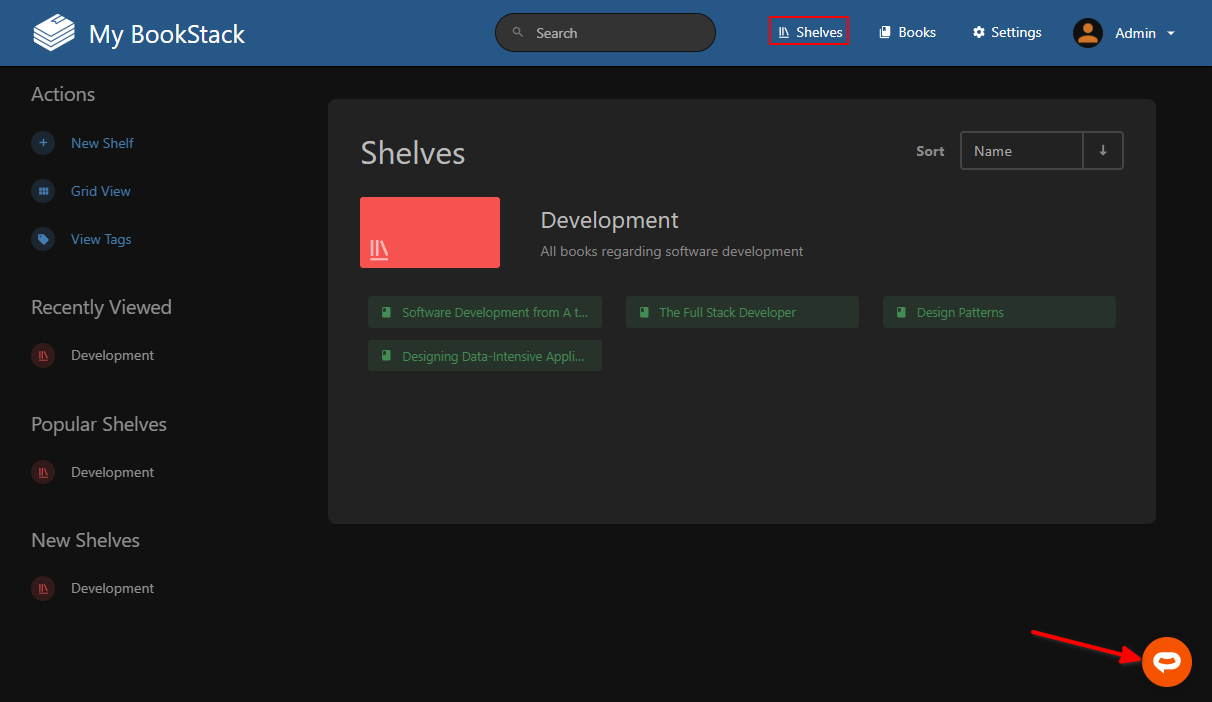
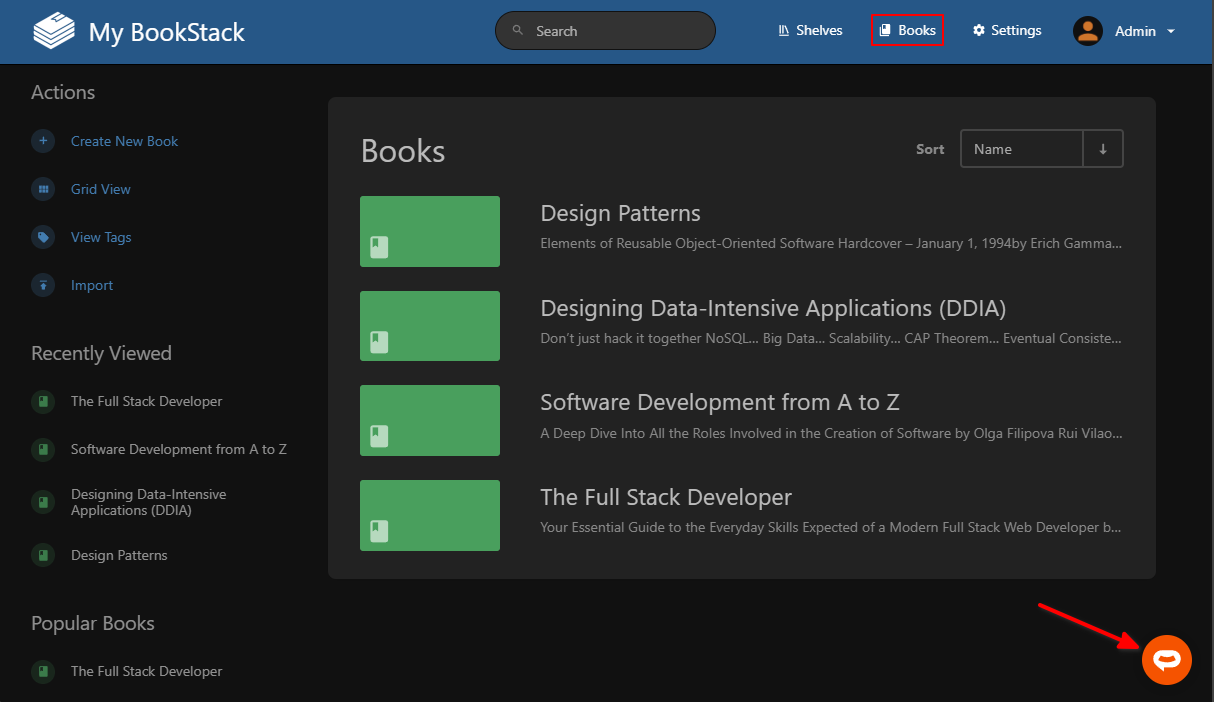
4. Your AI support agent button will now be displayed on your **BookStack** **BookStack** application under **Shelves** as well as **Books**
5. If you click on the button it will display the AI support agent dialogue
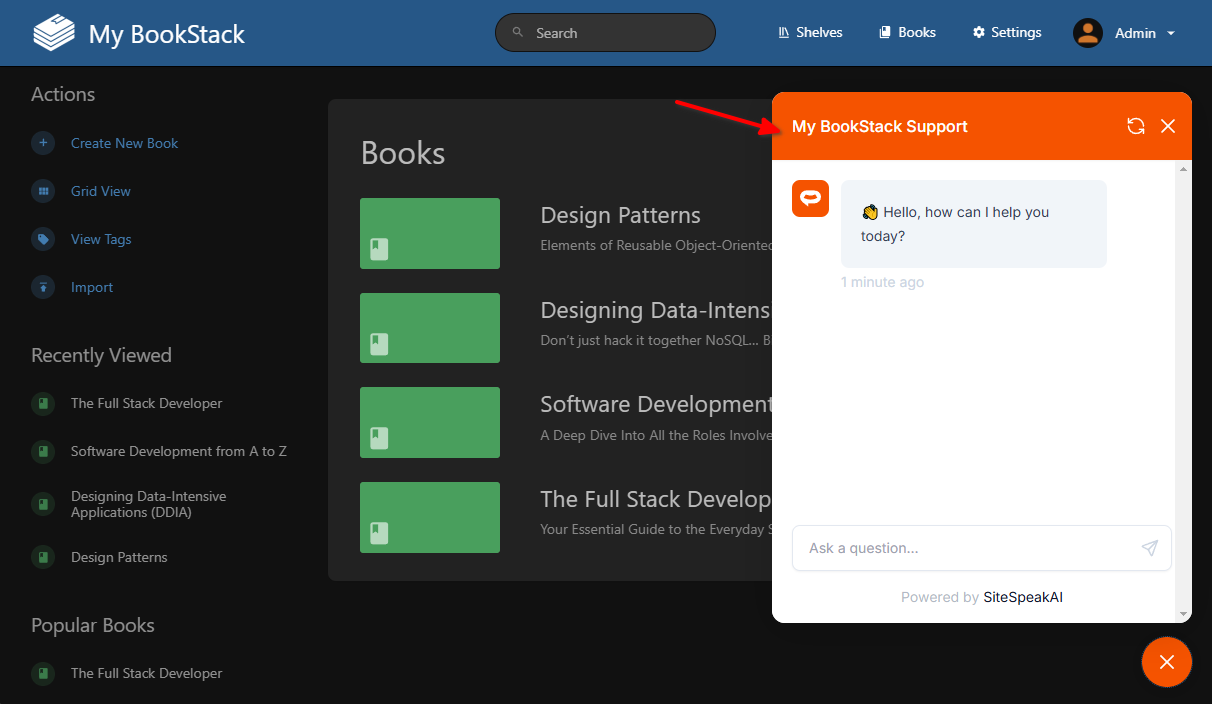
Your AI support agent has now been added to your **BookStack** application and your visitors/customers can start interacting with it!
***
Join over 1000+ businesses, websites and startups automating their customer service and other tasks with a custom trained AI agent.
### In BookStack
1. Log into your **BookStack** account and select **Settings** on the top right menu

2. Select **Customization** on the left side menu

3. Scroll down on the list of Customizations, insert your snippet in the text box under **Custom HTML Head Content** and click on **Save Settings**

4. Your AI support agent button will now be displayed on your **BookStack** **BookStack** application under **Shelves** as well as **Books**


5. If you click on the button it will display the AI support agent dialogue

Your AI support agent has now been added to your **BookStack** application and your visitors/customers can start interacting with it!
***
Join over 1000+ businesses, websites and startups automating their customer service and other tasks with a custom trained AI agent.