> ## Documentation Index
> Fetch the complete documentation index at: https://sitespeak.ai/docs/llms.txt
> Use this file to discover all available pages before exploring further.
# How to add a ChatGPT AI support agent to EzyCourse
> How to add your custom ChatGPT trained AI support agent to your ezyCourse website.
You want to embed your custom trained AI support agent in your **EzyCourse** website page. Here's how to add an AI support agent to EzyCourse with SiteSpeakAI.
**EzyCourse** is an online course platform designed for educators and trainers to easily create and host their courses. It offers a straightforward approach to building and selling online learning experiences.
**Website URL:** [EzyCourse](https://www.ezycourse.com/)
## Add your AI support agent to your **EzyCourse** website
### In SiteSpeakAI
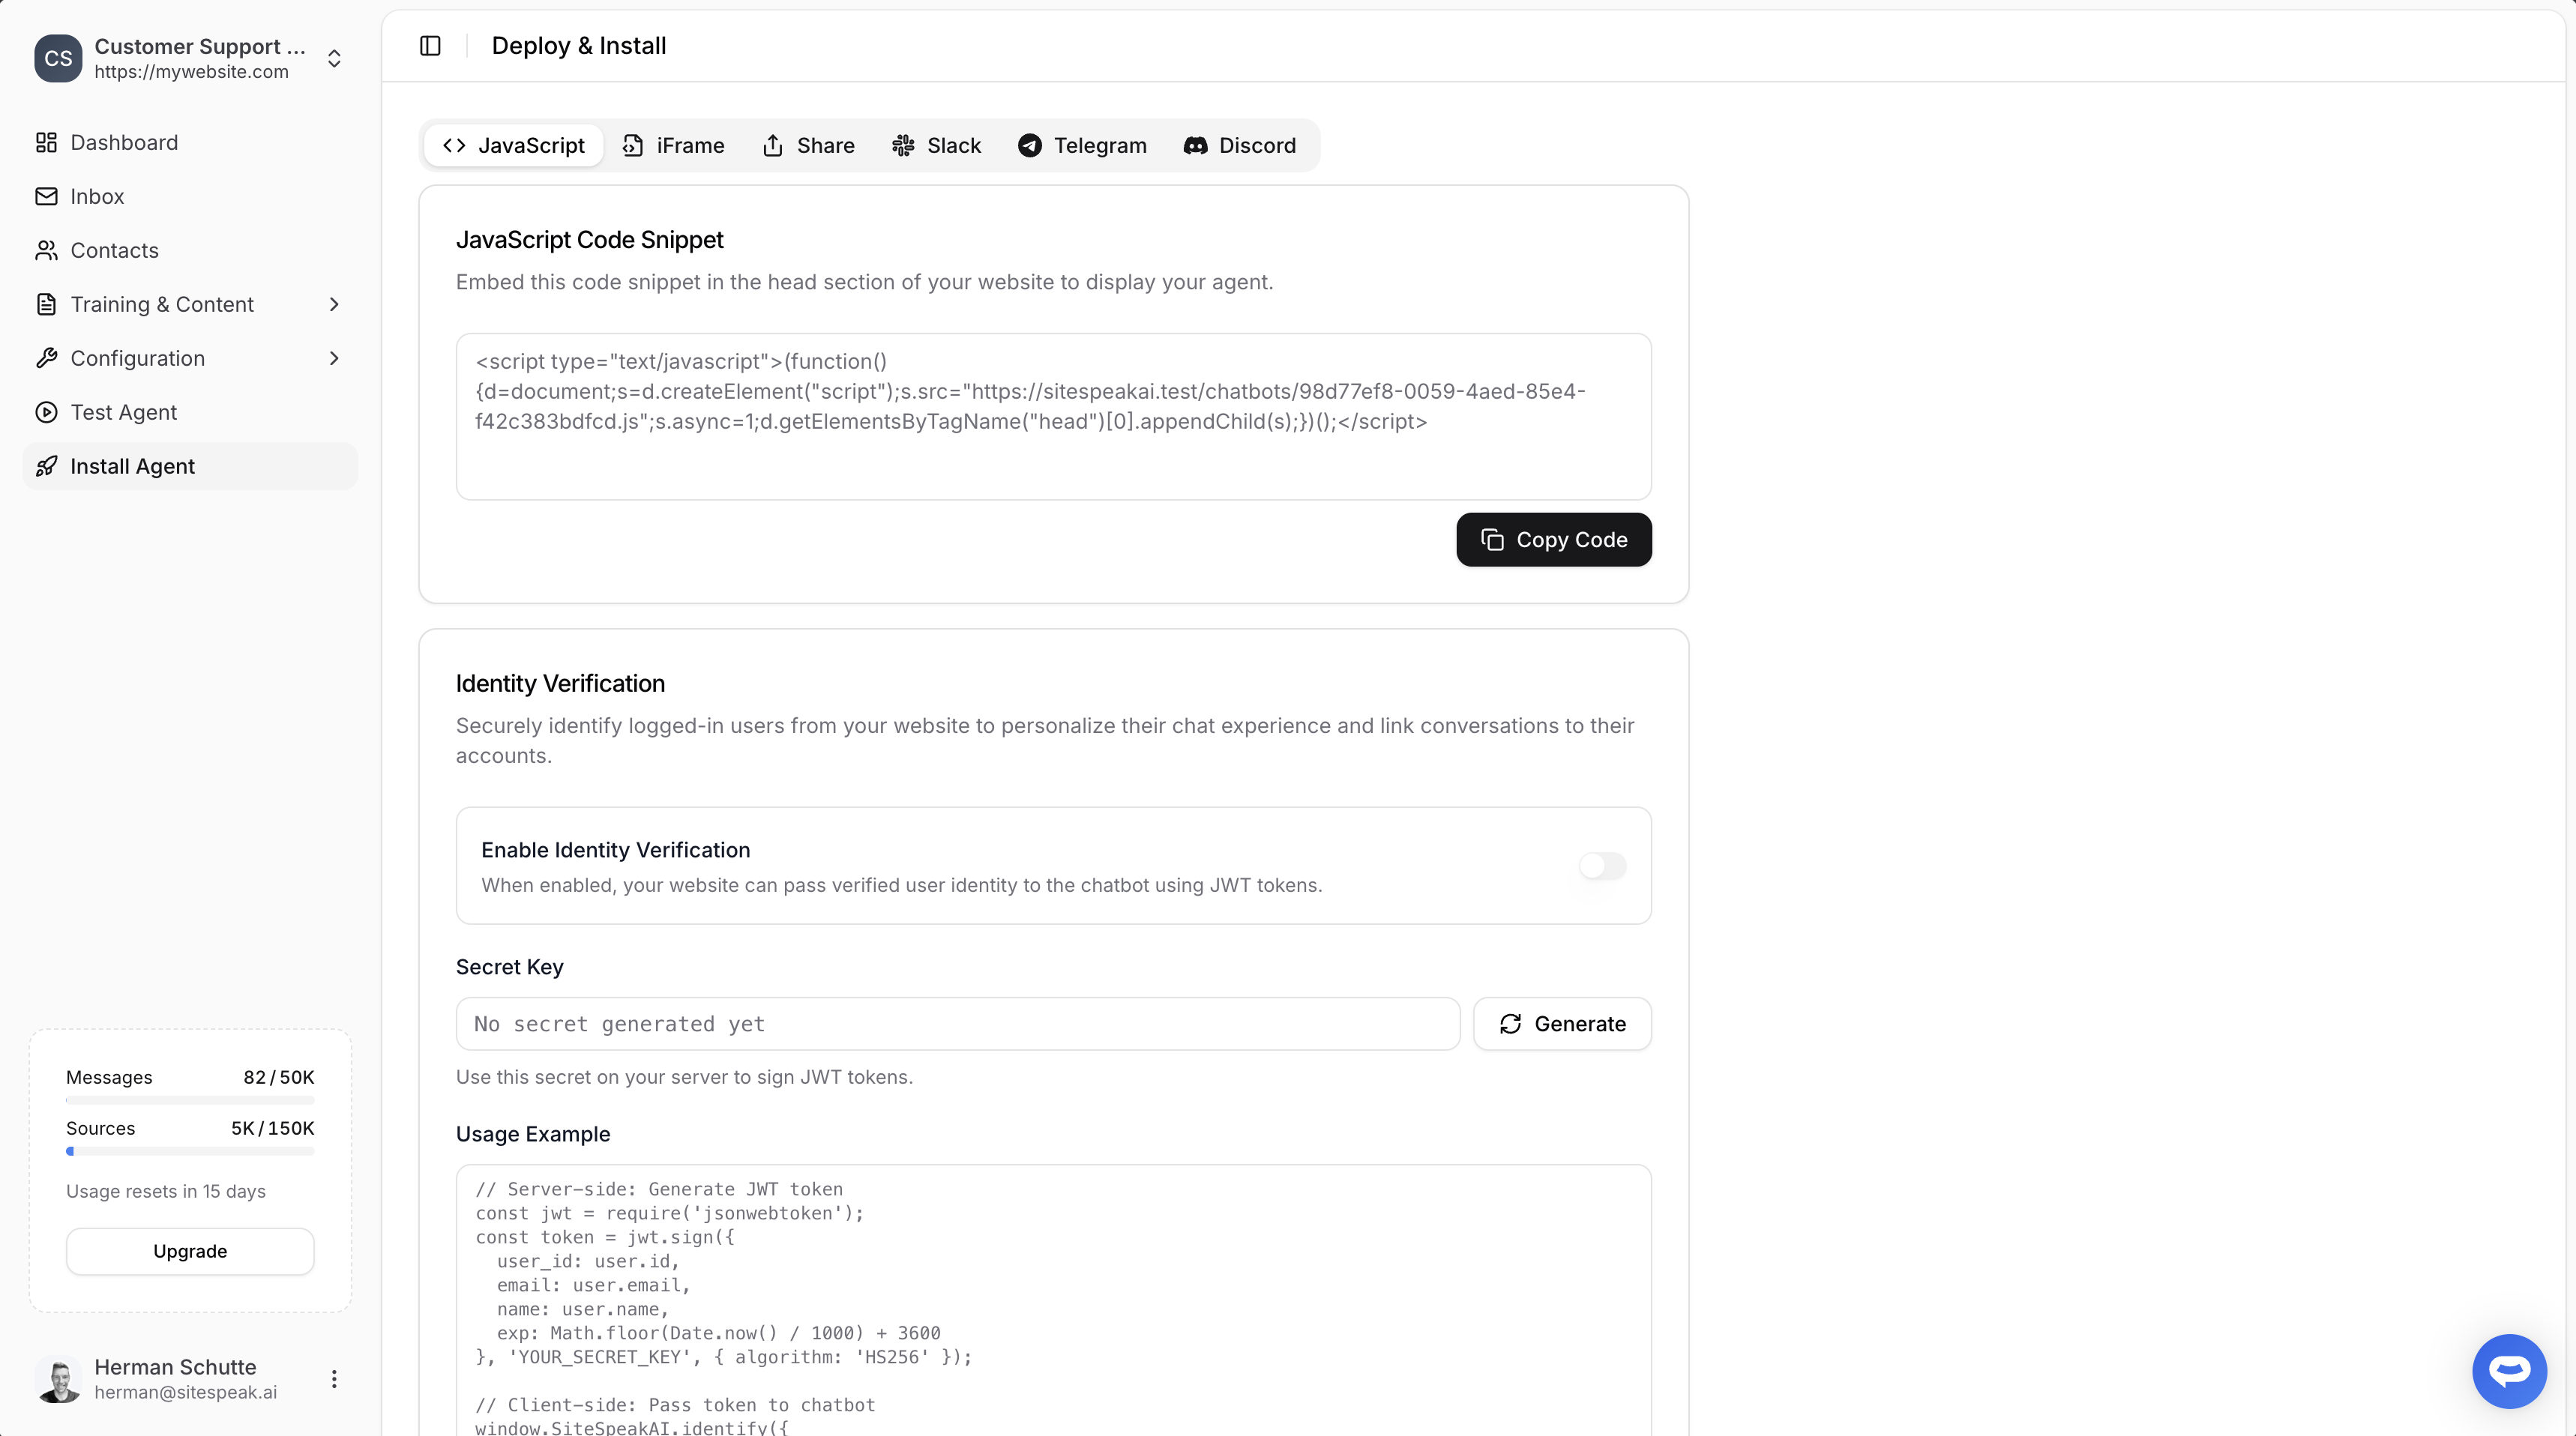
Select your chatbot from the dropdown menu at the top, click on the **Install Agent** section in the sidebar, then click on the **Copy Code** button to copy your code snippet.
 ### In EzyCourse
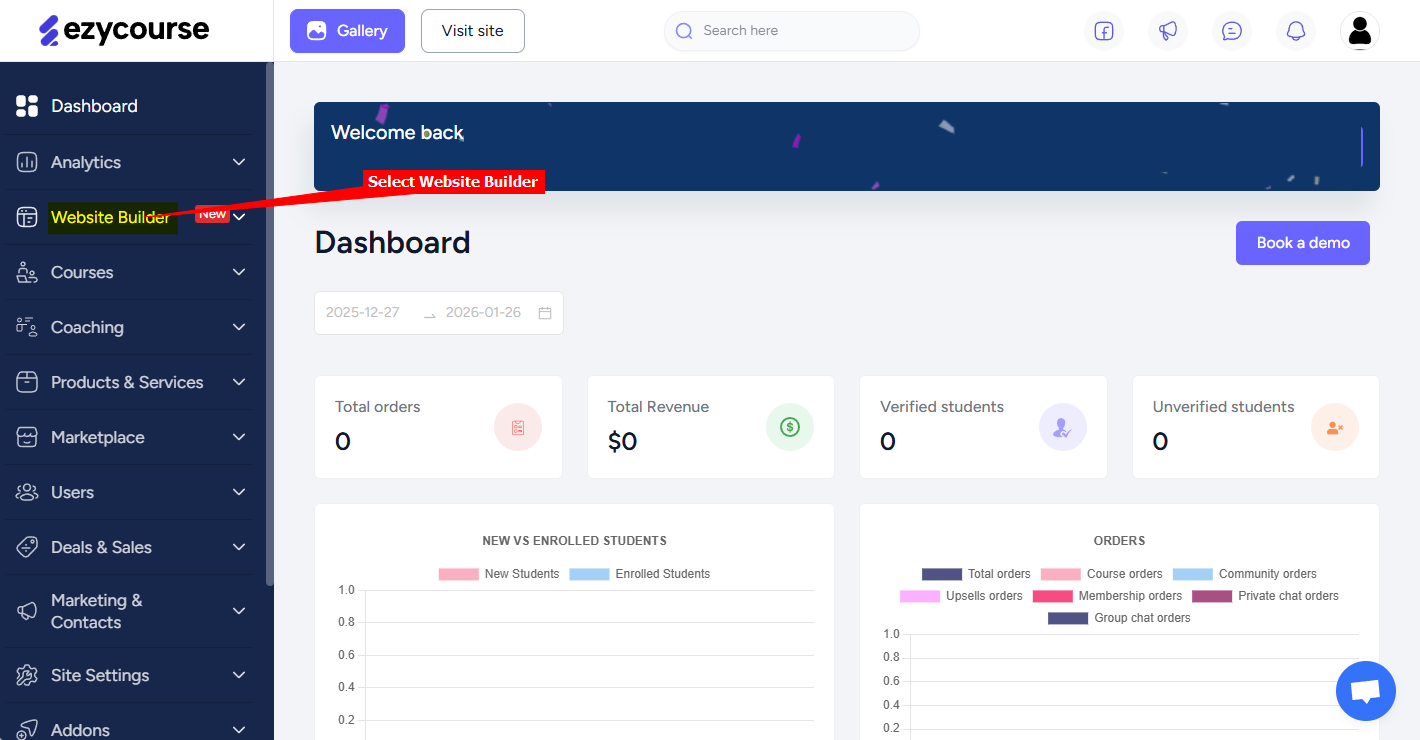
1. Log into your **EzyCourse** account and on the dashboard select **Website Builder** on the left sidebar
### In EzyCourse
1. Log into your **EzyCourse** account and on the dashboard select **Website Builder** on the left sidebar
 Note that you can add the AI support agent globally to your EzyCourse website or to specific pages
#### A. Adding your agent globally
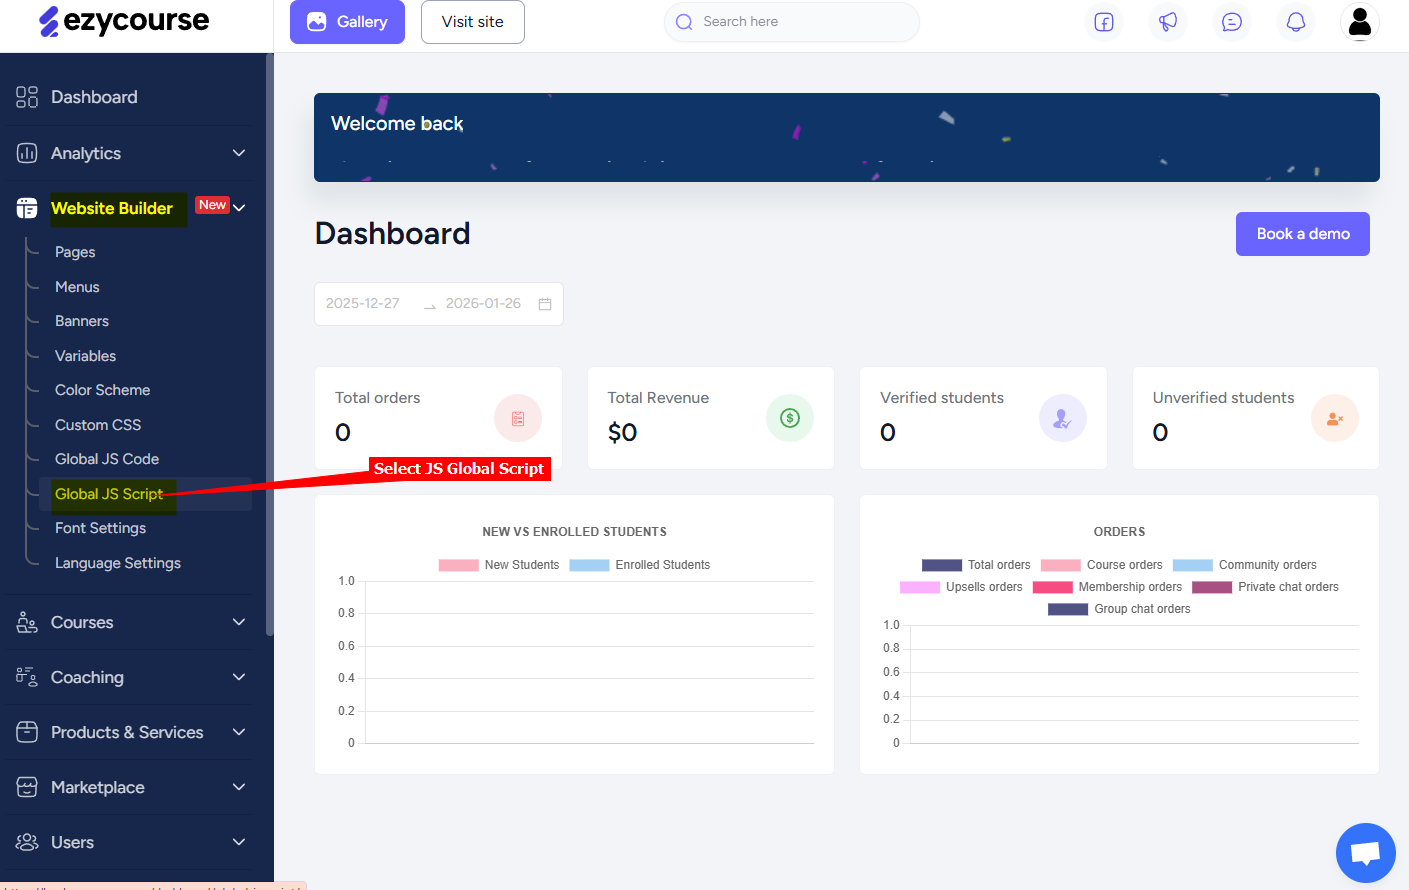
2. Select **Global JS Script** on the list under **Website Builder**
Note that you can add the AI support agent globally to your EzyCourse website or to specific pages
#### A. Adding your agent globally
2. Select **Global JS Script** on the list under **Website Builder**
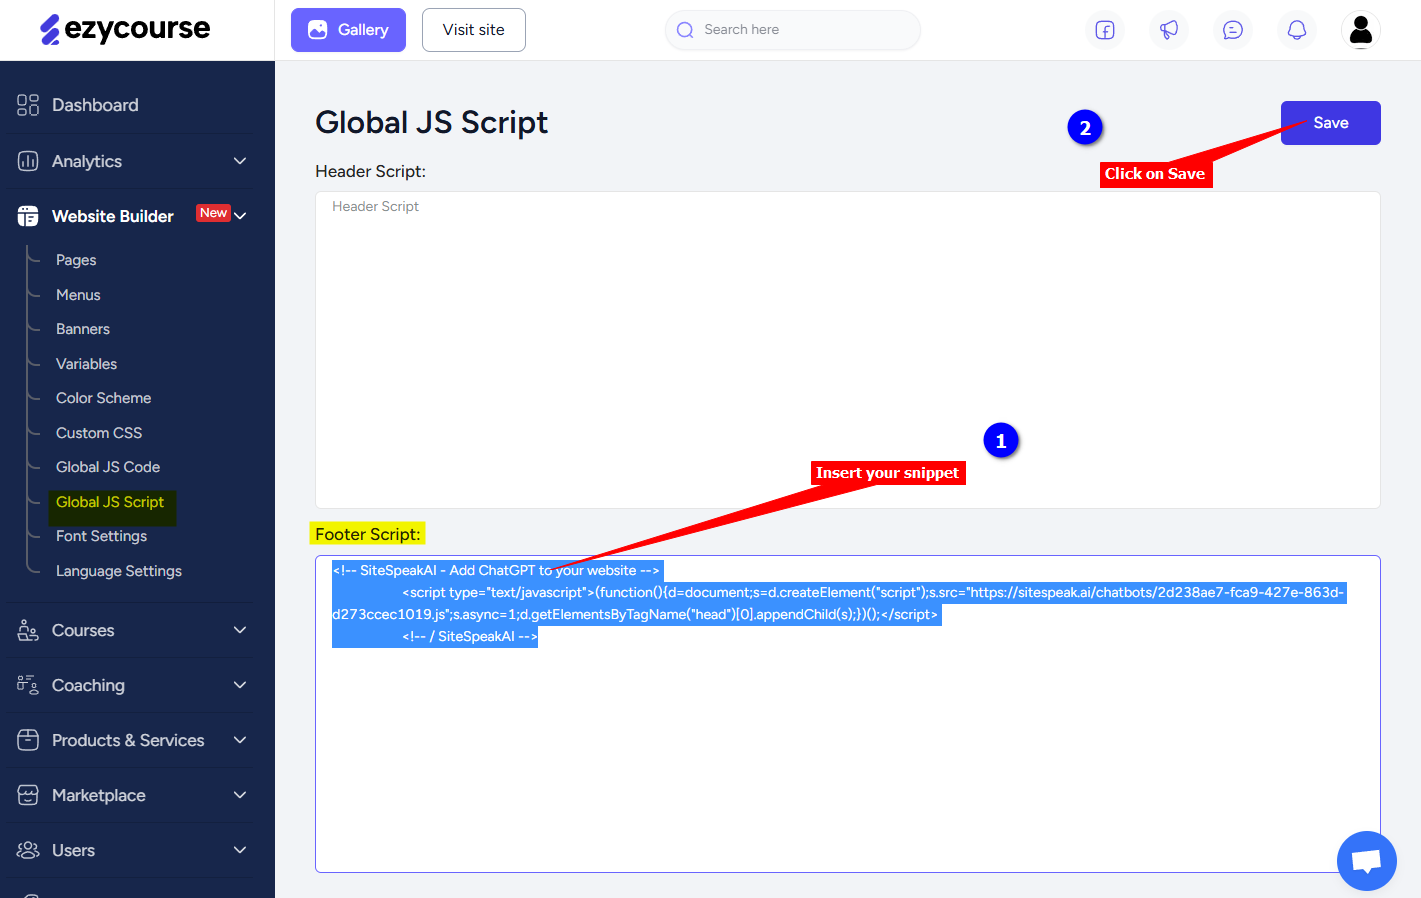
 3. Insert your AI support agent snippet in the **Footer Script** (or the **Header Script**) textbox and click on Save
 #### B. Adding your agent to specific pages
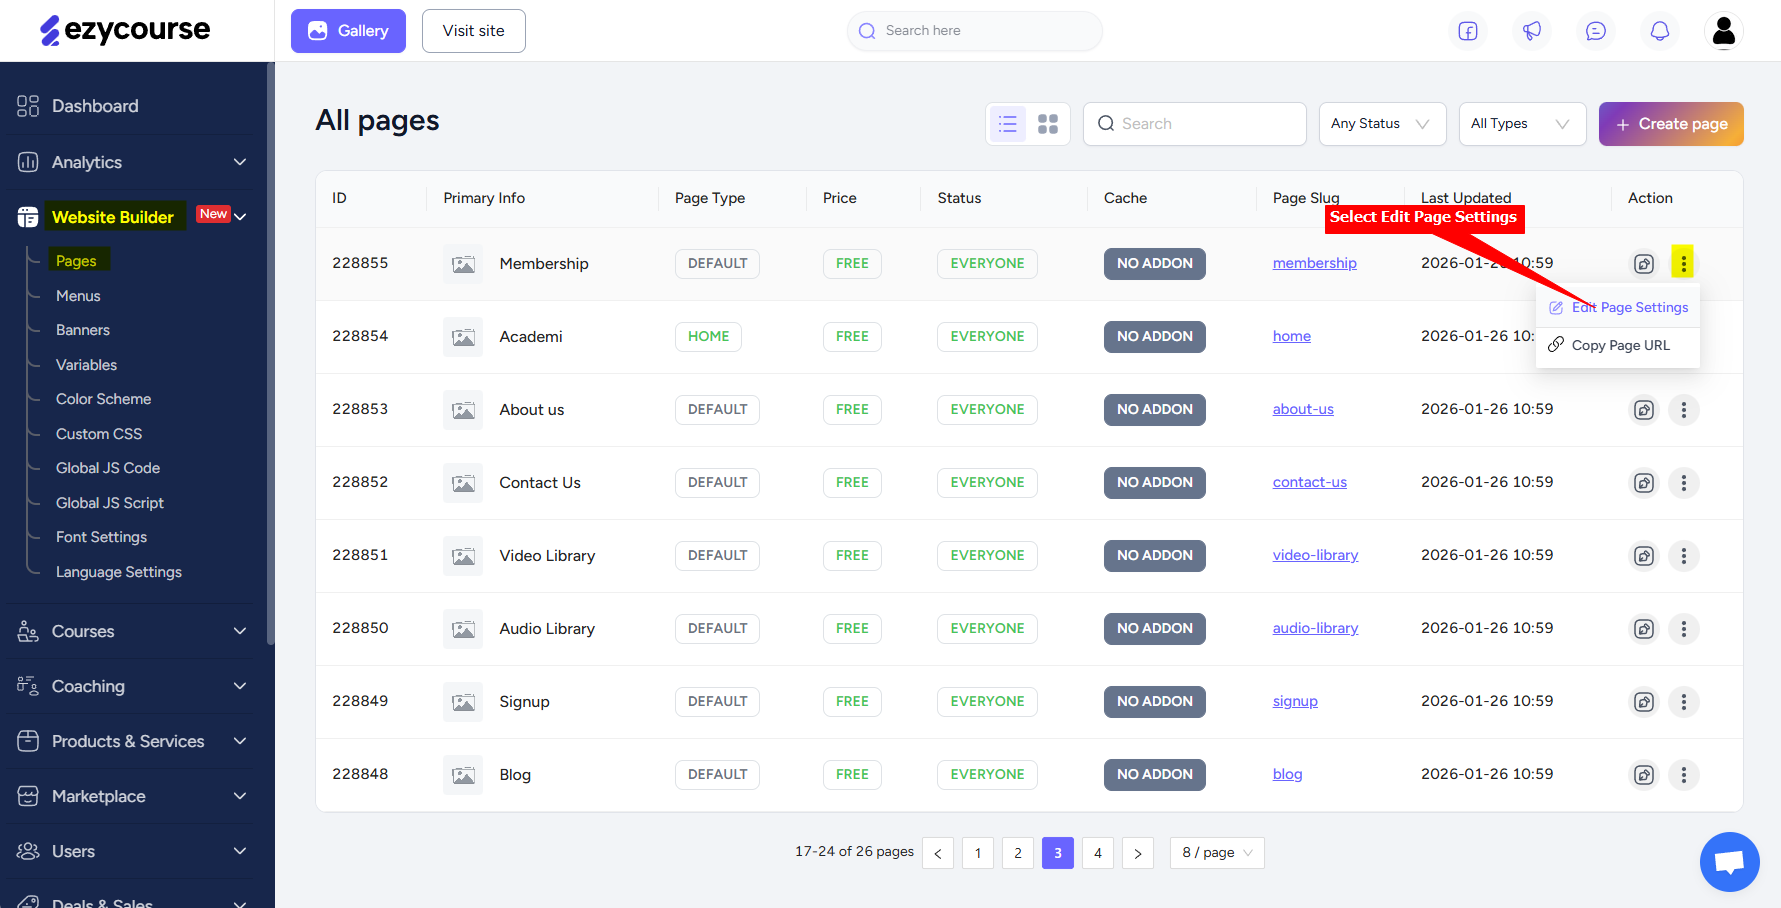
4. Select **Pages** on the list under **Website Builder** and click on the **Edit Page Settings** option (3 vertical dots menu) for the page you want to add your agent to
#### B. Adding your agent to specific pages
4. Select **Pages** on the list under **Website Builder** and click on the **Edit Page Settings** option (3 vertical dots menu) for the page you want to add your agent to
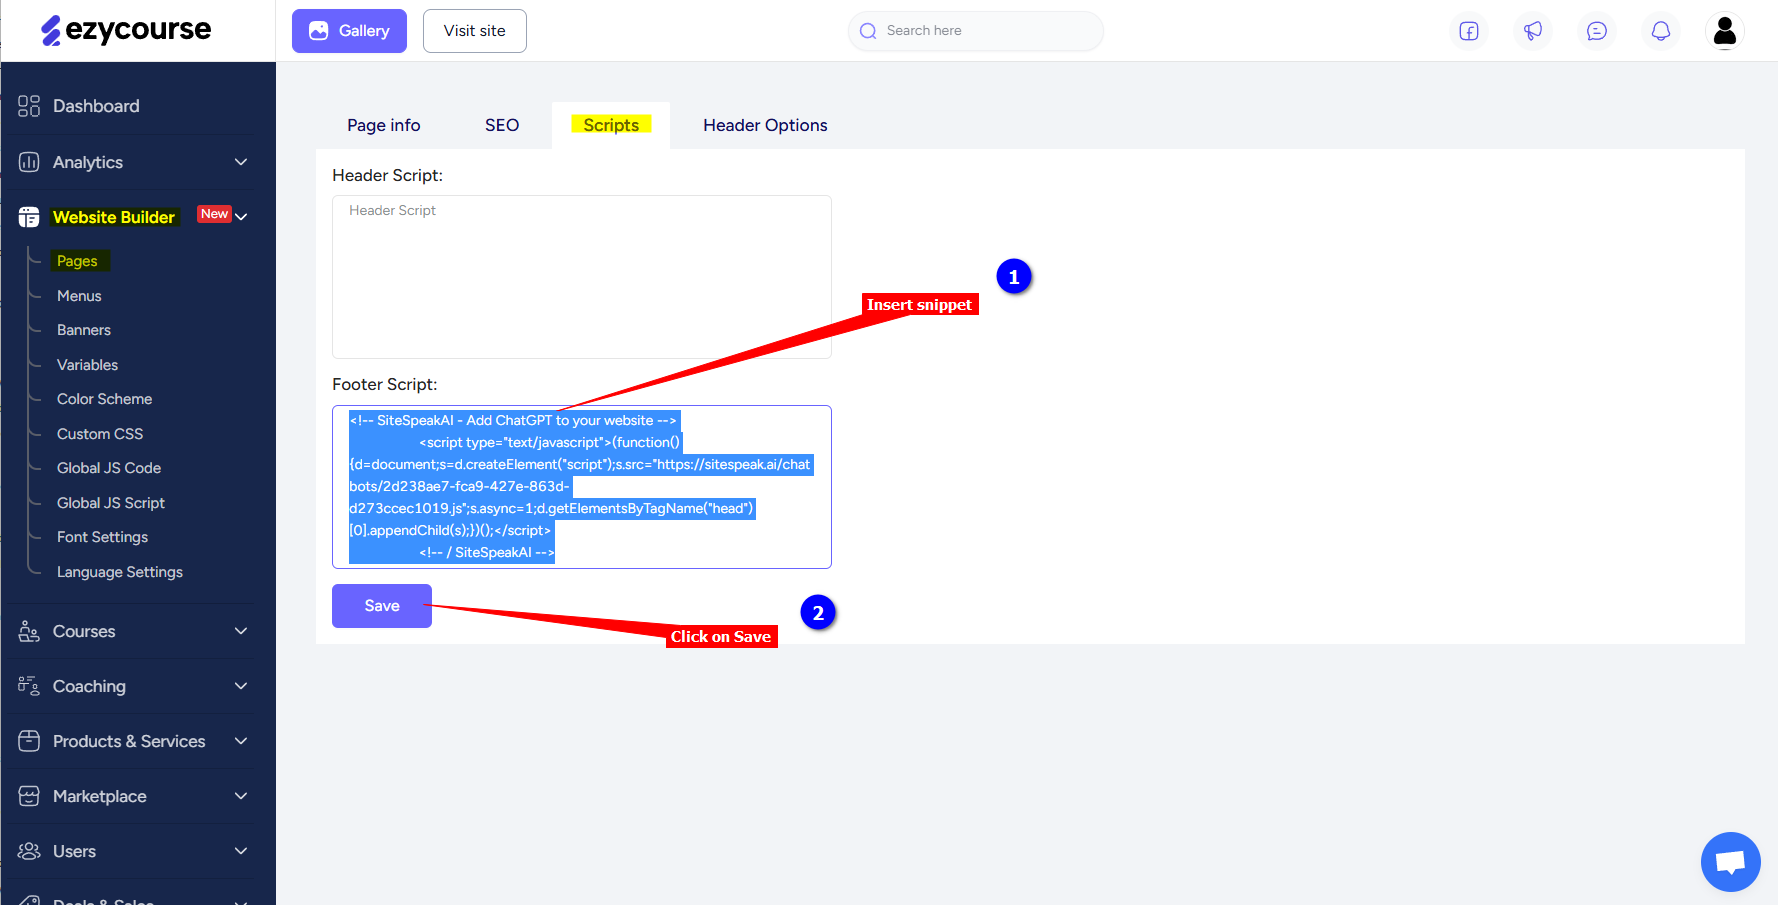
 5. Select the **Scripts** tab on the Page Settings, insert your AI support agent snippet in the **Footer Script** (or the **Header Script**) textbox and click on Save
 #### C. Display of the AI support agent (globally or page specific)
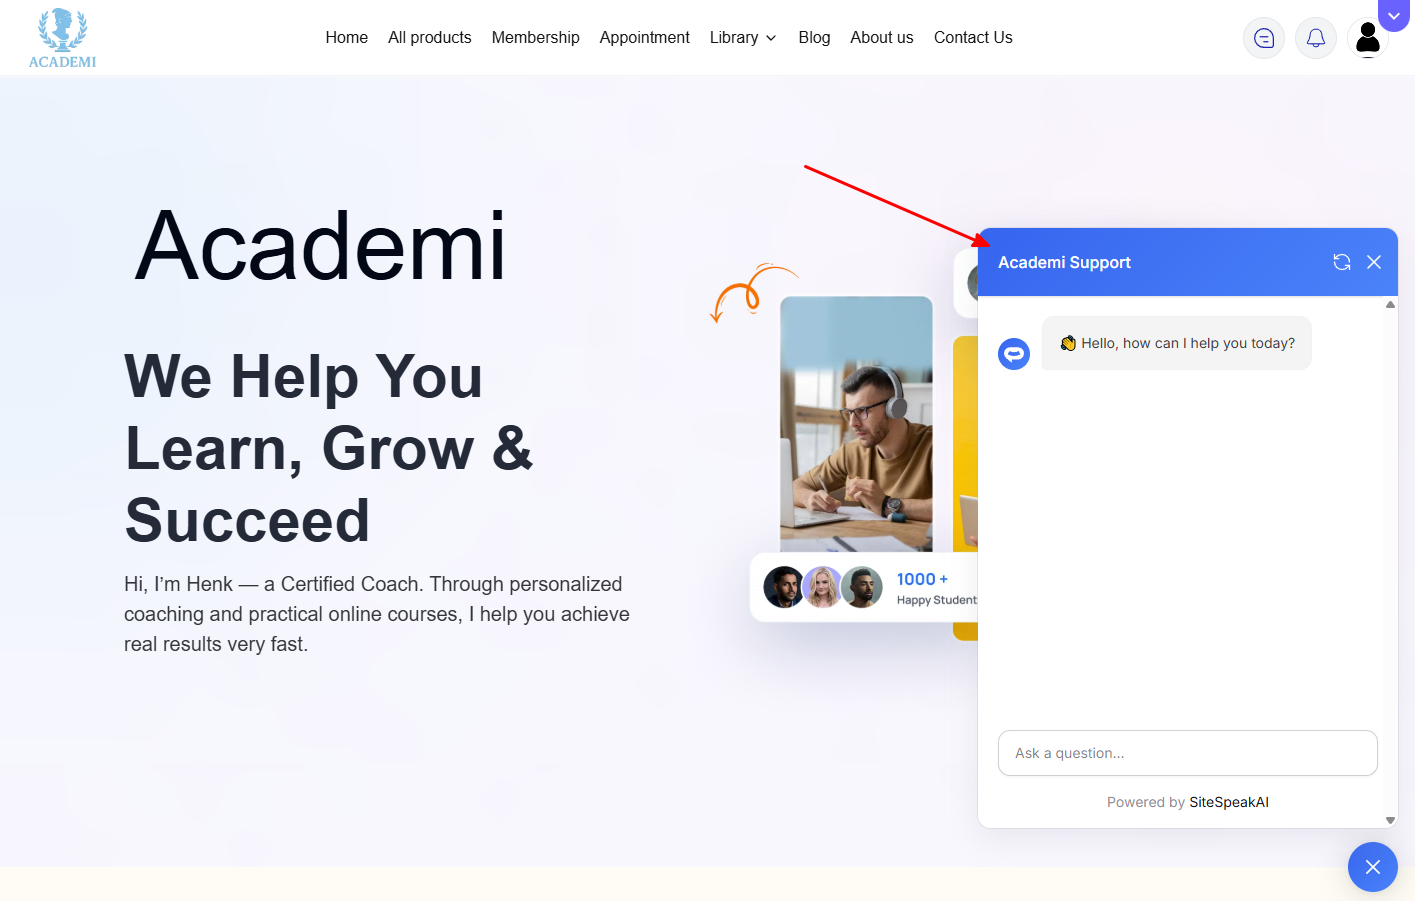
6. Your AI support agent button will now be displayed on your **EzyCourse** website page
#### C. Display of the AI support agent (globally or page specific)
6. Your AI support agent button will now be displayed on your **EzyCourse** website page
 7. If you click on the button it will display the AI support agent dialogue
 Your AI support agent has now been added to your **EzyCourse** website (globally or page specific) and your visitors/customers can start interacting with it!
***
Join over 1000+ businesses, websites and startups automating their customer service and other tasks with a custom trained AI agent.
Your AI support agent has now been added to your **EzyCourse** website (globally or page specific) and your visitors/customers can start interacting with it!
***
Join over 1000+ businesses, websites and startups automating their customer service and other tasks with a custom trained AI agent.