> ## Documentation Index
> Fetch the complete documentation index at: https://sitespeak.ai/docs/llms.txt
> Use this file to discover all available pages before exploring further.
# How to add a ChatGPT AI support agent to Framer
> How to add your custom ChatGPT trained AI support agent to your Framer website.
You want to embed your custom trained AI support agent in your **Framer** website page. Here's how to add an AI support agent to Framer with SiteSpeakAI.
In this tutorial, I'll guide you through the process of adding your custom ChatGPT AI support agent to your Framer website.
Before you can add your agent to Framer, you need to create and train it. After you log in to SiteSpeak, you land on the Get Started page, which walks you through it in five quick steps. First, give your agent a name. This is the name your visitors will see when they chat with it. Click Save and Continue to create the agent. Next, add the website you want your agent to learn from. For this example I'll use snapwidget.com. Click Save and Continue, and SiteSpeak crawls the site to find pages it can train on. In a few seconds, it finds the main pages on the site. SiteSpeak selects those pages for you. Click Save and Continue to train your agent on them. SiteSpeak now trains your agent on that content automatically. Once it finishes, your agent is ready to answer questions about your site, and you can add it to your Framer website.
First, we'll walk through how you can integrate your custom ChatGPT-trained AI support agent into your Framer site. Start by logging into your Framer account. Once you're on the dashboard, select the project you want to edit. Next, click on Settings to access the Site Settings for your project. Within the Site Settings, look over to the left sidebar and click on Custom Code. On the Custom Code page, click on the `<>` Custom Code item to bring up the Script Editor. Here, you'll want to scroll down to the End of `` section to insert your code. Once you've done that, your AI support agent button will appear on your Framer website page. By clicking on this button, you'll be able to display the AI support agent dialogue, ready to assist your visitors.
And that's it. You've successfully added a ChatGPT AI support agent to your Framer site.
**Framer** is a website builder that's different from traditional drag-and-drop platforms like Wix or Squarespace. It's essentially a **design tool for websites**. Instead of just picking pre-made templates, you build your website using **code-like components** – think of them as building blocks you can customize with CSS (the language that controls how websites look). It's incredibly powerful for creating **interactive and visually stunning websites**, especially those with complex animations, micro-interactions, and unique layouts.
**Website URL:** [Framer](https://www.framer.com/)
## Add your AI support agent to your **Framer** website
### In SiteSpeakAI
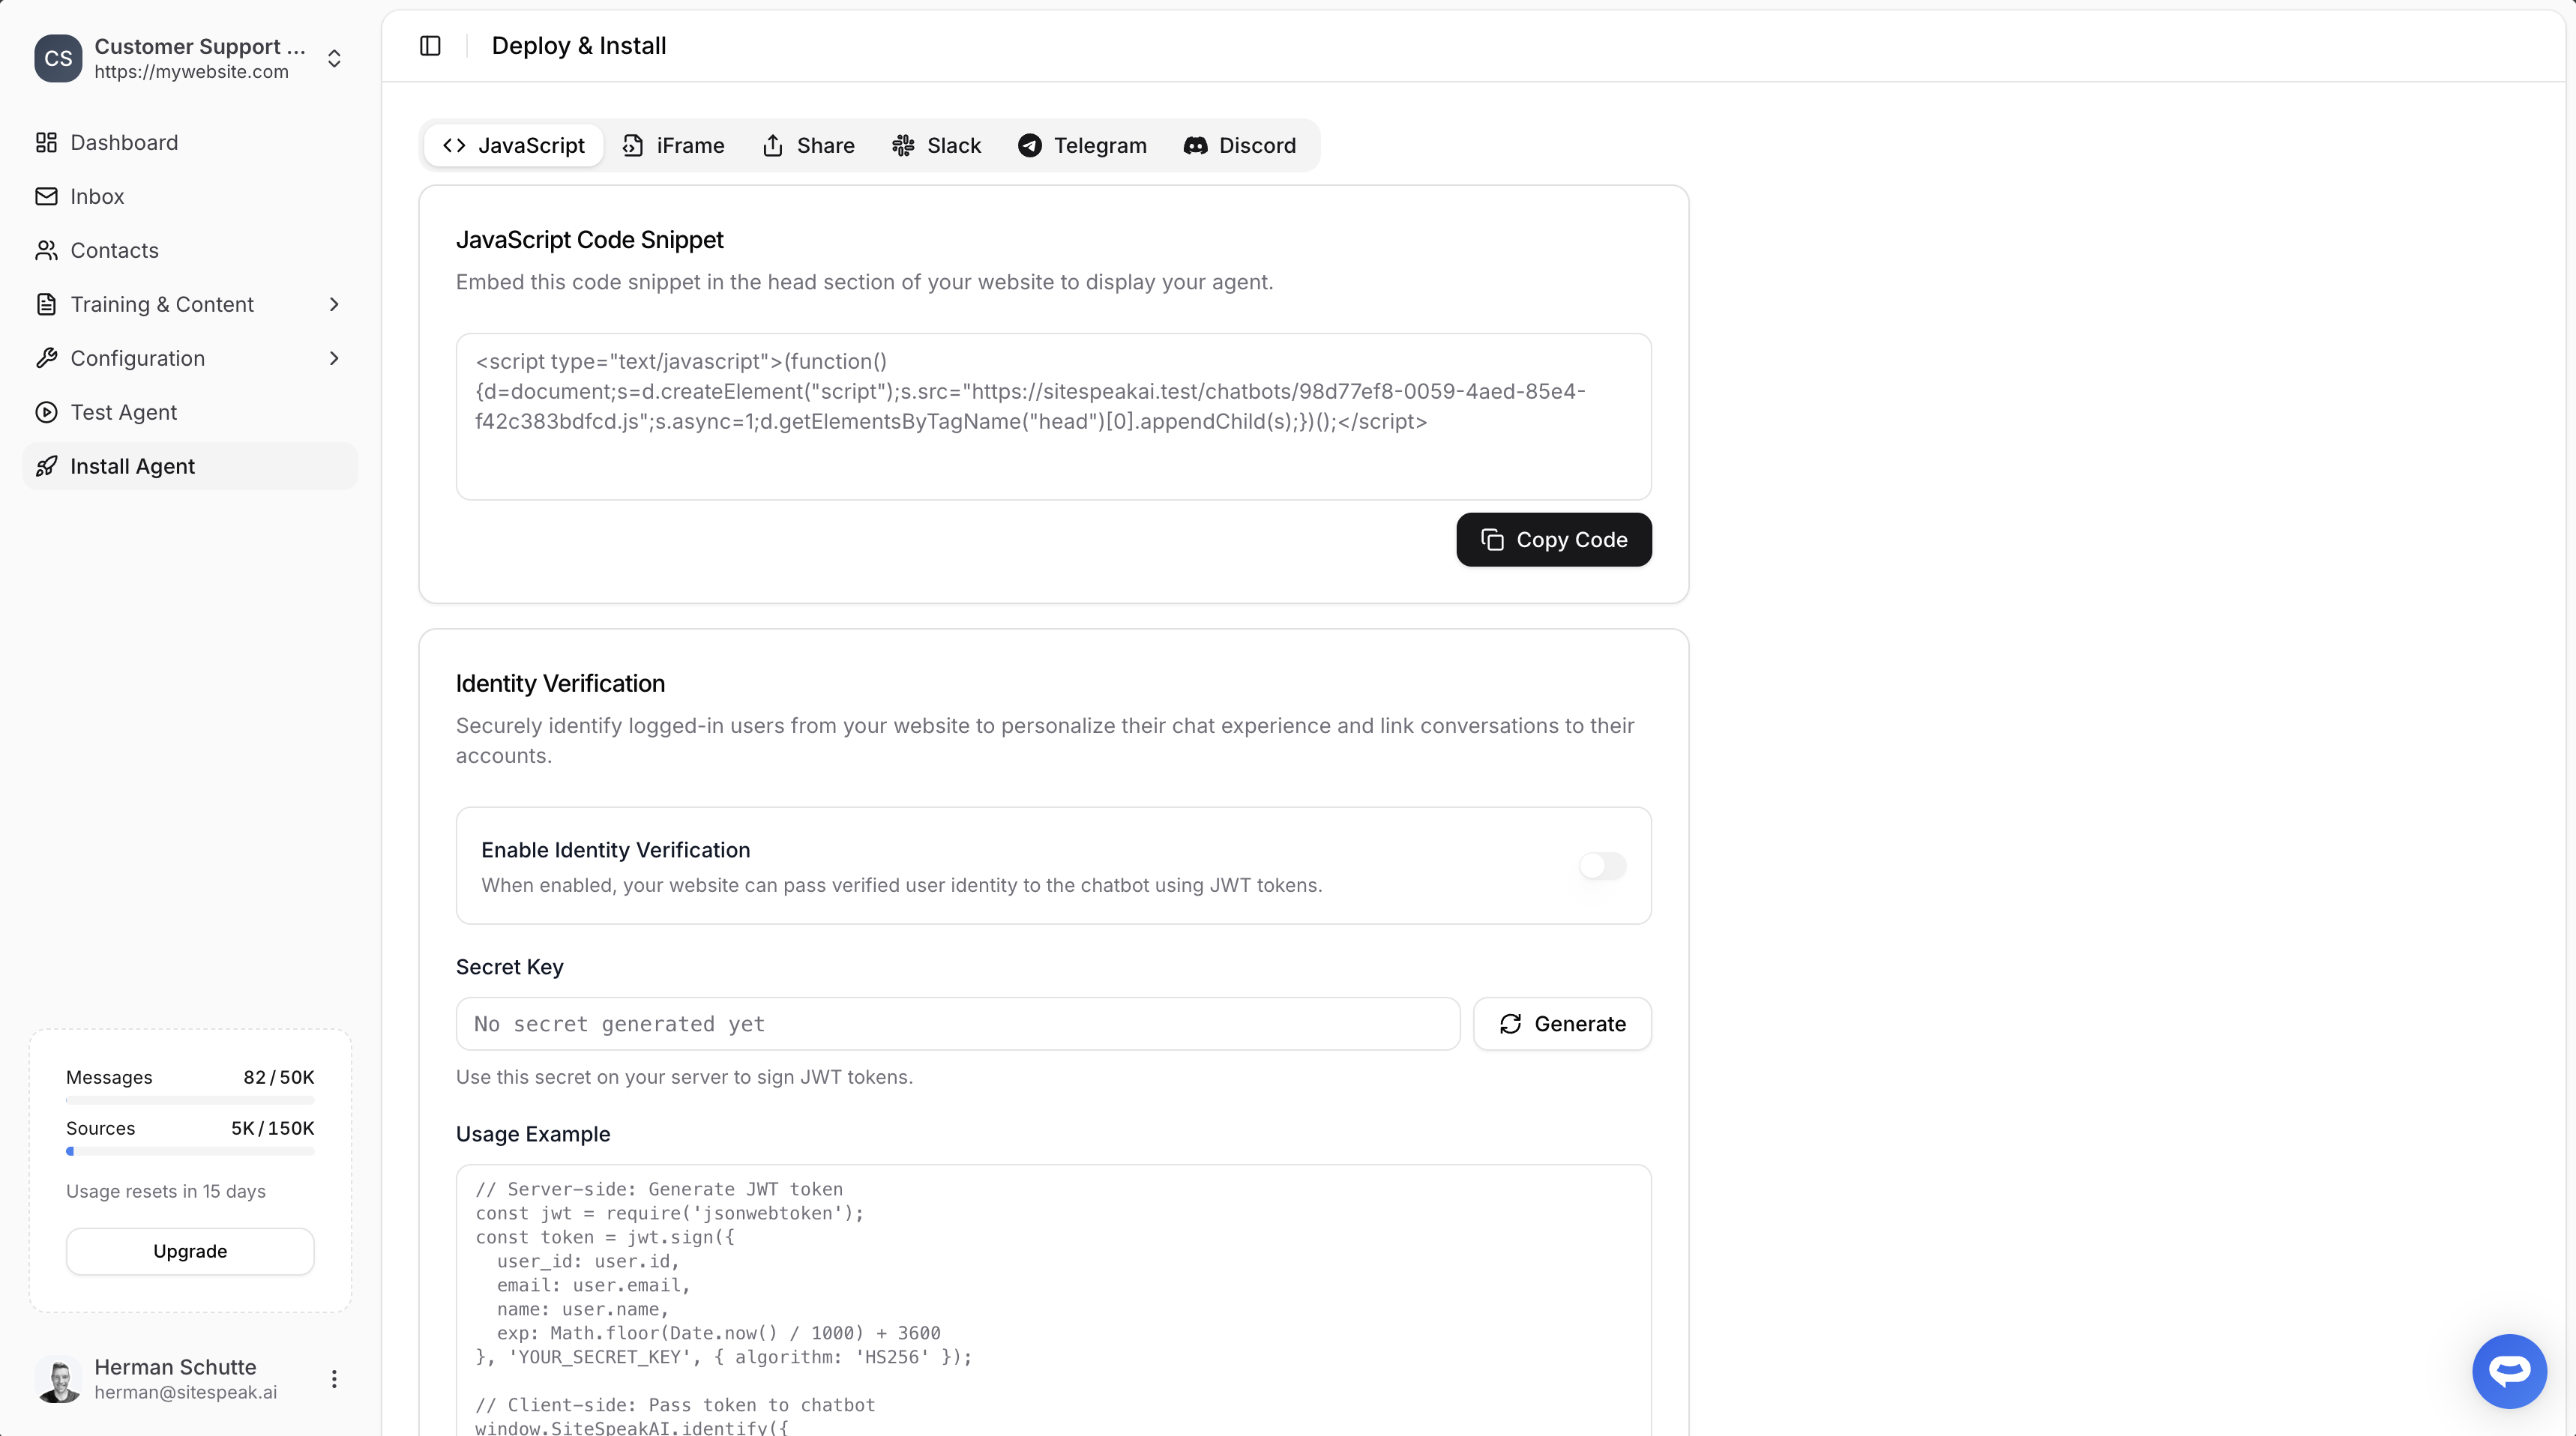
Select your chatbot from the dropdown menu at the top, click on the **Install Agent** section in the sidebar, then click on the **Copy Code** button to copy your code snippet.
### In Framer
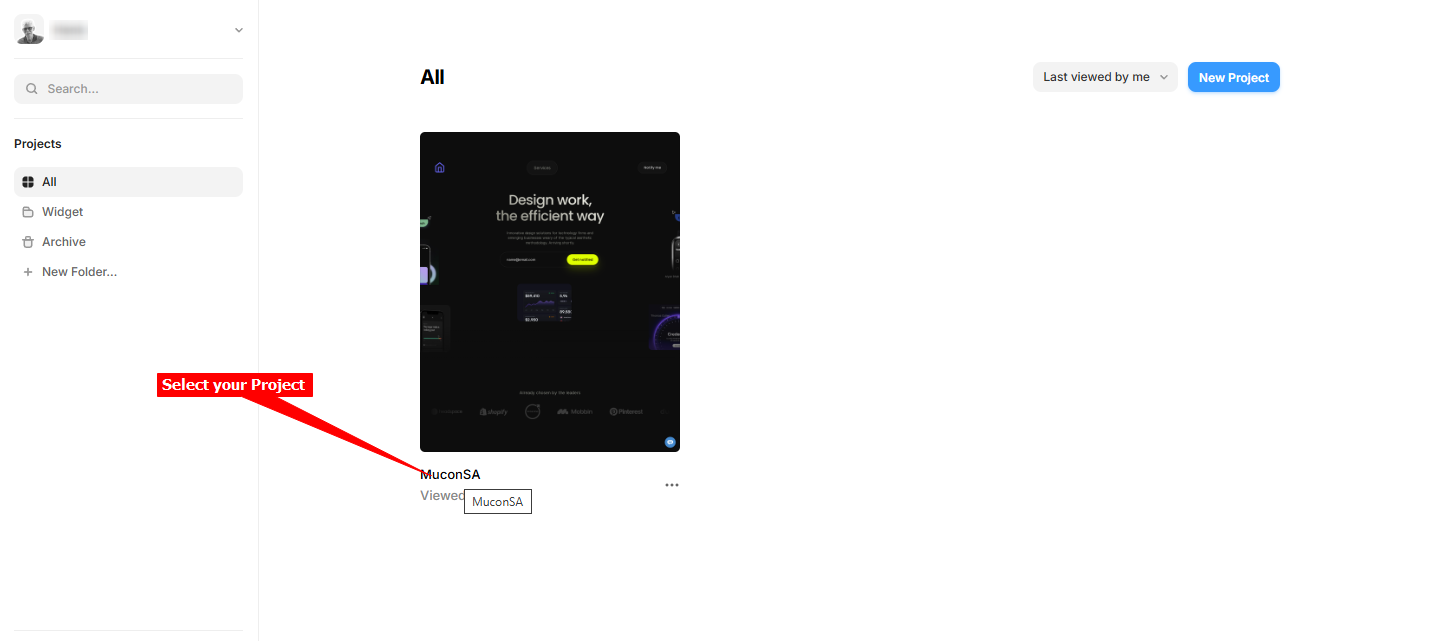
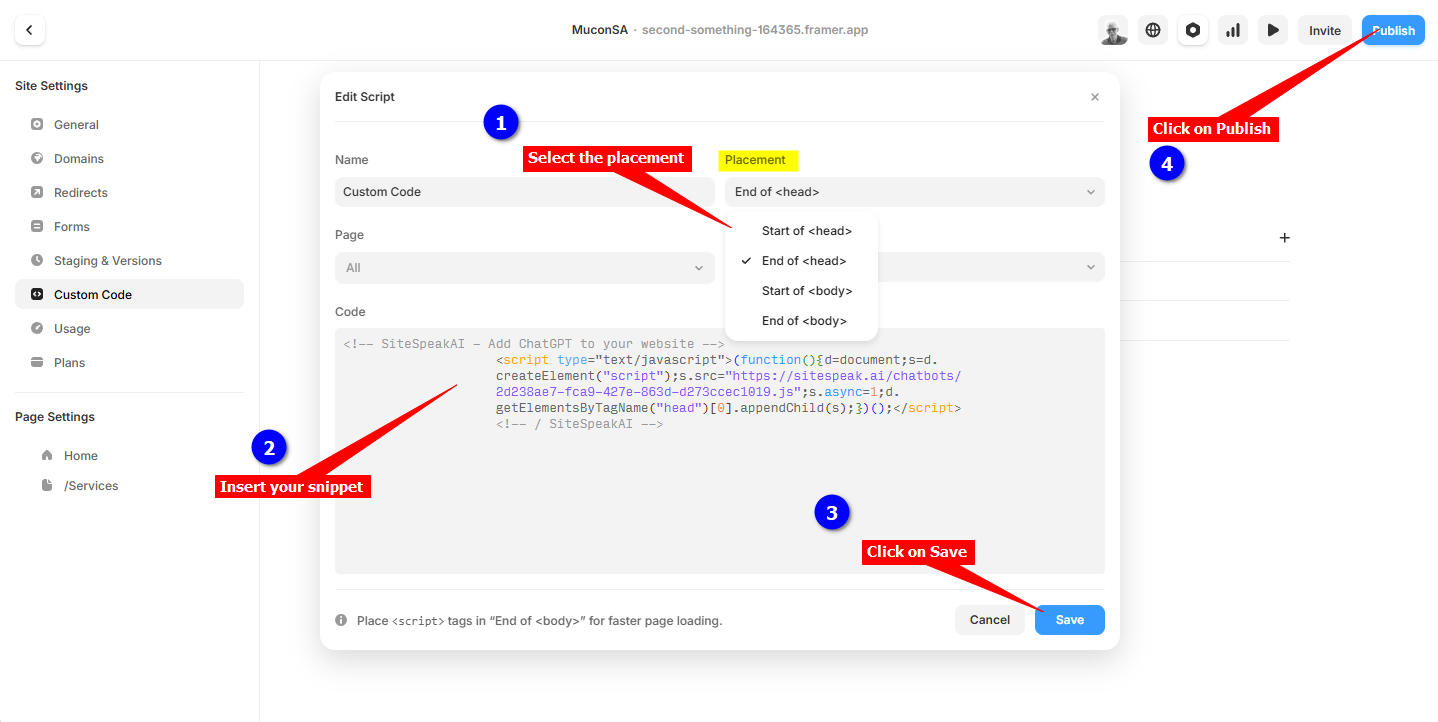
1. Log into your **Framer** account and on the dashboard, select the project to edit
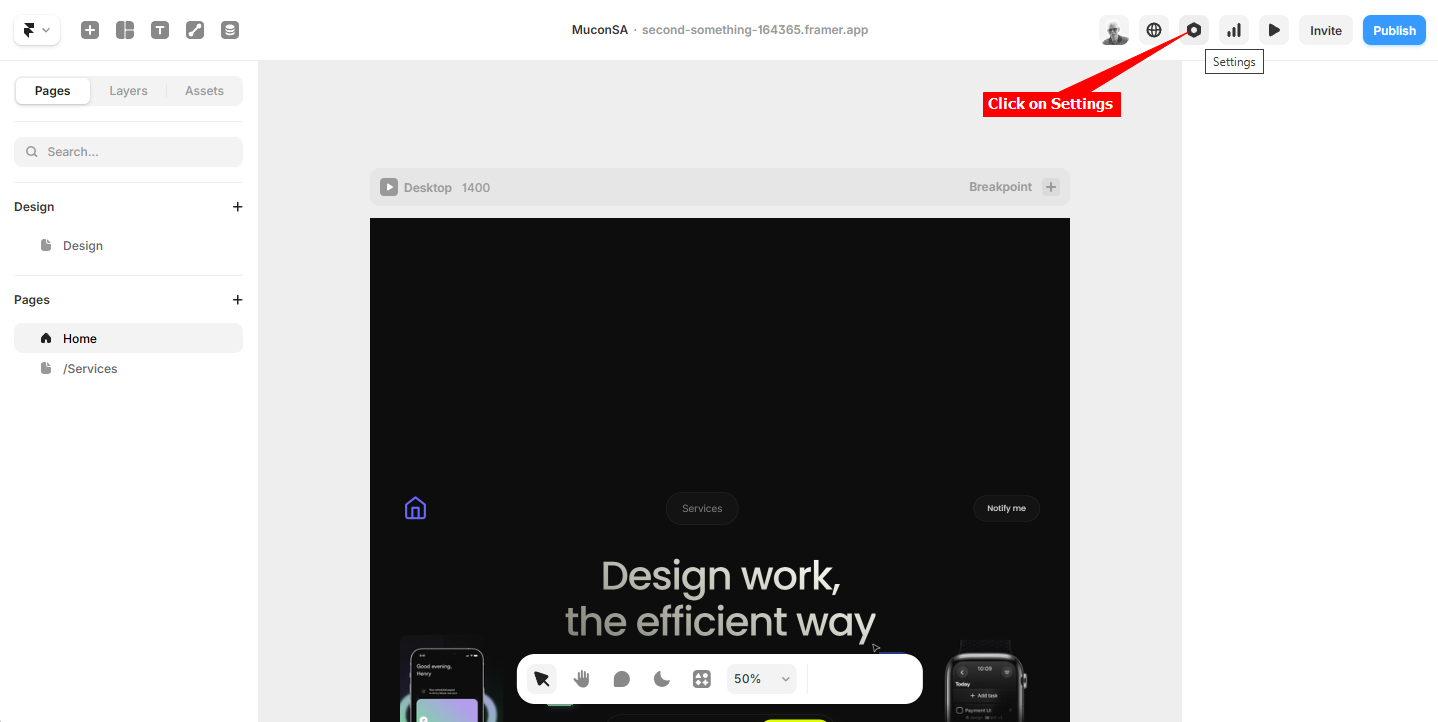
2. Click on **Settings** to open the Site Settings
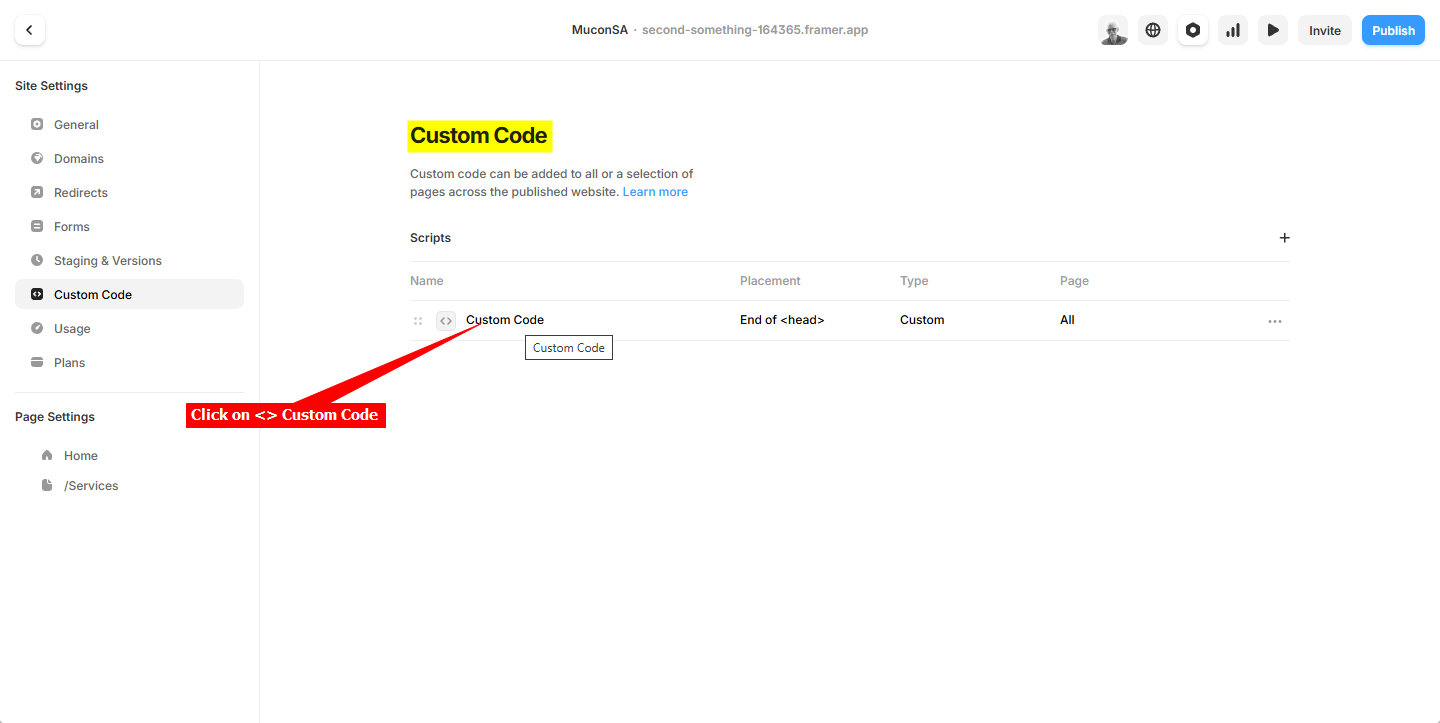
3. Under **Site Settings**, on the left side bar, click on **Custom Code**
4. On the **Custom Code** page, click on the **`<>` Custom Code** item to open the Script Editor
5. Insert your snippet. You have a few options where to insert your snippet, i.e.
* Start of ``
* End of ``
* Start of ``
* End of ``
When done, click on **Save** and then click on **Publish**
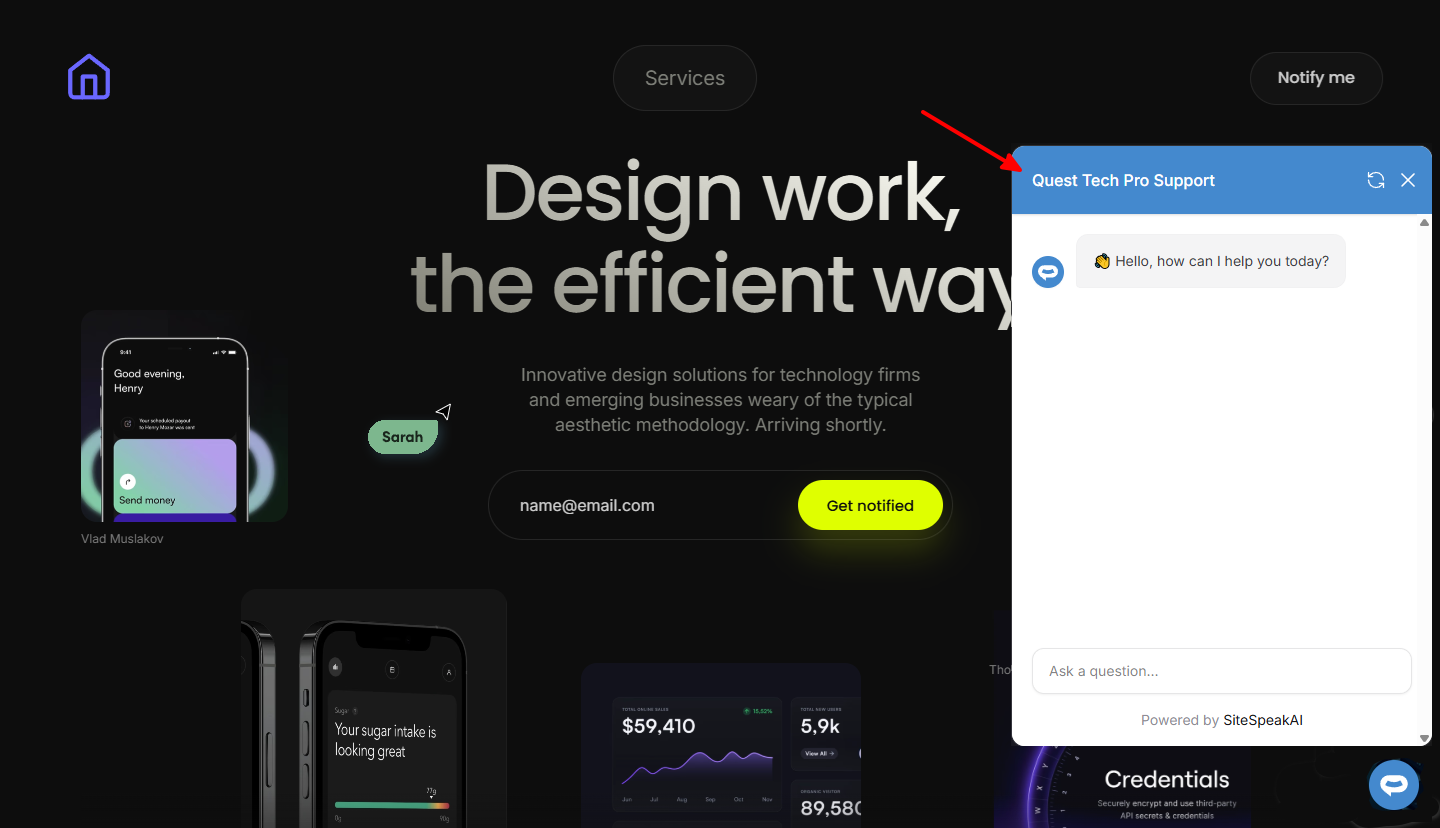
6. Your AI support agent button will now be displayed on your **Framer** website page
7. If you click on the button it will display the AI support agent dialogue
Your AI support agent has now been added to your **Framer** website and your visitors/customers can start interacting with it!
***
Join over 1000+ businesses, websites and startups automating their customer service and other tasks with a custom trained AI agent.
 ### In Framer
1. Log into your **Framer** account and on the dashboard, select the project to edit
### In Framer
1. Log into your **Framer** account and on the dashboard, select the project to edit
 2. Click on **Settings** to open the Site Settings
 3. Under **Site Settings**, on the left side bar, click on **Custom Code**
 4. On the **Custom Code** page, click on the **`<>` Custom Code** item to open the Script Editor
 5. Insert your snippet. You have a few options where to insert your snippet, i.e.
* Start of ``
* End of ``
* Start of ``
* End of ``
When done, click on **Save** and then click on **Publish**
5. Insert your snippet. You have a few options where to insert your snippet, i.e.
* Start of ``
* End of ``
* Start of ``
* End of ``
When done, click on **Save** and then click on **Publish**
 6. Your AI support agent button will now be displayed on your **Framer** website page
 7. If you click on the button it will display the AI support agent dialogue
 Your AI support agent has now been added to your **Framer** website and your visitors/customers can start interacting with it!
***
Your AI support agent has now been added to your **Framer** website and your visitors/customers can start interacting with it!
***