> ## Documentation Index
> Fetch the complete documentation index at: https://sitespeak.ai/docs/llms.txt
> Use this file to discover all available pages before exploring further.
# How to add a ChatGPT AI support agent to Github Pages
> How to add your custom ChatGPT trained AI support agent to your Github Pages website.
You want to embed your custom trained AI support agent in your **Github Pages** website page. Here's how to add an AI support agent to Github Pages with SiteSpeakAI.
**GitHub Pages** is a free service offered by GitHub that allows you to host static websites directly from your GitHub repositories. It's incredibly easy to use, you simply push your HTML, CSS, and JavaScript files to a specific branch of your repository (usually `main` or `gh-pages`), and GitHub Pages automatically builds and serves your website. It's perfect for personal portfolios, documentation sites, landing pages, and simple blogs.
**Website URL:** [**GitHub Pages**](https://pages.github.com/)
## Add your AI support agent to your **Github Pages** website
### In SiteSpeakAI
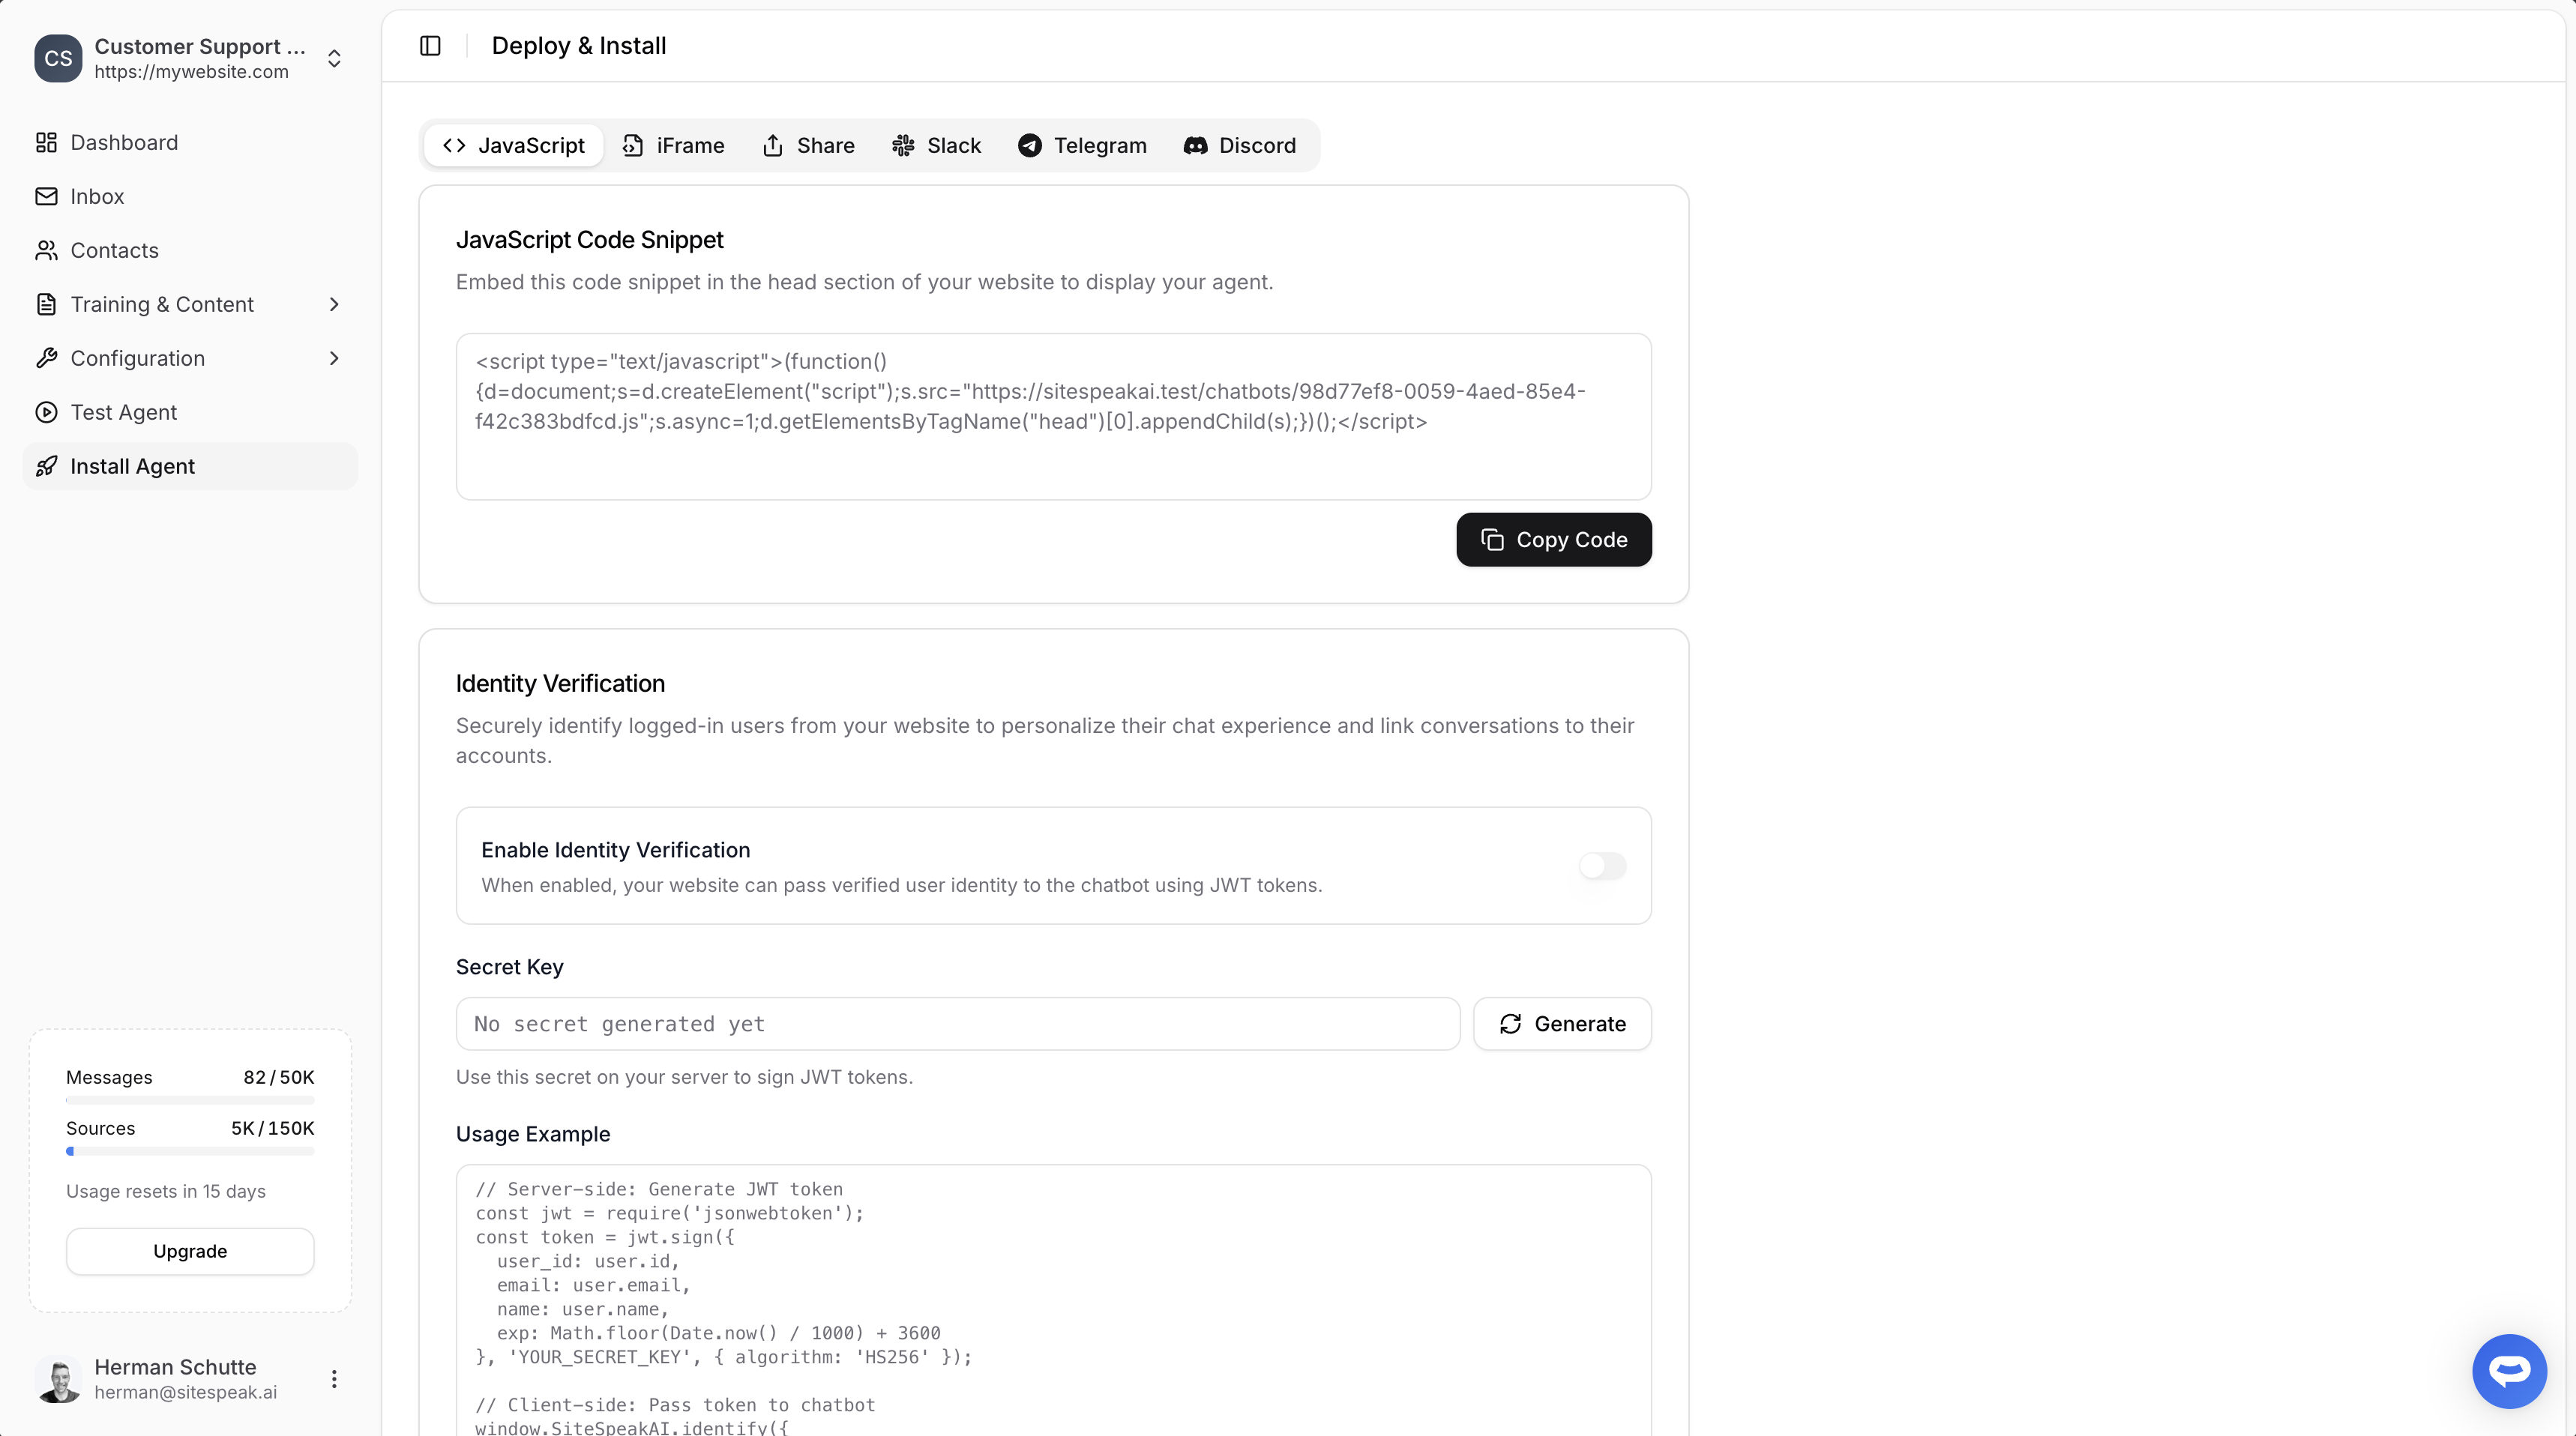
Select your chatbot from the dropdown menu at the top, click on the **Install Agent** section in the sidebar, then click on the **Copy Code** button to copy your code snippet.
 ### In Github Pages
1. Log into your **Github** account and select your Github page you want to add the AI support agent to
### In Github Pages
1. Log into your **Github** account and select your Github page you want to add the AI support agent to
 2. Select the **index.html** file of your page. If you have more pages in your Github website then you will have to repeat the whole process for each page
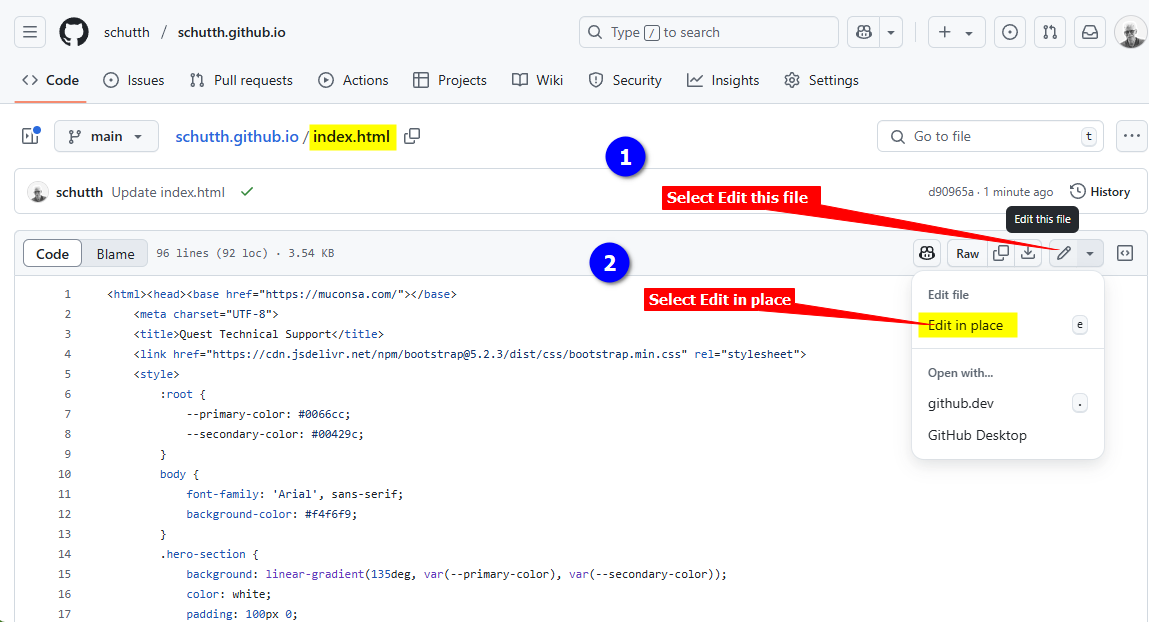
 3. On the page editor page, select **Edit this file** and then select the way you want to edit the file, i.e. **Edit in place** (This opens an editor to allow editing), **github.dev** or **Github Desktop**. For the sake of this tutorial we will use the **Edit in place** option
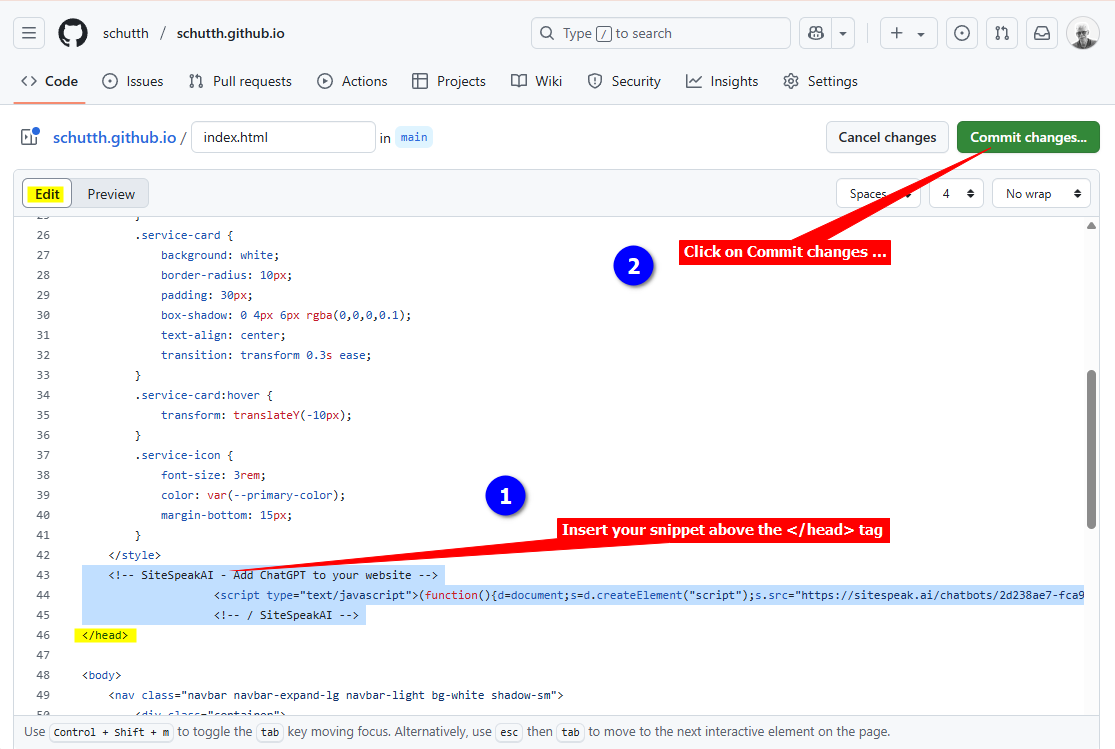
 4. When the editor opens your file in edit mode, scroll down and insert your support agent snippet just above the `` tag. When done, click on the **Commit changes...** button to commit your changes to the repository
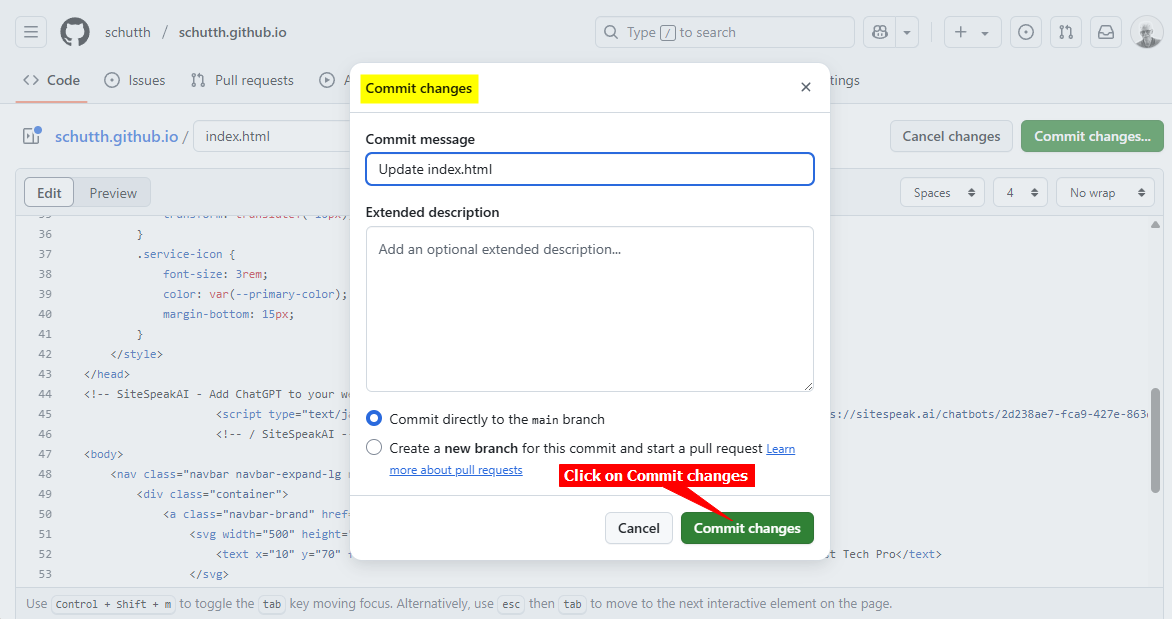
 5. Click on **Commit changes** in the Commit changes dialogue box
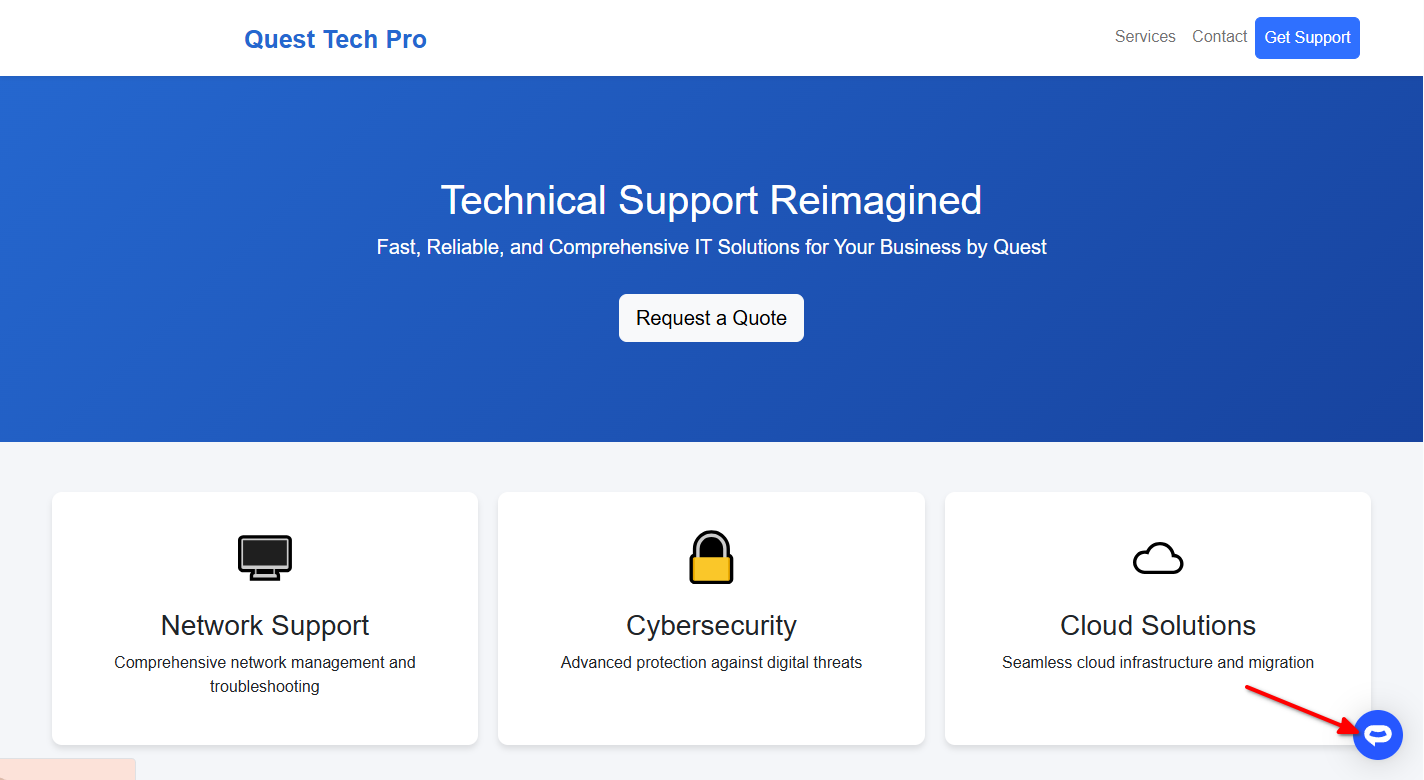
 6. Your AI support agent button will now be displayed on your **Github Pages** website page
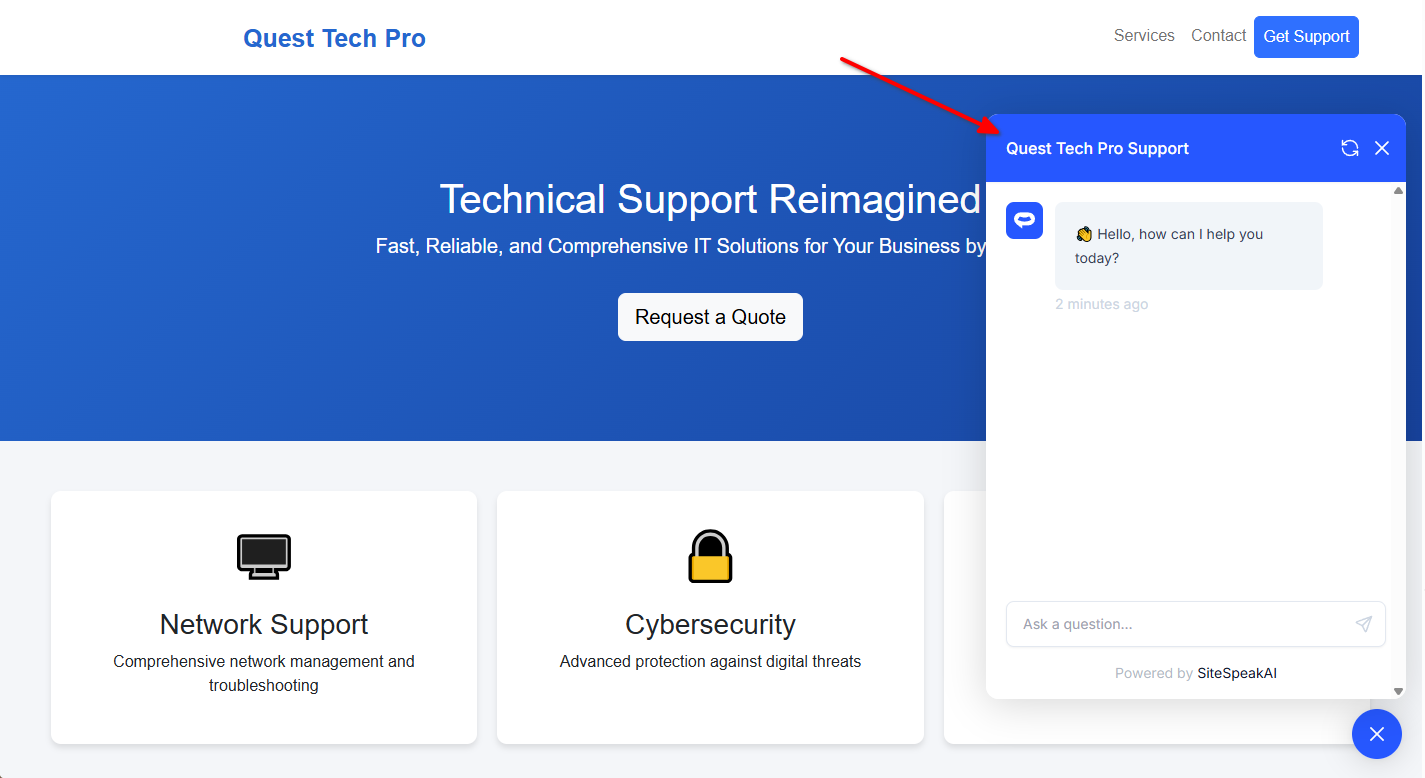
 7. If you click on the button it will display the AI support agent dialogue
 Your AI support agent has now been added to your **Github Pages** website and your visitors can start interacting with it!
***
Join over 1000+ businesses, websites and startups automating their customer service and other tasks with a custom trained AI agent.
Your AI support agent has now been added to your **Github Pages** website and your visitors can start interacting with it!
***
Join over 1000+ businesses, websites and startups automating their customer service and other tasks with a custom trained AI agent.