> ## Documentation Index
> Fetch the complete documentation index at: https://sitespeak.ai/docs/llms.txt
> Use this file to discover all available pages before exploring further.
# How to add a ChatGPT AI support agent to Pagemaker
> How to add your custom ChatGPT trained AI support agent to your Pagemaker landing page.
You want to embed your custom trained AI support agent in your **Pagemaker** landing page. Here's how to add an AI support agent to Pagemaker with SiteSpeakAI.
**Pagemaker** is a no-code landing page builder designed to help users create high-converting, mobile-first web pages quickly and easily. It's especially popular among marketers, entrepreneurs, and e-commerce sellers who want to launch campaigns without needing design or coding skills.
**Website:** [Pagemaker](https://pagemaker.io/).
## Add your AI support agent to your **Pagemaker** landing page
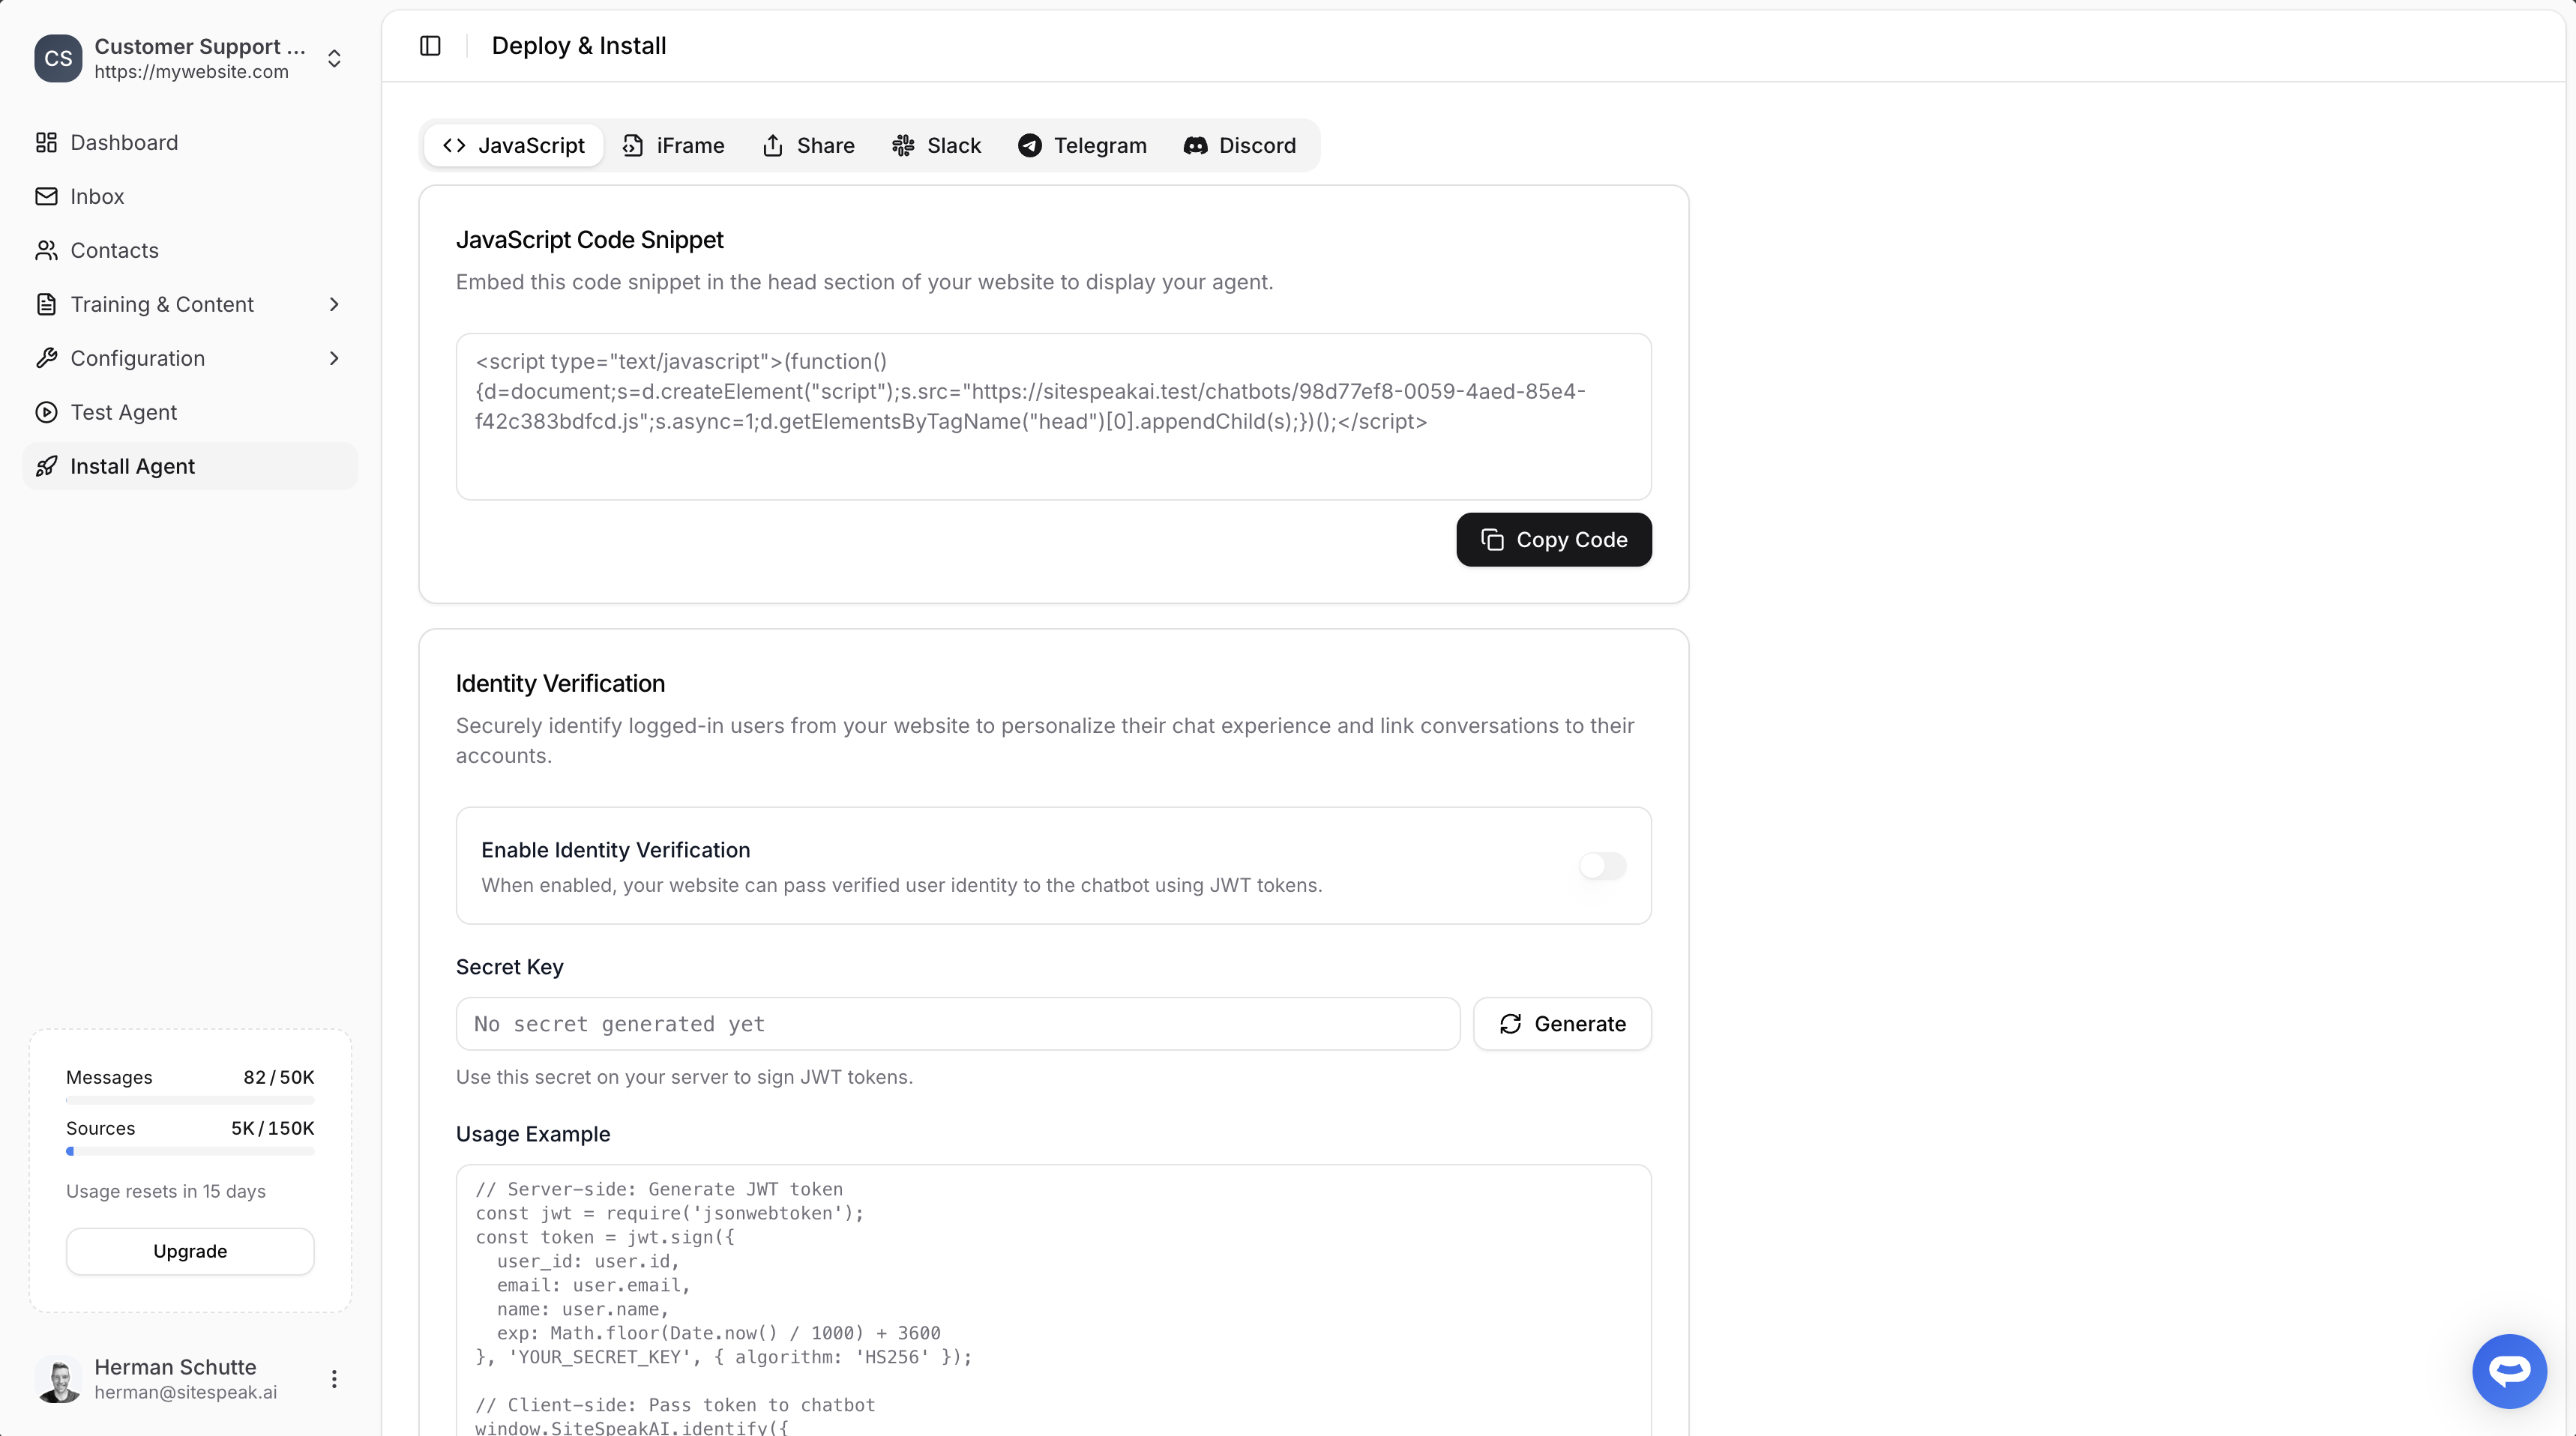
### In SiteSpeakAI
Select your chatbot from the dropdown menu at the top, click on the **Install Agent** section in the sidebar, then click on the **Copy Code** button to copy your code snippet.
 ### In Pagemaker
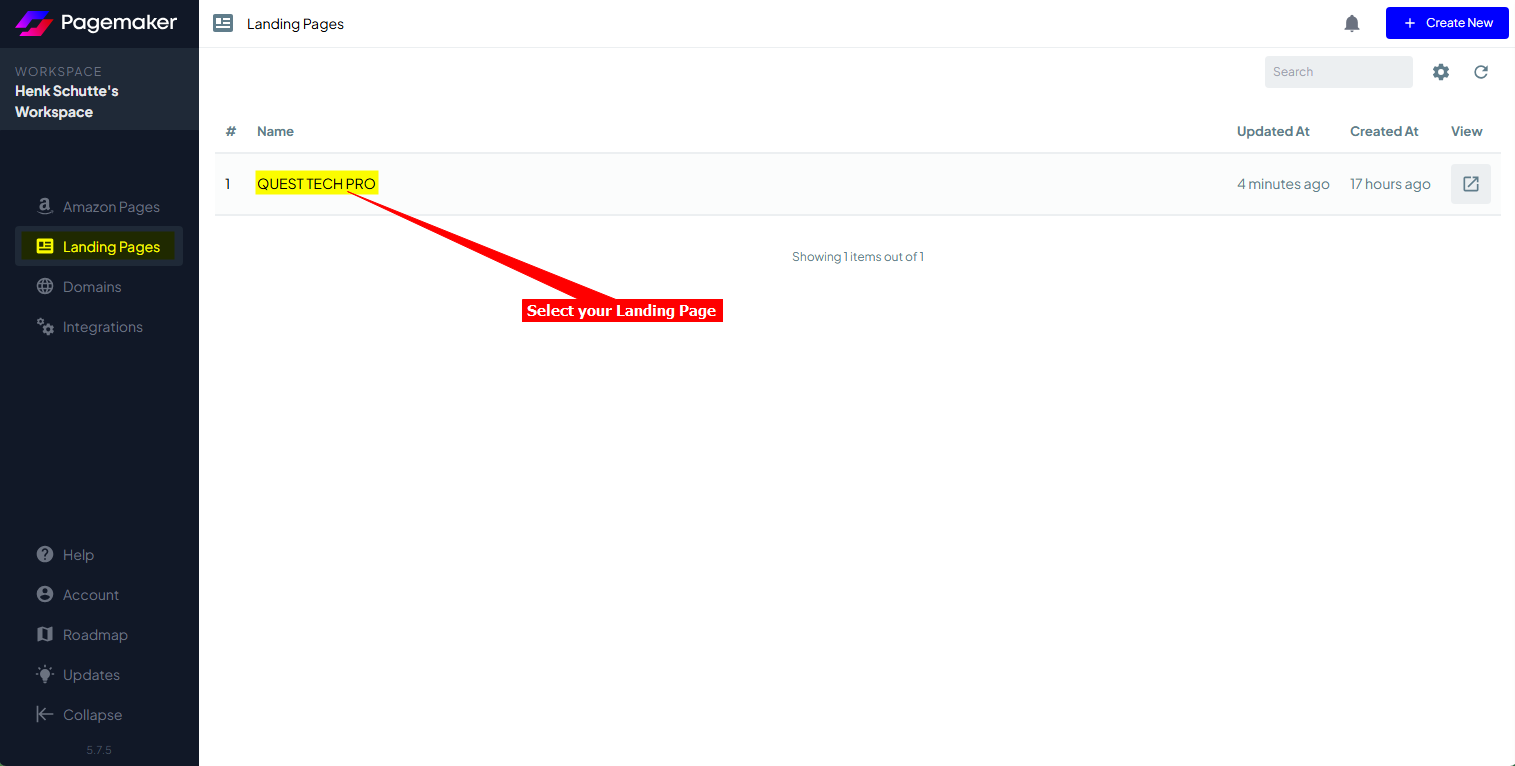
1. Log into your **Pagemaker** account and select your landing page on the **Landing Pages** screen
**Note**: There are two (2) ways to add your snippet to your **Pagemaker** page.
a. Using the **Custom Code** module to insert the code per page or
b. Add a global **Javascript** which can then be applied to all or selected pages
#### A. Using the ***Custom Code*** module option:
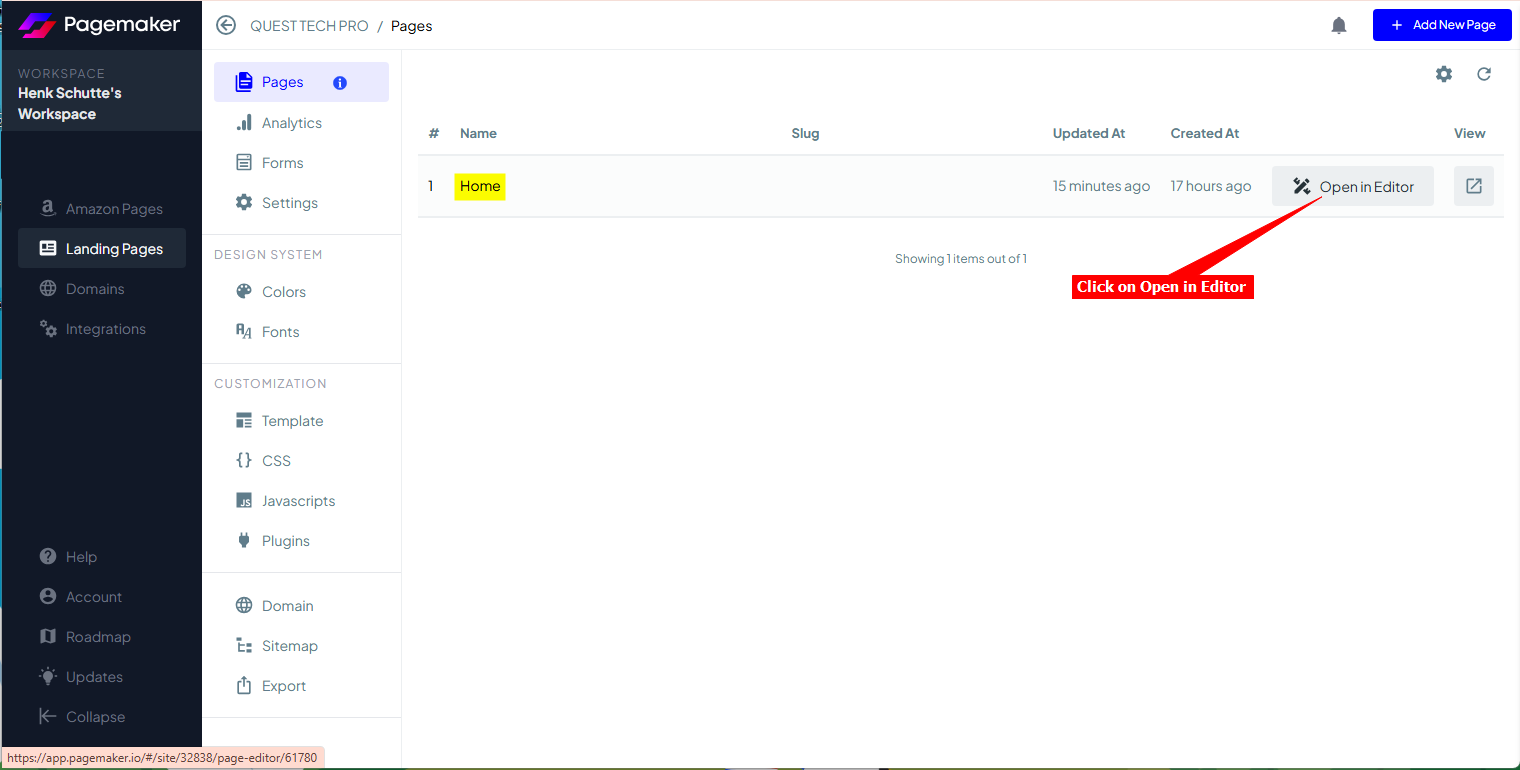
i. Click on **Open in Editor** to open the page in Edit mode
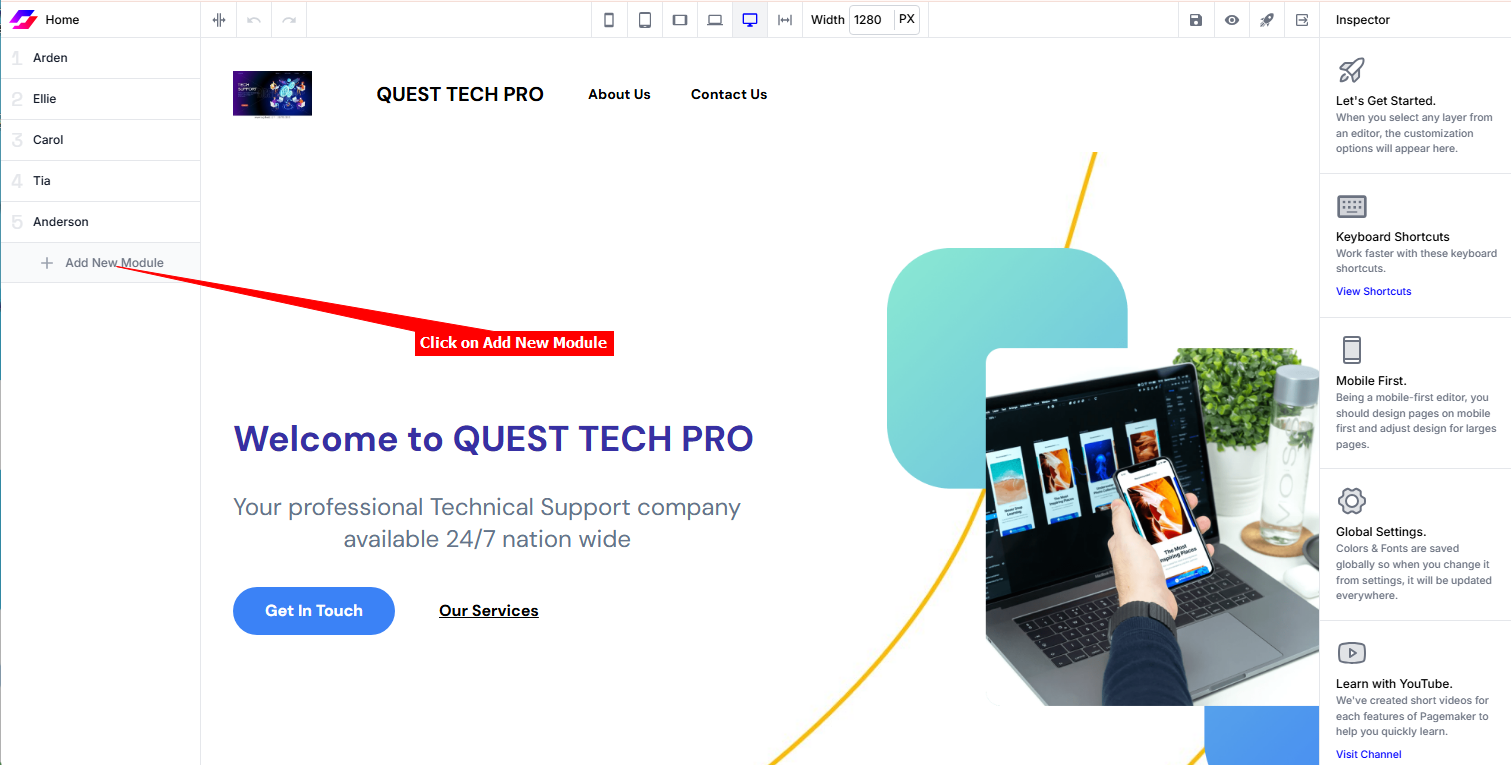
**Note**: On the left side you will see a list of modules (with names as created by **Pagemaker**). These are the items displayed on your page, i.e. Header, Hero, Footer, etc.
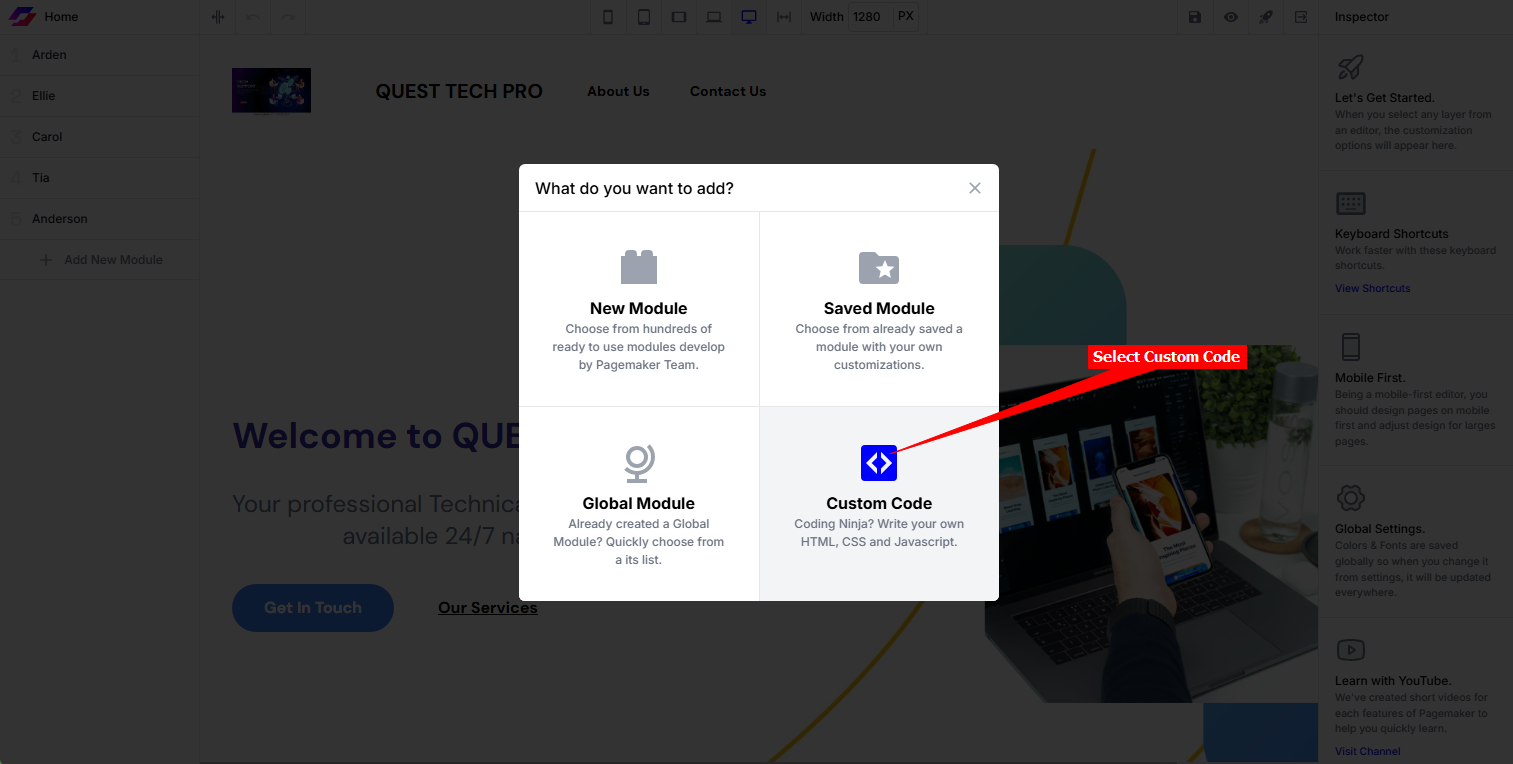
ii. Click on **Add New Module** to add a Custom Code module
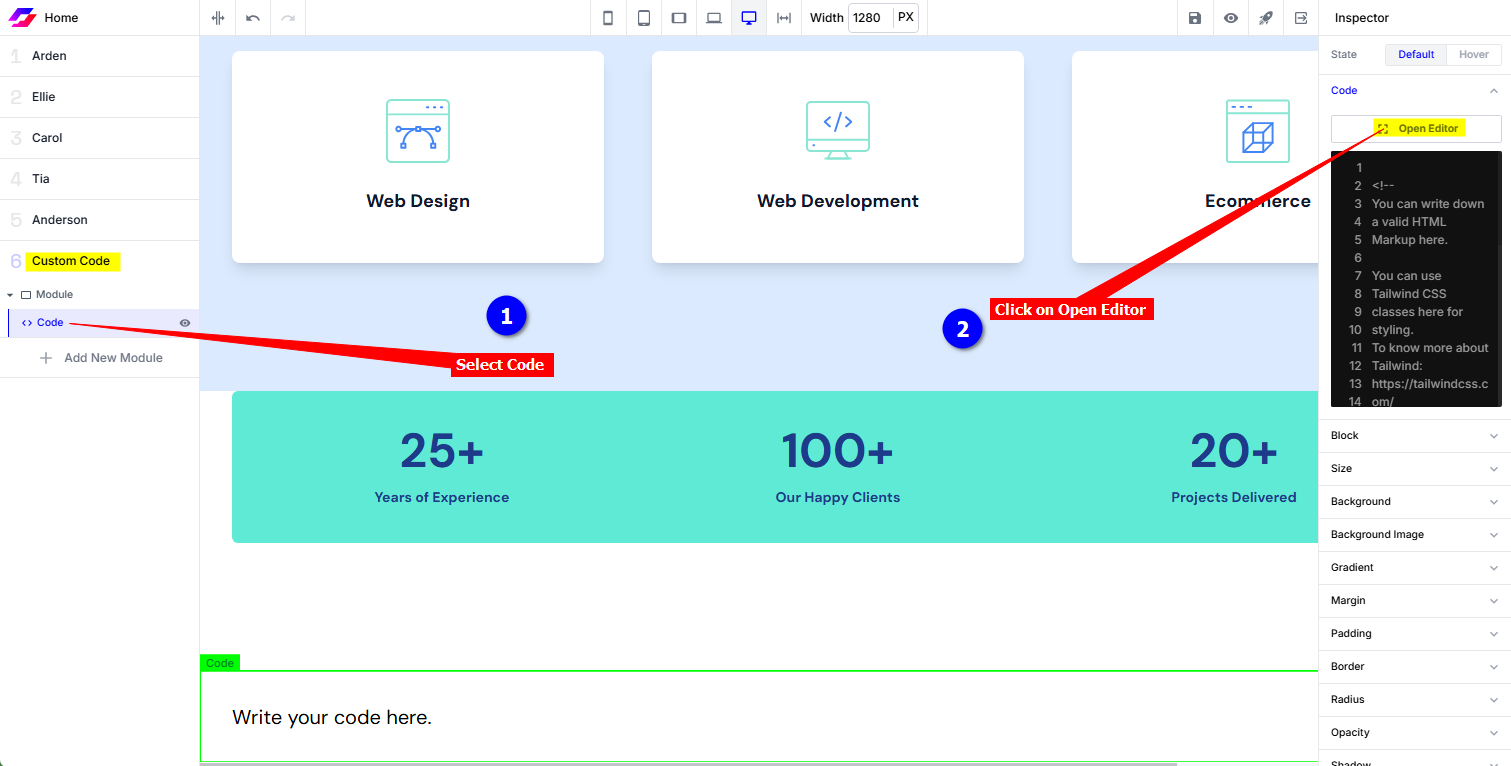
iii. Select the **Custom Code** module
iv. Select **Code** on the Custom Code module and click on **Open Editor**
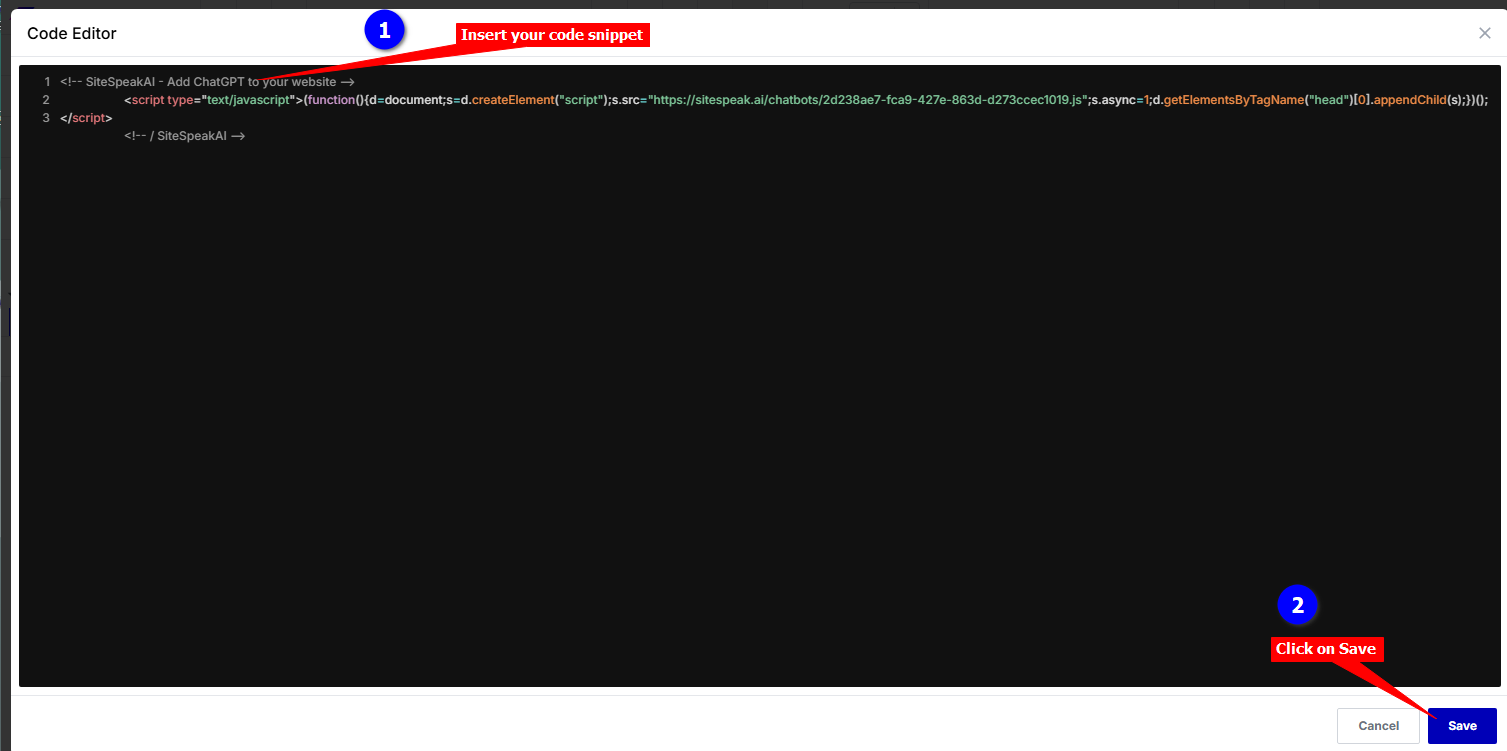
v. Replace the current contents of the **Code Editor** with your AI support agent snippet and click on **Save**
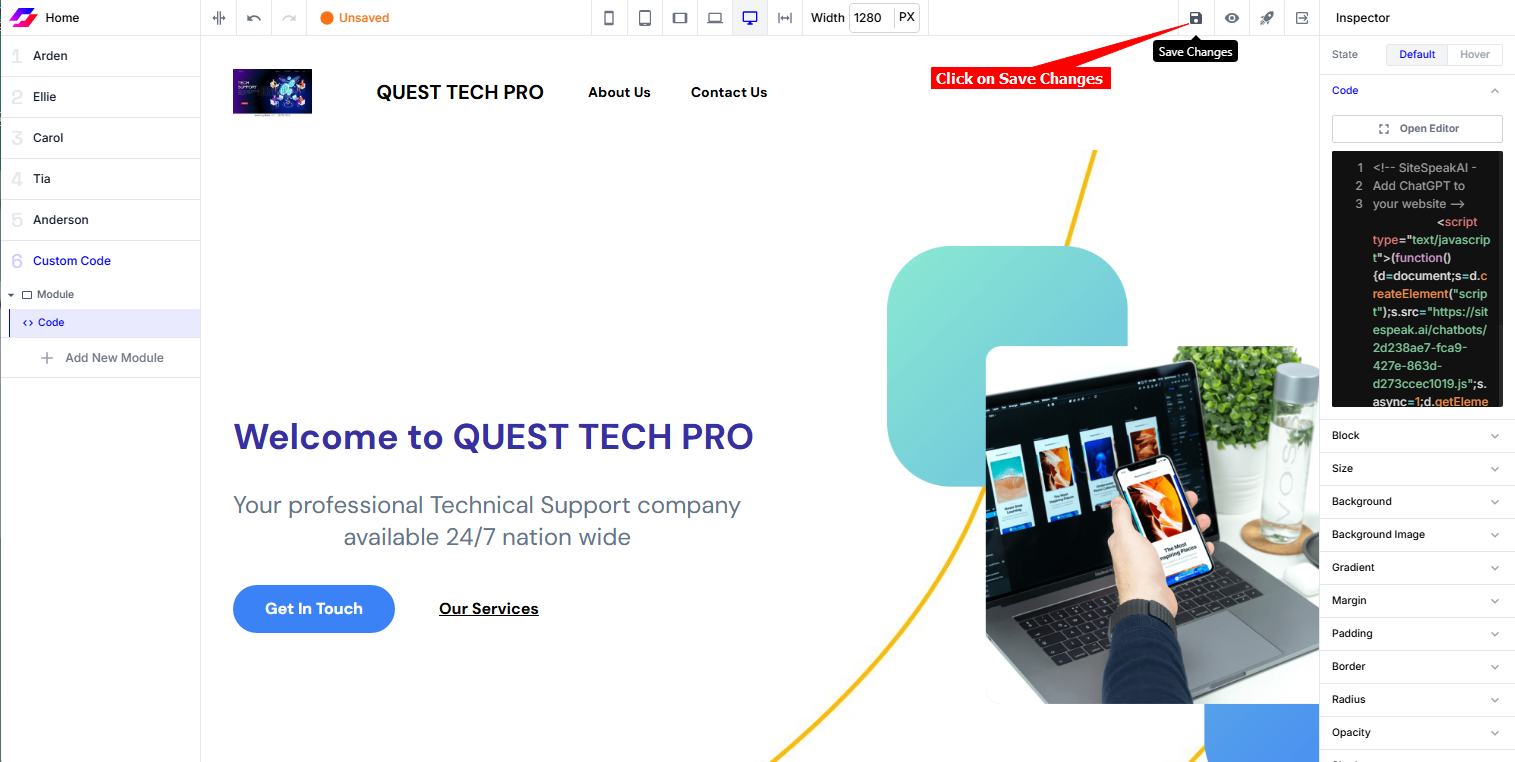
vi. Click on **Save Changes** to update your page
#### B. Using the global ***Script*** option:
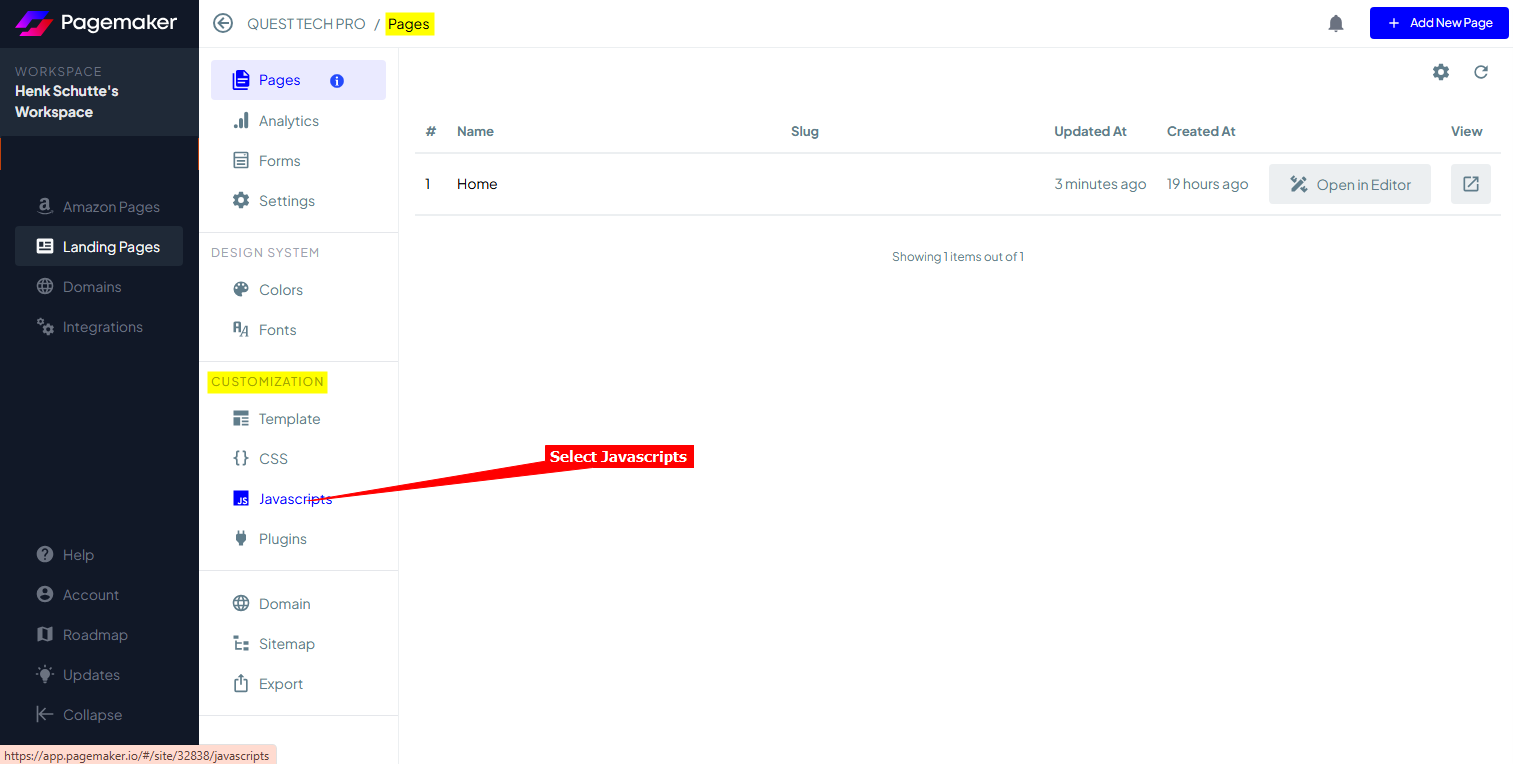
i. On the **Pages** screen, click on **Javascripts** under **Customization** to add your snippet as a new script to **Pagemaker**
ii. Select **+ Add New Script** to add a new script
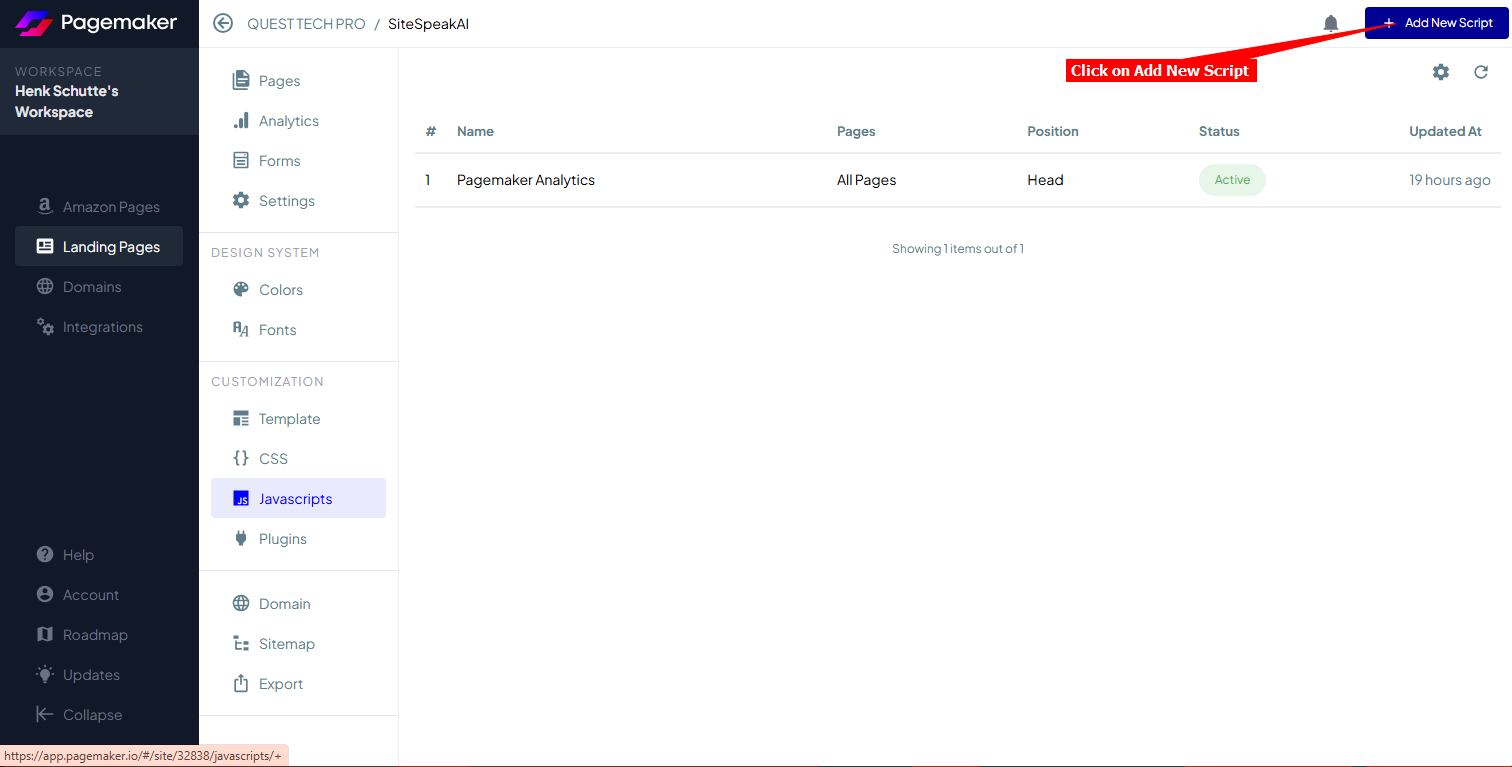
iii. Provide a name for the script (we'll just call it **SiteSpeakAI**), select the position where it will be displayed (this can be **Footer** or **Head**) and indicate if it should be displayed on **All pages** or **Select pages**.
Replace the contents of the current **Script** with your snippet, make sure the status is enabled and click on **Save**. You can also use **View Draft Site** or **View Live Site** to see how your snippet performs

#### C. For both options:
1. Your AI support agent button will now be displayed on your **Pagemaker** landing page
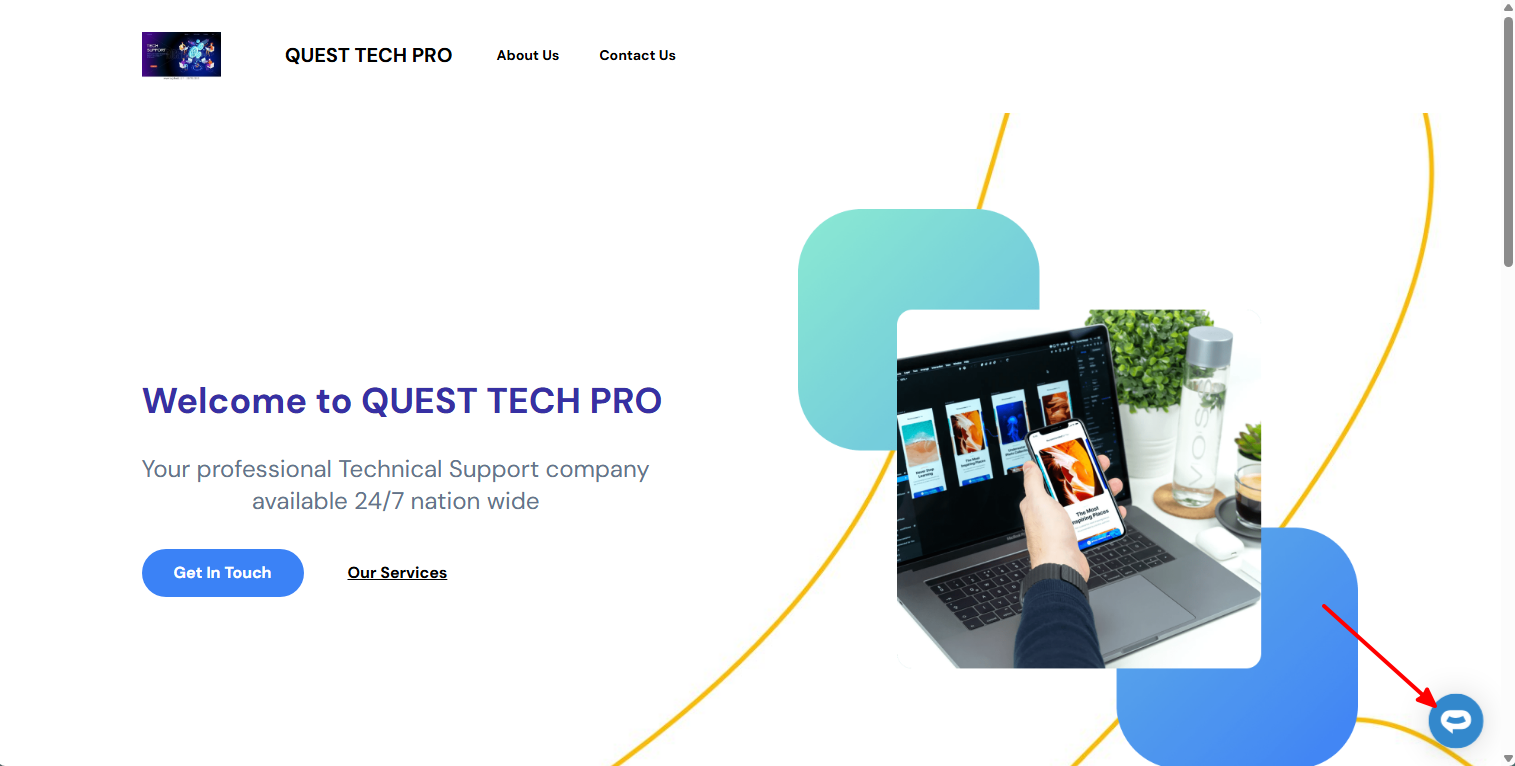
2. If you click on the button, it will display the AI support agent dialogue
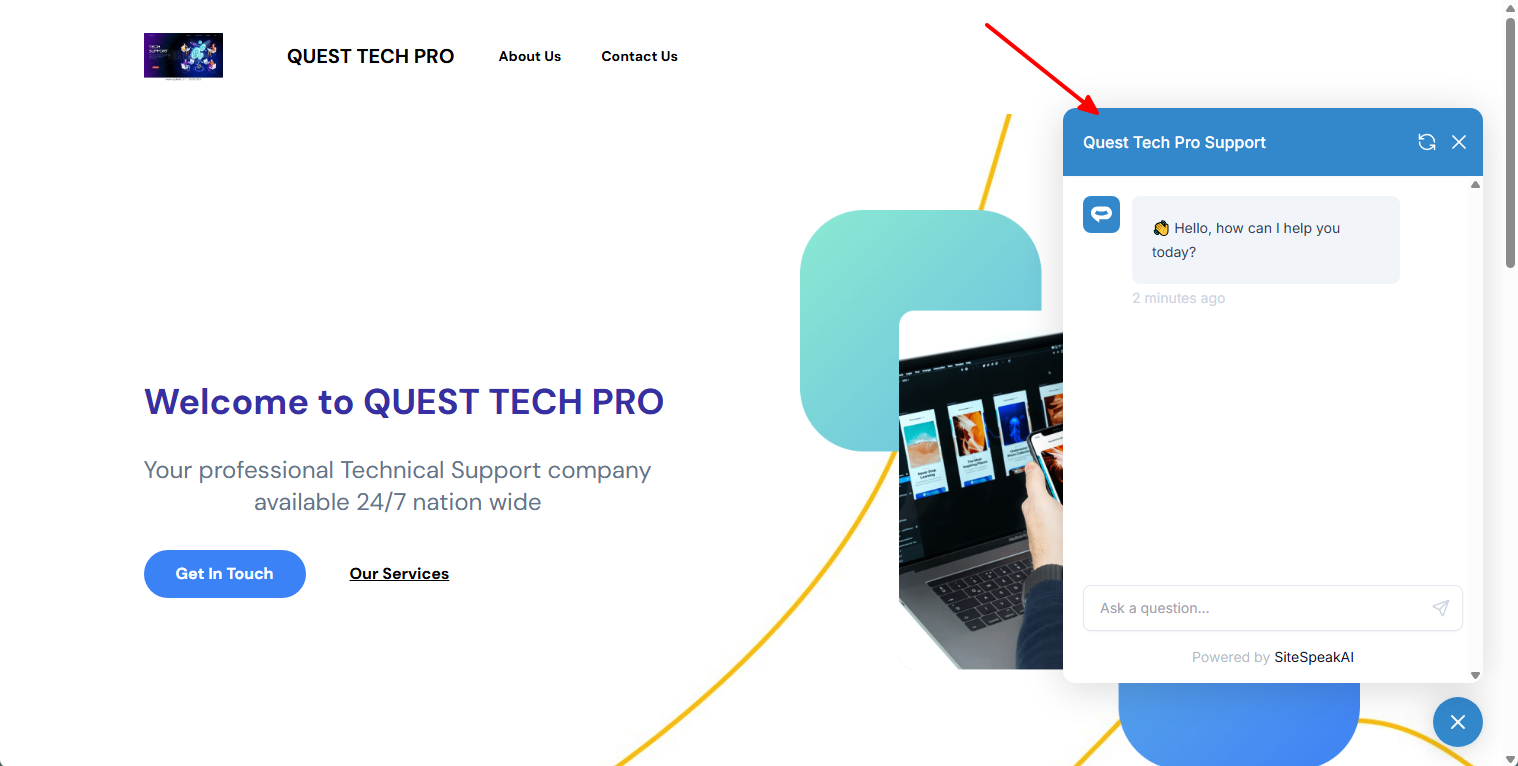
Your AI support agent has now been added to your **Pagemaker** website and your visitors/customers can start interacting with it!
***
Join over 1000+ businesses, websites and startups automating their customer service and other tasks with a custom trained AI agent.
### In Pagemaker
1. Log into your **Pagemaker** account and select your landing page on the **Landing Pages** screen

**Note**: There are two (2) ways to add your snippet to your **Pagemaker** page.
a. Using the **Custom Code** module to insert the code per page or
b. Add a global **Javascript** which can then be applied to all or selected pages
#### A. Using the ***Custom Code*** module option:
i. Click on **Open in Editor** to open the page in Edit mode

**Note**: On the left side you will see a list of modules (with names as created by **Pagemaker**). These are the items displayed on your page, i.e. Header, Hero, Footer, etc.
ii. Click on **Add New Module** to add a Custom Code module

iii. Select the **Custom Code** module

iv. Select **Code** on the Custom Code module and click on **Open Editor**

v. Replace the current contents of the **Code Editor** with your AI support agent snippet and click on **Save**

vi. Click on **Save Changes** to update your page

#### B. Using the global ***Script*** option:
i. On the **Pages** screen, click on **Javascripts** under **Customization** to add your snippet as a new script to **Pagemaker**

ii. Select **+ Add New Script** to add a new script

iii. Provide a name for the script (we'll just call it **SiteSpeakAI**), select the position where it will be displayed (this can be **Footer** or **Head**) and indicate if it should be displayed on **All pages** or **Select pages**.
Replace the contents of the current **Script** with your snippet, make sure the status is enabled and click on **Save**. You can also use **View Draft Site** or **View Live Site** to see how your snippet performs

#### C. For both options:
1. Your AI support agent button will now be displayed on your **Pagemaker** landing page

2. If you click on the button, it will display the AI support agent dialogue

Your AI support agent has now been added to your **Pagemaker** website and your visitors/customers can start interacting with it!
***
Join over 1000+ businesses, websites and startups automating their customer service and other tasks with a custom trained AI agent.