> ## Documentation Index
> Fetch the complete documentation index at: https://sitespeak.ai/docs/llms.txt
> Use this file to discover all available pages before exploring further.
# How to add a ChatGPT AI support agent to Rocket
> How to add your custom ChatGPT trained AI support agent to your Rocket website.
You want to embed your custom trained AI support agent in your **Rocket** website page. Here's how to add an AI support agent to Rocket with SiteSpeakAI.
**Rocket** is a cutting-edge AI-powered no-code platform that empowers users to transform their ideas into fully functional web and mobile applications swiftly and effortlessly. By leveraging natural language prompts or importing Figma designs, Rocket automates the entire development process, from frontend and backend creation to deployment, without requiring any coding expertise.
**Website URL:** [Rocket](https://www.rocket.new/)
## Add your AI support agent to your **Rocket** website
**Please note**: We are not going to edit any **code files** or add any **blocks** or **sections**. We are going to make use of the Rocket **AI** website builder to place the code snippet in the appropriate area of the website code.
This makes the whole process faster and safer. You are not touching any part of the code and the bonus is that if you don't like what you see, you can just ask Rocket to undo (or remove) the code that it added on your instruction. The only thing is you must make sure that your request is properly formulated. We'll see later what we mean by this.
### In SiteSpeakAI
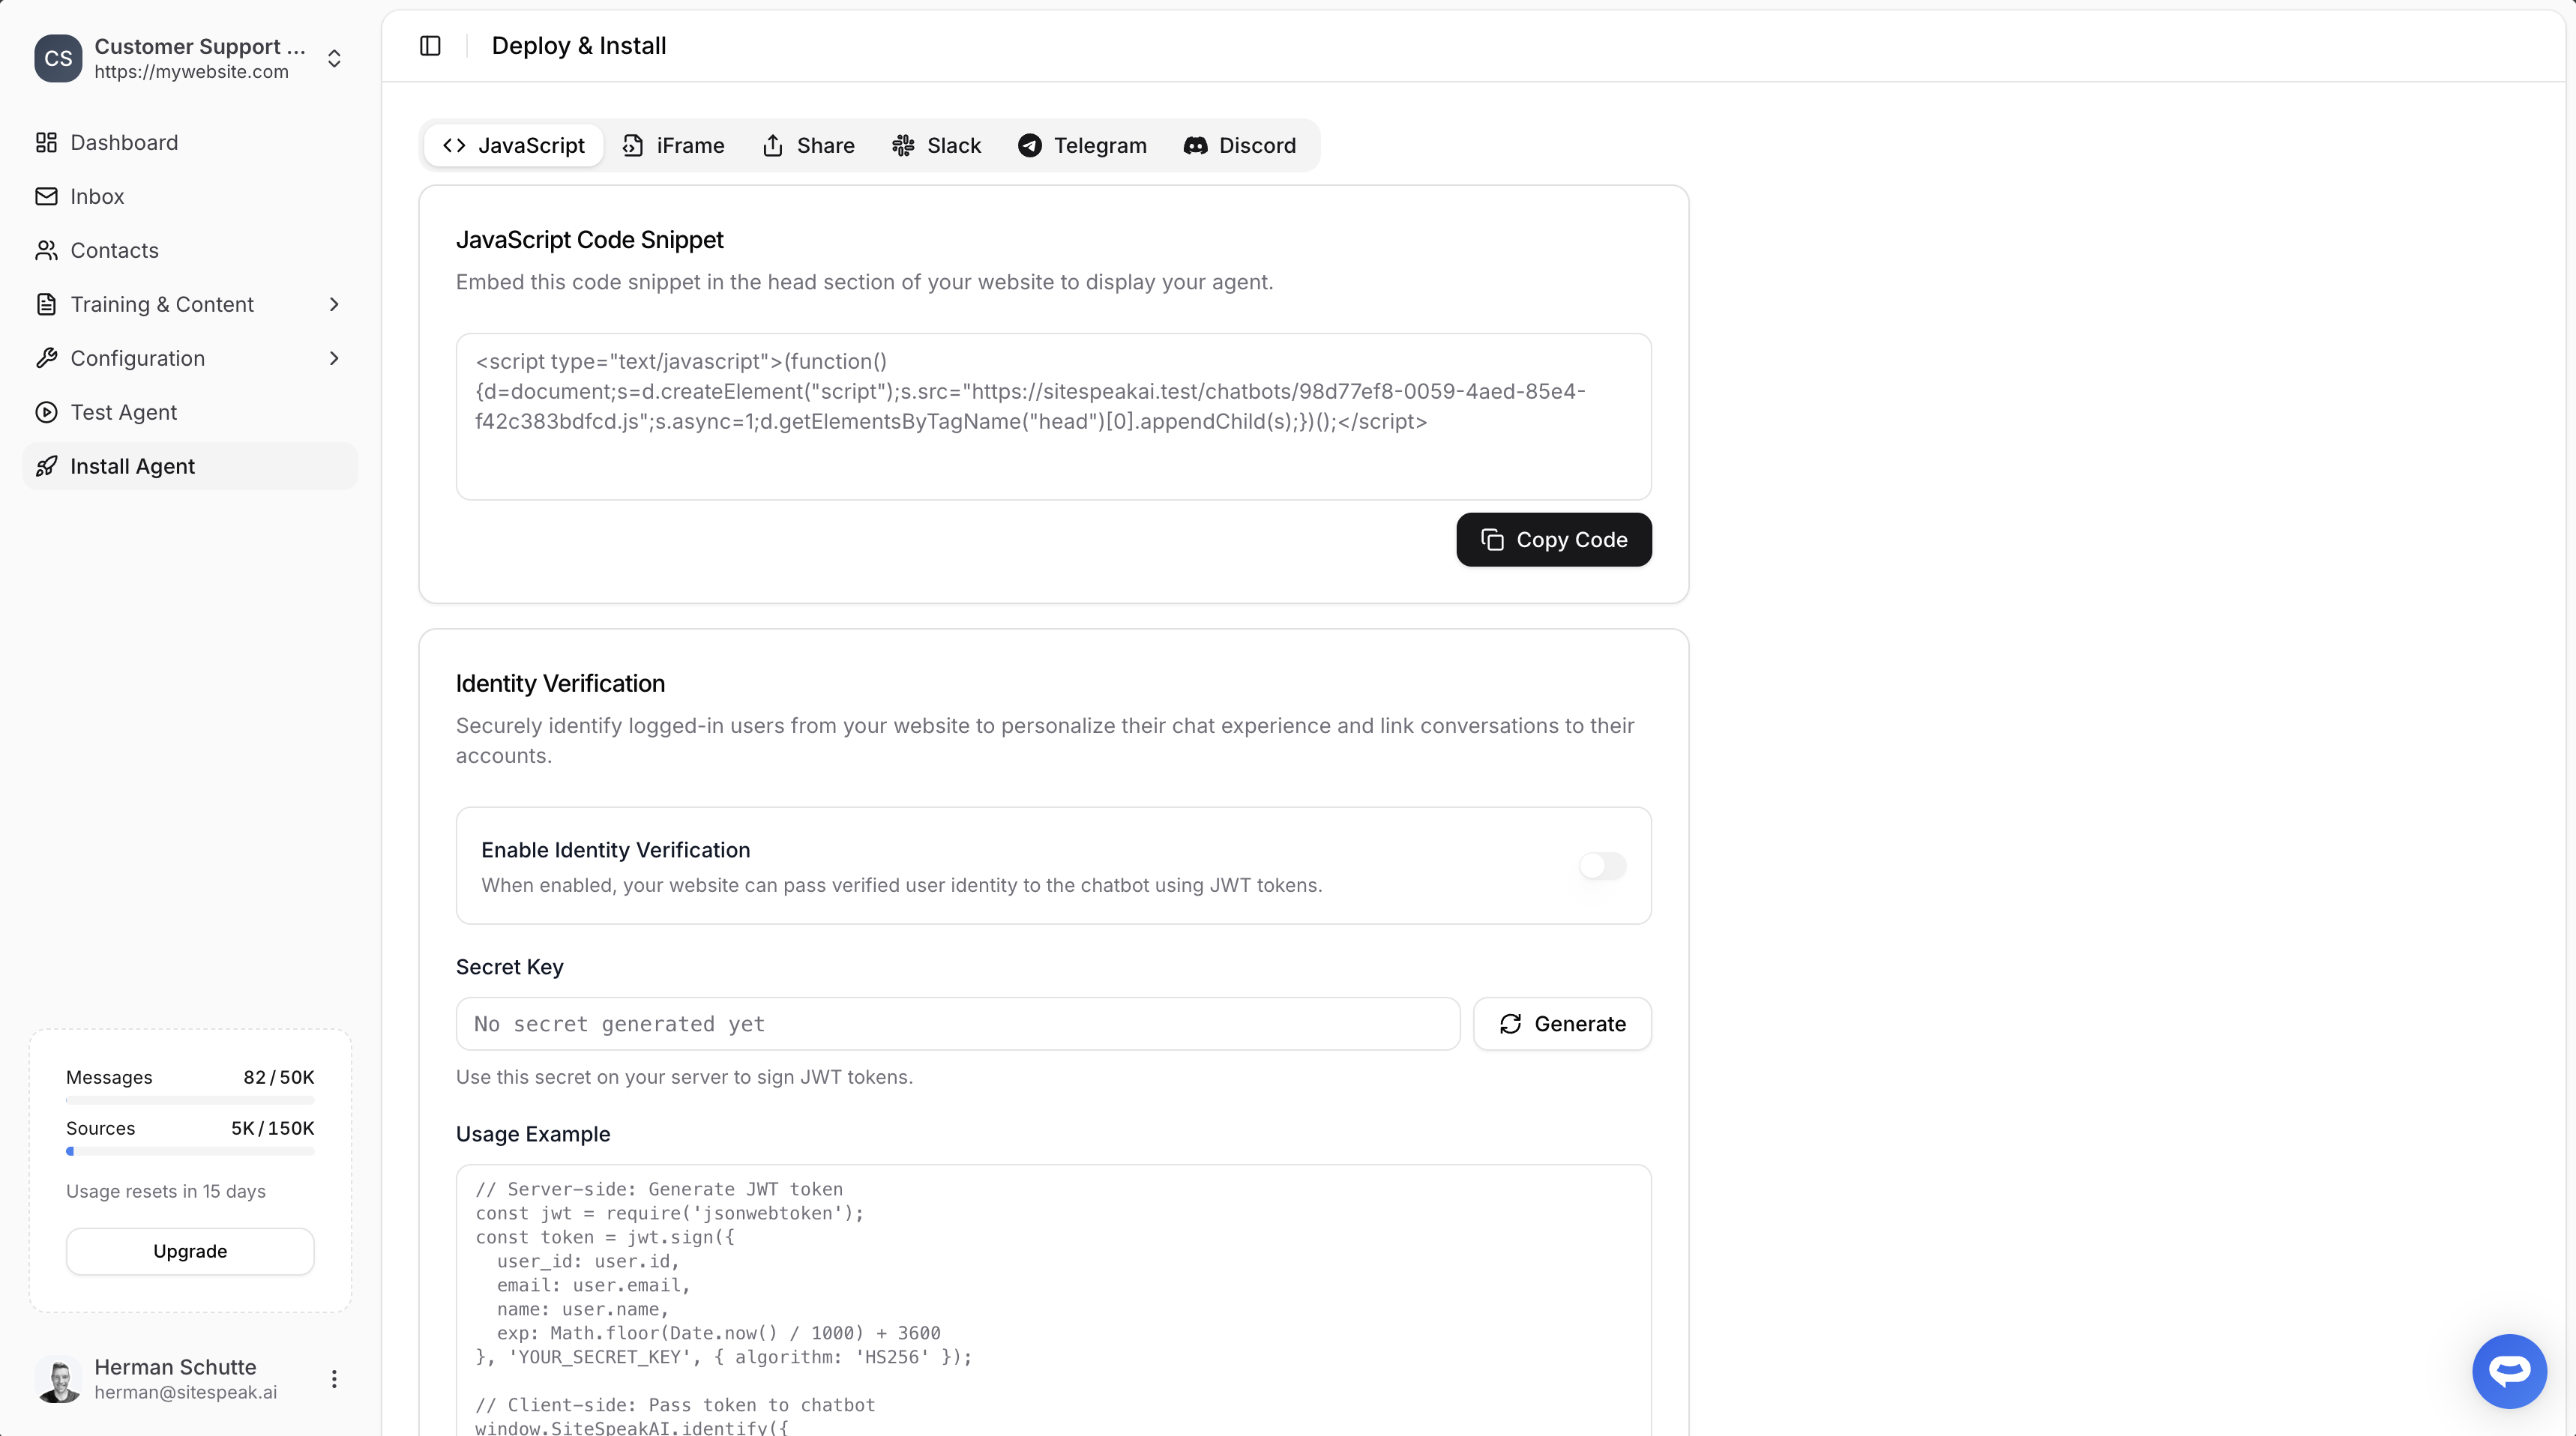
Select your chatbot from the dropdown menu at the top, click on the **Install Agent** section in the sidebar, then click on the **Copy Code** button to copy your code snippet.
 ### In Rocket
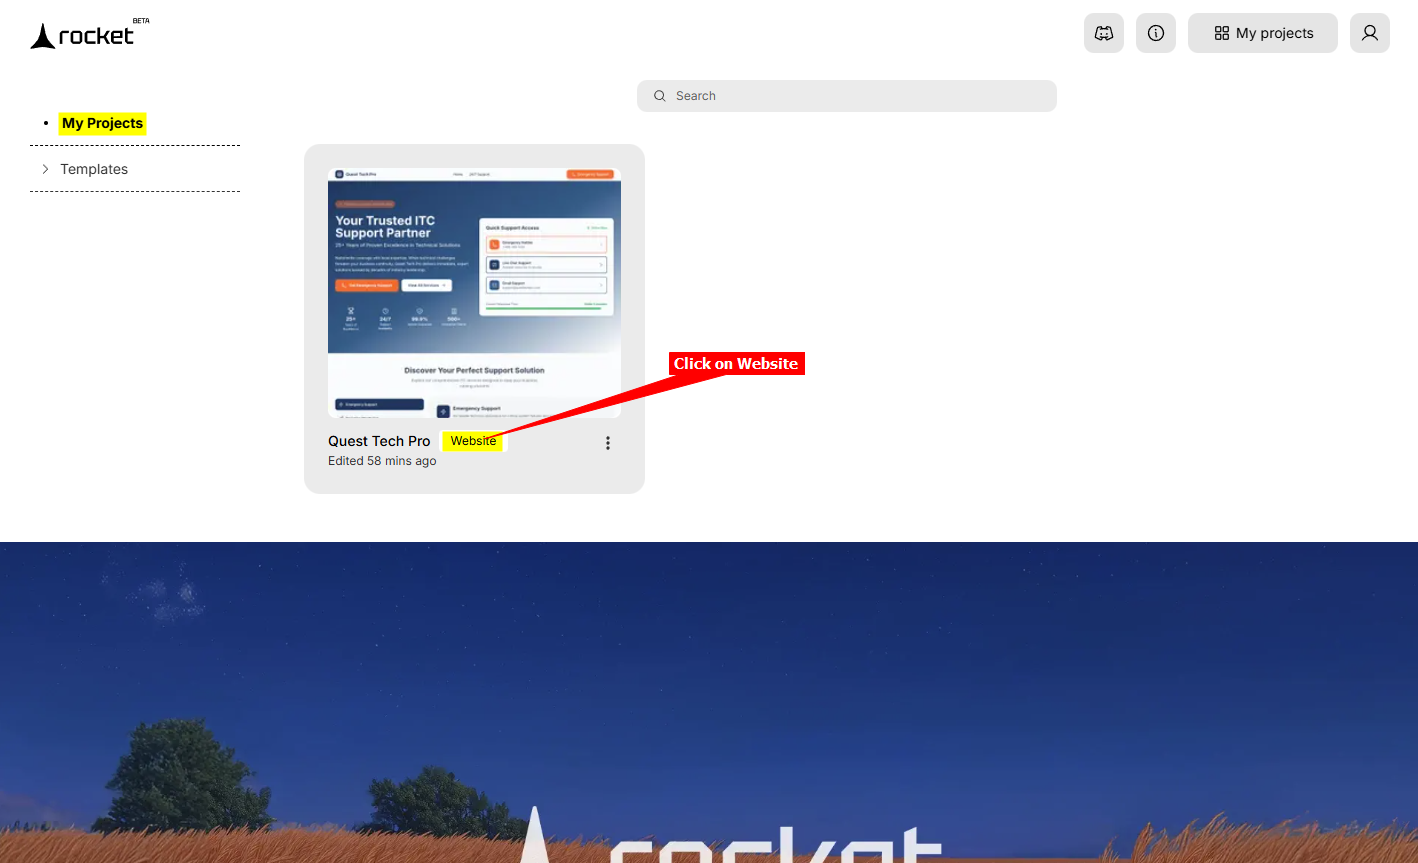
1. Log into your [Rocket](https://www.rocket.new/) account and click on **My projects**

2. Click on **Website** to open the Website editor
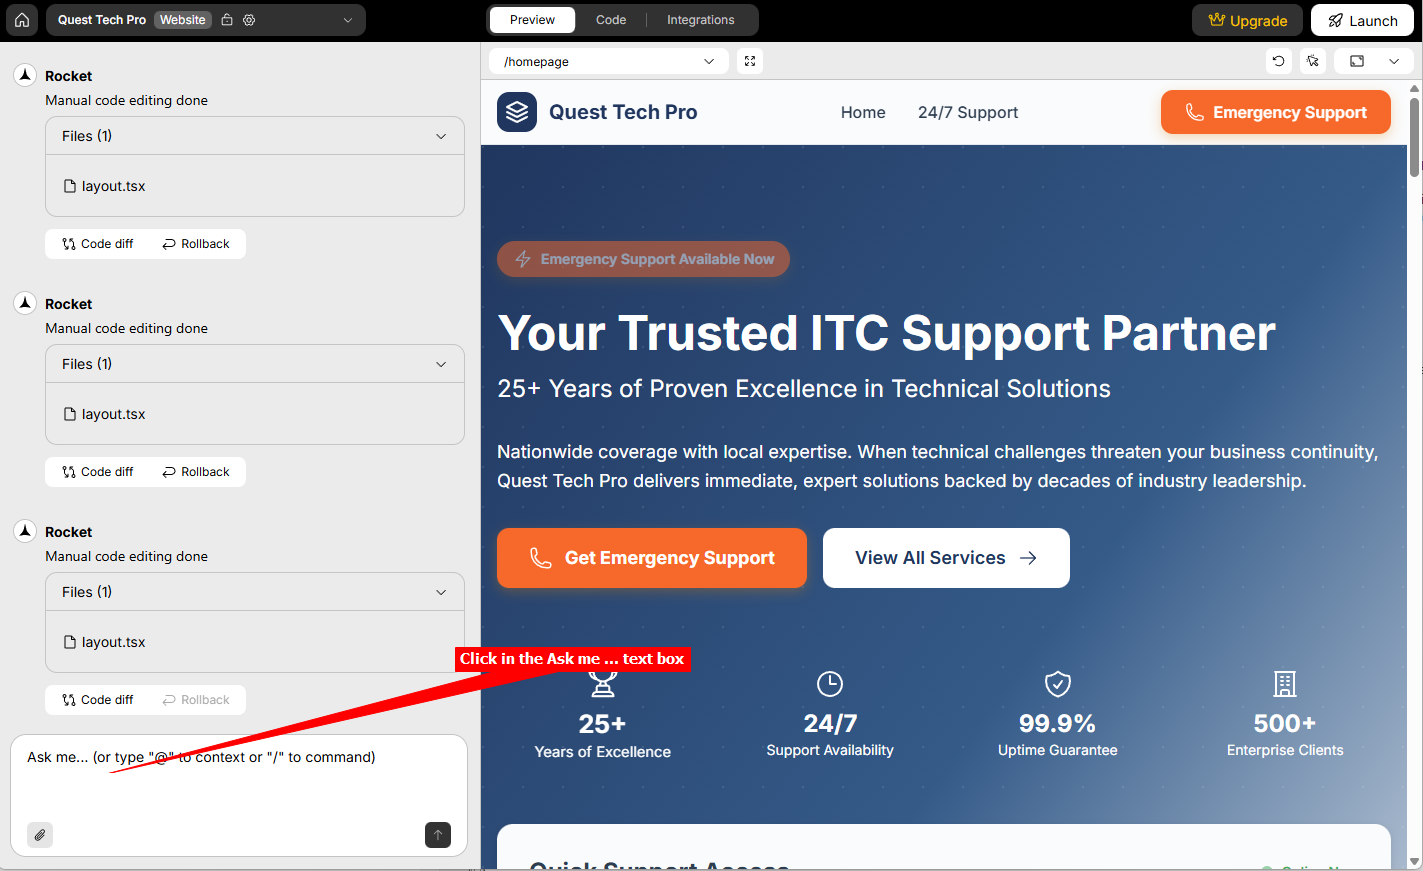
3. Click in the **Ask me ...** text box
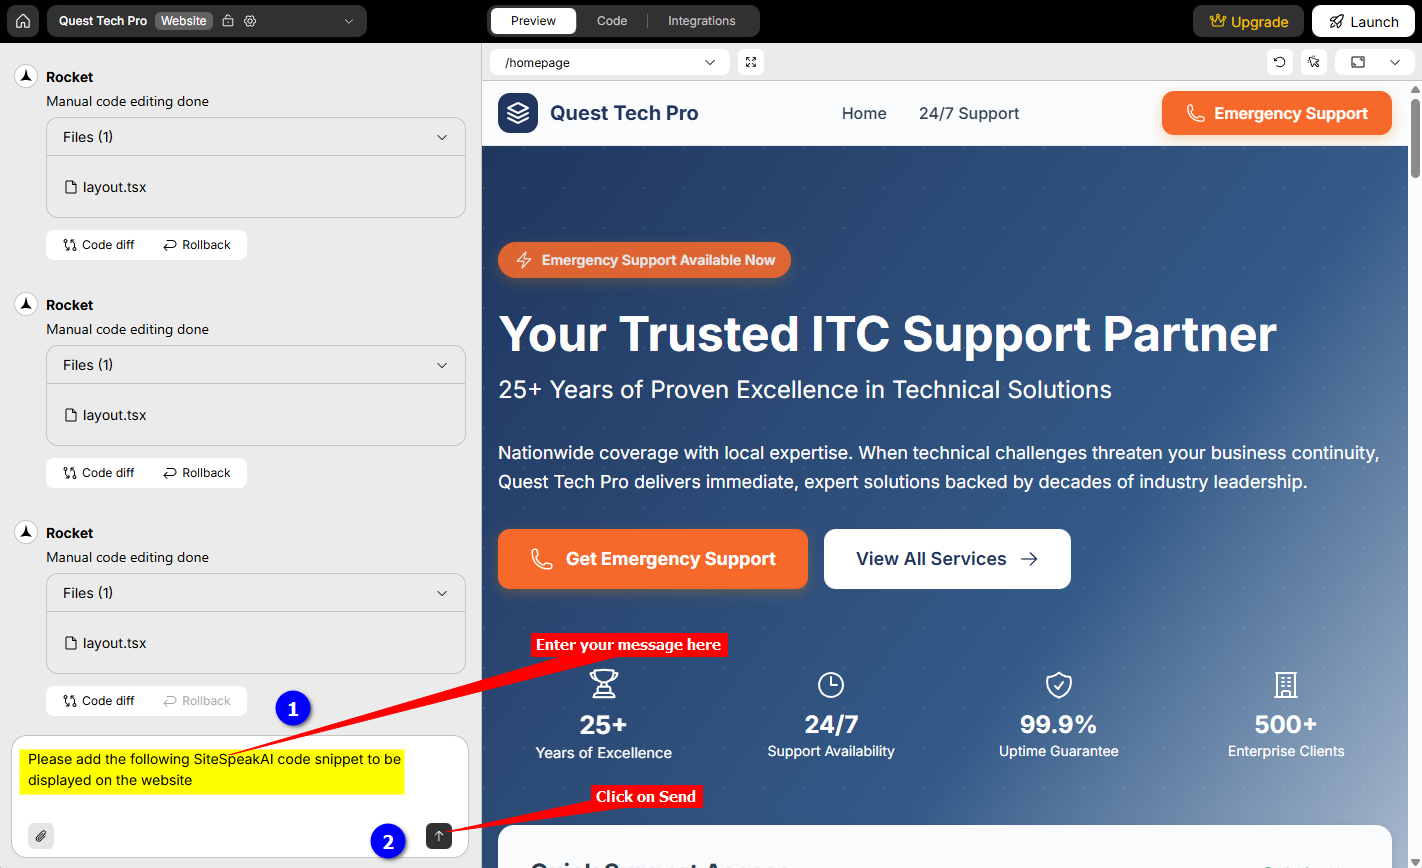
4. Enter the following message in the text box as an instruction to Rocket (This messsage tells Rocket exactly what we want it to do for us)
***Please add the following SiteSpeakAI code snippet to be displayed on the website***
Click on **Send**
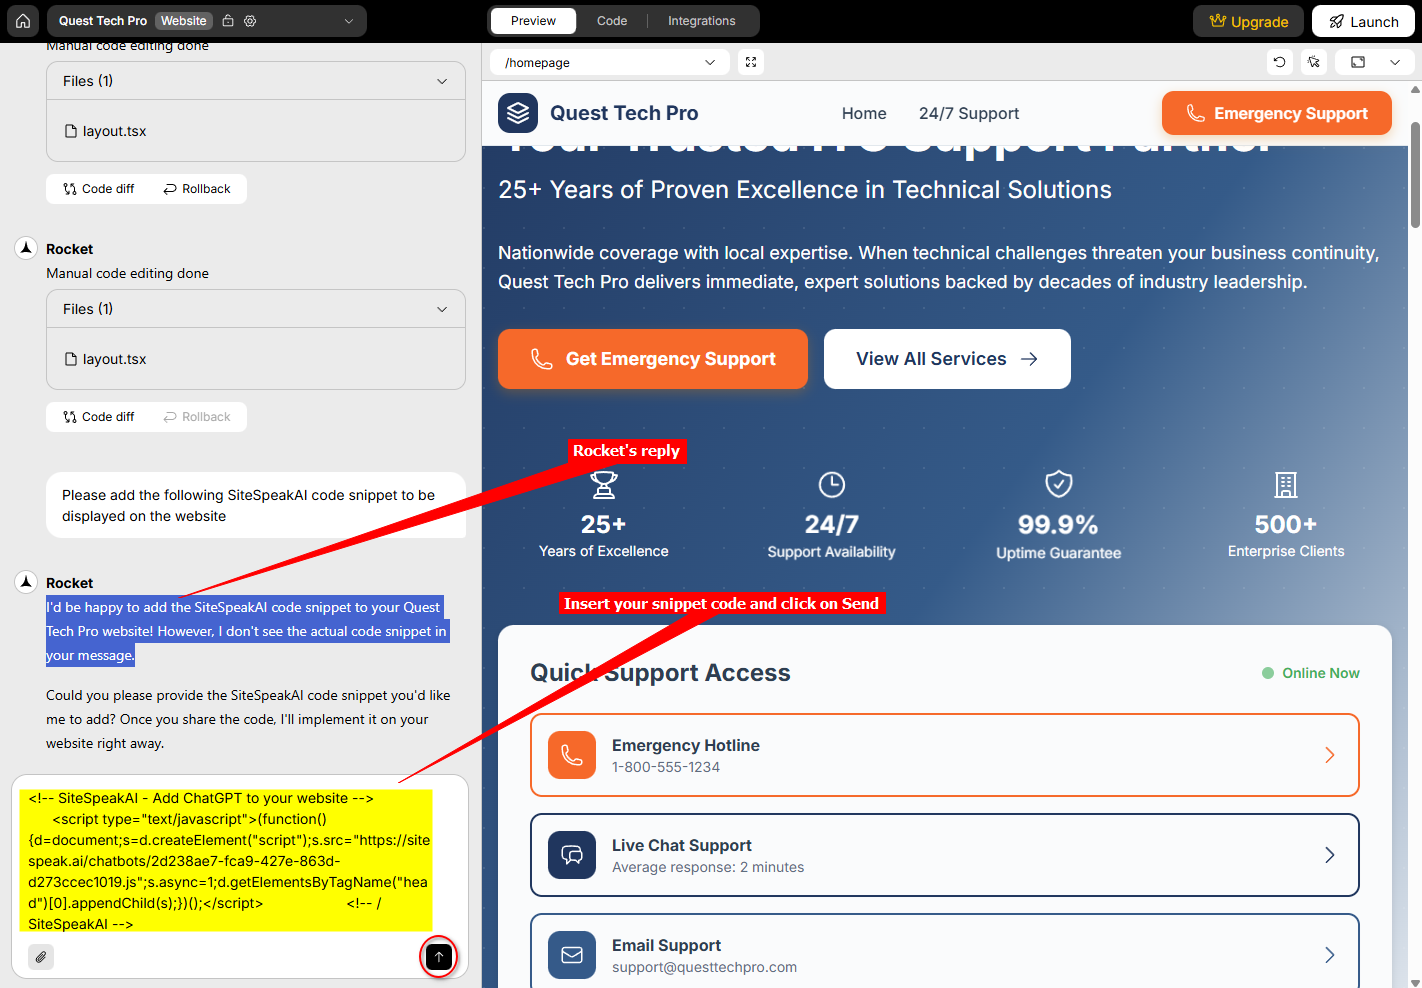
5. Rocket will then reply with a message indicating that you should supply it with the actual code snippet.
(The reason why we do this in 2 parts is that you can't create a new line in your message by means of the ENTER key, similar to Copilot)
Insert the code snippet into the textbox and click again on **Send**
6. Rocket will then do it's magic and display the AI support agent button on your website in the editor. It will actually also inform you where it added the code in the code base
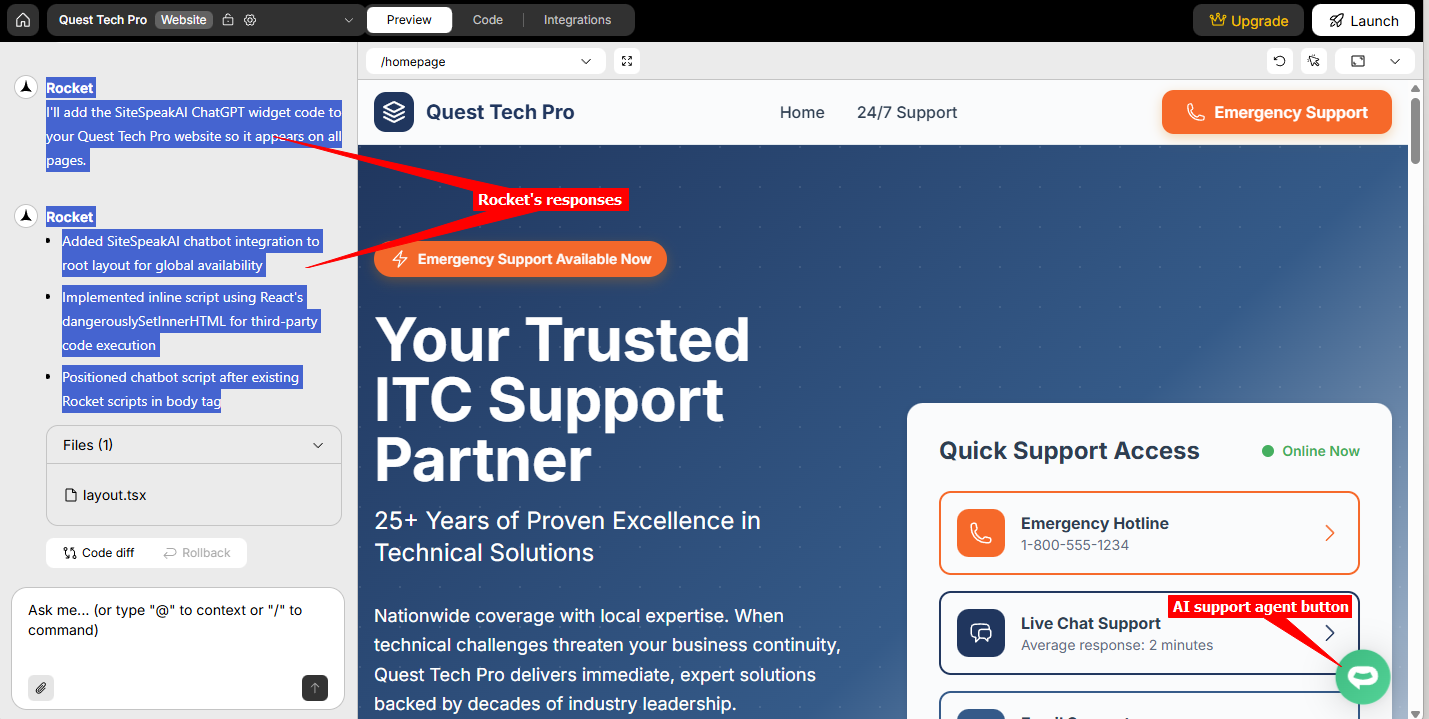
7. Your AI support agent button will now be displayed on your **Rocket** website page
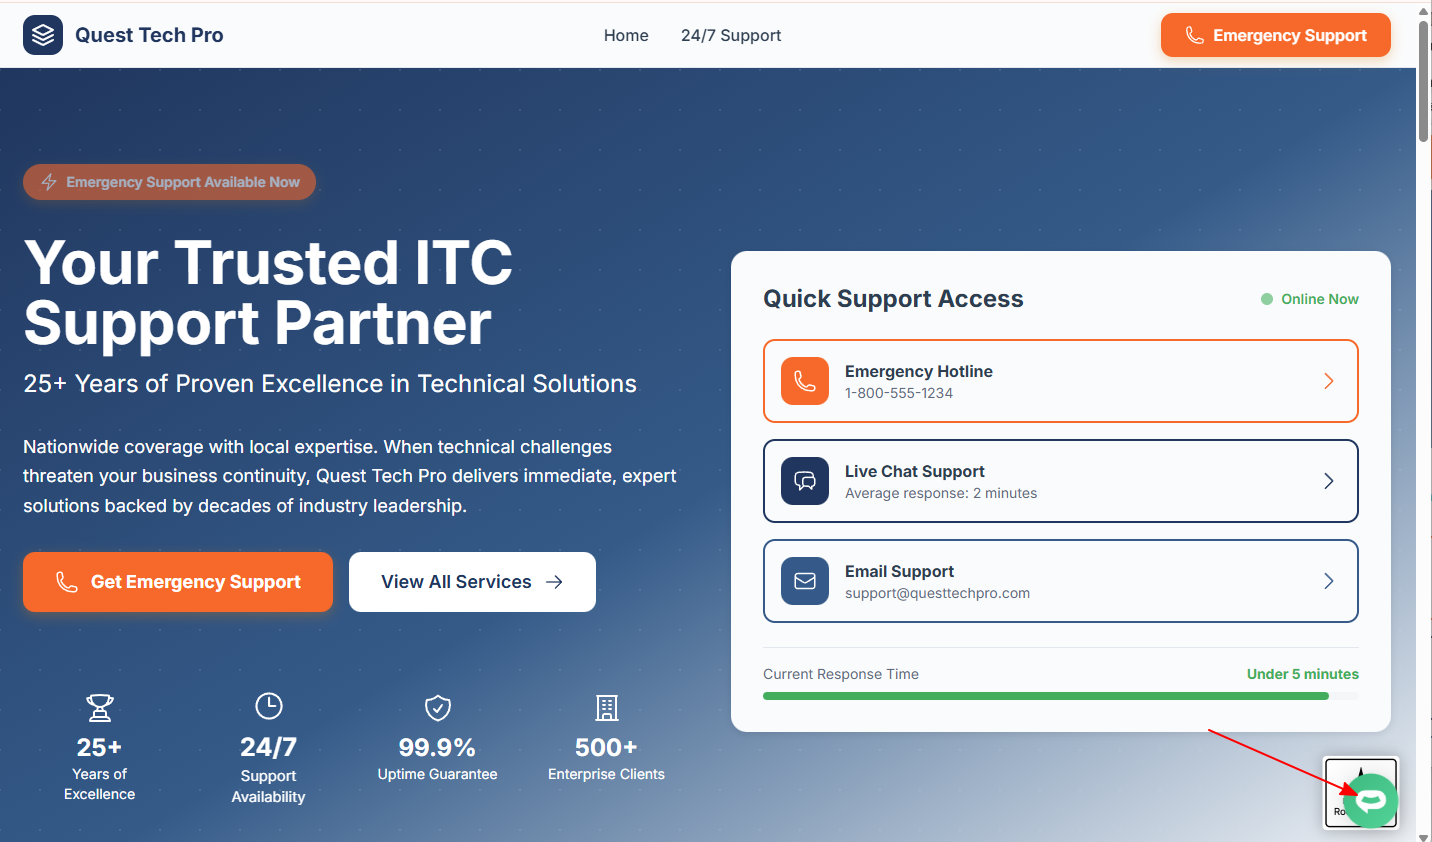
8. If you click on the button it will display the AI support agent dialogue
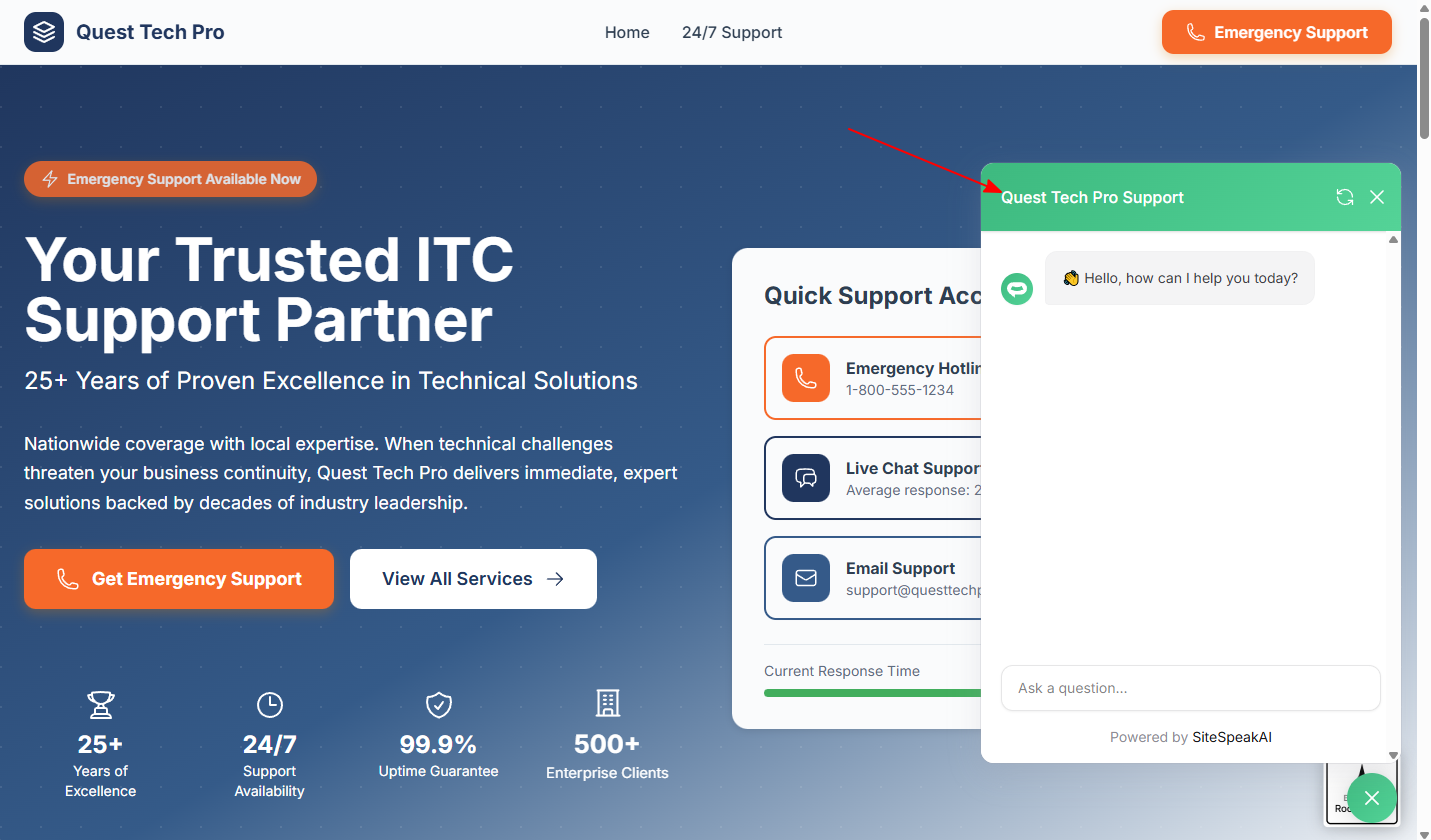
Your AI support agent has now been added to your **Rocket** website and your visitors/customers can start interacting with it!
***
Join over 1000+ businesses, websites and startups automating their customer service and other tasks with a custom trained AI agent.
### In Rocket
1. Log into your [Rocket](https://www.rocket.new/) account and click on **My projects**

2. Click on **Website** to open the Website editor

3. Click in the **Ask me ...** text box

4. Enter the following message in the text box as an instruction to Rocket (This messsage tells Rocket exactly what we want it to do for us)
***Please add the following SiteSpeakAI code snippet to be displayed on the website***
Click on **Send**

5. Rocket will then reply with a message indicating that you should supply it with the actual code snippet.
(The reason why we do this in 2 parts is that you can't create a new line in your message by means of the ENTER key, similar to Copilot)
Insert the code snippet into the textbox and click again on **Send**

6. Rocket will then do it's magic and display the AI support agent button on your website in the editor. It will actually also inform you where it added the code in the code base

7. Your AI support agent button will now be displayed on your **Rocket** website page

8. If you click on the button it will display the AI support agent dialogue

Your AI support agent has now been added to your **Rocket** website and your visitors/customers can start interacting with it!
***
Join over 1000+ businesses, websites and startups automating their customer service and other tasks with a custom trained AI agent.