> ## Documentation Index
> Fetch the complete documentation index at: https://sitespeak.ai/docs/llms.txt
> Use this file to discover all available pages before exploring further.
# How to add a ChatGPT AI support agent to Shopify
> How to add your custom ChatGPT trained AI support agent to your Shopify store.
You want to embed your custom trained AI support agent in your Shopify store. Here's how to add an AI support agent to Shopify with SiteSpeakAI.
In this tutorial, I'll show you how to add a ChatGPT AI support agent to your Shopify store. We'll create and train it, install it on your theme, and connect it to live order data so it can answer where is my order questions for real.
Before you can add your agent to your Shopify store, you need to create and train it. After you log in to SiteSpeak, you land on the Get Started page, which walks you through it in five quick steps. First, give your agent a name. This is the name your visitors will see when they chat with it. Click Save and Continue to create the agent. Next, add the website you want your agent to learn from. For this example I'll use snapwidget.com. Click Save and Continue, and SiteSpeak crawls the site to find pages it can train on. In a few seconds, it finds the main pages on the site. SiteSpeak selects those pages for you. Click Save and Continue to train your agent on them. SiteSpeak now trains your agent on that content automatically. Once it finishes, your agent is ready to answer questions about your site, and you can add it to your Shopify store.
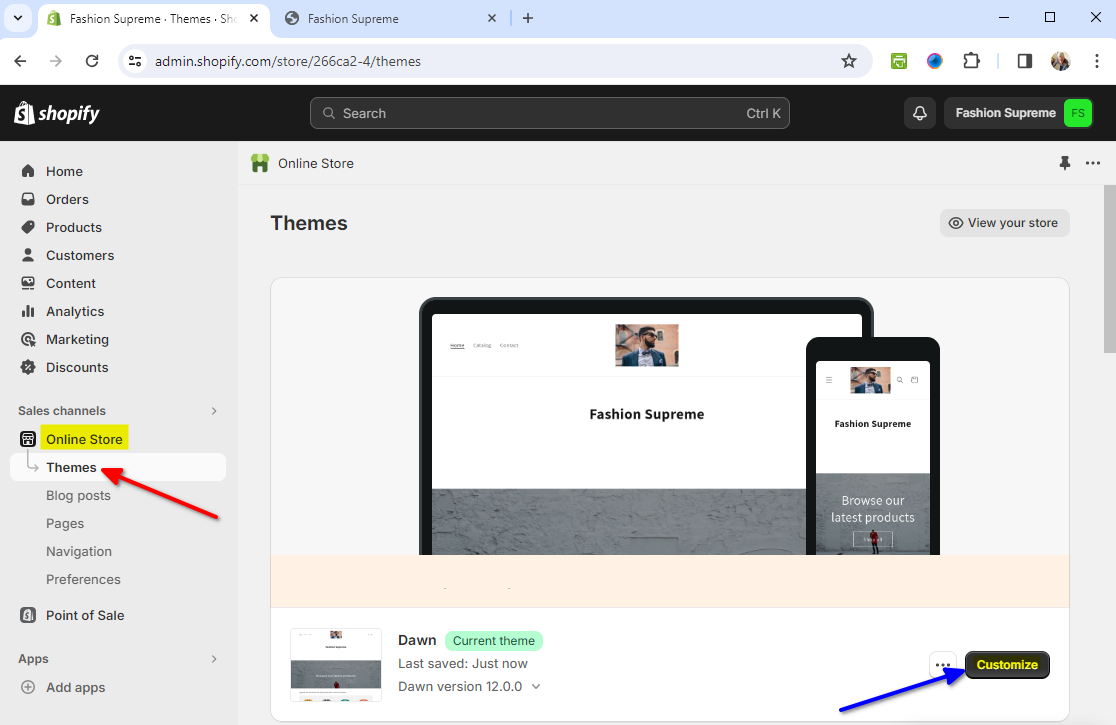
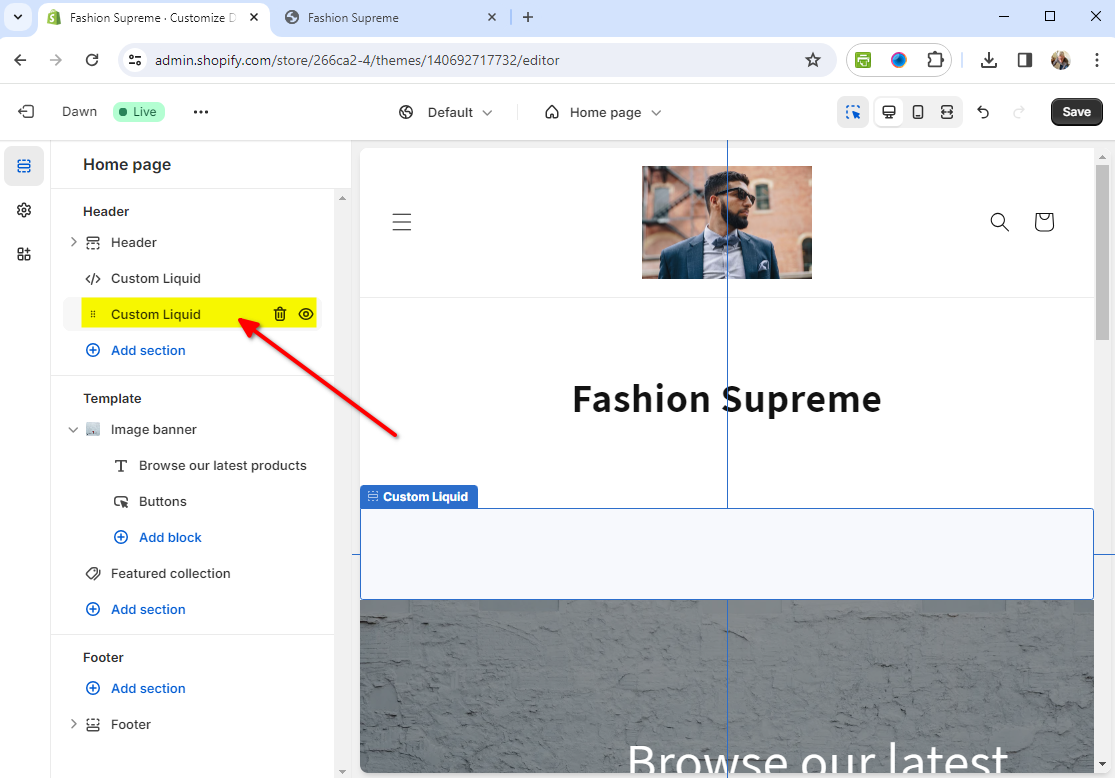
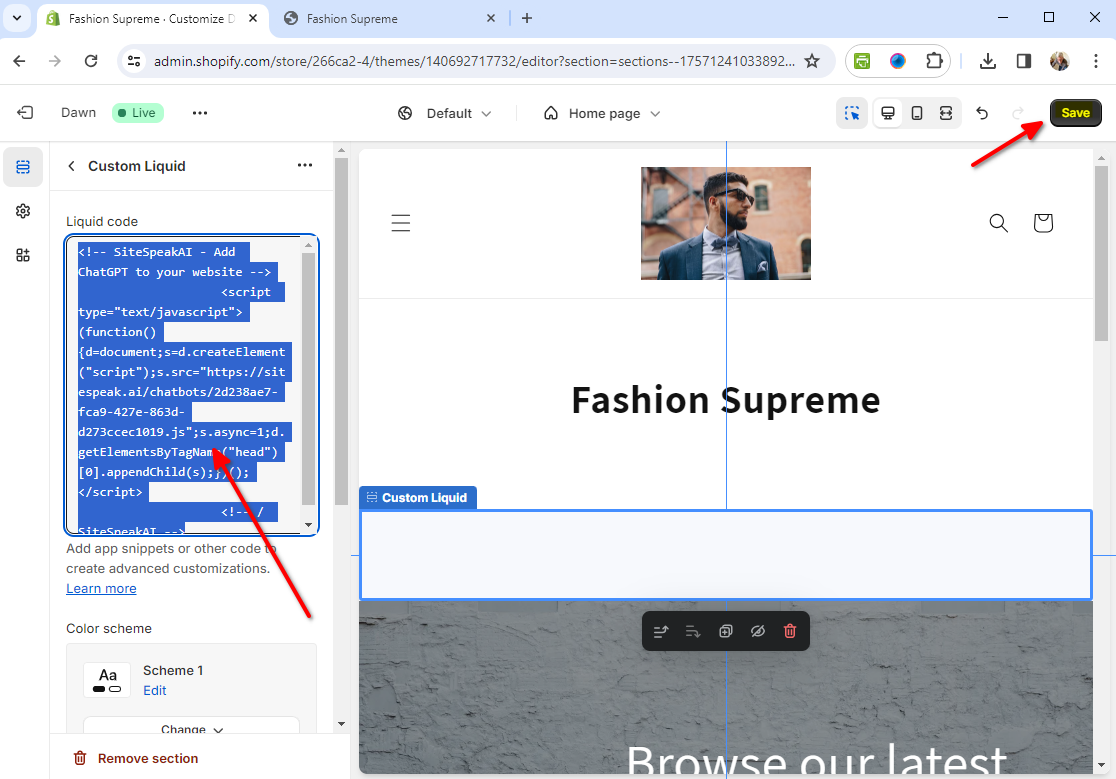
Now let's put it on your store. We'll add your trained ChatGPT AI support agent to your Shopify theme. First, head over to the Sales Channels section. Under the Online Store list, click on Themes, find the theme you're using, and then click Customize. Next, click on Add Section under the Header area, and select the option labeled Custom Liquid. Go ahead and click on the new Custom Liquid section you've just created. In the textbox that appears, paste your SiteSpeak snippet into the Custom Liquid area, and remember to click Save before you exit. And there you have it. Your AI support agent is now live on your Shopify store, with the support button visible on your store page. When a customer clicks the button, the AI support agent opens, ready to answer questions about your products and policies.
Here's what makes this powerful for a store. Open Tools and Actions, search for Shopify, and you'll see two actions. Add Shopify Get Orders so your agent can pull live order status and tracking, and Get Products for real time pricing and availability. On the Get Orders action, paste your store URL and your Shopify Admin API access token, then click Add Action. Now when a customer asks where is my order, your agent looks it up live instead of guessing from a static FAQ.
And that's it. Your Shopify store now has an AI support agent that is trained on your content, answers around the clock, and looks up real order status for your customers.
**Shopify** is a commerce platform that helps you sell online and in person. Entrepreneurs, retailers, and global brands use Shopify to make sales, run stores, and grow their businesses.
**Website URL:** [Shopify](https://www.shopify.com/)
## Add your AI support agent to your Shopify store
### In SiteSpeakAI
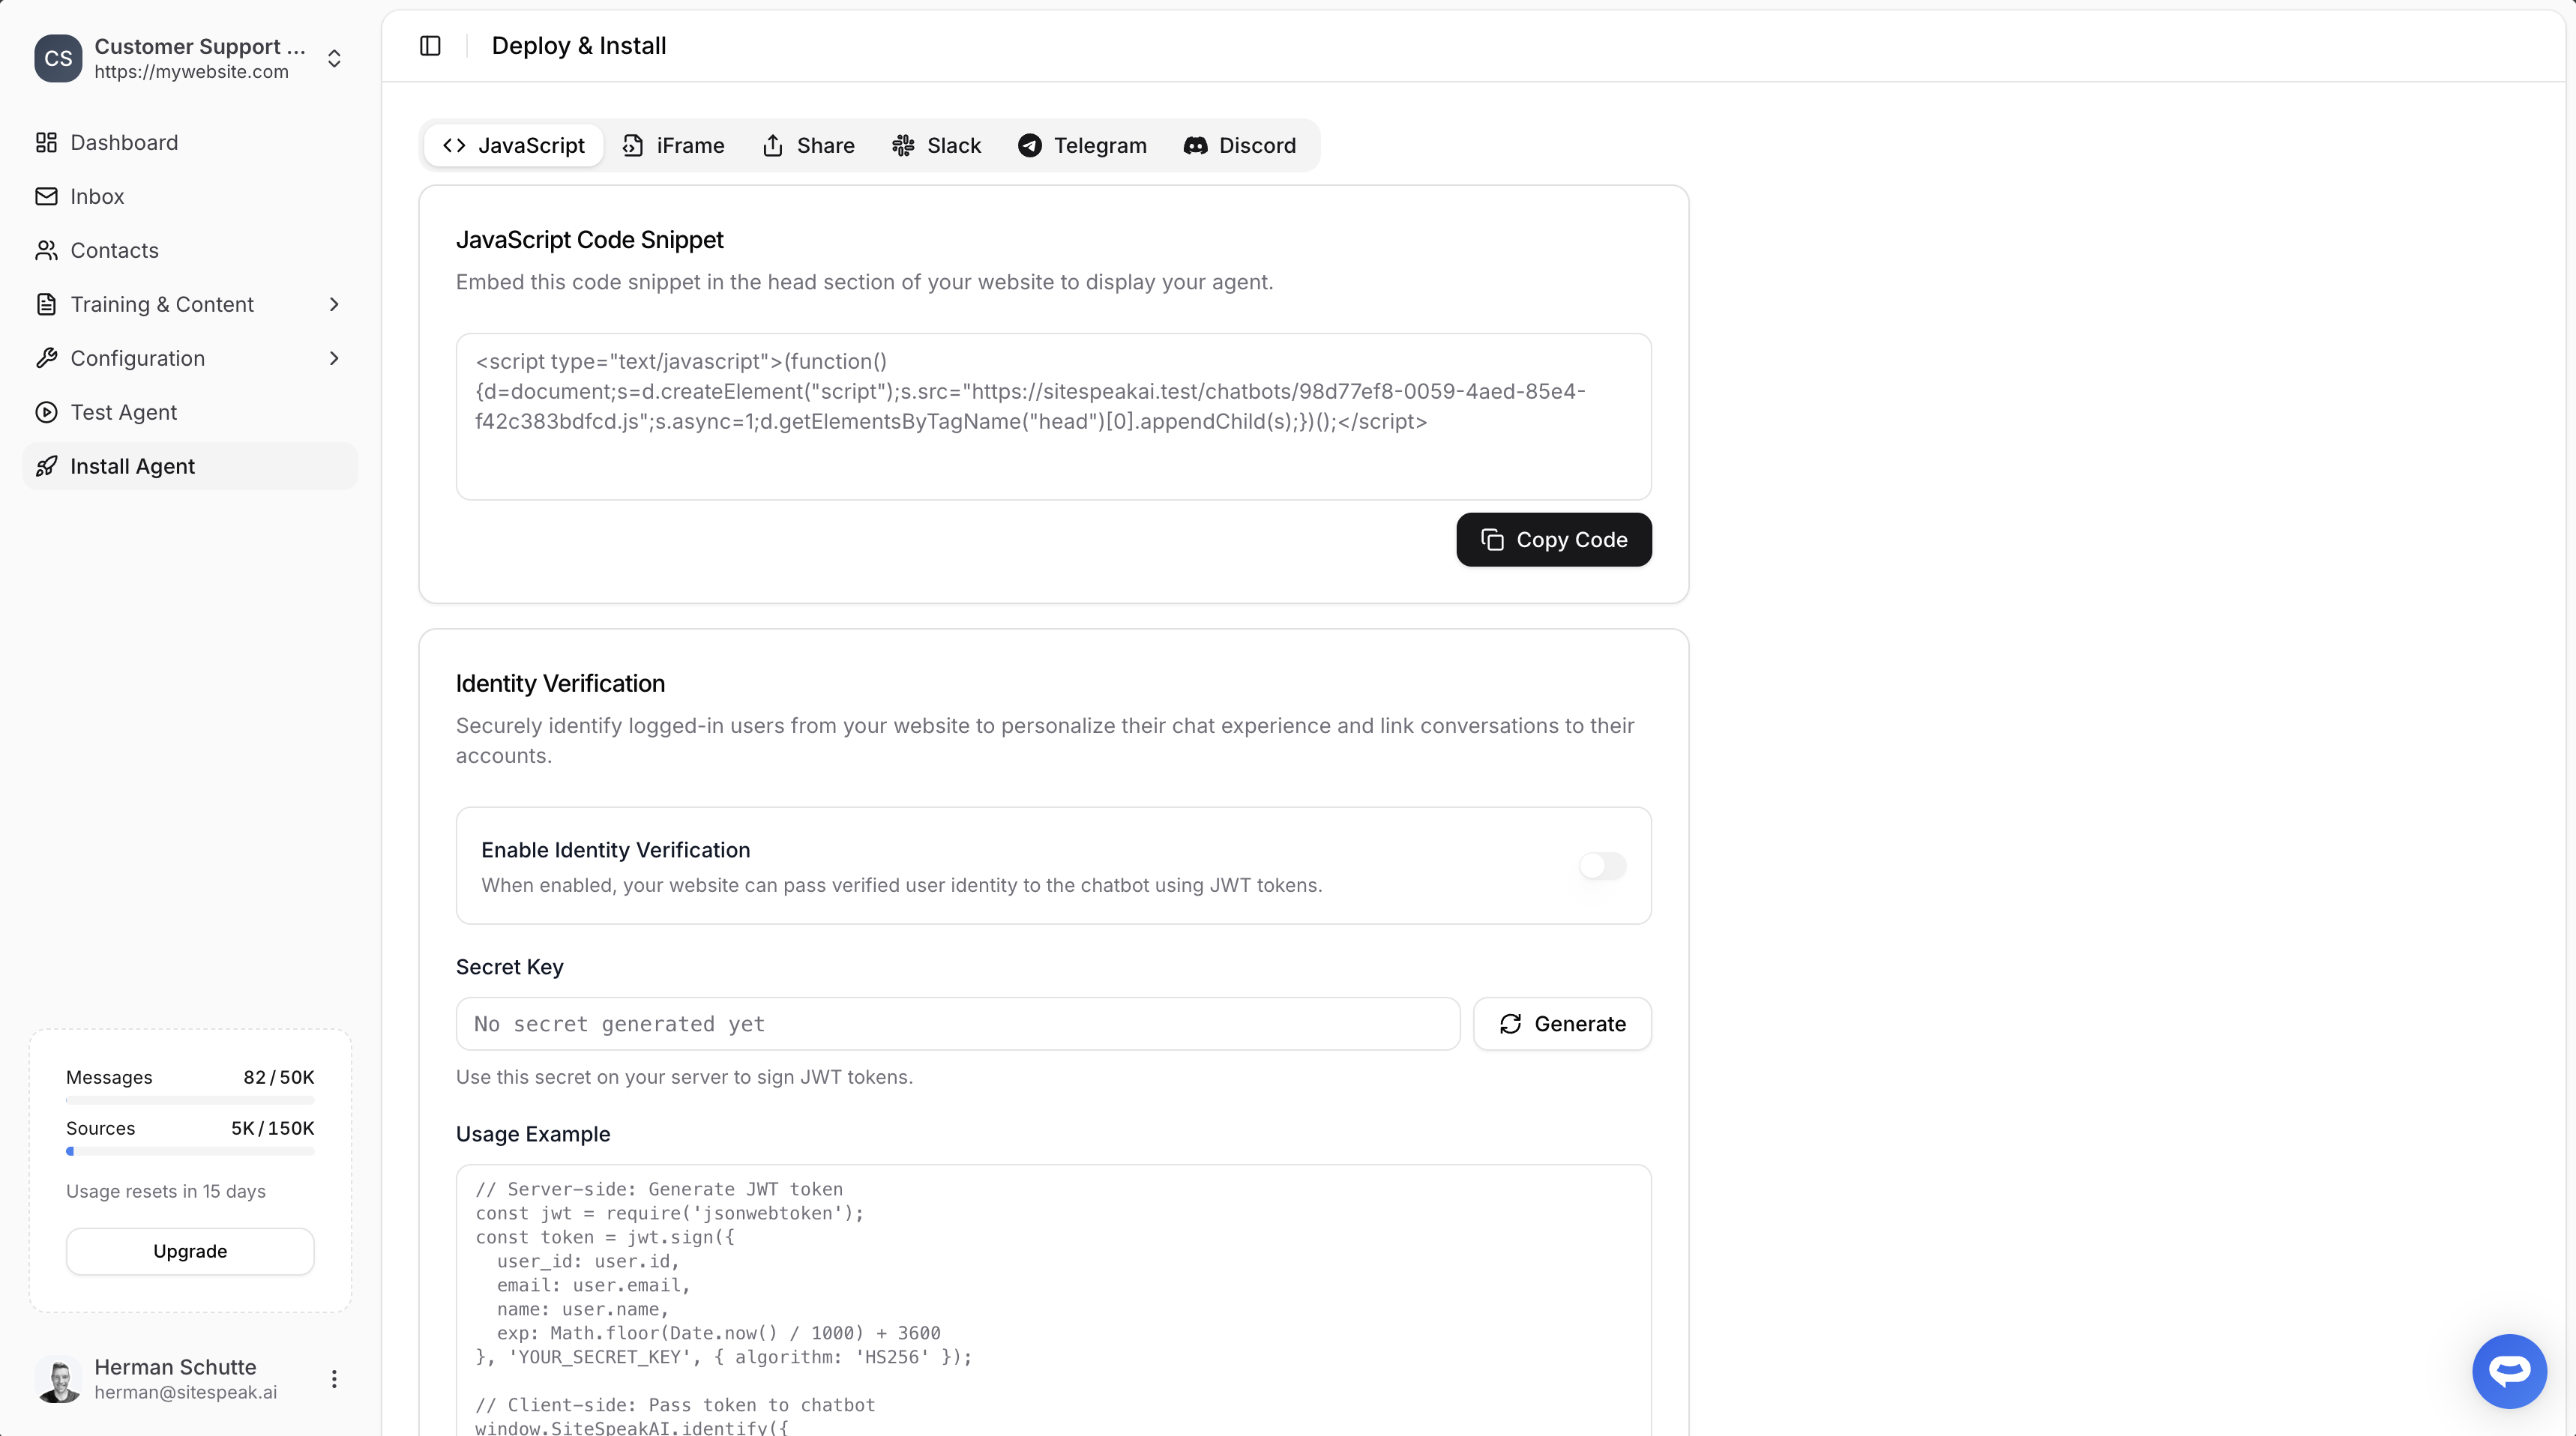
Select your chatbot from the dropdown menu at the top, click on the **Install Agent** section in the sidebar, then click on the **Copy Code** button to copy your code snippet.
### In Shopify
1. Under **Sales Channels**, select **Themes** on the **Online Store** list and click on **Customize** for the relevant theme
2. Click on **Add Section** under **Header** and select **\ Custom Liquid**

3. Click on the newly created **Custom Liquid** section
4. Insert your snippet in the **Custom Liquid** text box modal and click on **Save**
5. That's it - your AI support agent is now added to your Shopify store and the AI support agent button will appear on your store page
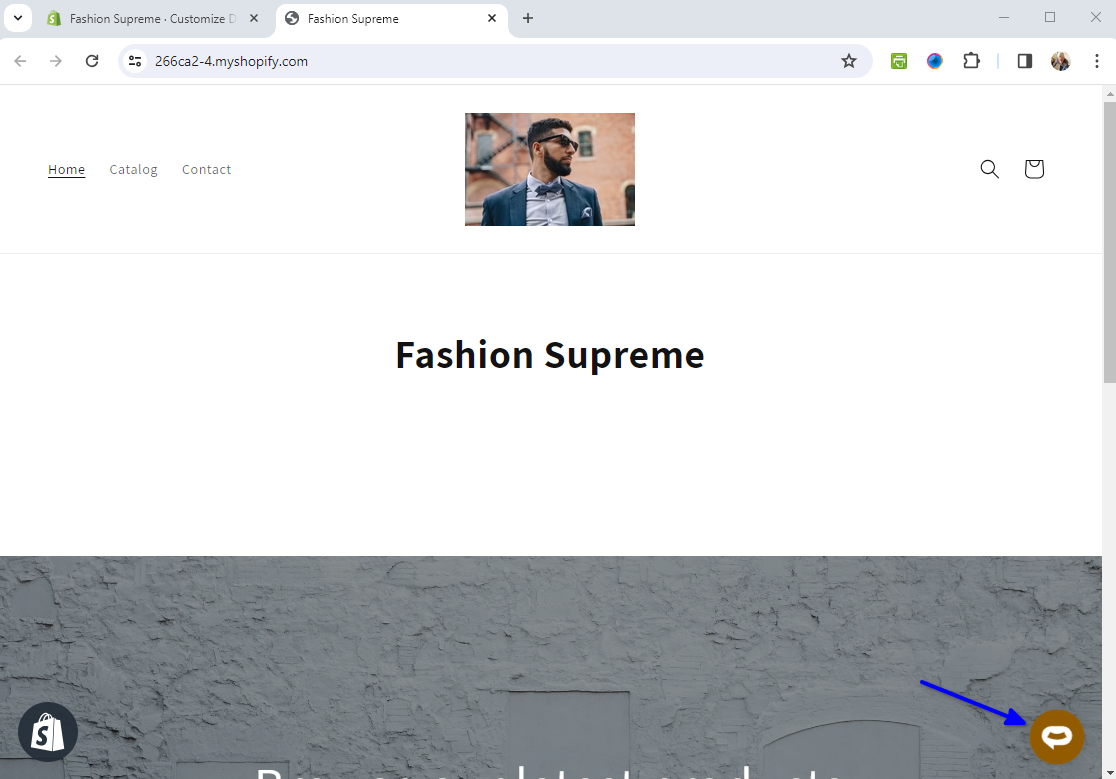
6. If you click on the button it will display the AI support agent dialogue
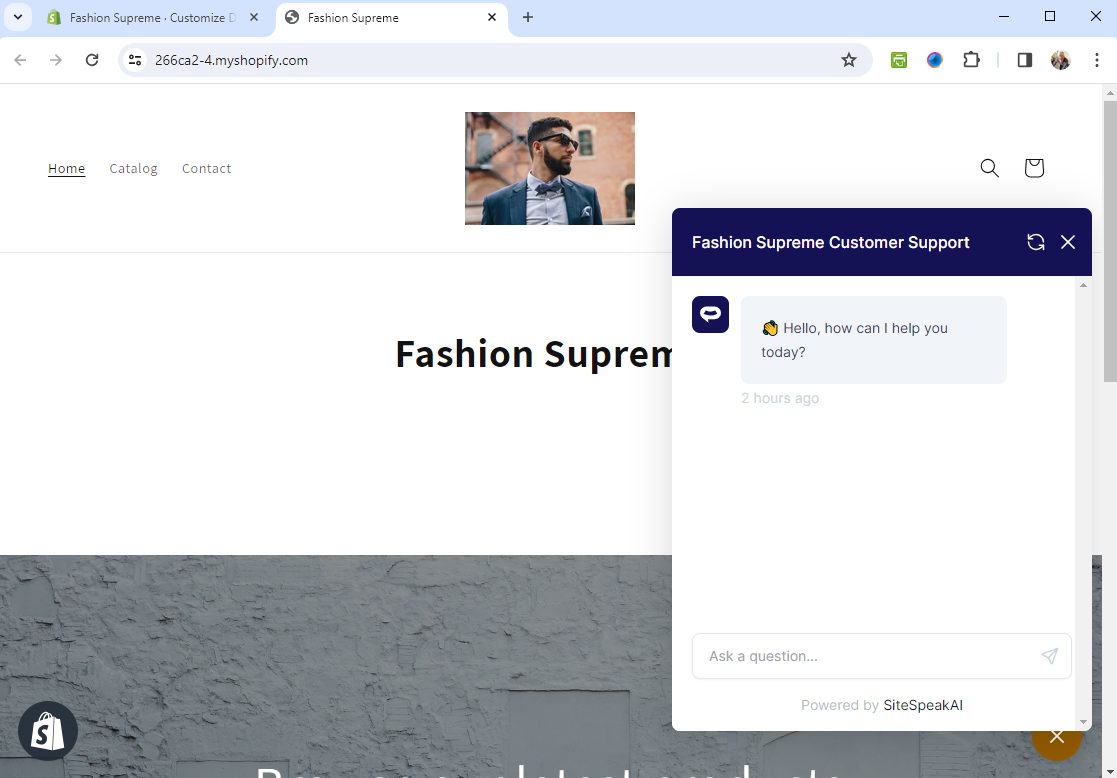
Your AI support agent has now been added to your **Shopify** store and your visitors/customers can start interacting with it!
***
Join over 1000+ businesses, websites and startups automating their customer service and other tasks with a custom trained AI agent.
 ### In Shopify
1. Under **Sales Channels**, select **Themes** on the **Online Store** list and click on **Customize** for the relevant theme

2. Click on **Add Section** under **Header** and select **\ Custom Liquid**

3. Click on the newly created **Custom Liquid** section

4. Insert your snippet in the **Custom Liquid** text box modal and click on **Save**

5. That's it - your AI support agent is now added to your Shopify store and the AI support agent button will appear on your store page

6. If you click on the button it will display the AI support agent dialogue

Your AI support agent has now been added to your **Shopify** store and your visitors/customers can start interacting with it!
***
### In Shopify
1. Under **Sales Channels**, select **Themes** on the **Online Store** list and click on **Customize** for the relevant theme

2. Click on **Add Section** under **Header** and select **\ Custom Liquid**

3. Click on the newly created **Custom Liquid** section

4. Insert your snippet in the **Custom Liquid** text box modal and click on **Save**

5. That's it - your AI support agent is now added to your Shopify store and the AI support agent button will appear on your store page

6. If you click on the button it will display the AI support agent dialogue

Your AI support agent has now been added to your **Shopify** store and your visitors/customers can start interacting with it!
***