> ## Documentation Index
> Fetch the complete documentation index at: https://sitespeak.ai/docs/llms.txt
> Use this file to discover all available pages before exploring further.
# How to add a ChatGPT AI support agent to Siter.io
> How to add your custom ChatGPT trained AI support agent to your Siter.io website.
You want to embed your custom trained AI support agent in your **Siter.io** website page. Here's how to add an AI support agent to Siter.io with SiteSpeakAI.
**Siter.io** is a no-code website builder focused on speed and simplicity. It's designed for quickly creating professional-looking websites, landing pages, and online stores without needing to write any code. It uses a drag-and-drop interface with pre-designed templates and blocks, making it very easy to customize and build your site. It's particularly good for entrepreneurs, small businesses, and anyone who wants a fast and straightforward way to get online.
**Website URL:** [siter.io](https://siter.io/)
## Add your AI support agent to your Siter.io website
### In SiteSpeakAI
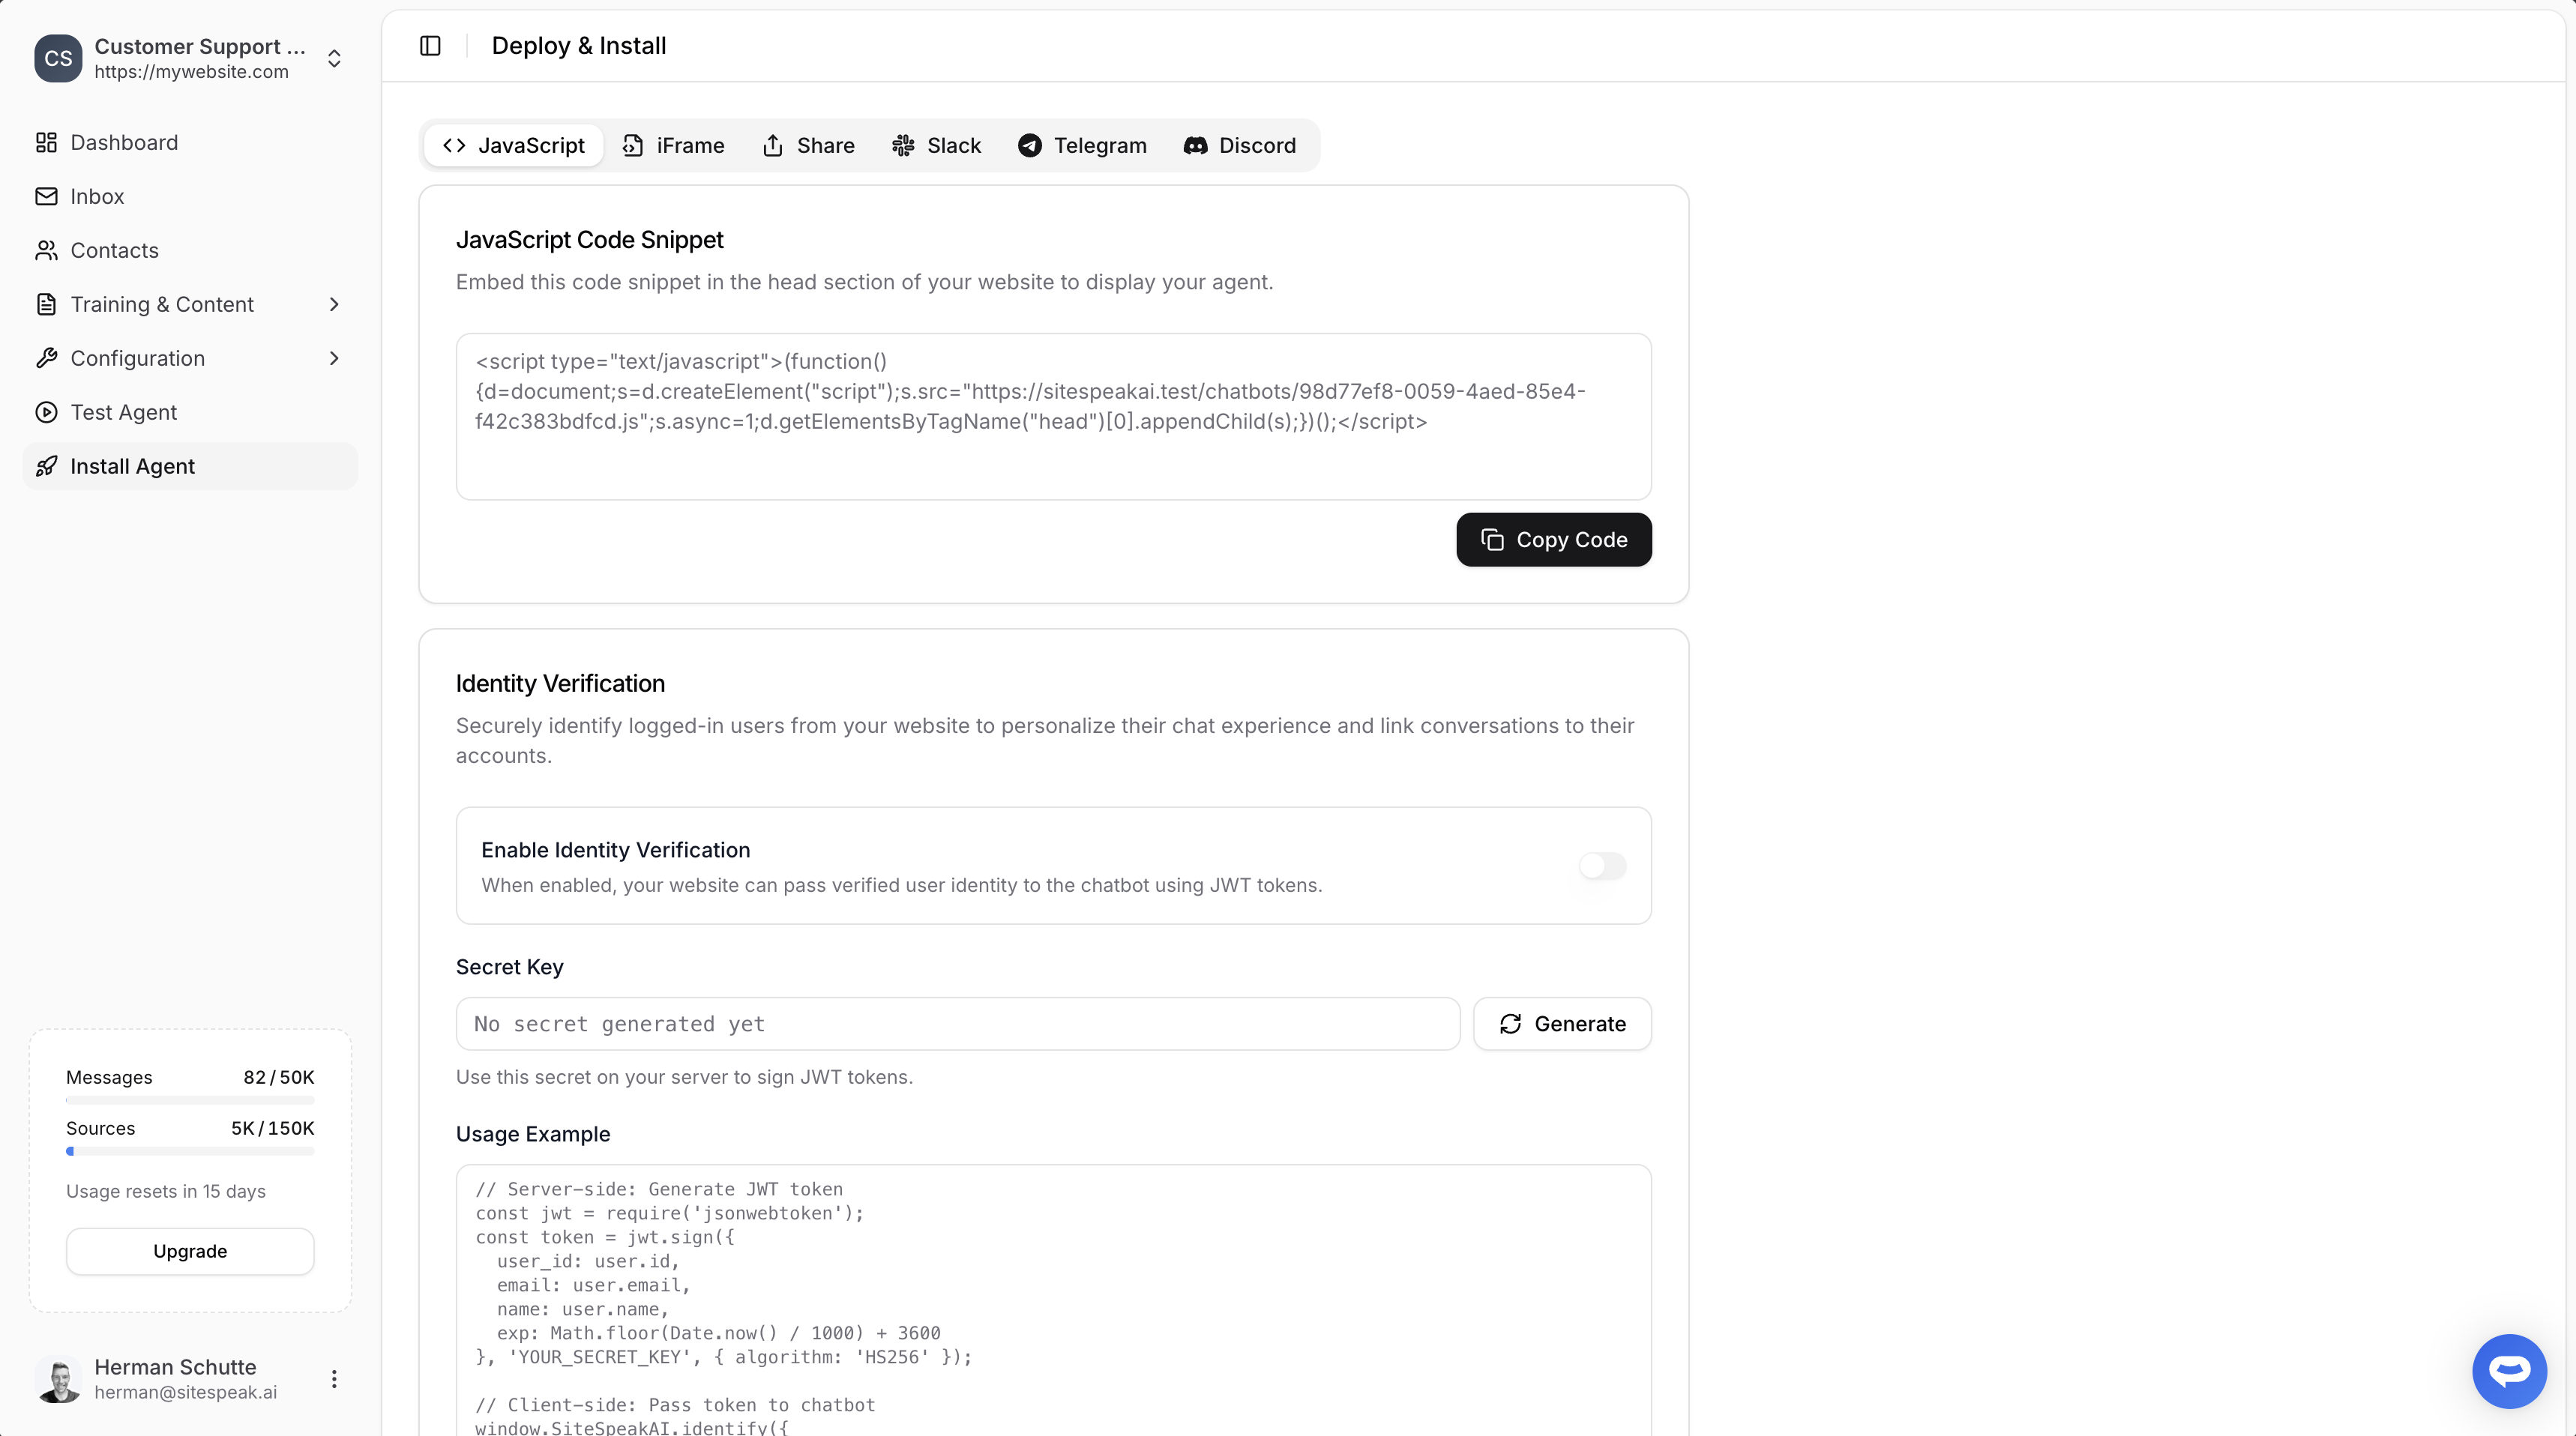
Select your chatbot from the dropdown menu at the top, click on the **Install Agent** section in the sidebar, then click on the **Copy Code** button to copy your code snippet.
 ### In Siter.io
**Please note**:
To insert Custom HTML in **Siter.io**, you can use the **Code Tool** element to insert your snippet per page, or the **Head Code Injection** option under the **Custom Code** settings for site-wide integration.
Unfortunately, the **Head Code Injection** setting doesn't work properly with SitespeakAI, so we will look at using the **Code Tool** element. Due to the fact that this provides insertion per page (which is a tedious option), we will create a **Component** that contains the snippet and can then be added on each page. This will then have the advantage of editing once and can then be applied to wherever you use the Component. Sounds confusing? Maybe, but if you follow my instructions it should be quite easy.
Let's continue embedding our clever little AI support agent.
1. Log into your **Siter.io** account and on the dashboard, select the site you want to add your AI support agent to.

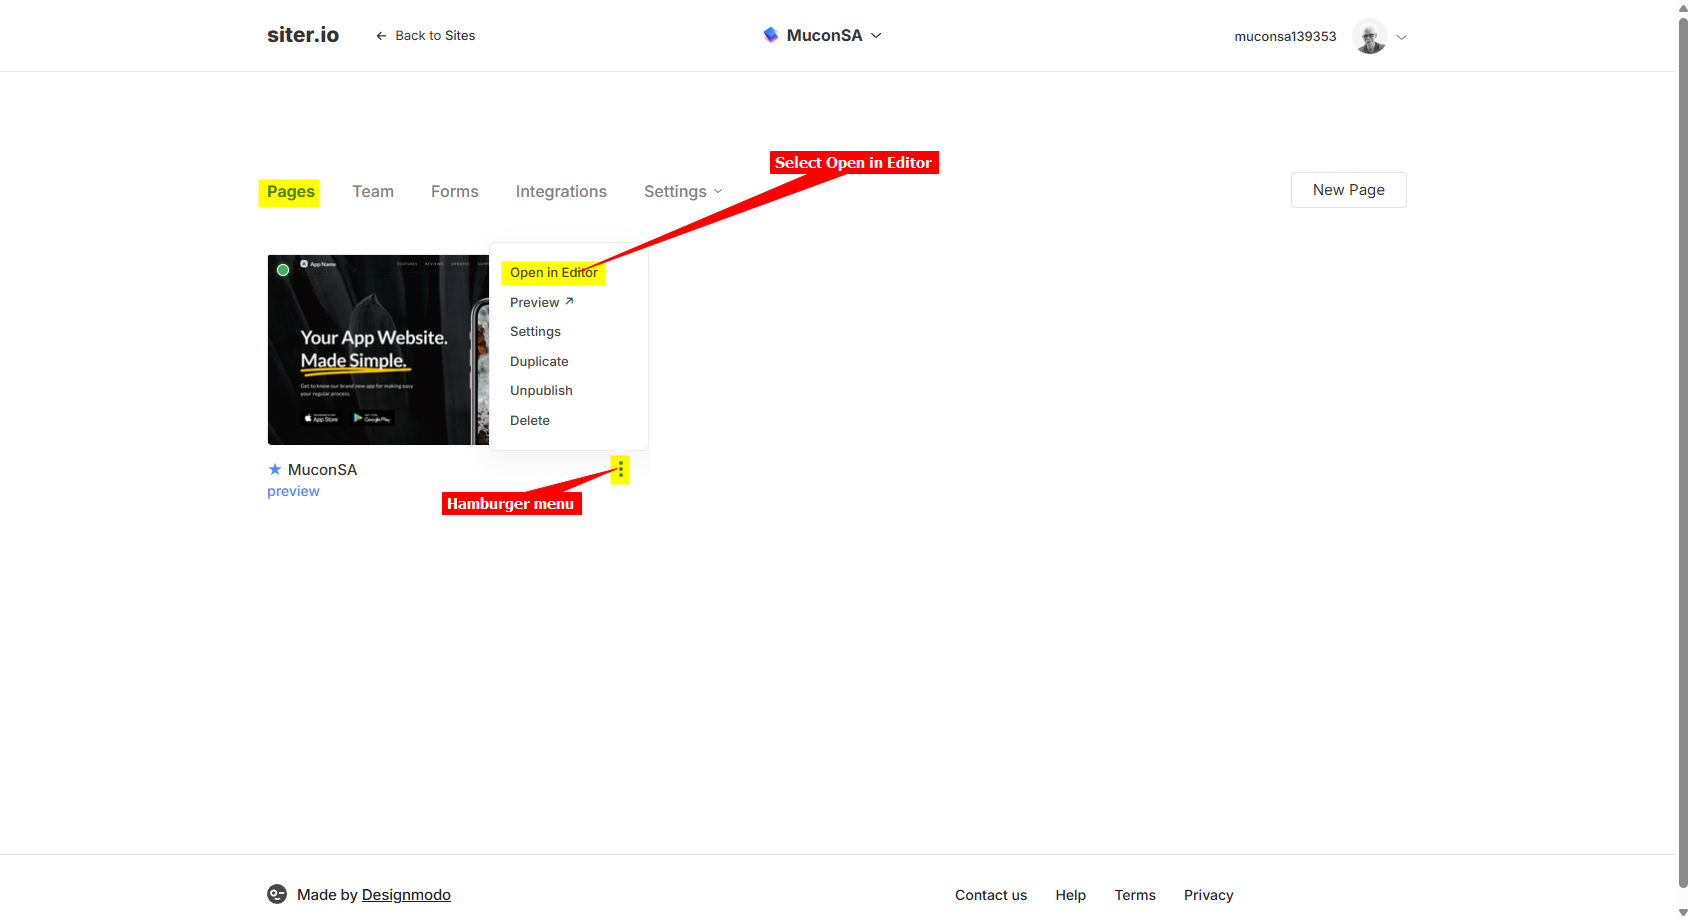
2. Make sure the **Pages** tab is selected, click on the hamburger menu and select **Open in Editor** to start editing your website page.
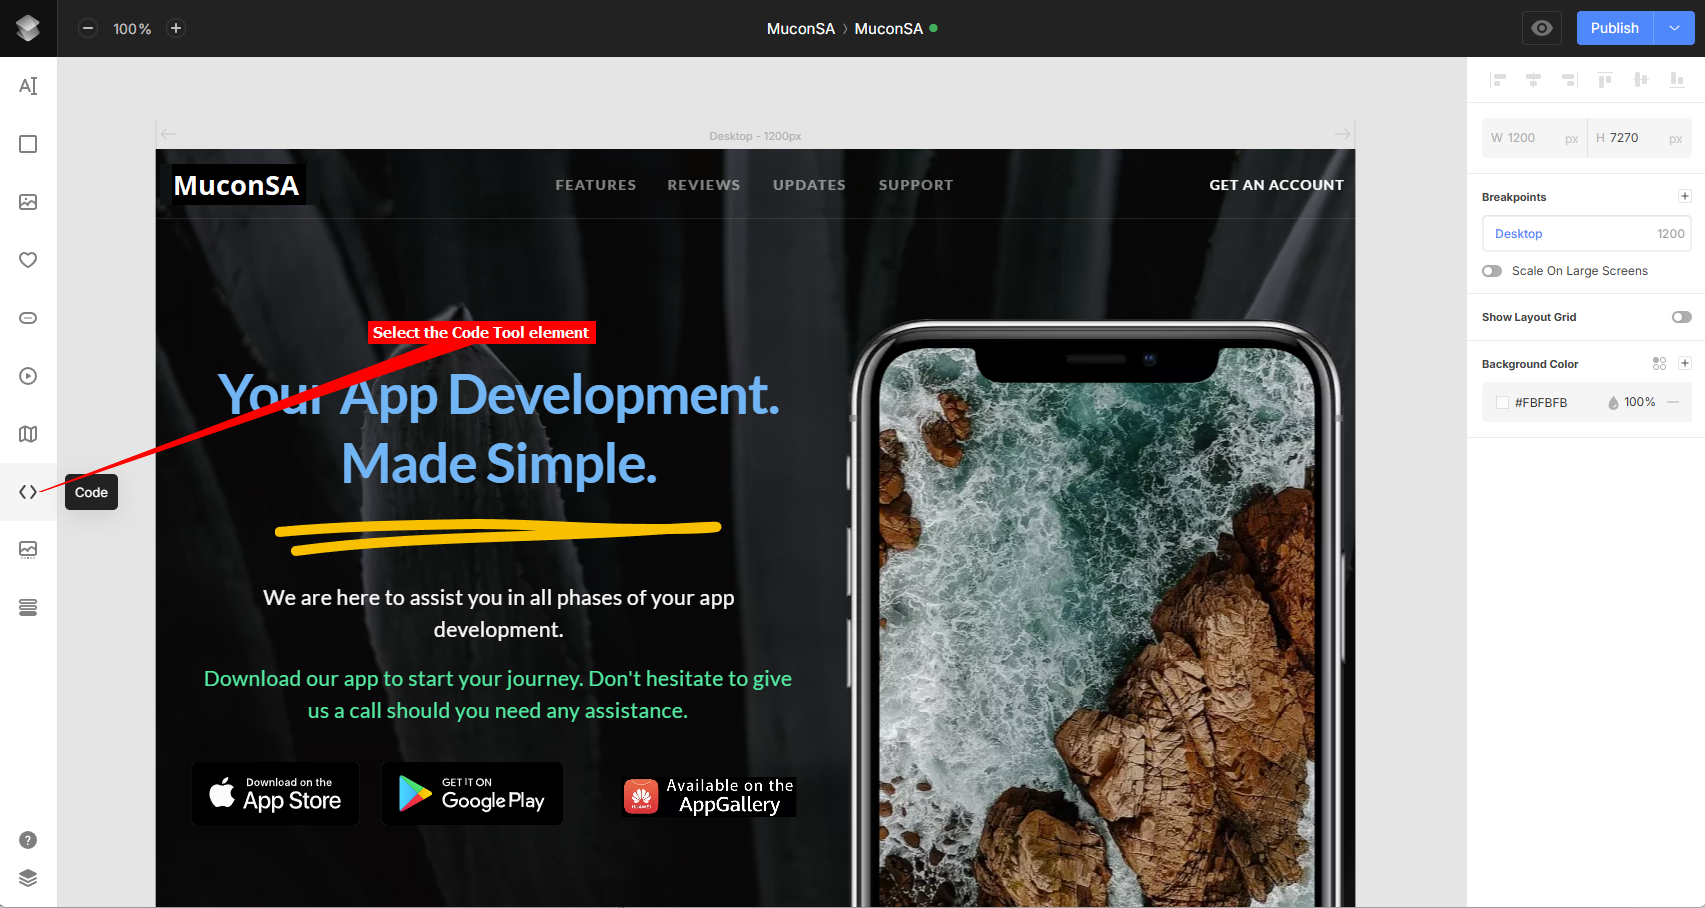
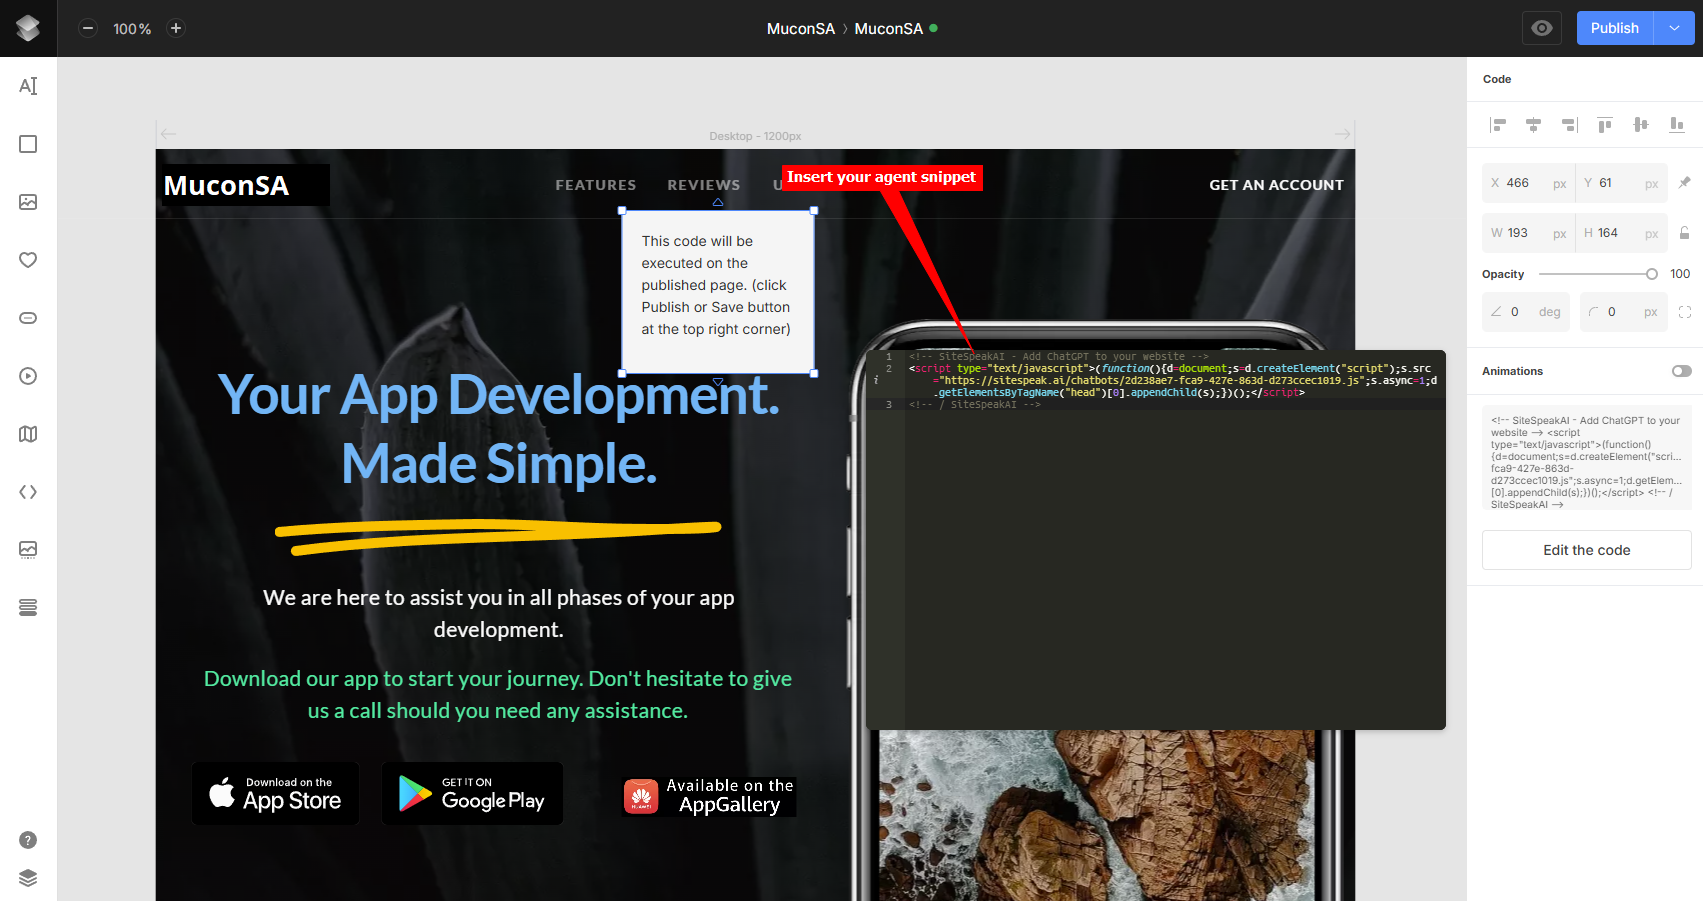
3. Select the **Code Tool** in the lefthand toolbar and then place the element on your project page (it doesn't matter where you put it, the snippet itself won't be displayed, only the actual Agent will be displayed at the bottom of your page).
4. A gray placeholder box will appear on your project page. Click on **Edit the code** in the righthand toolbar
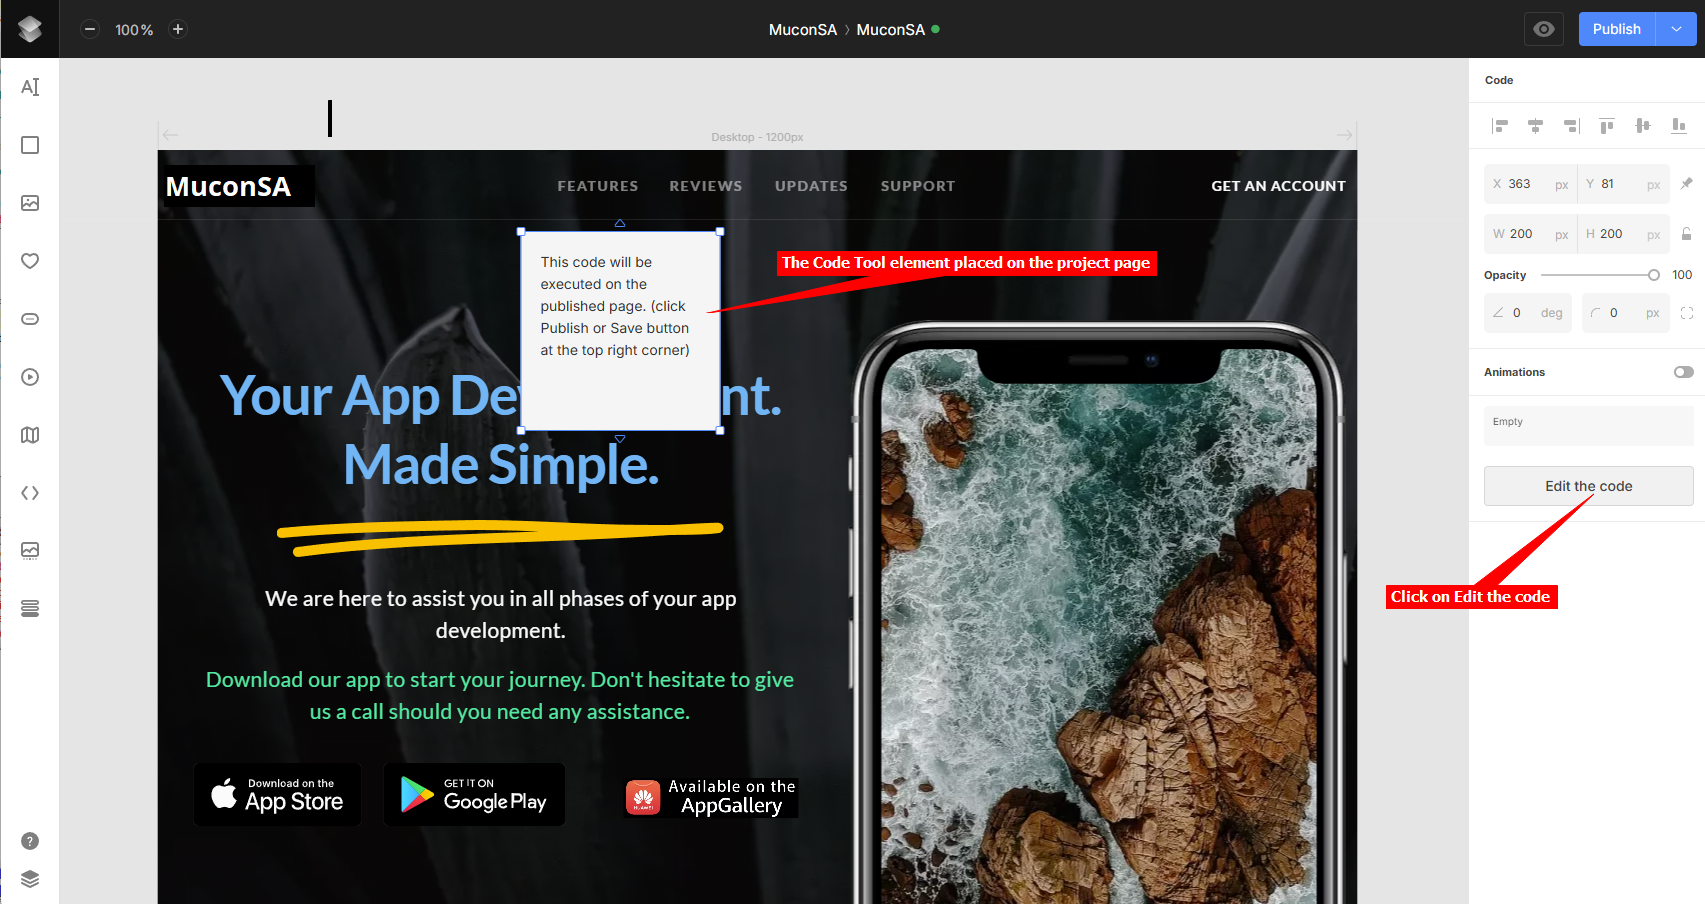
5. Insert your AI support agent snippet in the provided text box
6. Click on the **Layers** toolbar item to display the layers and double-click on the **Code** element
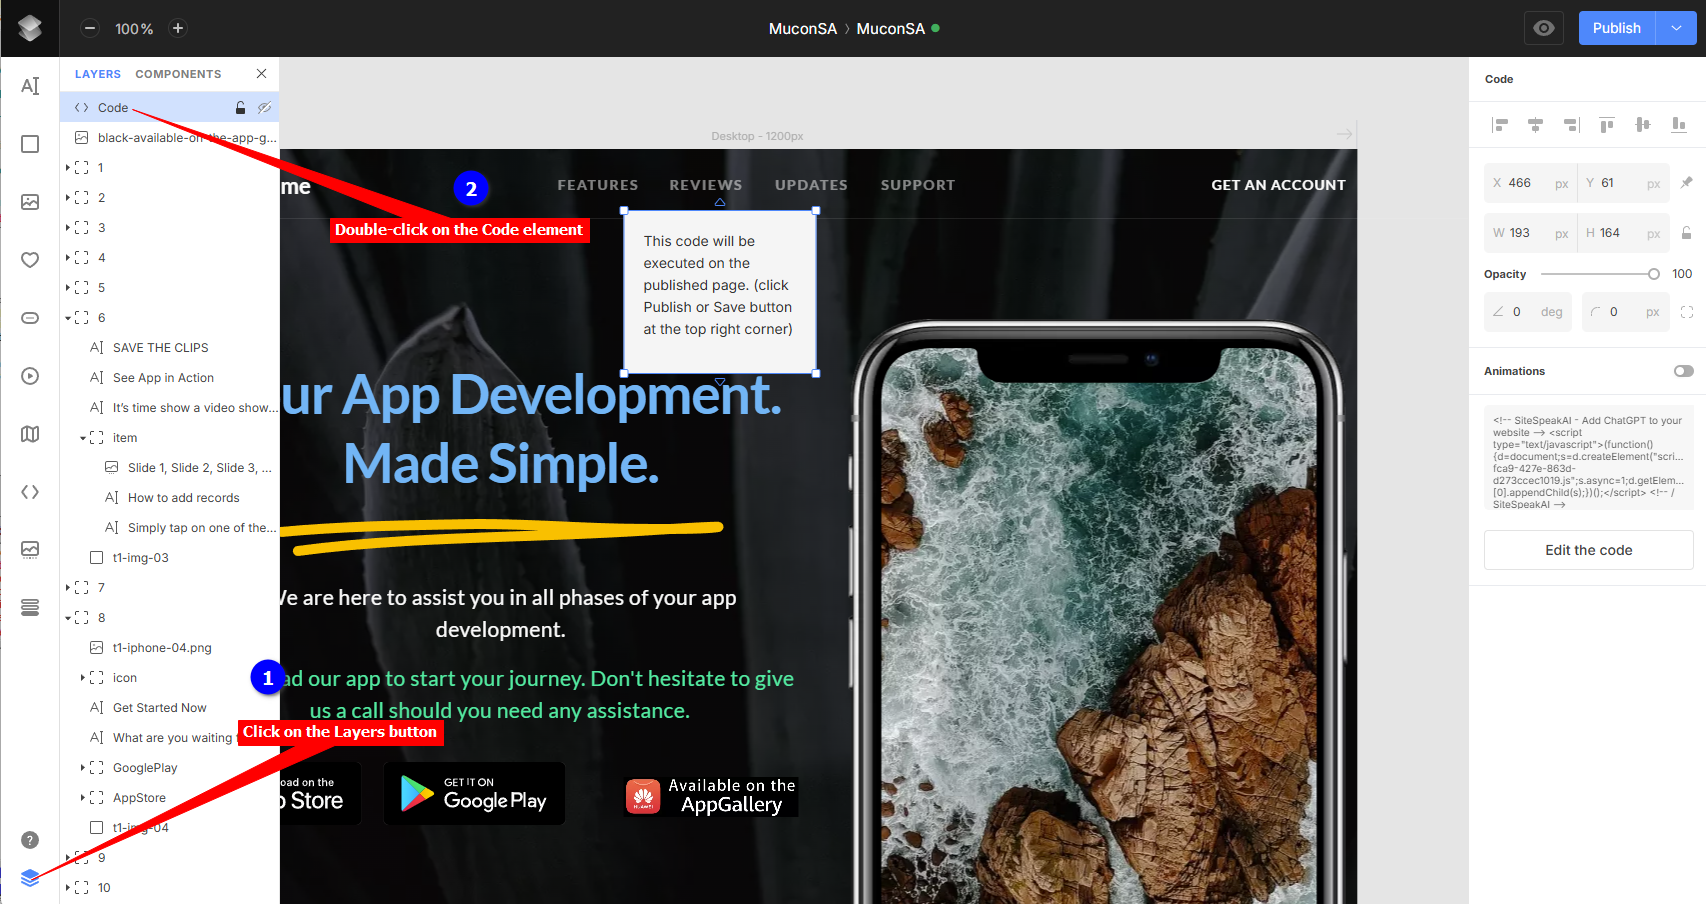
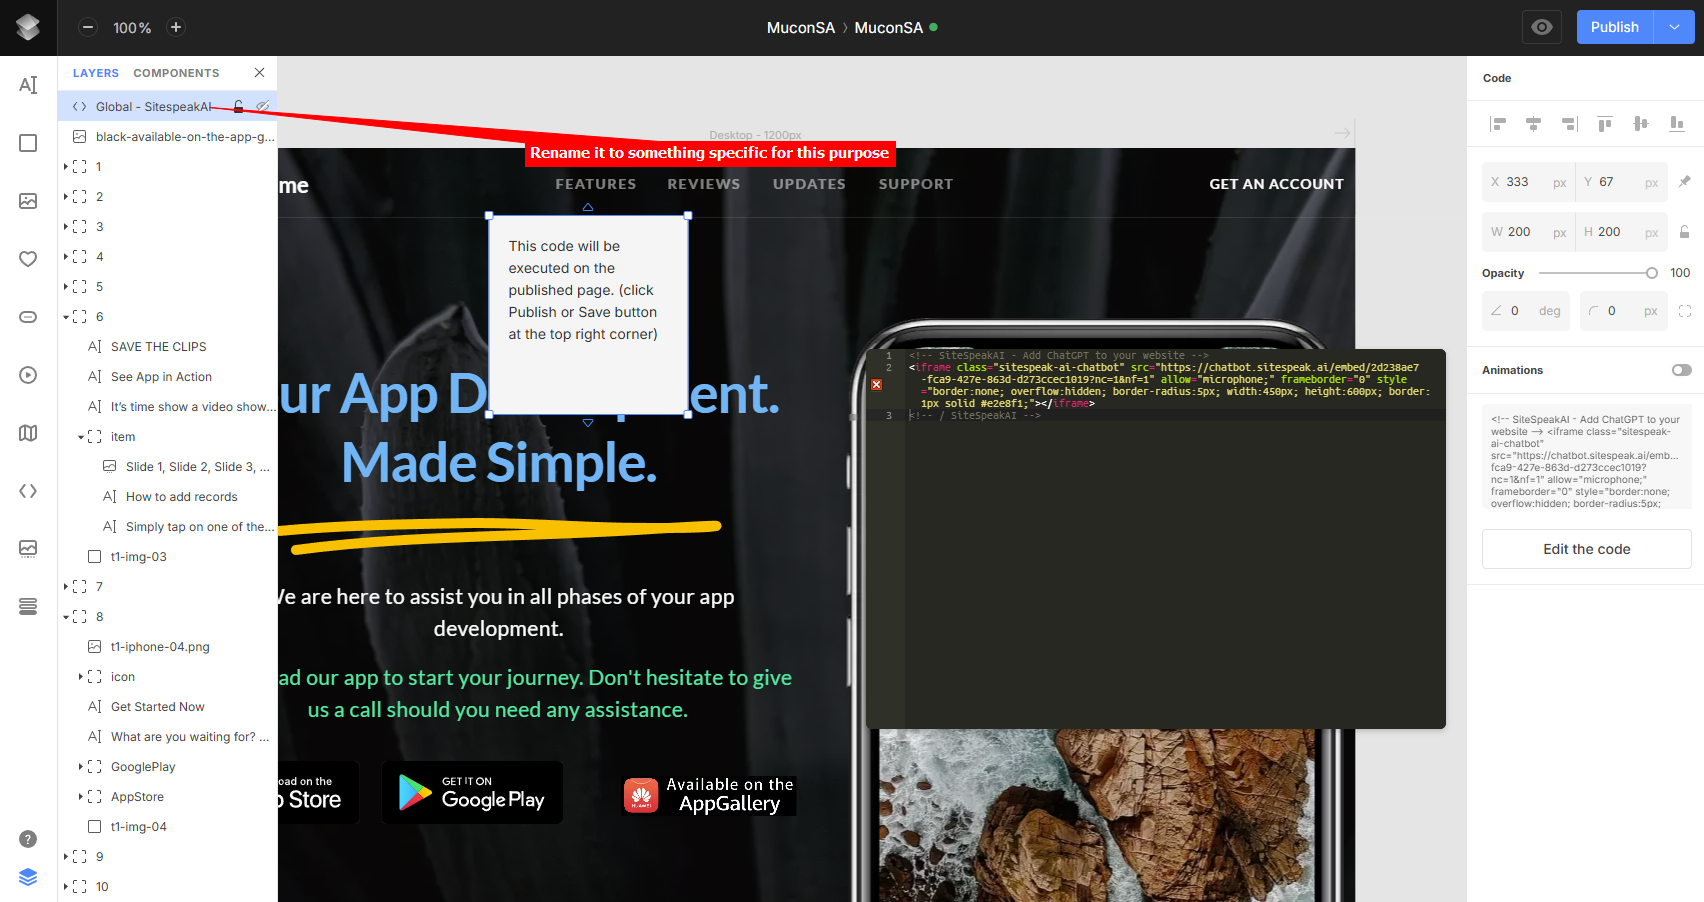
7. Rename the Code element to something specific, e.g. **Global - SitespeakAI**
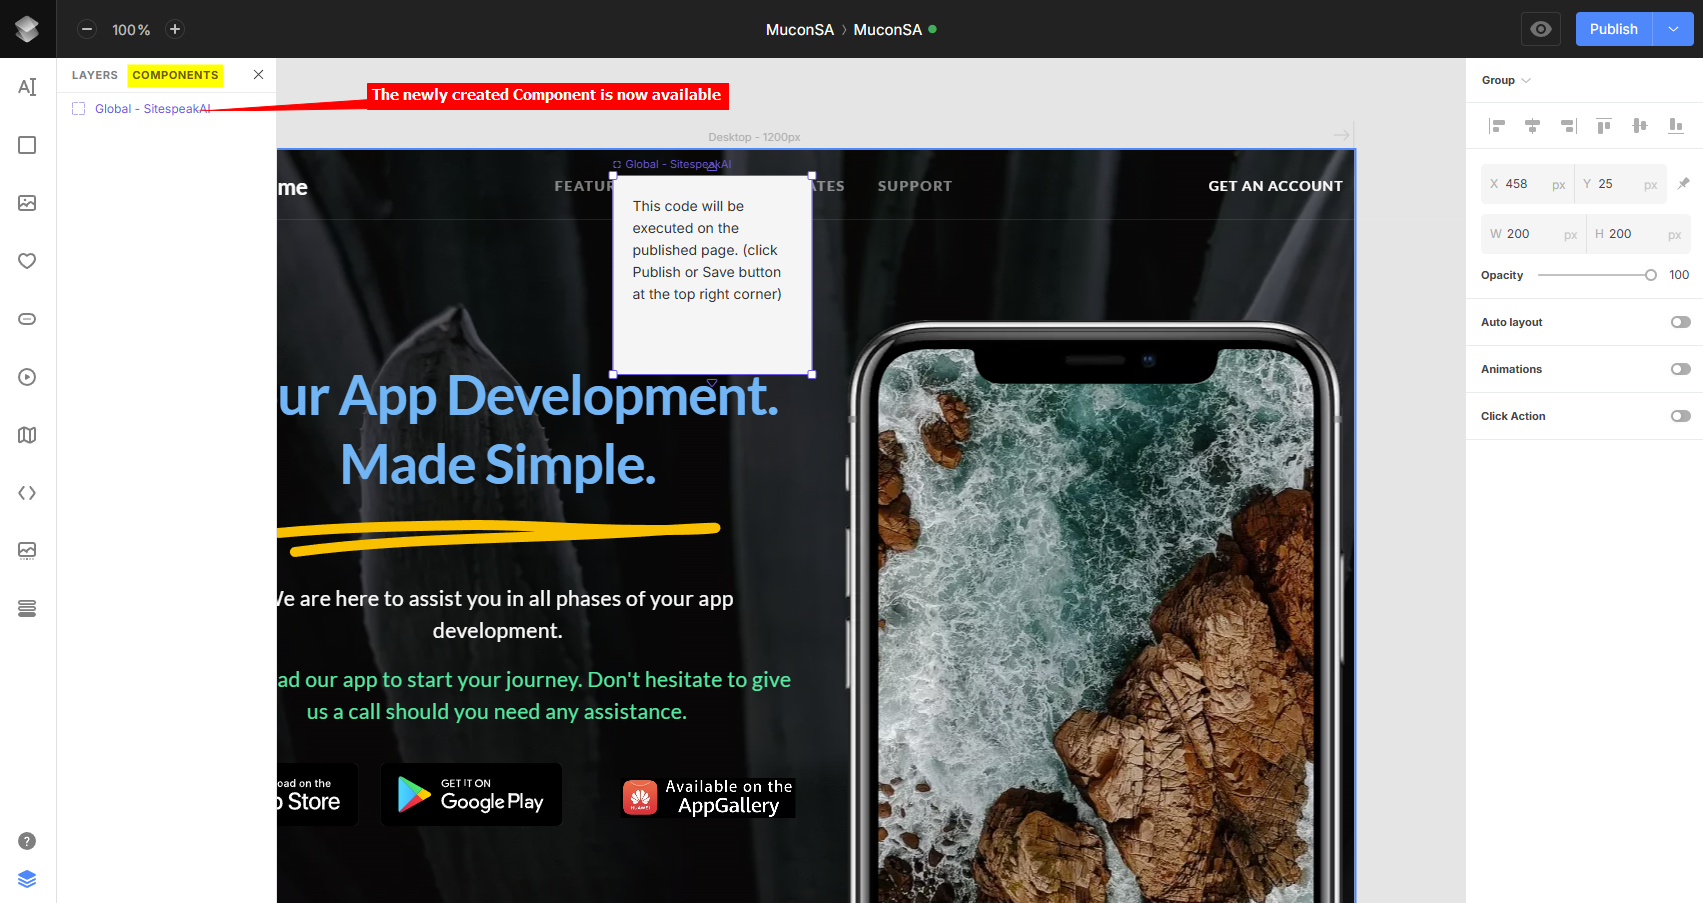
8. Right-click on the renamed element, select **Create Component** and click on **Publish**
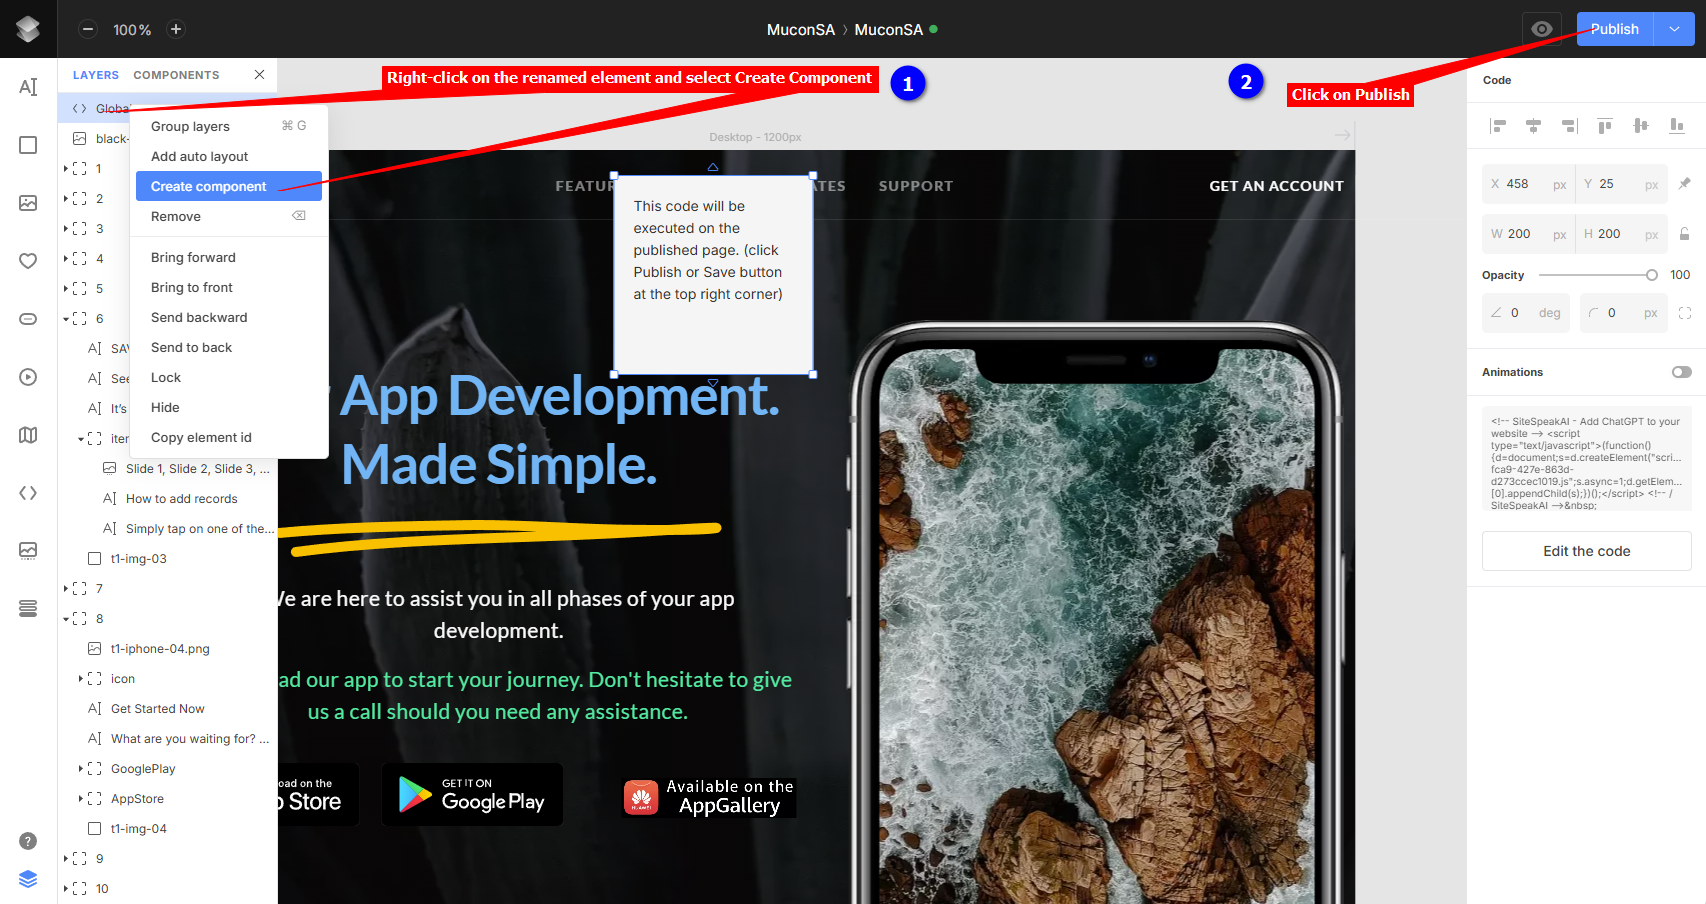
9. The newly created component is now available under **Components**. It can now be added to any page in the project that is part of the website. If you make changes to this component (i.e. modify the snippet content) then it will be applied to all instances where you use this component.
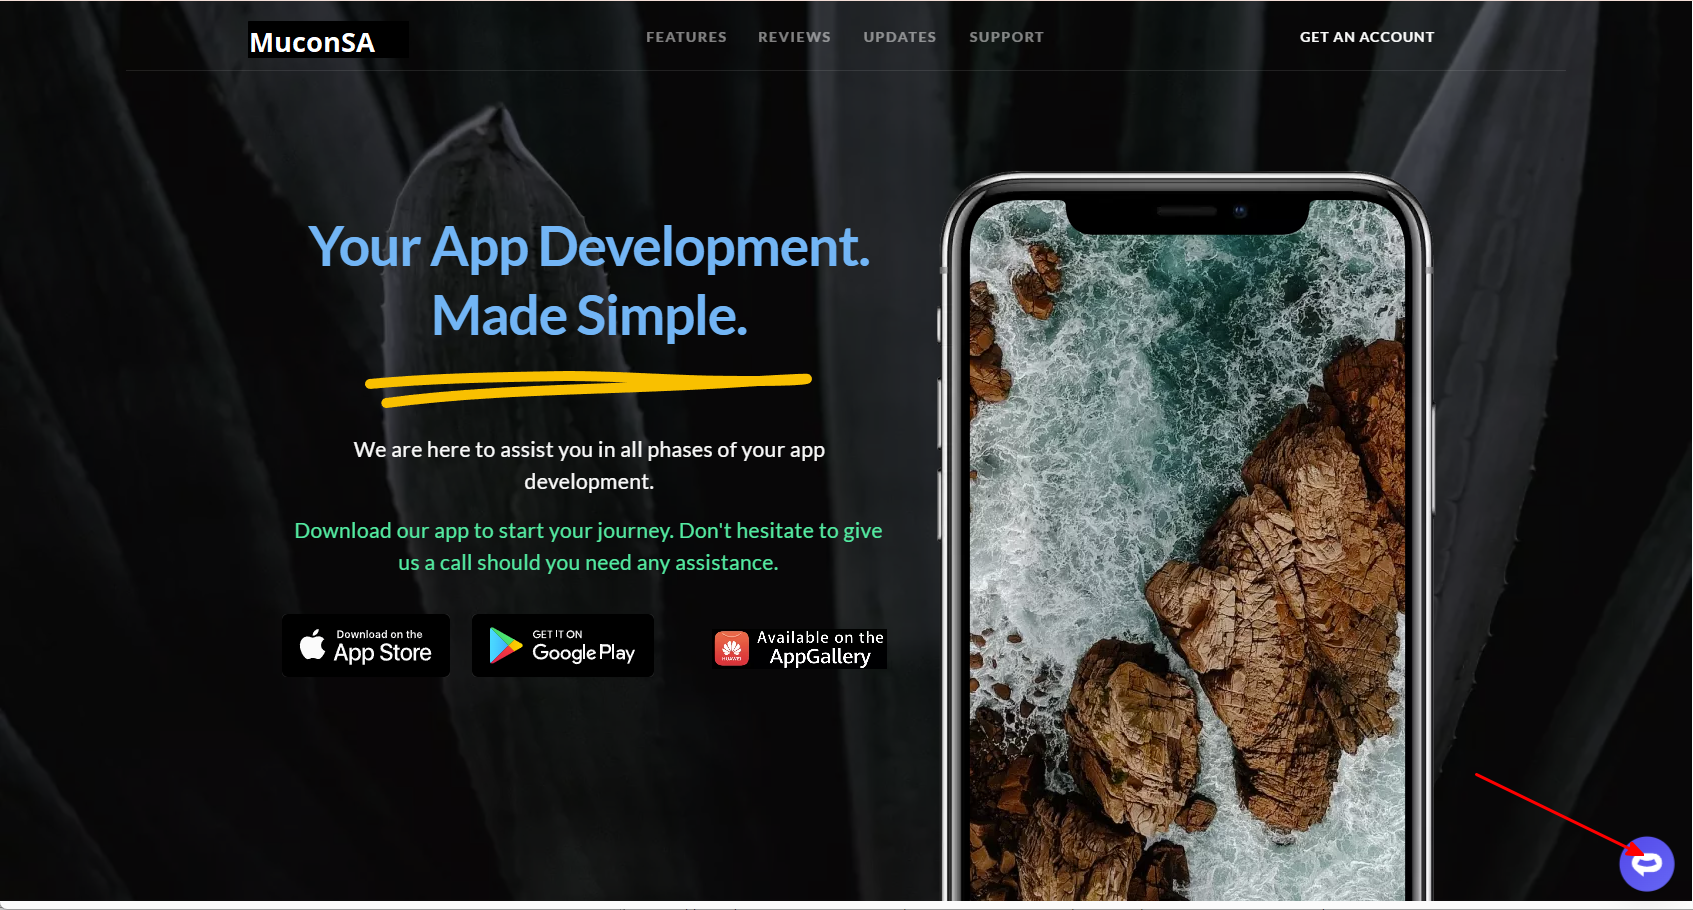
10. Your AI support agent button will now be displayed on your **Siter.io** website page
11. If you click on the button it will display the AI support agent dialogue
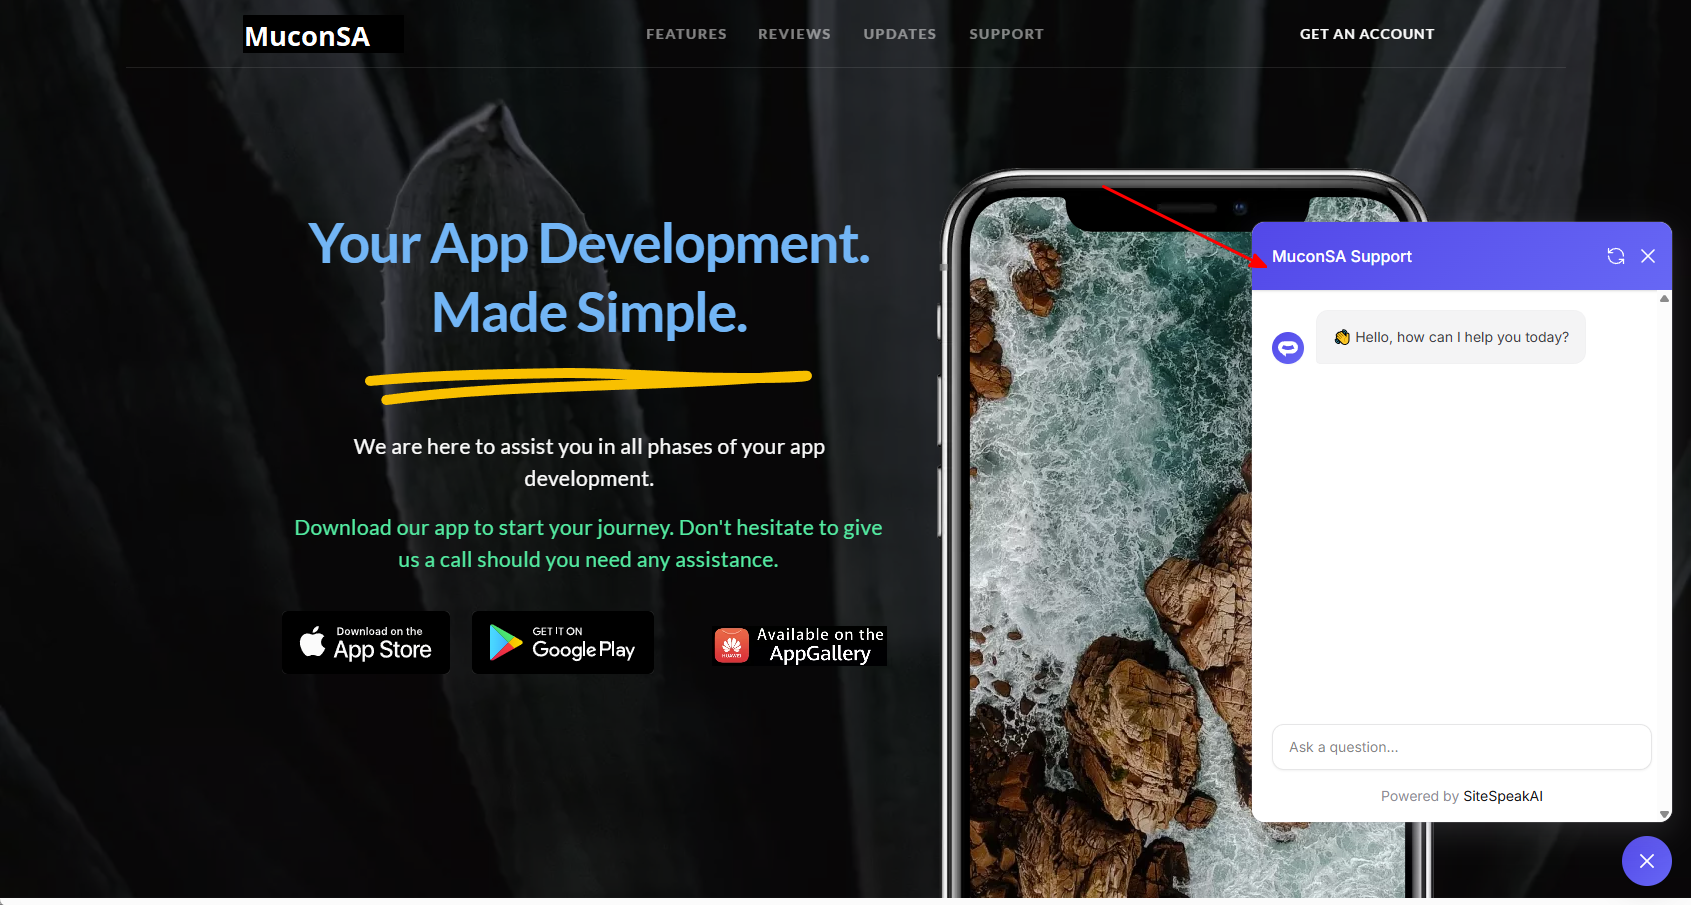
Your AI support agent has now been added to your **Siter.io** website and your visitors/customers can start interacting with it!
***
Join over 1000+ businesses, websites and startups automating their customer service and other tasks with a custom trained AI agent.
### In Siter.io
**Please note**:
To insert Custom HTML in **Siter.io**, you can use the **Code Tool** element to insert your snippet per page, or the **Head Code Injection** option under the **Custom Code** settings for site-wide integration.
Unfortunately, the **Head Code Injection** setting doesn't work properly with SitespeakAI, so we will look at using the **Code Tool** element. Due to the fact that this provides insertion per page (which is a tedious option), we will create a **Component** that contains the snippet and can then be added on each page. This will then have the advantage of editing once and can then be applied to wherever you use the Component. Sounds confusing? Maybe, but if you follow my instructions it should be quite easy.
Let's continue embedding our clever little AI support agent.
1. Log into your **Siter.io** account and on the dashboard, select the site you want to add your AI support agent to.

2. Make sure the **Pages** tab is selected, click on the hamburger menu and select **Open in Editor** to start editing your website page.

3. Select the **Code Tool** in the lefthand toolbar and then place the element on your project page (it doesn't matter where you put it, the snippet itself won't be displayed, only the actual Agent will be displayed at the bottom of your page).

4. A gray placeholder box will appear on your project page. Click on **Edit the code** in the righthand toolbar

5. Insert your AI support agent snippet in the provided text box

6. Click on the **Layers** toolbar item to display the layers and double-click on the **Code** element

7. Rename the Code element to something specific, e.g. **Global - SitespeakAI**

8. Right-click on the renamed element, select **Create Component** and click on **Publish**

9. The newly created component is now available under **Components**. It can now be added to any page in the project that is part of the website. If you make changes to this component (i.e. modify the snippet content) then it will be applied to all instances where you use this component.

10. Your AI support agent button will now be displayed on your **Siter.io** website page

11. If you click on the button it will display the AI support agent dialogue

Your AI support agent has now been added to your **Siter.io** website and your visitors/customers can start interacting with it!
***
Join over 1000+ businesses, websites and startups automating their customer service and other tasks with a custom trained AI agent.