> ## Documentation Index
> Fetch the complete documentation index at: https://sitespeak.ai/docs/llms.txt
> Use this file to discover all available pages before exploring further.
# How to add a ChatGPT AI support agent to Squarespace
> How to add your custom ChatGPT trained AI support agent to your Squarespace website.
You want to embed your custom trained AI support agent in your **Squarespace** website page. Here's how to add an AI support agent to Squarespace with SiteSpeakAI.
In this tutorial, I'll show you how to add a ChatGPT AI chatbot to your Squarespace website. We'll create and train it on your own content, then add it to your site so it can answer your visitors' questions around the clock.
Before you can add your agent to Squarespace, you need to create and train it. After you log in to SiteSpeak, you land on the Get Started page, which walks you through it in five quick steps. First, give your agent a name. This is the name your visitors will see when they chat with it. Click Save and Continue to create the agent. Next, add the website you want your agent to learn from. For this example I'll use snapwidget.com. Click Save and Continue, and SiteSpeak crawls the site to find pages it can train on. In a few seconds, it finds the main pages on the site. SiteSpeak selects those pages for you. Click Save and Continue to train your agent on them. SiteSpeak now trains your agent on that content automatically. Once it finishes, your agent is ready to answer questions, and you can add it to your Squarespace website.
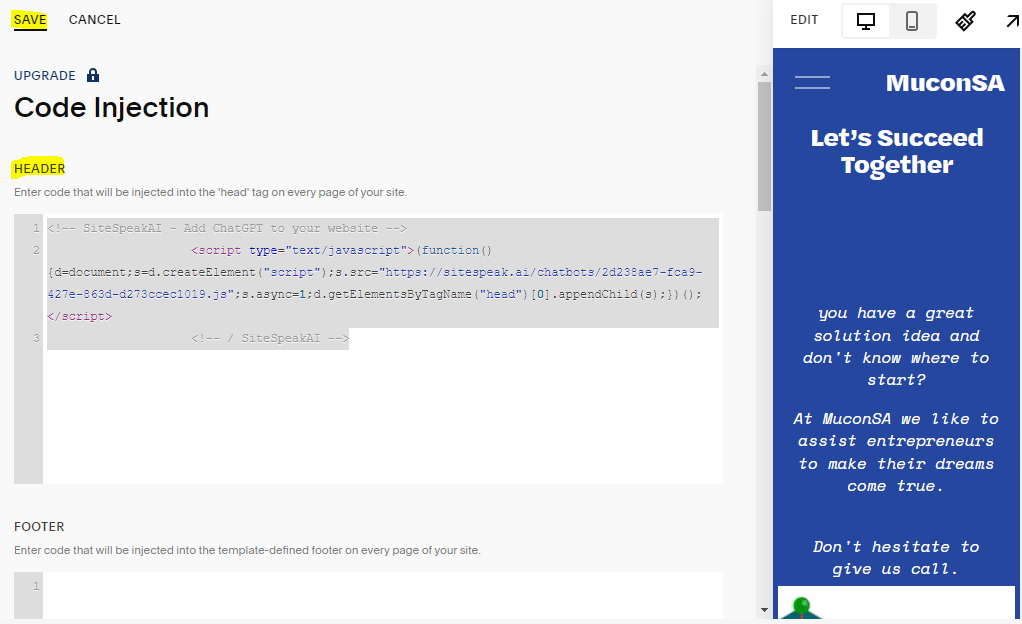
Once your agent is trained, open Install Agent in SiteSpeak and copy your JavaScript snippet. Code Injection on Squarespace needs a Business or Commerce plan. Log in to Squarespace and open the site you want to edit by clicking Website. In the Pages menu, scroll down to Utilities and select Website Tools. Under Website Tools, choose Code Injection. Paste your SiteSpeakAI snippet into the Header section, then click Save. Click Preview to see your agent on your live site. Your chatbot button now appears on your Squarespace website. Visitors can click it to open the chat and start asking questions, around the clock.
And that's it. Your ChatGPT AI chatbot is now live on your Squarespace site, trained on your content and ready to help your visitors.
**Squarespace** is a website building platform that allows users to create and host professional-looking websites and online stores. It’s known for its ease of use and beautiful, modern templates.
**Website URL**: [Squarespace](https://www.squarespace.com/)
Code Injection is available on Squarespace **Business** and **Commerce** plans only. If you're on a Personal plan, you'll need to upgrade to add custom code to your site.
## Add your AI support agent to your **Squarespace** website
### In SiteSpeakAI
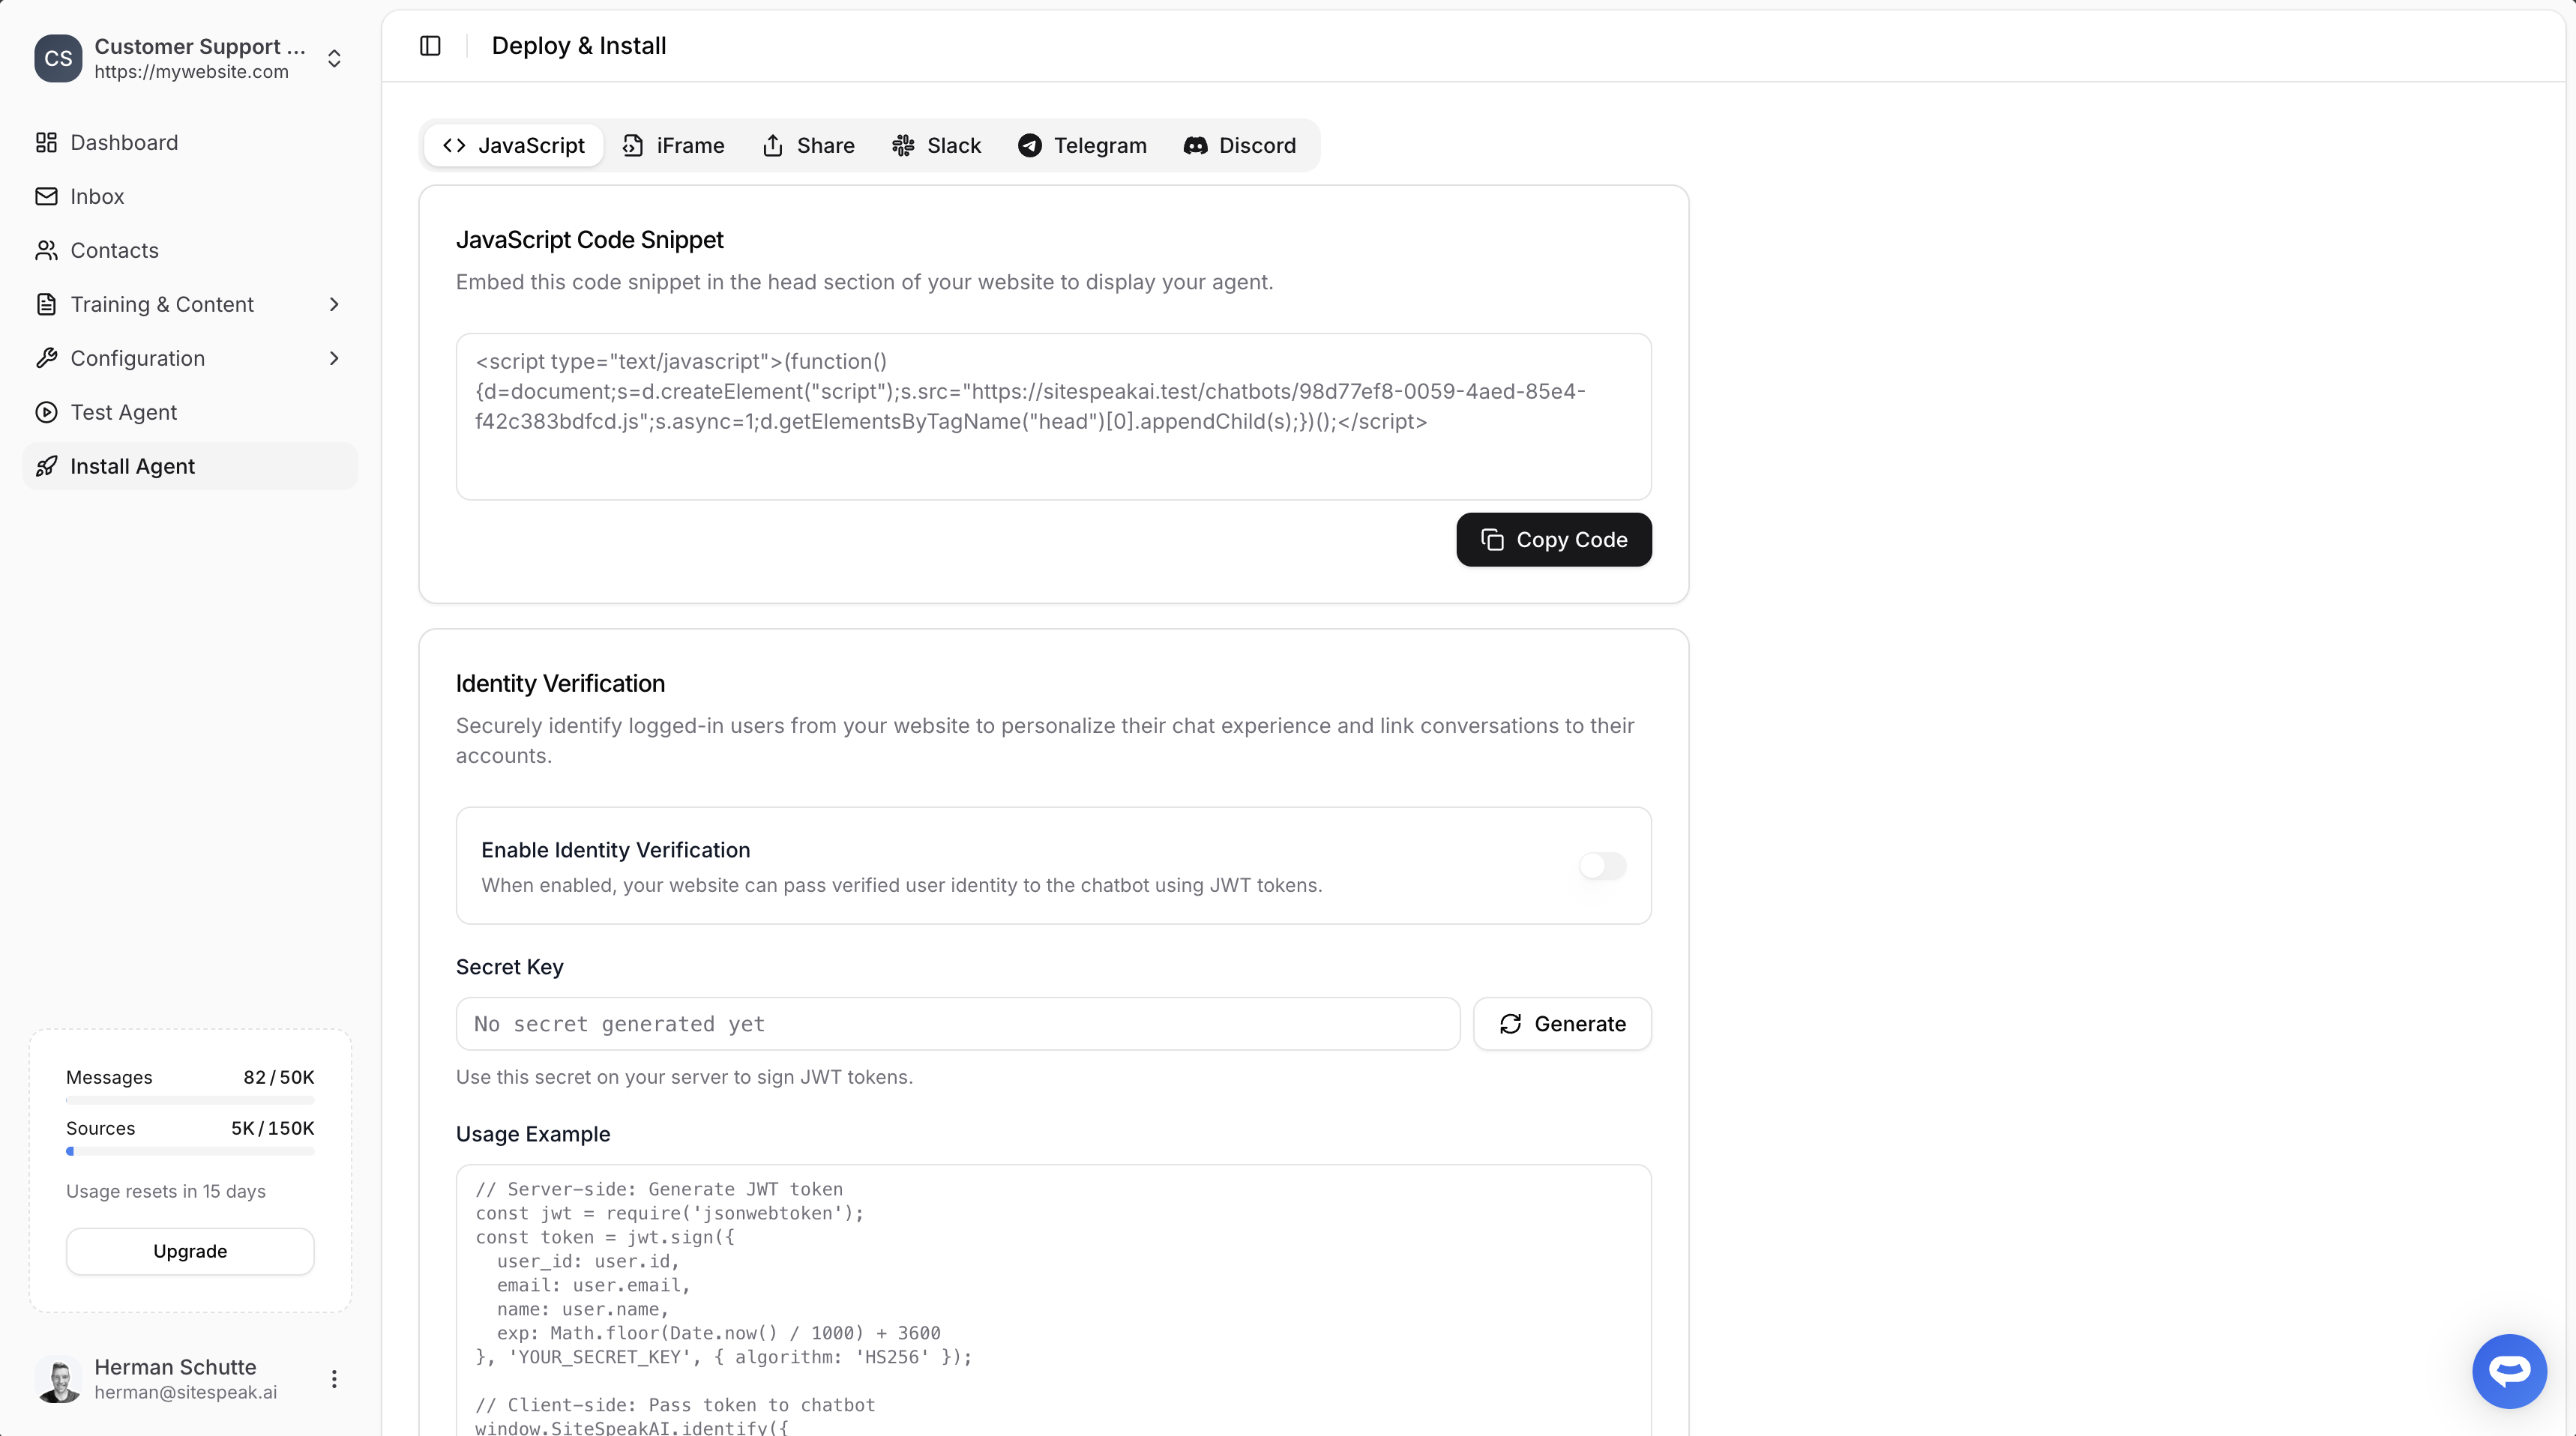
Select your chatbot from the dropdown menu at the top, click on the **Install Agent** section in the sidebar, then click on the **Copy Code** button to copy your code snippet.
### In Squarespace
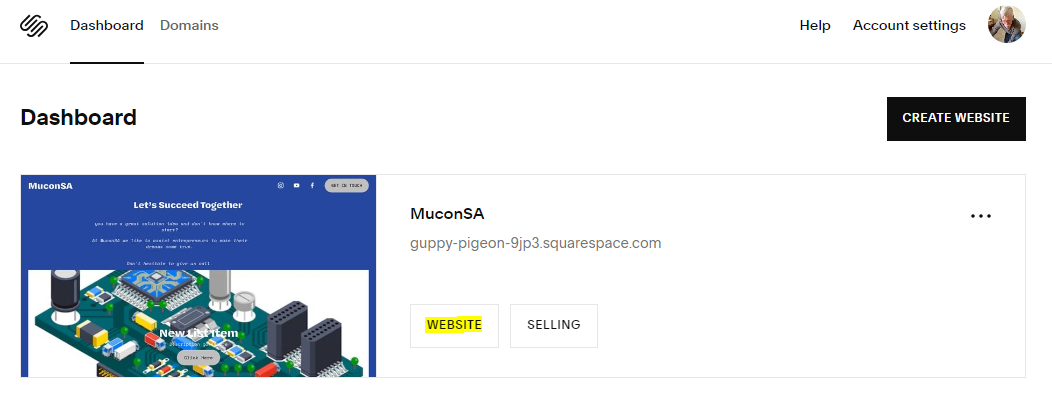
1. Log in to your Squarespace account and click on **WEBSITE** for the site you want to edit
#### A. Adding your AI support agent site wide
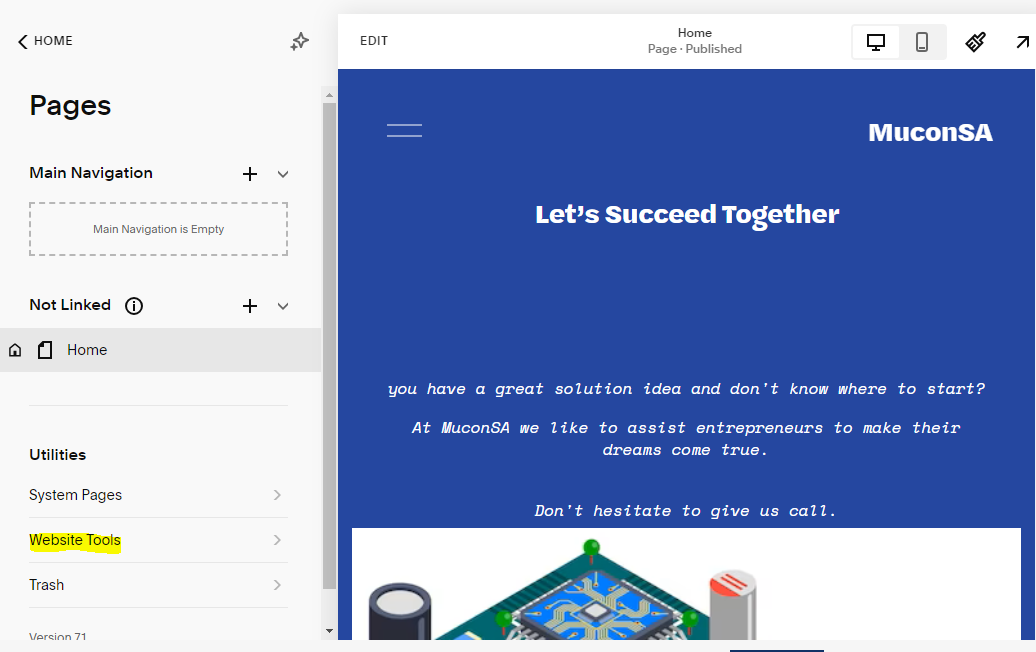
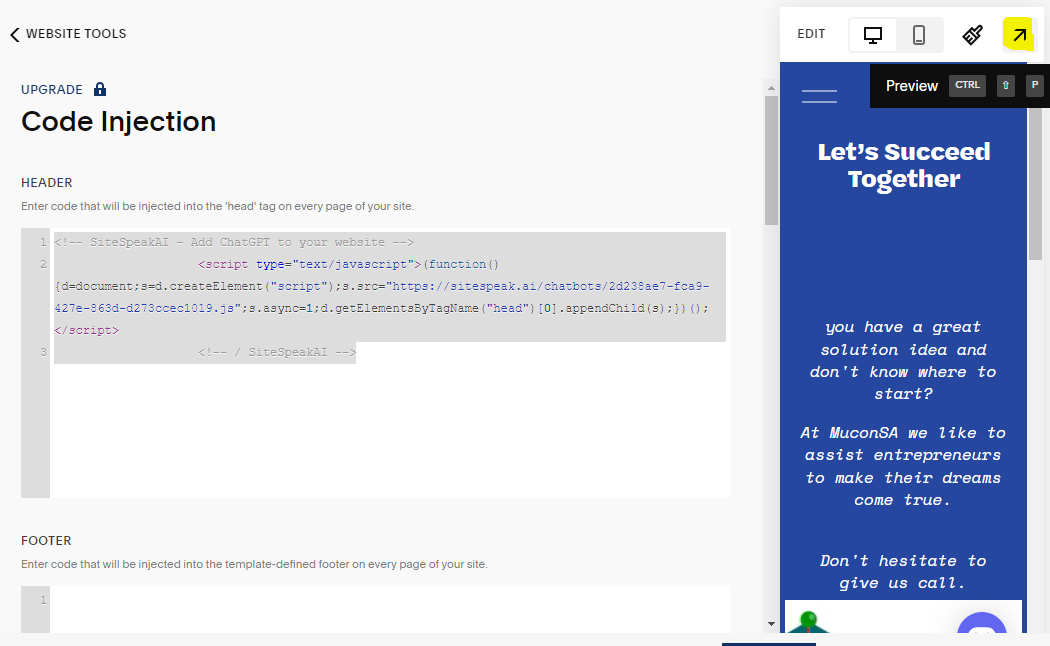
1. Under **Utilities** on the **Pages** left-side menu, select **Website Tools**
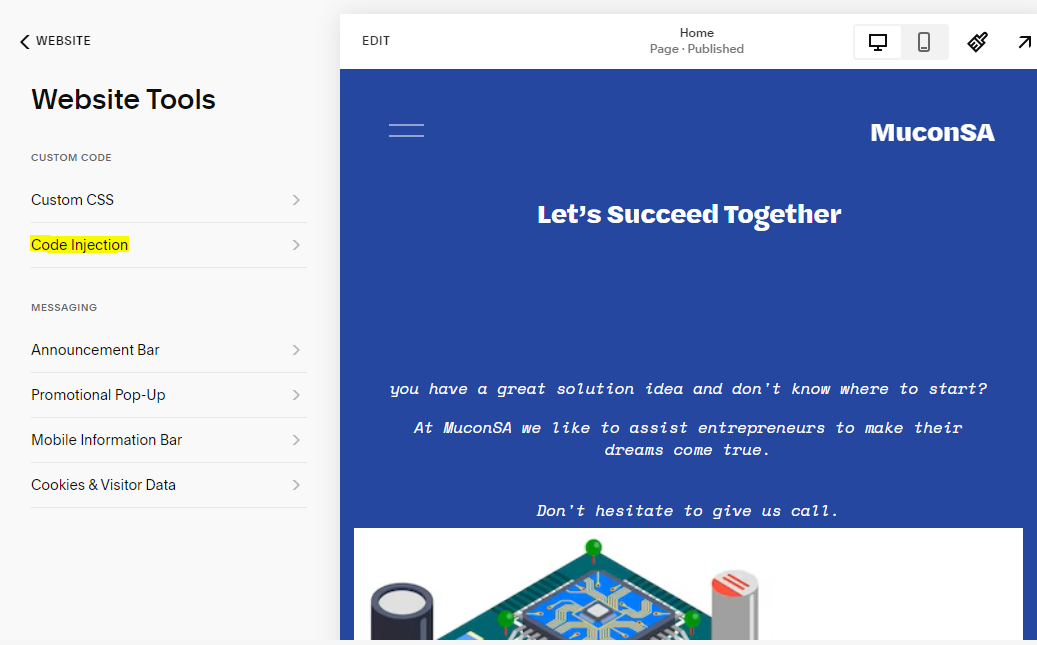
2. Under **Website Tools**, select **Code Injection**
3. Paste your code snippet in the **Header** section and click **Save**
4. Click **Preview** to see your AI support agent on your live website
5. Your AI support agent button will now appear on your website

6. Visitors can click the button to open the AI support agent chat and start asking questions
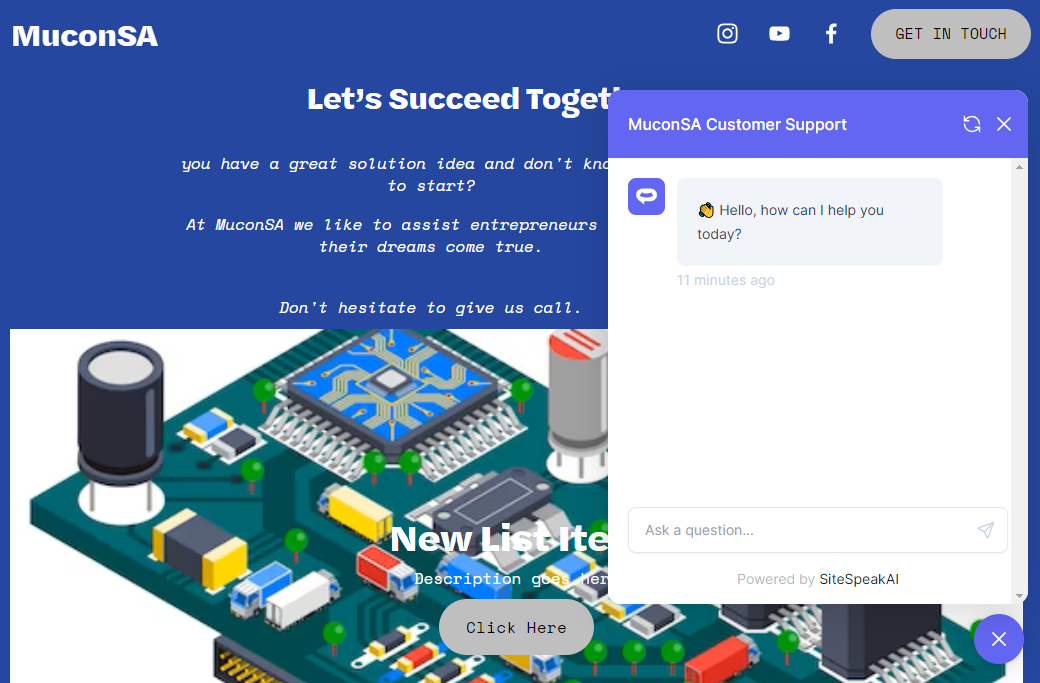
Your AI support agent is now live on your **Squarespace** website.
#### B. Adding the AI support agent to specific pages only
If you want the AI support agent to appear only on certain pages instead of your entire site:
1. In Squarespace, go to the specific page where you want the AI support agent to be displayed
2. Click the gear icon to open **Page Settings**
3. Select the **Advanced** tab
4. Paste your code snippet in the **Page Header Code Injection** field
5. Click **Save**
This method lets you add the AI support agent to individual pages without affecting your whole site.
## Troubleshooting
**AI support agent not appearing?** Make sure you clicked **Save** after adding your code, then refresh your website. It may take a moment for changes to appear.
**Style conflicts with your theme?** The AI support agent widget is designed to work with all **Squarespace** templates. If you notice any visual issues, try adjusting the AI support agent position in your SiteSpeakAI dashboard settings.
**AI support agent position overlapping with elements?** You can customize the AI support agent's position (bottom-left, bottom-right) and offset in your SiteSpeakAI appearance settings to avoid overlapping with Squarespace elements like sticky footers or cookie banners.
**Code Injection option not available?** You'll need a Squarespace **Business** or **Commerce** plan to use Code Injection. Check your plan settings to confirm.
***
Join over 1000+ businesses, websites and startups automating their customer service and other tasks with a custom trained AI agent.
 ### In Squarespace
1. Log in to your Squarespace account and click on **WEBSITE** for the site you want to edit

#### A. Adding your AI support agent site wide
1. Under **Utilities** on the **Pages** left-side menu, select **Website Tools**

2. Under **Website Tools**, select **Code Injection**

3. Paste your code snippet in the **Header** section and click **Save**

4. Click **Preview** to see your AI support agent on your live website

5. Your AI support agent button will now appear on your website

6. Visitors can click the button to open the AI support agent chat and start asking questions

Your AI support agent is now live on your **Squarespace** website.
#### B. Adding the AI support agent to specific pages only
If you want the AI support agent to appear only on certain pages instead of your entire site:
1. In Squarespace, go to the specific page where you want the AI support agent to be displayed
2. Click the gear icon to open **Page Settings**
3. Select the **Advanced** tab
4. Paste your code snippet in the **Page Header Code Injection** field
5. Click **Save**
This method lets you add the AI support agent to individual pages without affecting your whole site.
## Troubleshooting
**AI support agent not appearing?** Make sure you clicked **Save** after adding your code, then refresh your website. It may take a moment for changes to appear.
**Style conflicts with your theme?** The AI support agent widget is designed to work with all **Squarespace** templates. If you notice any visual issues, try adjusting the AI support agent position in your SiteSpeakAI dashboard settings.
**AI support agent position overlapping with elements?** You can customize the AI support agent's position (bottom-left, bottom-right) and offset in your SiteSpeakAI appearance settings to avoid overlapping with Squarespace elements like sticky footers or cookie banners.
**Code Injection option not available?** You'll need a Squarespace **Business** or **Commerce** plan to use Code Injection. Check your plan settings to confirm.
***
### In Squarespace
1. Log in to your Squarespace account and click on **WEBSITE** for the site you want to edit

#### A. Adding your AI support agent site wide
1. Under **Utilities** on the **Pages** left-side menu, select **Website Tools**

2. Under **Website Tools**, select **Code Injection**

3. Paste your code snippet in the **Header** section and click **Save**

4. Click **Preview** to see your AI support agent on your live website

5. Your AI support agent button will now appear on your website

6. Visitors can click the button to open the AI support agent chat and start asking questions

Your AI support agent is now live on your **Squarespace** website.
#### B. Adding the AI support agent to specific pages only
If you want the AI support agent to appear only on certain pages instead of your entire site:
1. In Squarespace, go to the specific page where you want the AI support agent to be displayed
2. Click the gear icon to open **Page Settings**
3. Select the **Advanced** tab
4. Paste your code snippet in the **Page Header Code Injection** field
5. Click **Save**
This method lets you add the AI support agent to individual pages without affecting your whole site.
## Troubleshooting
**AI support agent not appearing?** Make sure you clicked **Save** after adding your code, then refresh your website. It may take a moment for changes to appear.
**Style conflicts with your theme?** The AI support agent widget is designed to work with all **Squarespace** templates. If you notice any visual issues, try adjusting the AI support agent position in your SiteSpeakAI dashboard settings.
**AI support agent position overlapping with elements?** You can customize the AI support agent's position (bottom-left, bottom-right) and offset in your SiteSpeakAI appearance settings to avoid overlapping with Squarespace elements like sticky footers or cookie banners.
**Code Injection option not available?** You'll need a Squarespace **Business** or **Commerce** plan to use Code Injection. Check your plan settings to confirm.
***