> ## Documentation Index
> Fetch the complete documentation index at: https://sitespeak.ai/docs/llms.txt
> Use this file to discover all available pages before exploring further.
# How to add a ChatGPT AI support agent to Versoly
> How to add your custom ChatGPT trained AI support agent to your Versoly website.
You want to embed your custom trained AI support agent in your **Versoly** website page. Here's how to add an AI support agent to Versoly with SiteSpeakAI.
**Versoly** is a website builder that focuses on making it incredibly easy to create beautiful, professional-looking websites without needing any coding knowledge. It's built around a drag-and-drop interface, offering pre-designed templates and a library of customizable elements like images, fonts, and buttons. It's particularly known for its strong focus on **e-commerce**, making it a great choice for selling products online.
**Website:** [Versoly](https://versoly.com/)
## Add your chatbot to your **Versoly** website
### In SiteSpeakAI
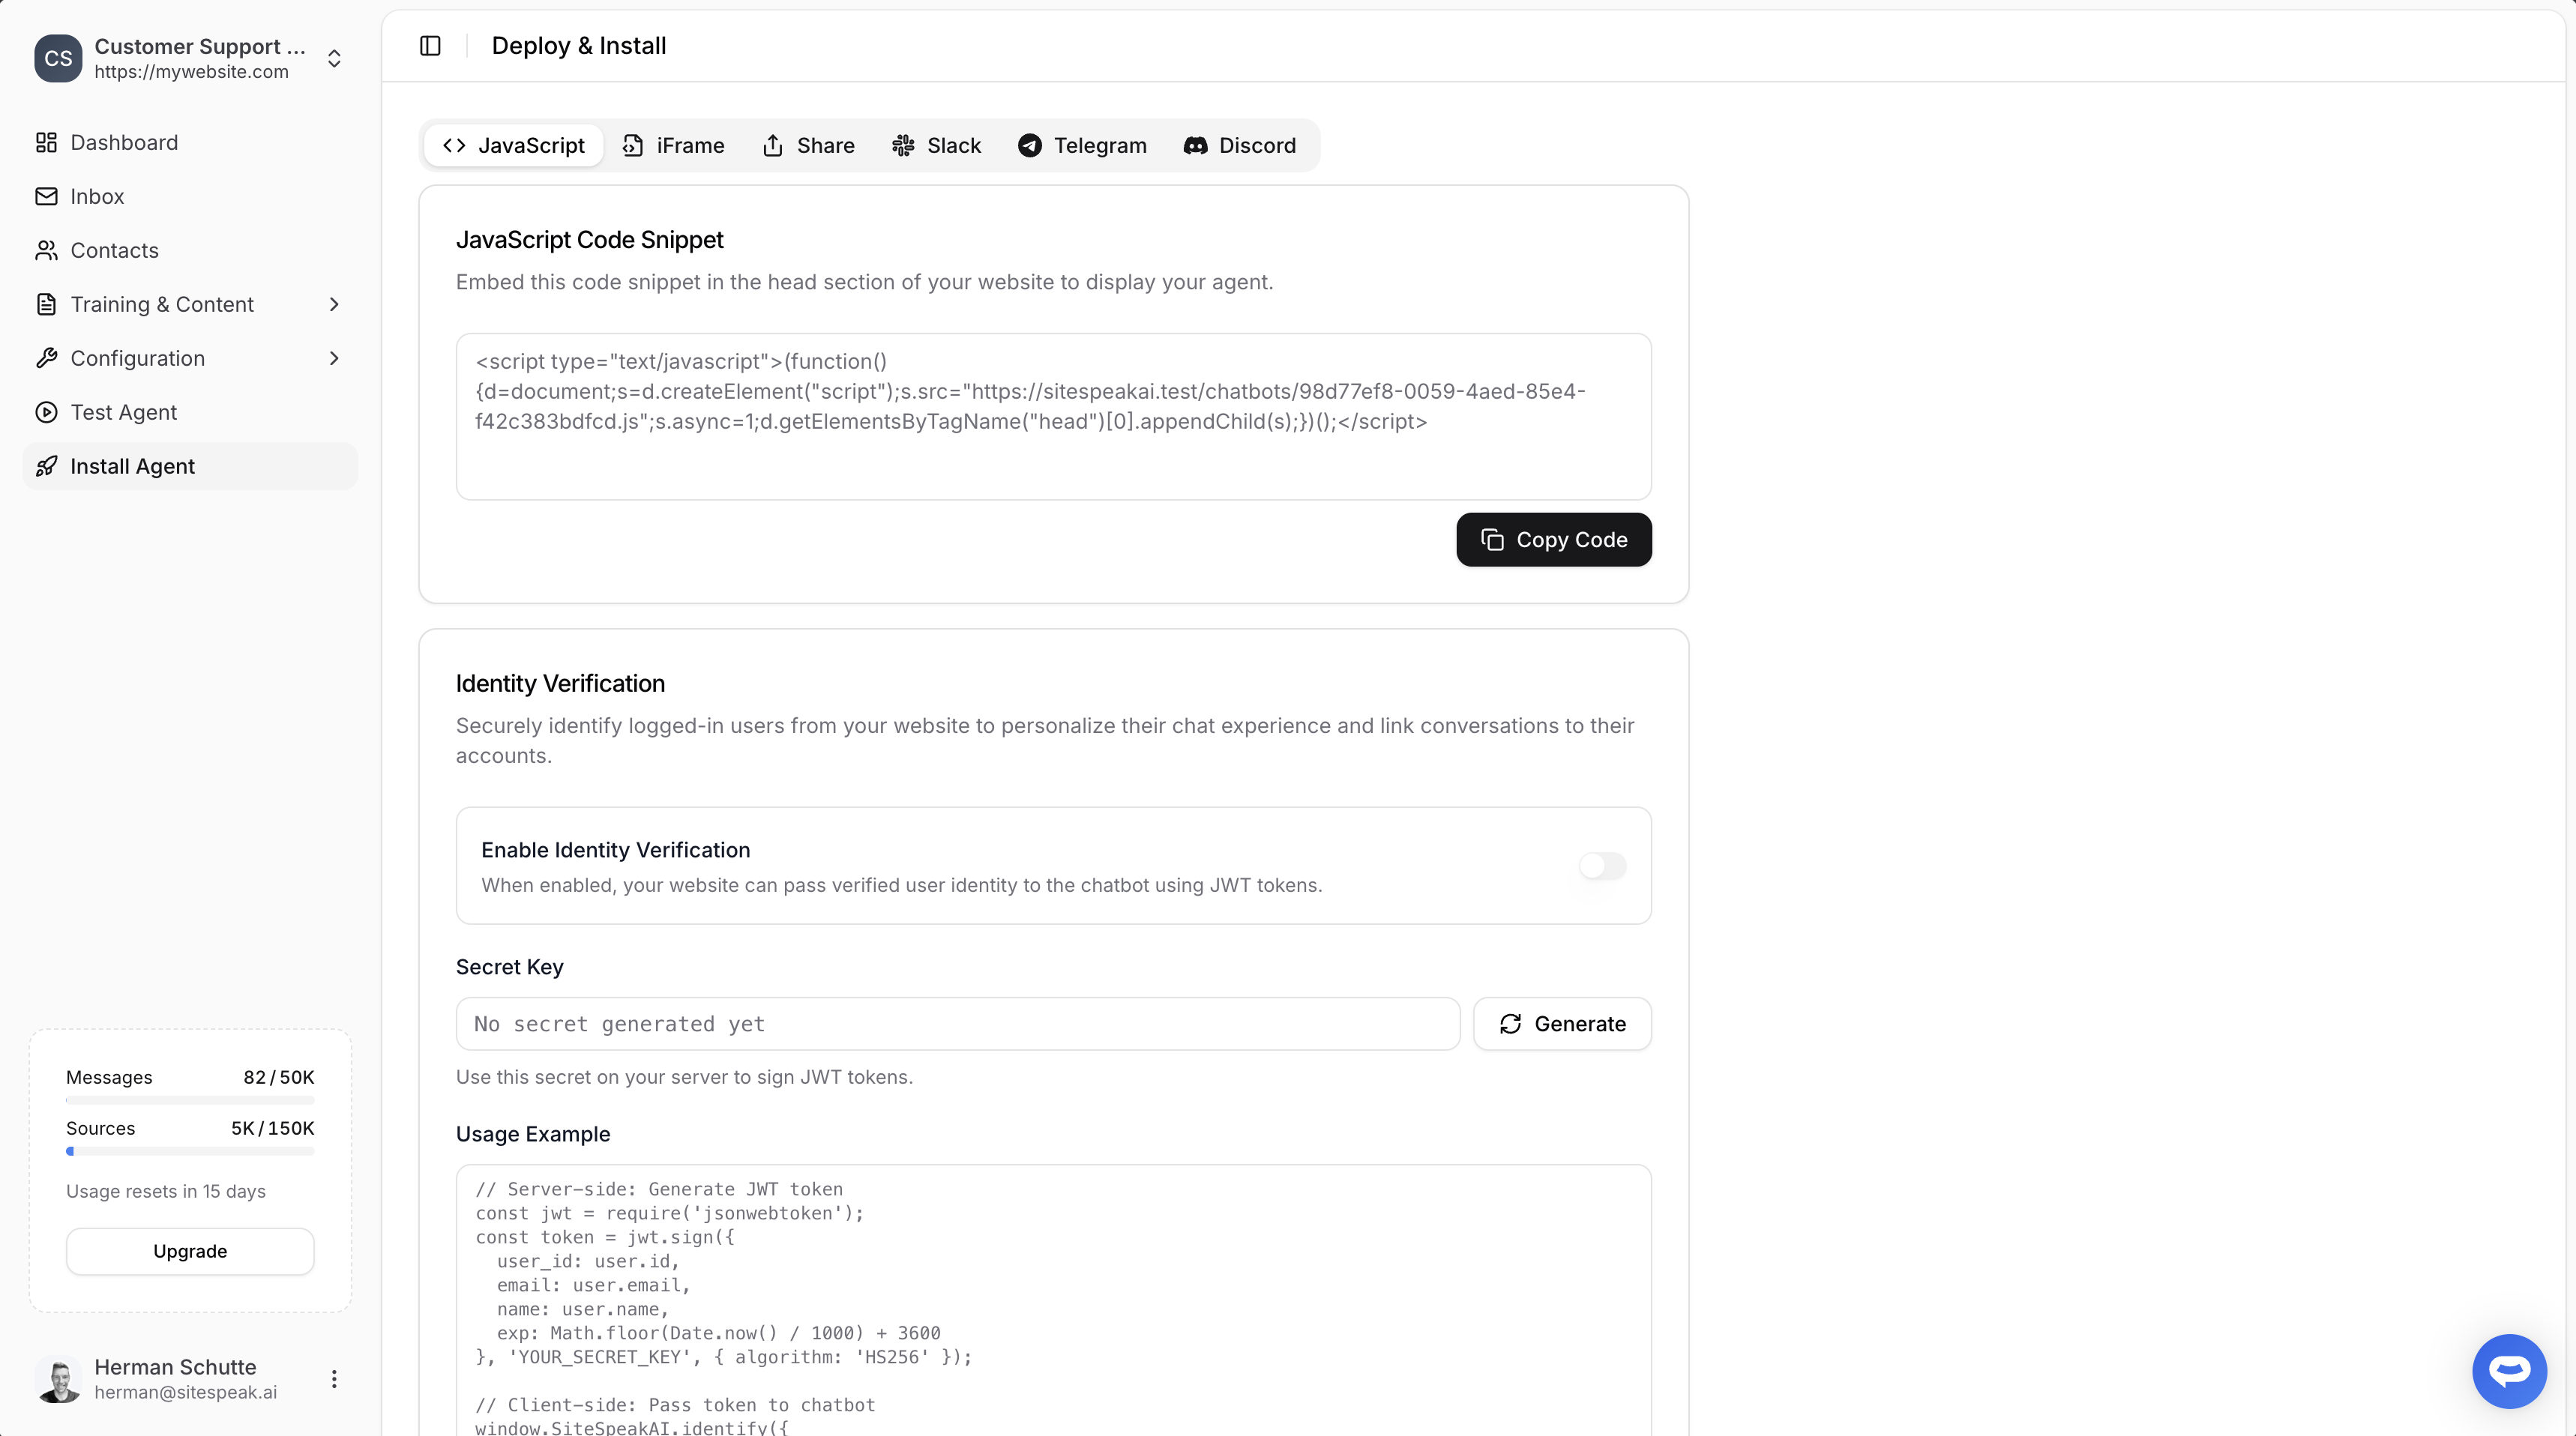
Select your chatbot from the dropdown menu at the top, click on the **Install Agent** section in the sidebar, then click on the **Copy Code** button to copy your code snippet.
 ### In Versoly
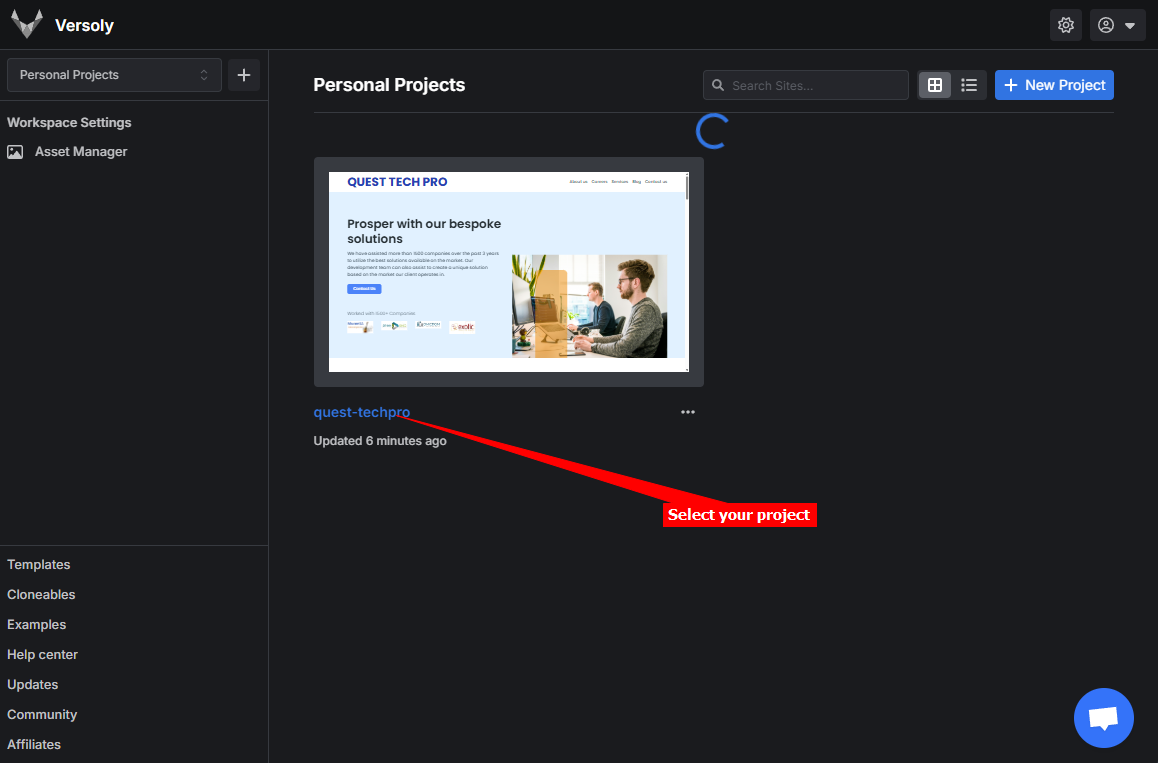
1. Log into your **Versoly** account and on the dashboard select the project you want to add your AI support agent to
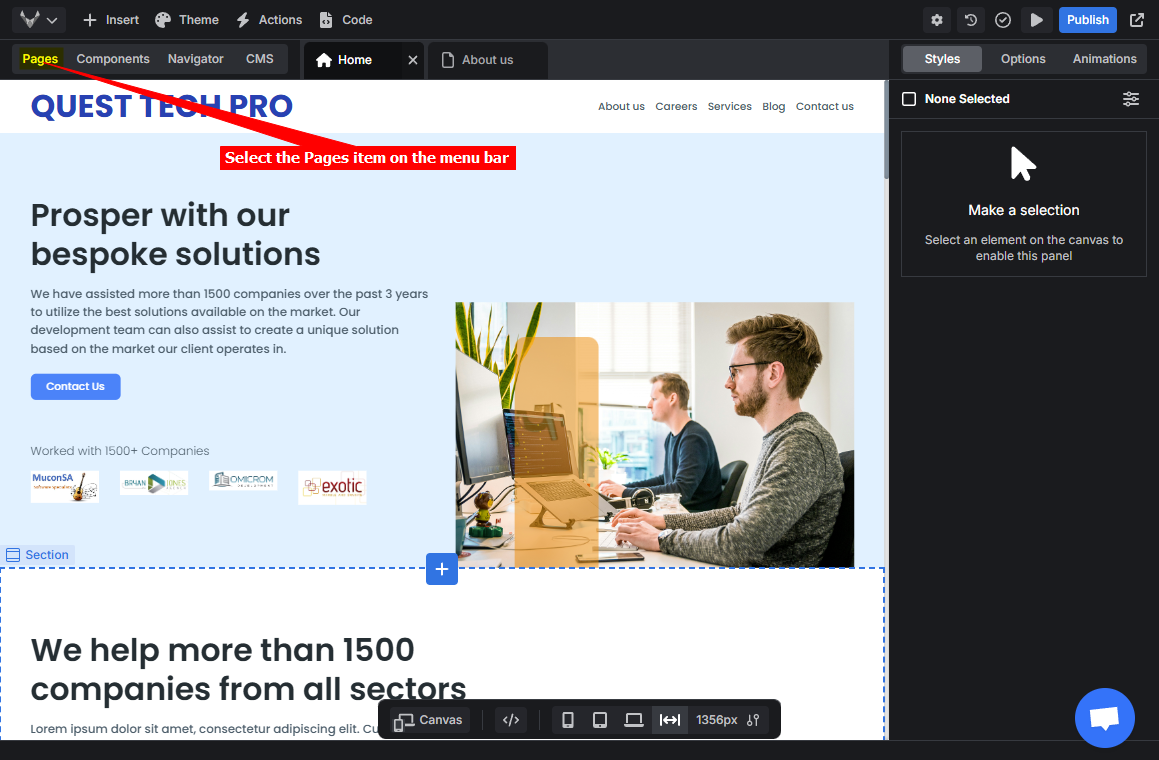
2. On the editor page select **Pages** on the top menu bar
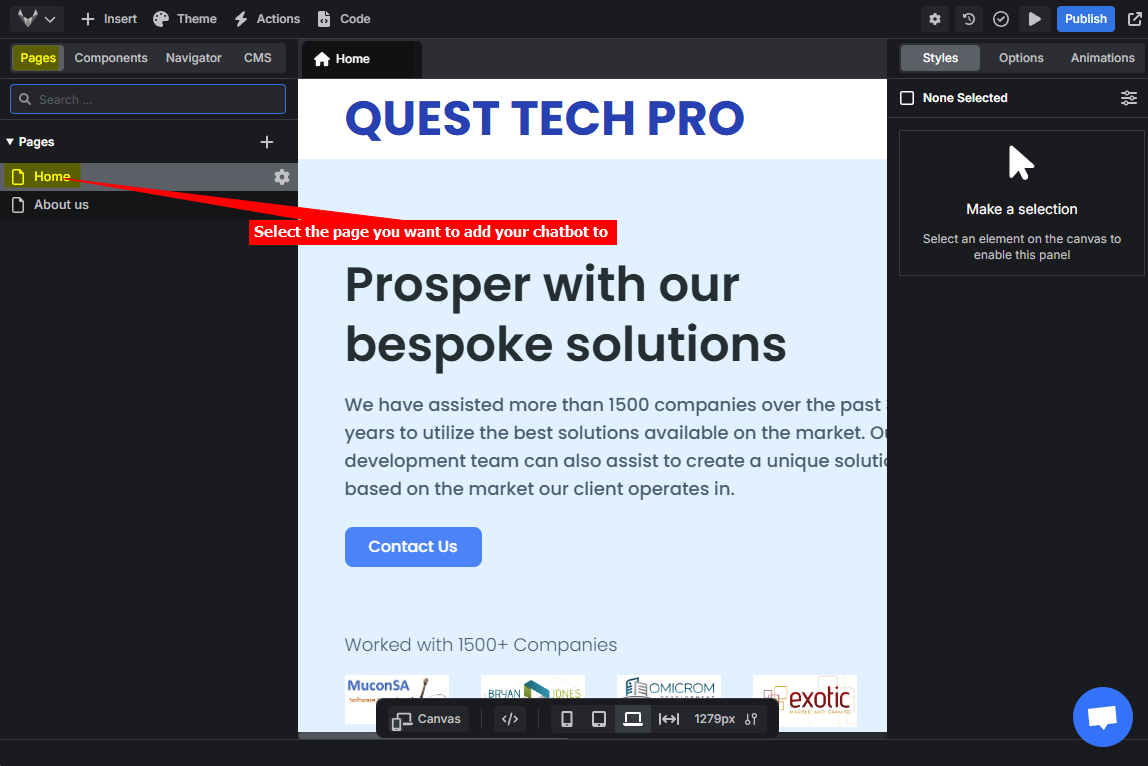
3. Select the page you want to add your snippet to
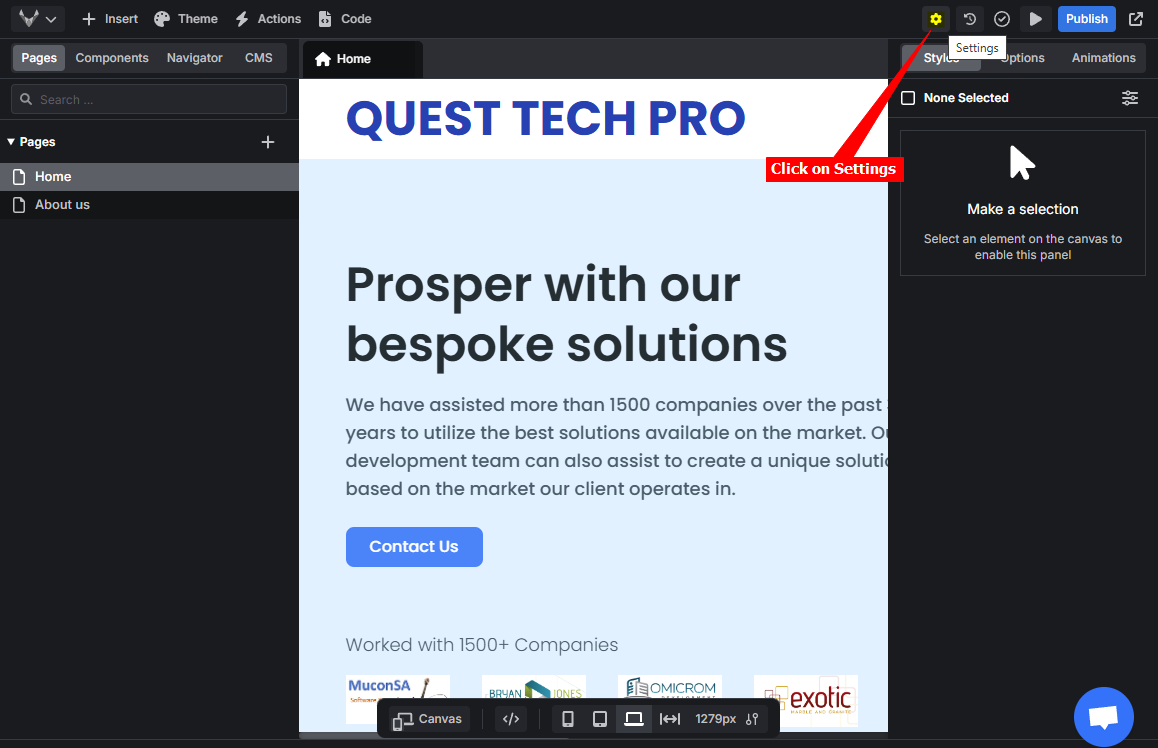
4. Click on **Settings** on the top toolbar
Note that **Versoly** allows adding your code snippet **per page** as well as **globally to all pages**.
**A. Using the per Page option**:
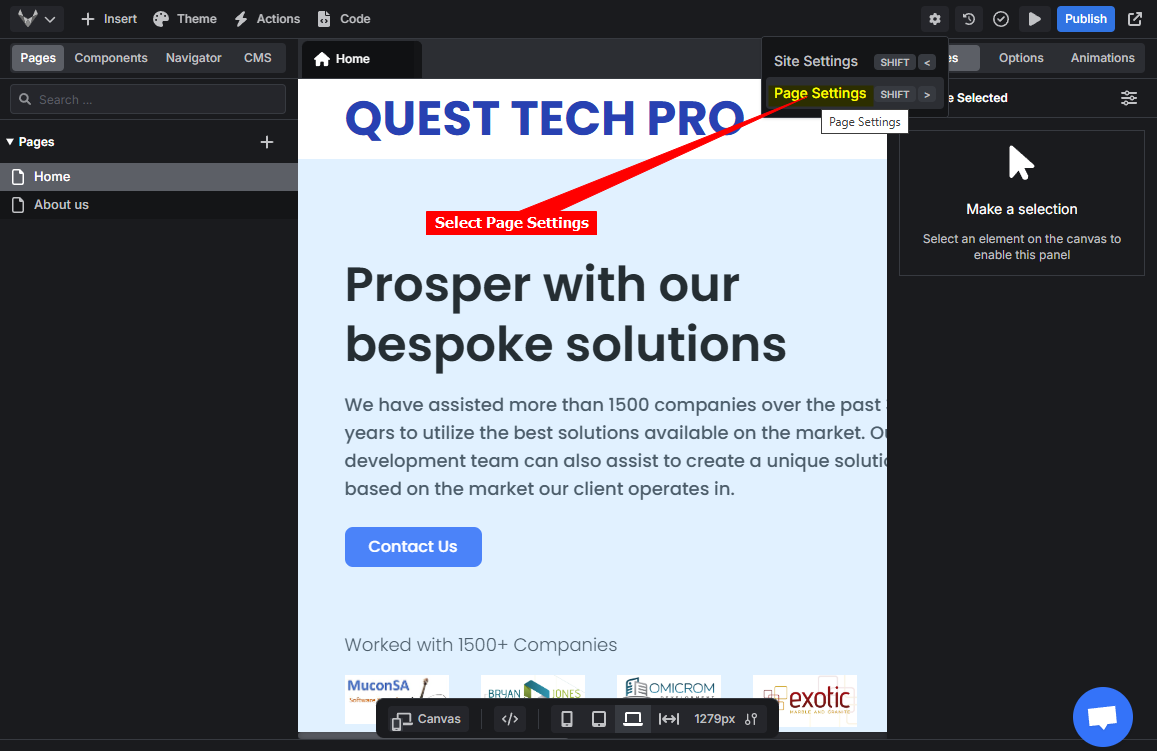
1. Select **Page Settings**
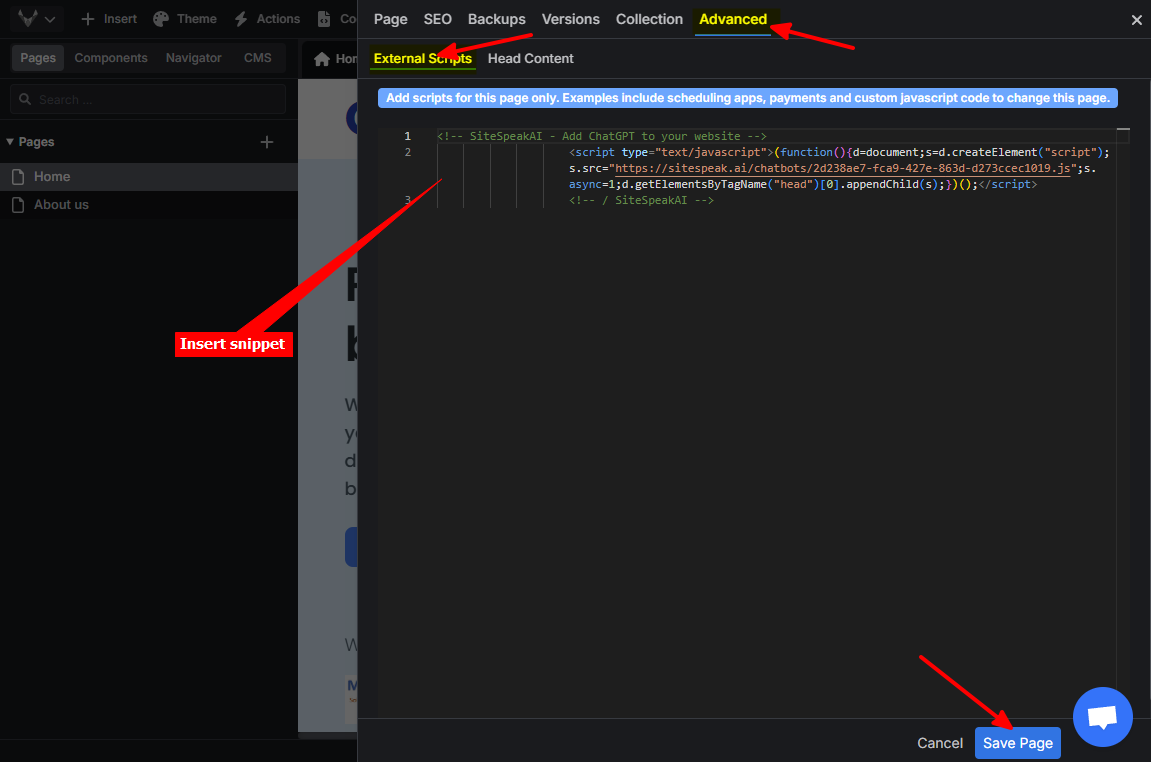
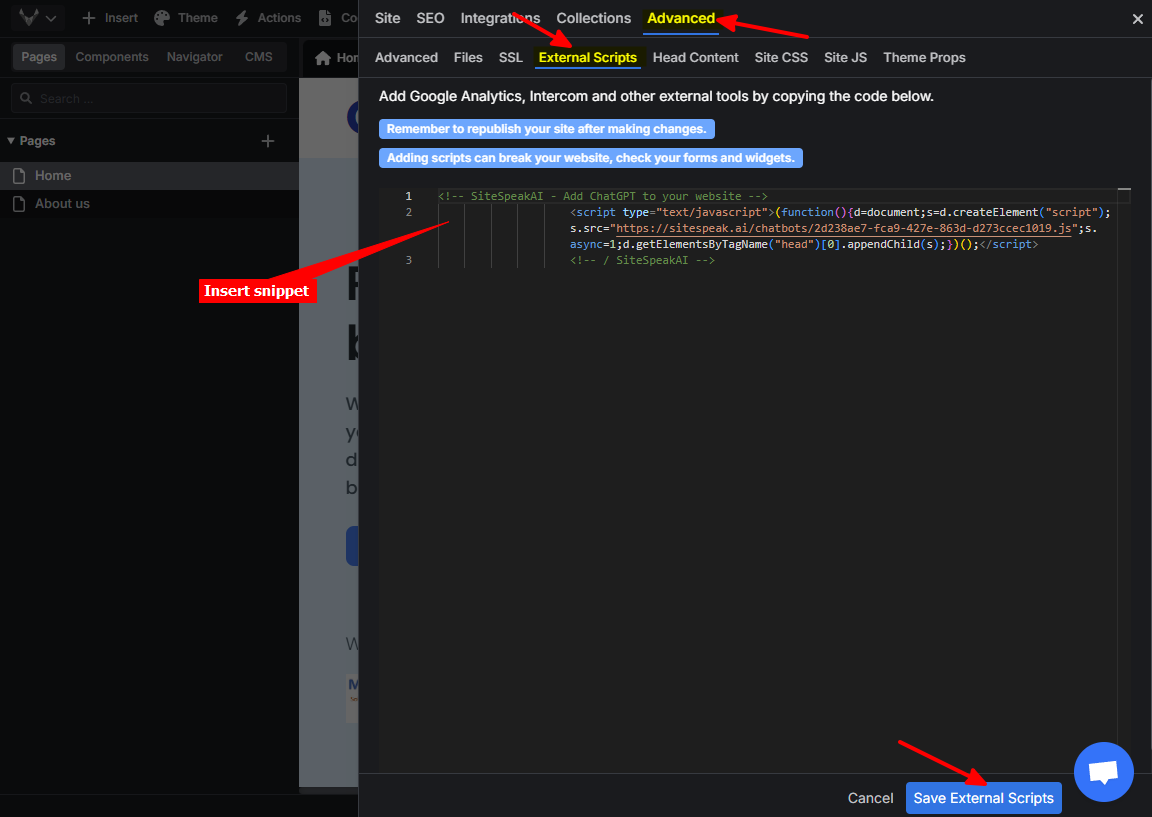
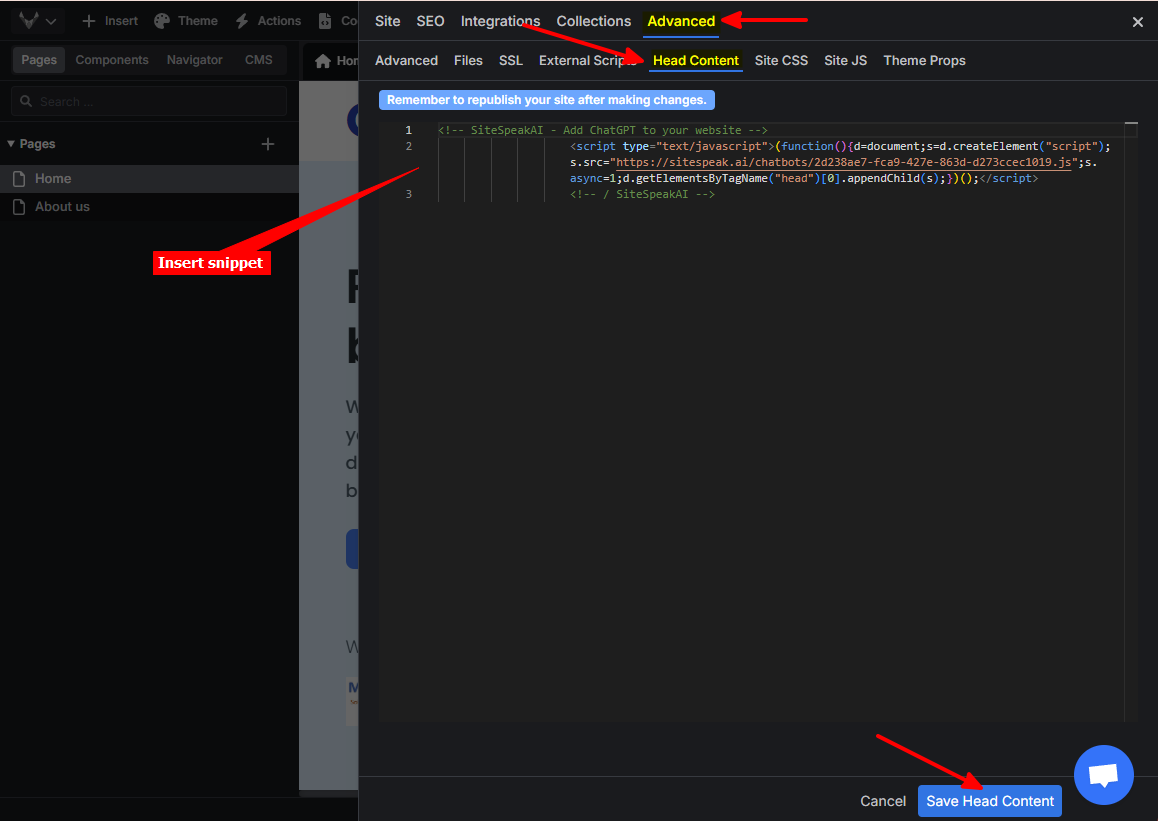
2. Select the **Advanced** tab, insert your snippet in either the **External Scripts** or the **Head Content** input text box and click on **Save Page**

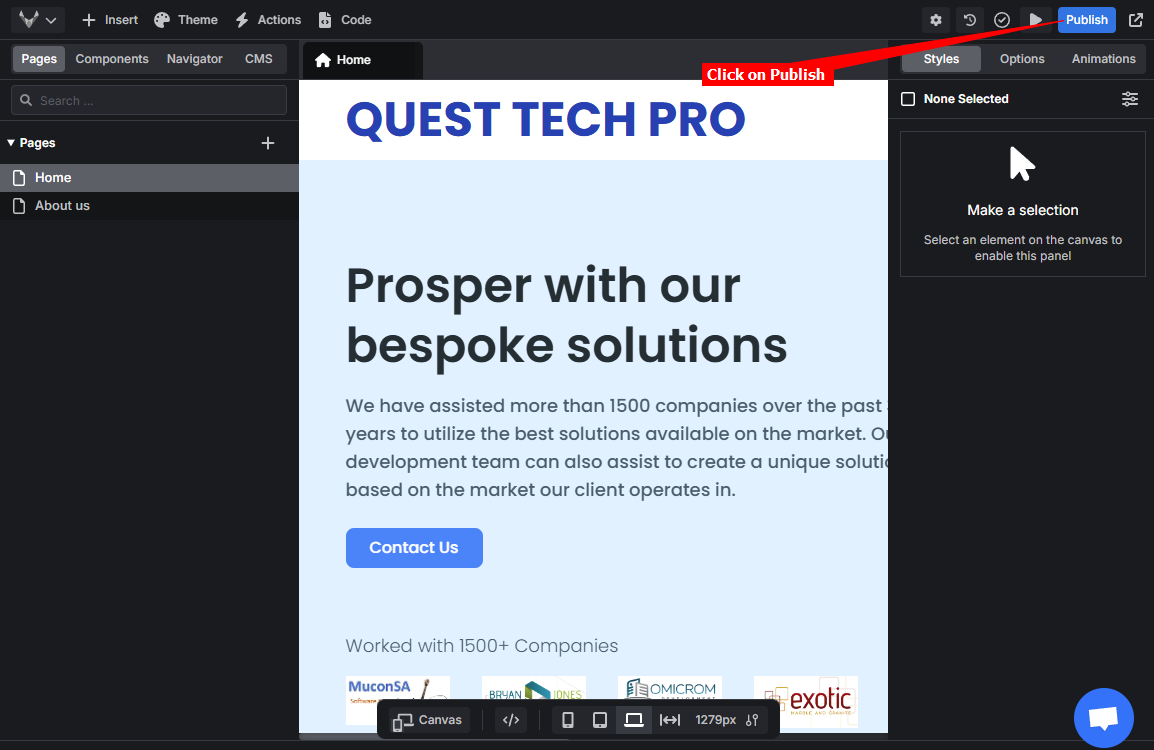
3. Click on **Publish**
**B. Using the global Site option**:
1. Click on **Site Settings**
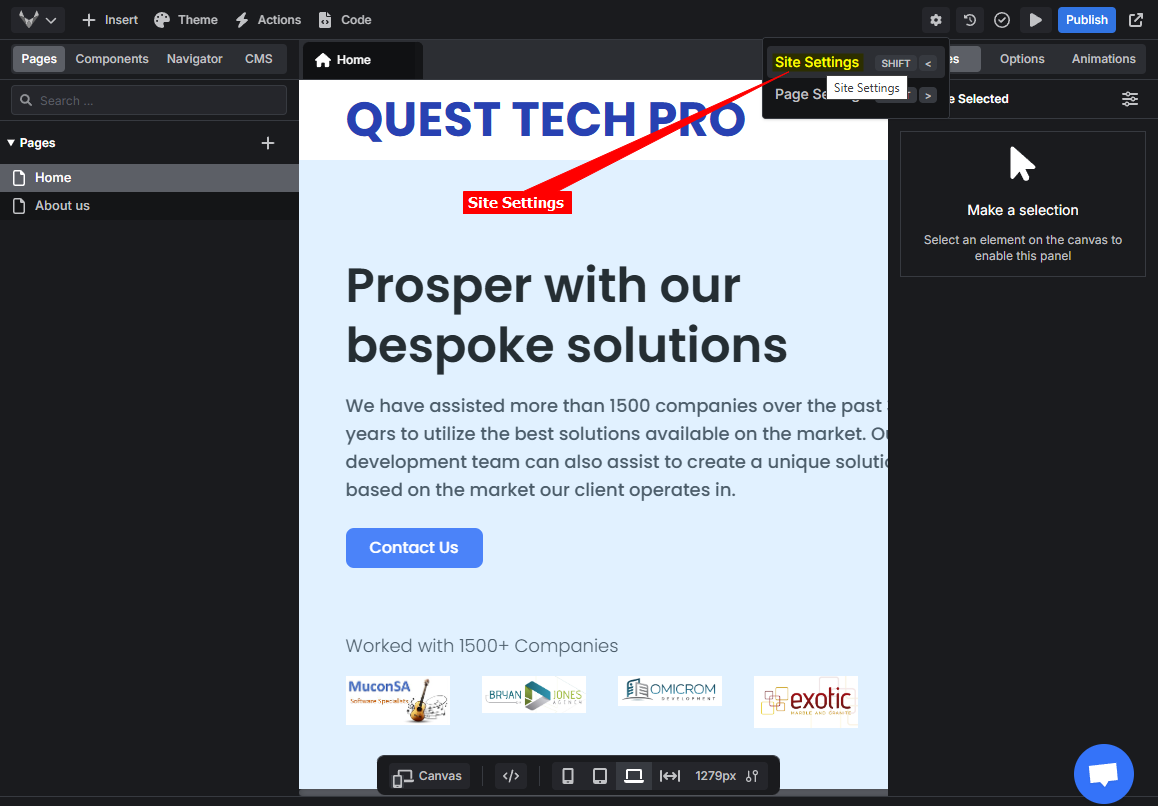
2. Select the **Advanced** tab, insert your snippet in either the **External Scripts**, the **Head Content** or the **Site JS** input text box and click on the **Save** button for the respective option
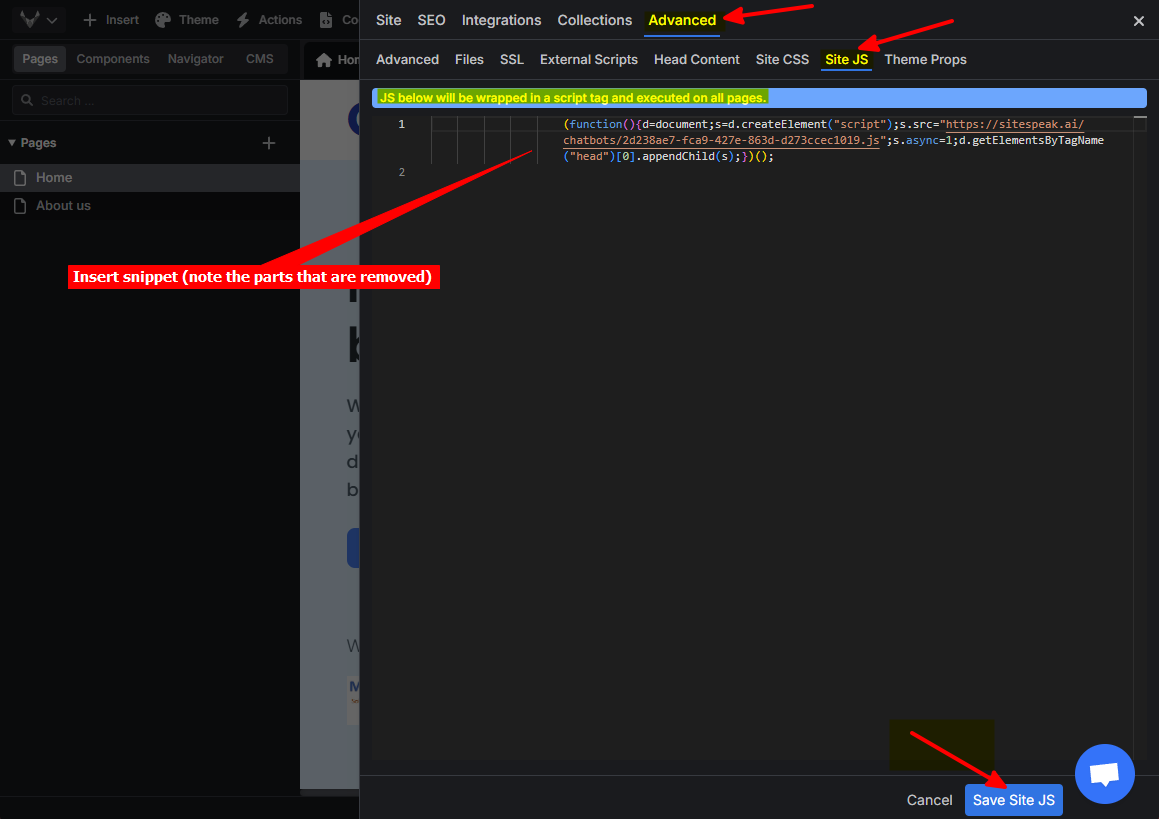
Please note that if you use the **Site JS** option, you must remove any **HTML** remark lines (``). You must also remove the script tags, **Versoly** adds its own script tags when it adds your snippet to the site pages.
3. Click on **Publish**

**C. For both options**:
1. Your AI support agent button will now be displayed on your **Versoly** website page

2. If you click on the button it will display the AI support agent dialogue
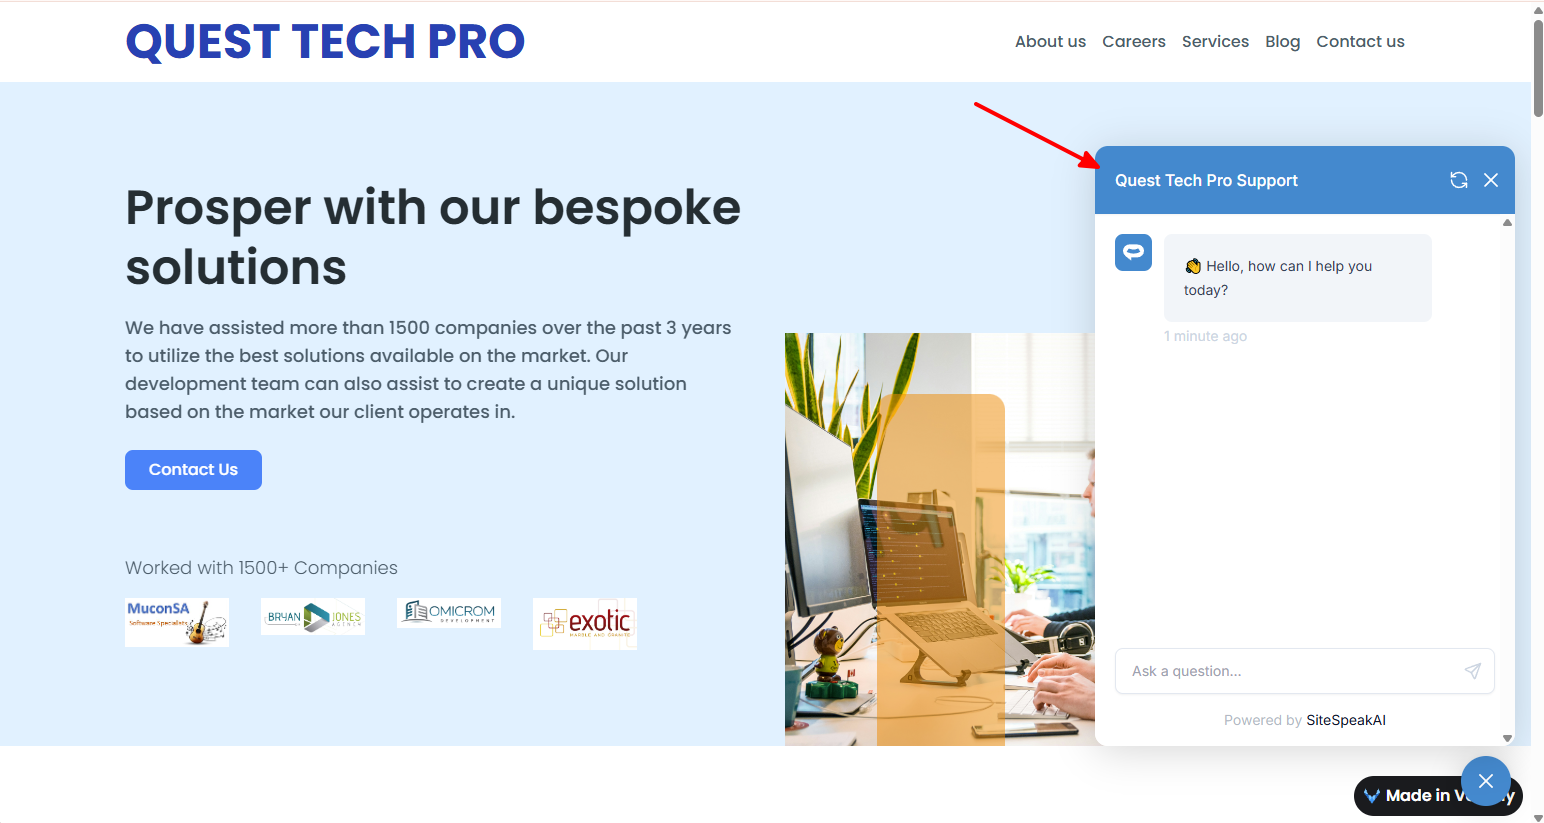
Your AI support agent has now been added to your **Versoly** website and your visitors/customers can start interacting with it!
***
Join over 1000+ businesses, websites and startups automating their customer service and other tasks with a custom trained AI agent.
### In Versoly
1. Log into your **Versoly** account and on the dashboard select the project you want to add your AI support agent to

2. On the editor page select **Pages** on the top menu bar

3. Select the page you want to add your snippet to

4. Click on **Settings** on the top toolbar

Note that **Versoly** allows adding your code snippet **per page** as well as **globally to all pages**.
**A. Using the per Page option**:
1. Select **Page Settings**

2. Select the **Advanced** tab, insert your snippet in either the **External Scripts** or the **Head Content** input text box and click on **Save Page**


3. Click on **Publish**

**B. Using the global Site option**:
1. Click on **Site Settings**

2. Select the **Advanced** tab, insert your snippet in either the **External Scripts**, the **Head Content** or the **Site JS** input text box and click on the **Save** button for the respective option


Please note that if you use the **Site JS** option, you must remove any **HTML** remark lines (``). You must also remove the script tags, **Versoly** adds its own script tags when it adds your snippet to the site pages.
3. Click on **Publish**

**C. For both options**:
1. Your AI support agent button will now be displayed on your **Versoly** website page

2. If you click on the button it will display the AI support agent dialogue

Your AI support agent has now been added to your **Versoly** website and your visitors/customers can start interacting with it!
***
Join over 1000+ businesses, websites and startups automating their customer service and other tasks with a custom trained AI agent.