> ## Documentation Index
> Fetch the complete documentation index at: https://sitespeak.ai/docs/llms.txt
> Use this file to discover all available pages before exploring further.
# How to add a ChatGPT AI support agent to WeWeb
> How to add your custom ChatGPT trained AI support agent to your WeWeb website.
You want to embed your custom trained AI support agent in your **WeWeb** website page. Here's how to add an AI support agent to WeWeb with SiteSpeakAI.
[WeWeb](https://www.weweb.io/) is a no-code frontend builder that allows users to create well constructed web applications by connecting to any backend or data source.
**Website URL**: [WeWeb](https://www.weweb.io/)
## Add your AI support agent to your **WeWeb** website
### In SiteSpeakAI
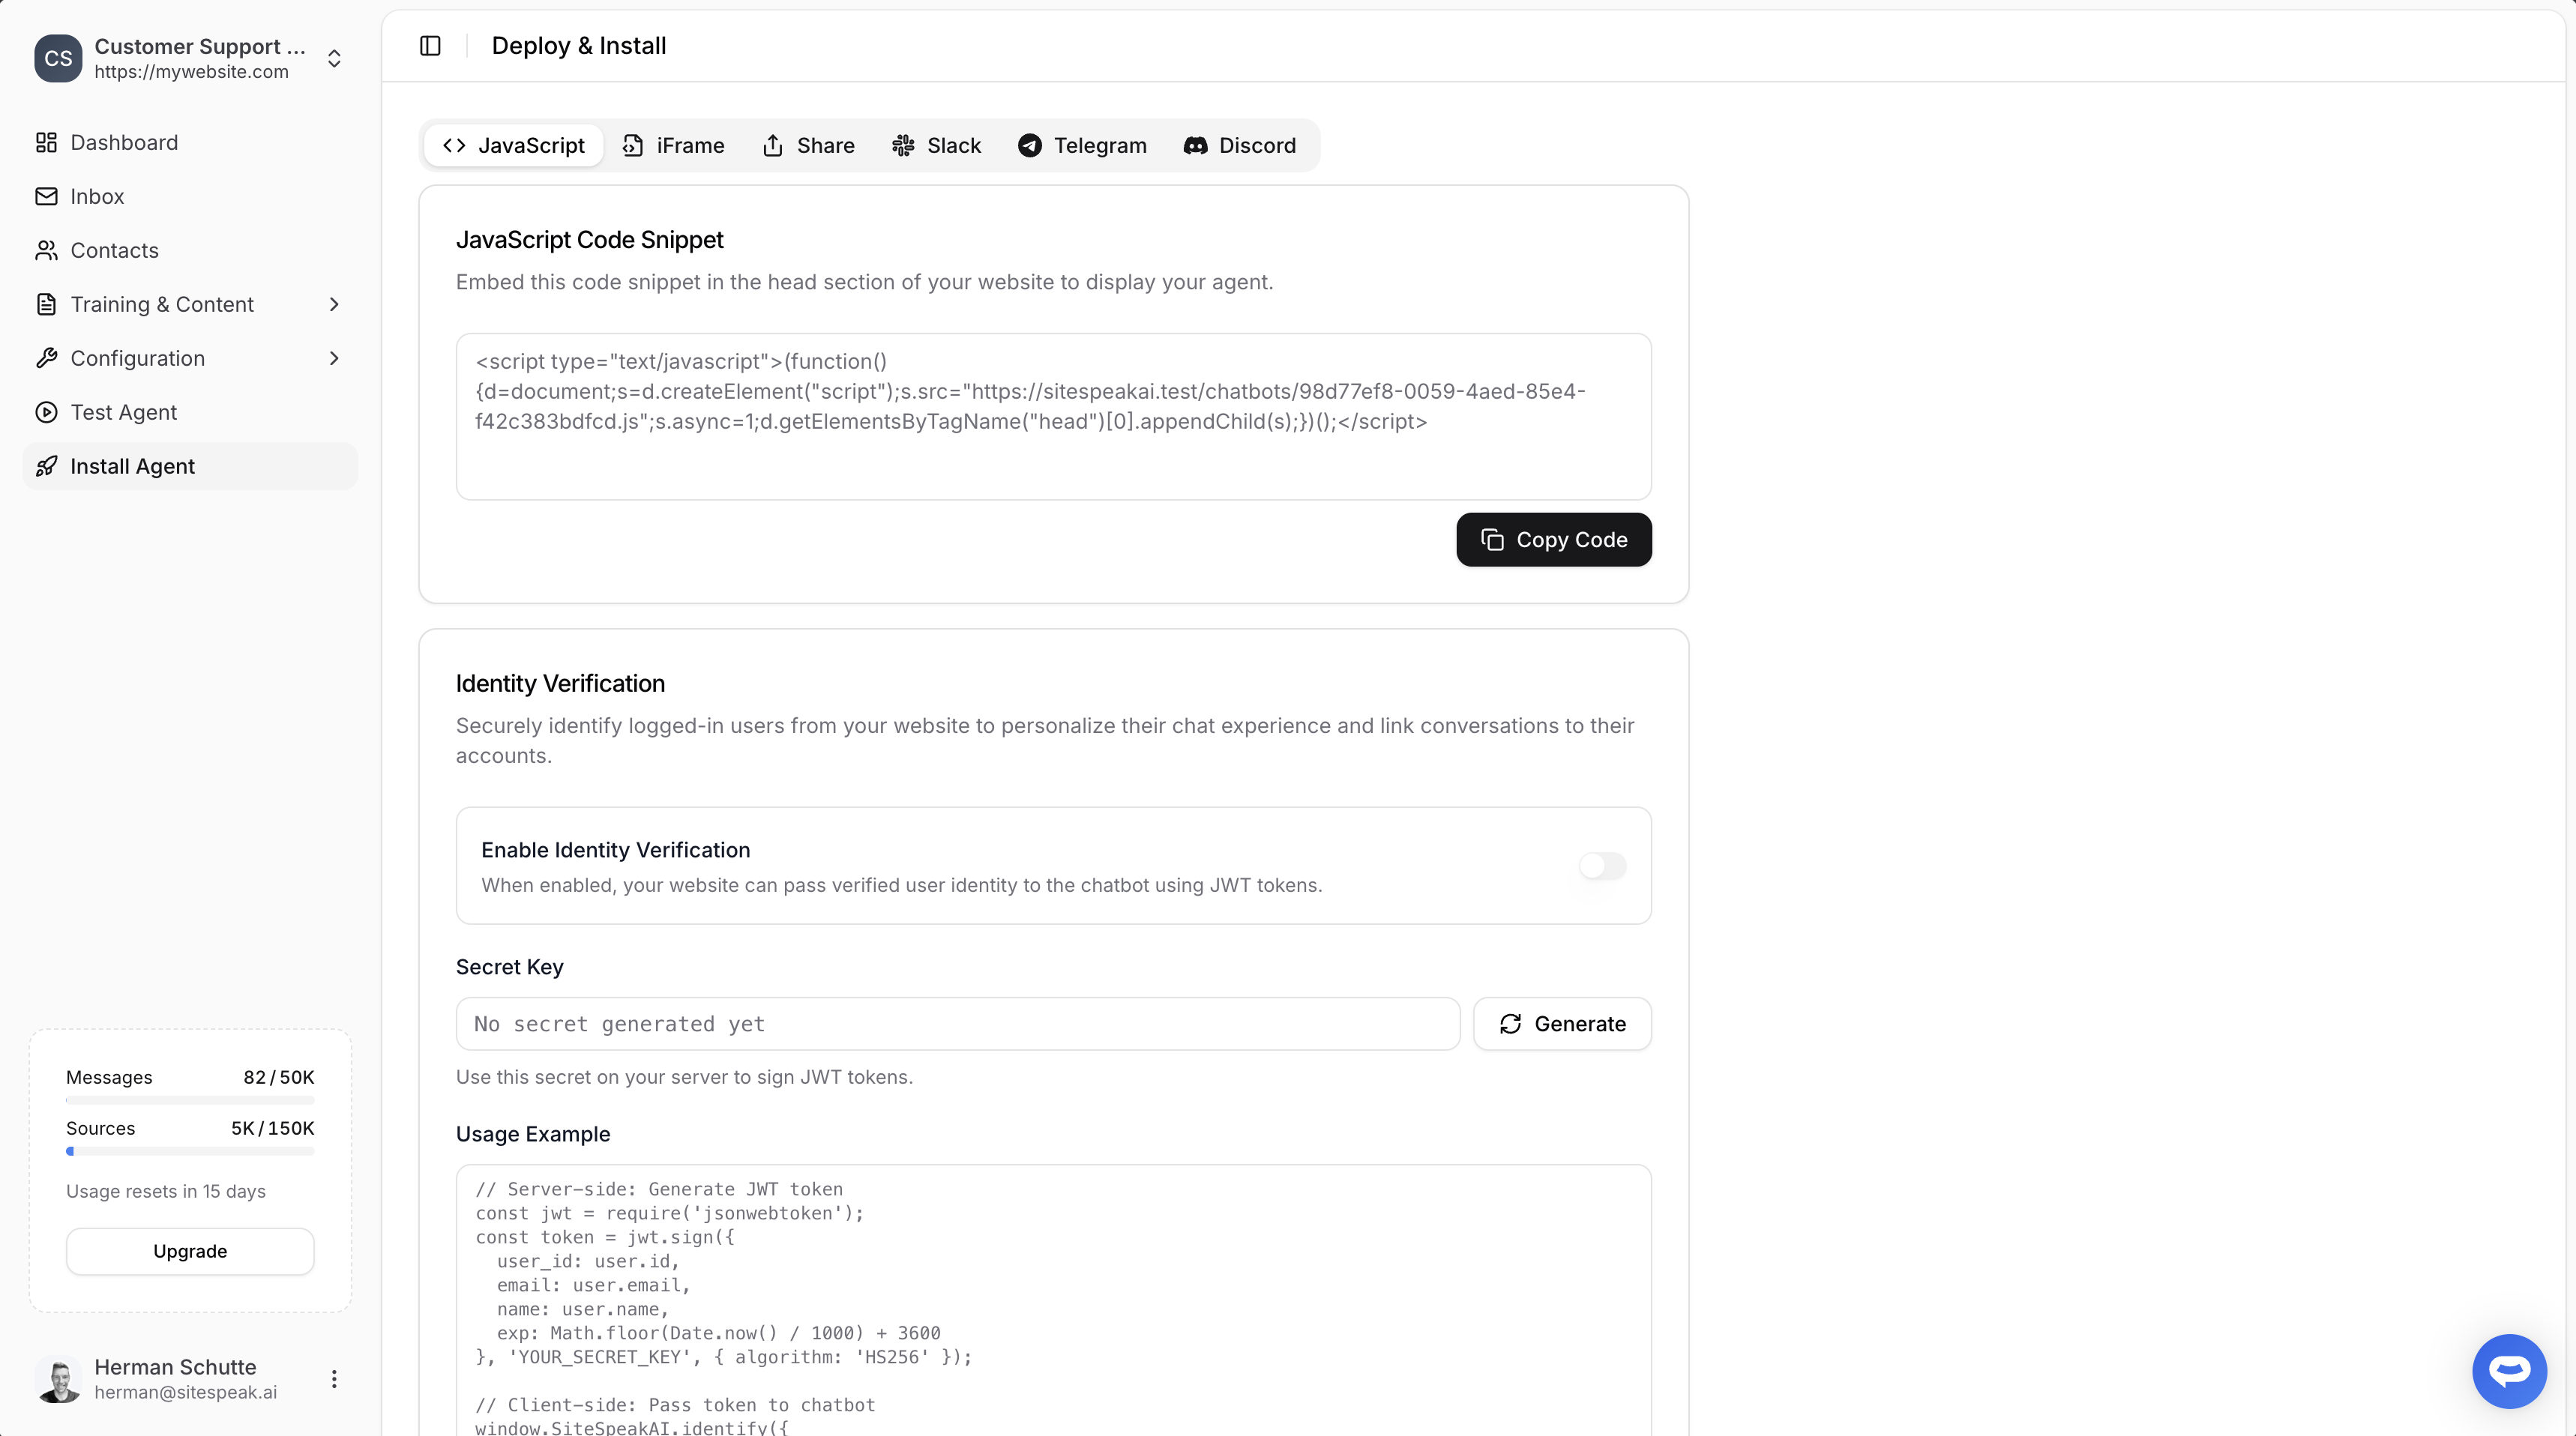
Select your chatbot from the dropdown menu at the top, click on the **Install Agent** section in the sidebar, then click on the **Copy Code** button to copy your code snippet.
 ### In WeWeb
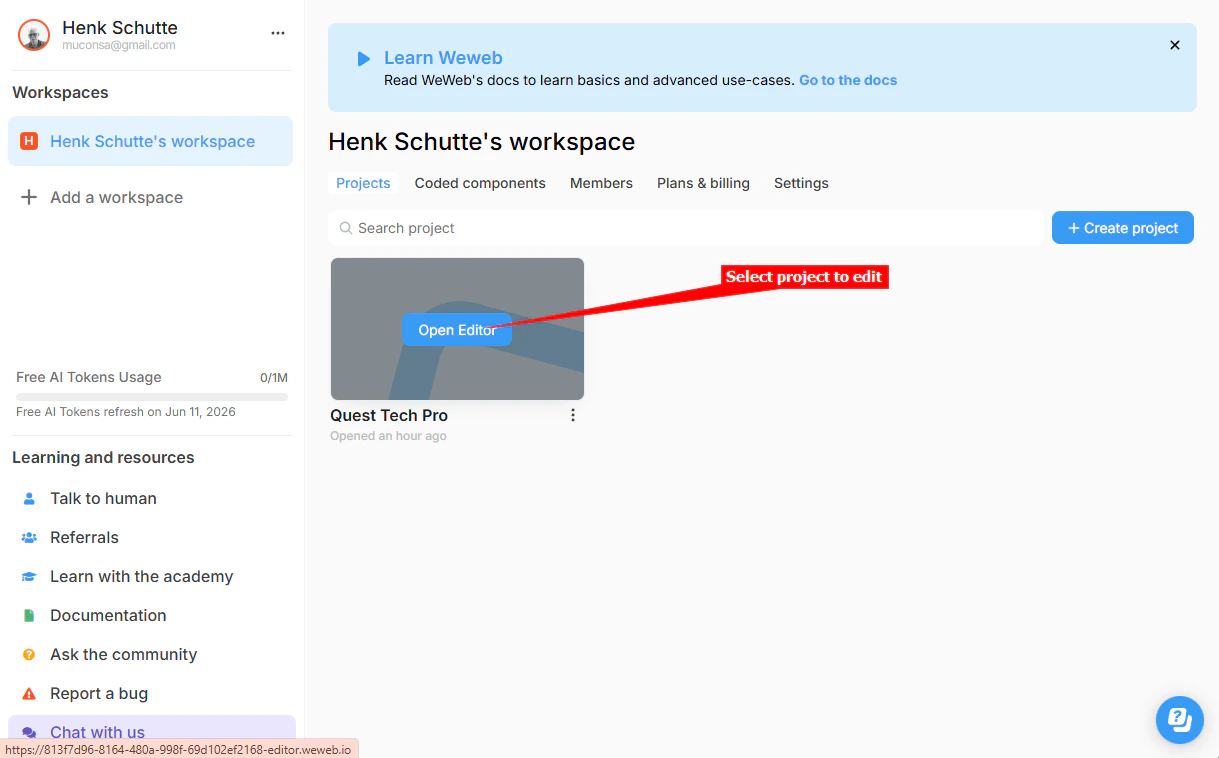
1. Log into your **WeWeb** account and on the dashboard select the project you wish to edit
### In WeWeb
1. Log into your **WeWeb** account and on the dashboard select the project you wish to edit
 2. **Please Note**! There are 2 ways to add your AI support agent to your WeWeb website:
a. Adding custom code manually in the project editor or
2. **Please Note**! There are 2 ways to add your AI support agent to your WeWeb website:
a. Adding custom code manually in the project editor or
b. Using the **FullStack AI prompt bar** in the project editor.
We are going to go through both options (for both options you will have to **Deploy** your website to see the AI support agent dialogue on your live website):
#### A. Adding custom code manually in the project editor
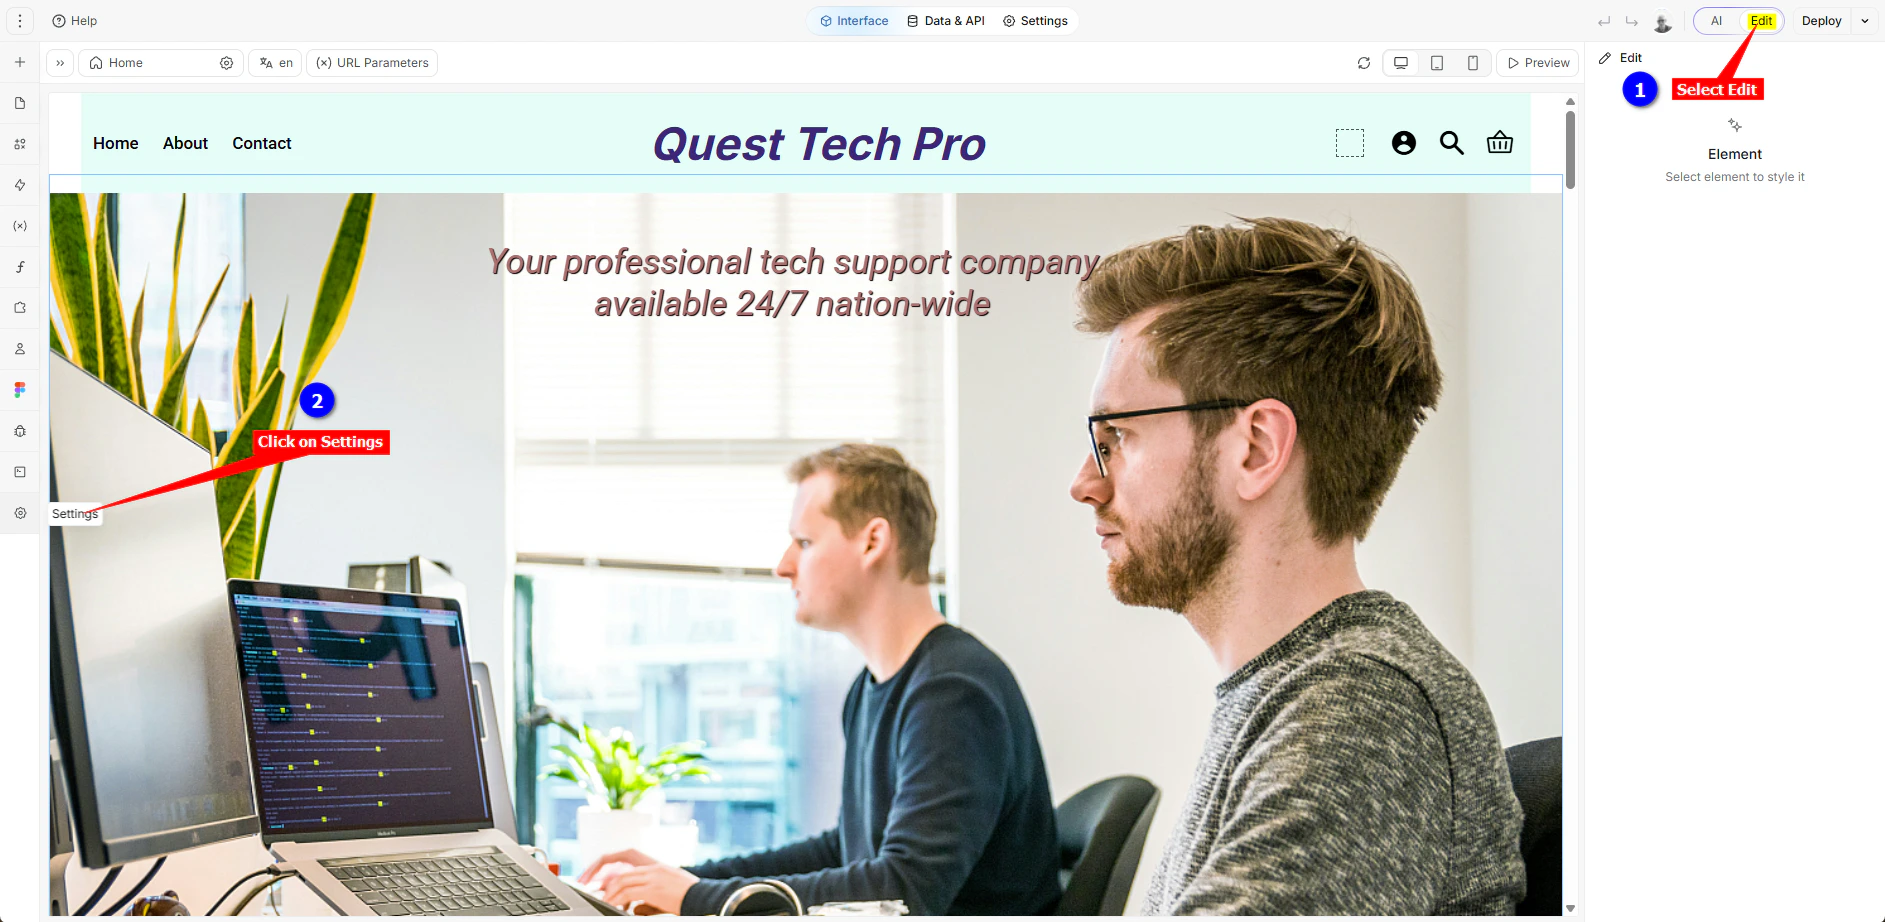
1. On the project editor page, ensure that the **Edit** option is selected and click on **Settings** in the left side toolbar
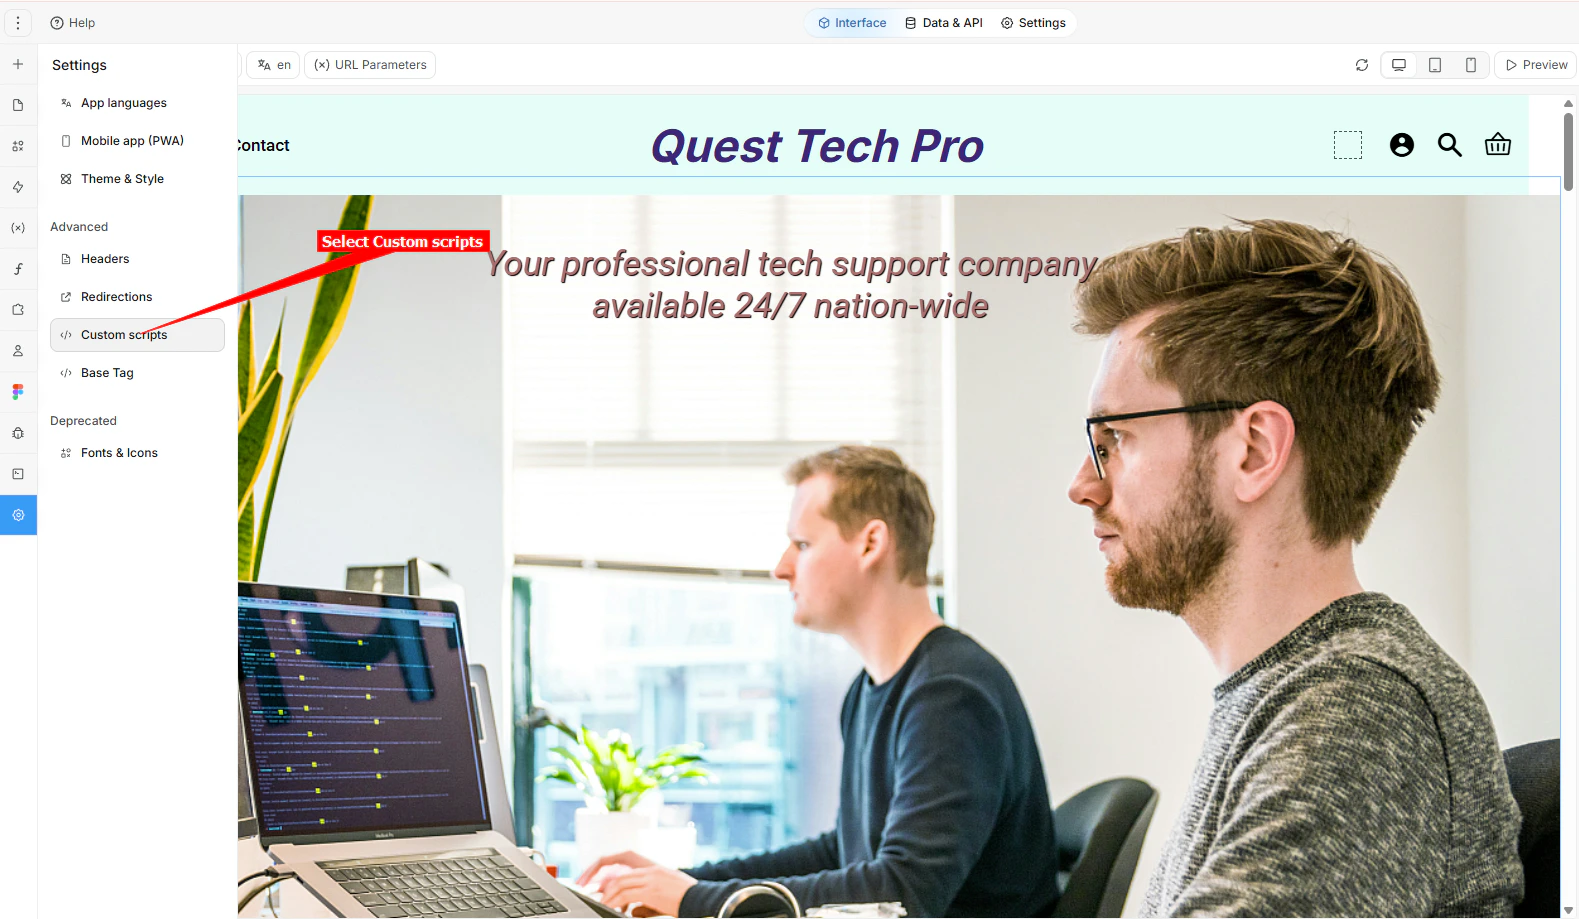
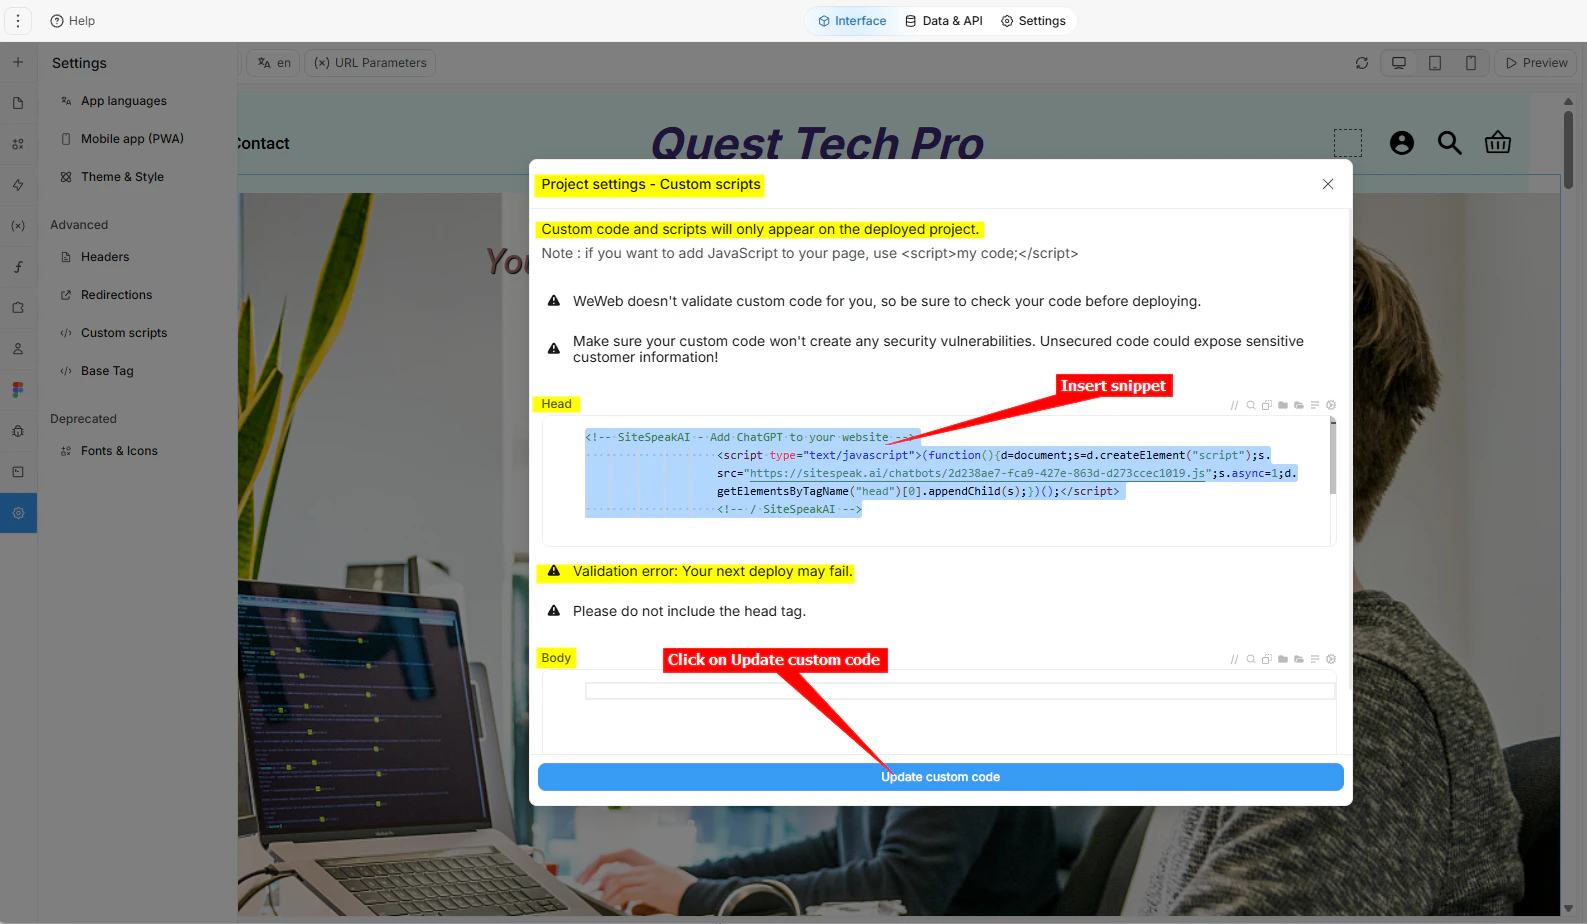
 2. Select **Custom scripts** in the left side toolbar
 Note that the **Project settings - Custom scripts** dialogue box states that *'Custom code and scripts will only appear on the deployed project'* meaning that you will have to **Deploy** your project to see your AI support agent dialogue on your live website page, it is not displayed on the Preview page.
3. Insert your snippet under **Head** or **Body**. A warning will appear to inform you that there is a validation error (*Validation error: Your next deploy may fail.*) but you can ignore the error. Click on **Update custom code** to save your code
Note that the **Project settings - Custom scripts** dialogue box states that *'Custom code and scripts will only appear on the deployed project'* meaning that you will have to **Deploy** your project to see your AI support agent dialogue on your live website page, it is not displayed on the Preview page.
3. Insert your snippet under **Head** or **Body**. A warning will appear to inform you that there is a validation error (*Validation error: Your next deploy may fail.*) but you can ignore the error. Click on **Update custom code** to save your code
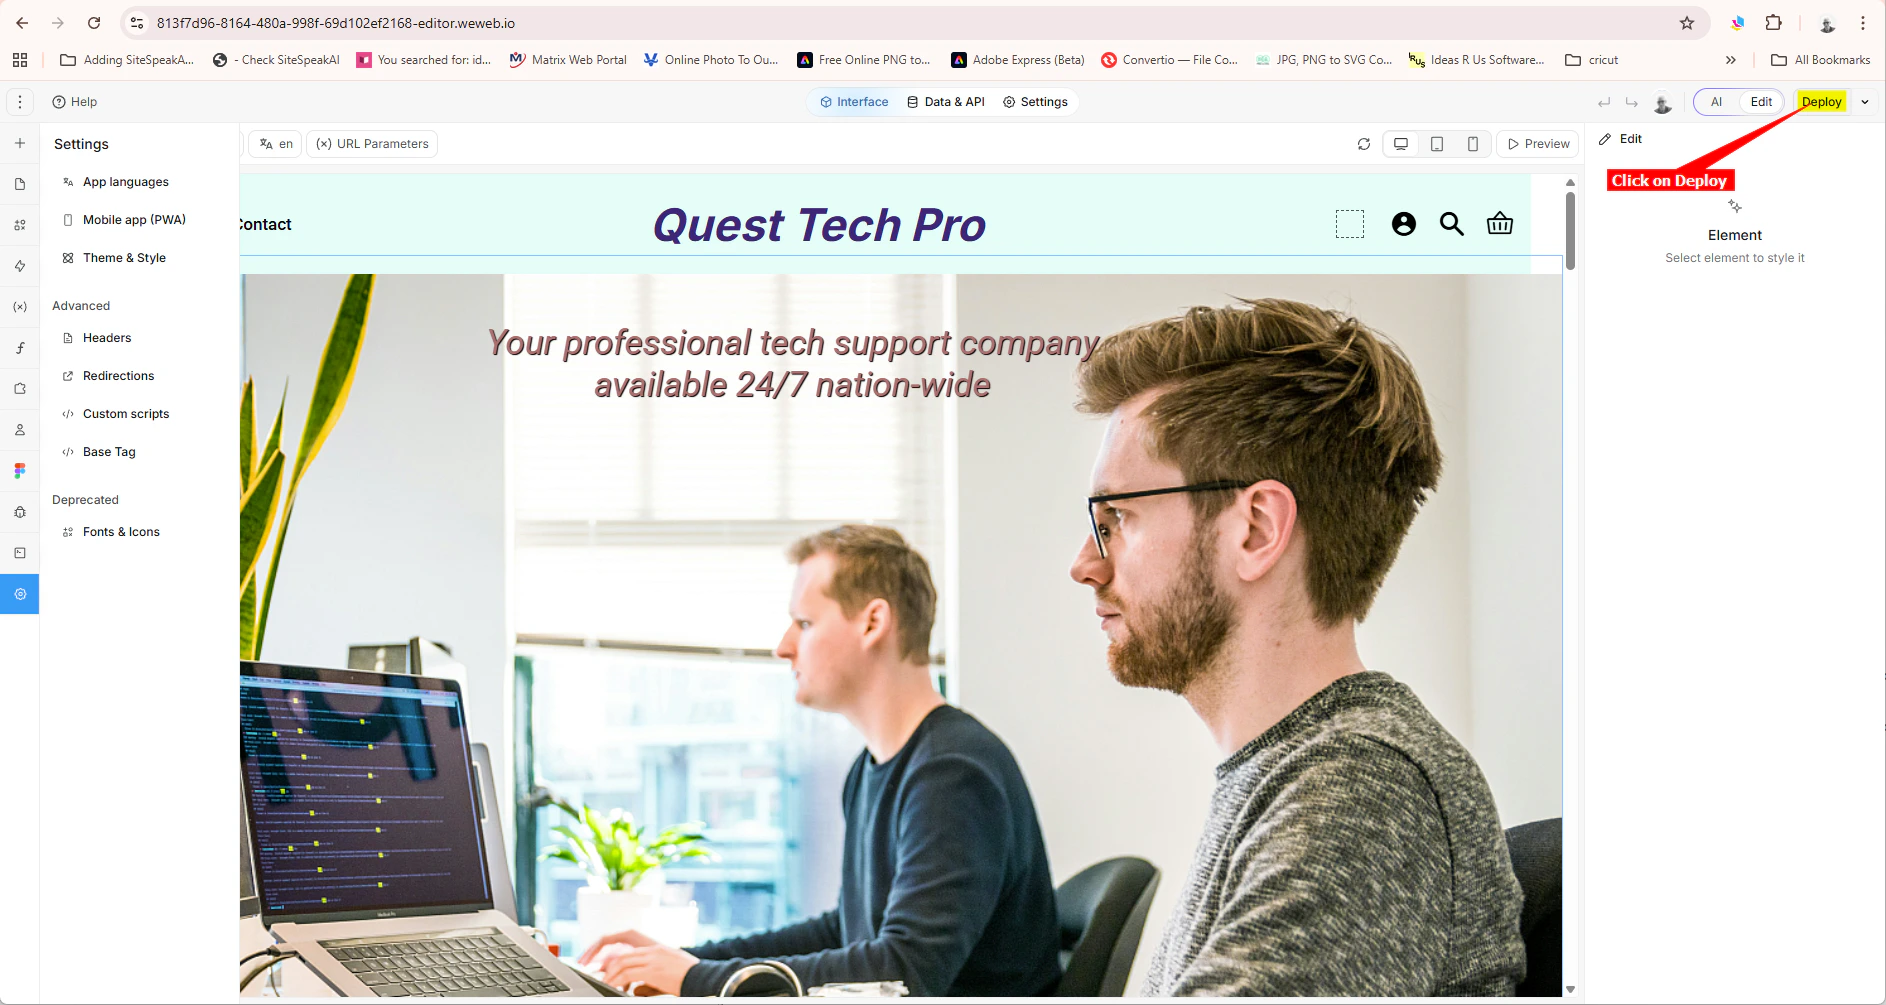
 4. Click on **Deploy** to deploy your website
 #### B. Using the FullStack AI prompt bar
1. Log into your WeWeb account as mentioned above and select your project to edit.
We are going to use WeWeb’s **FullStack AI prompt bar** to insert your SiteSpeakAI agent snippet site‑wide for us.
The prompt consists of an instruction, e.g. "Please add the following JS snippet to my app code:" followed by the snippet code as copied at the beginning of this tutorial. Note that the ##### part of the JS file URL will be your specific js script filename (36 characters including the 4 dashes).
**Tip**: Create the complete prompt in a text editor and then paste this into the AI prompt bar.
```
Please add the following JS snippet to my app code:
```
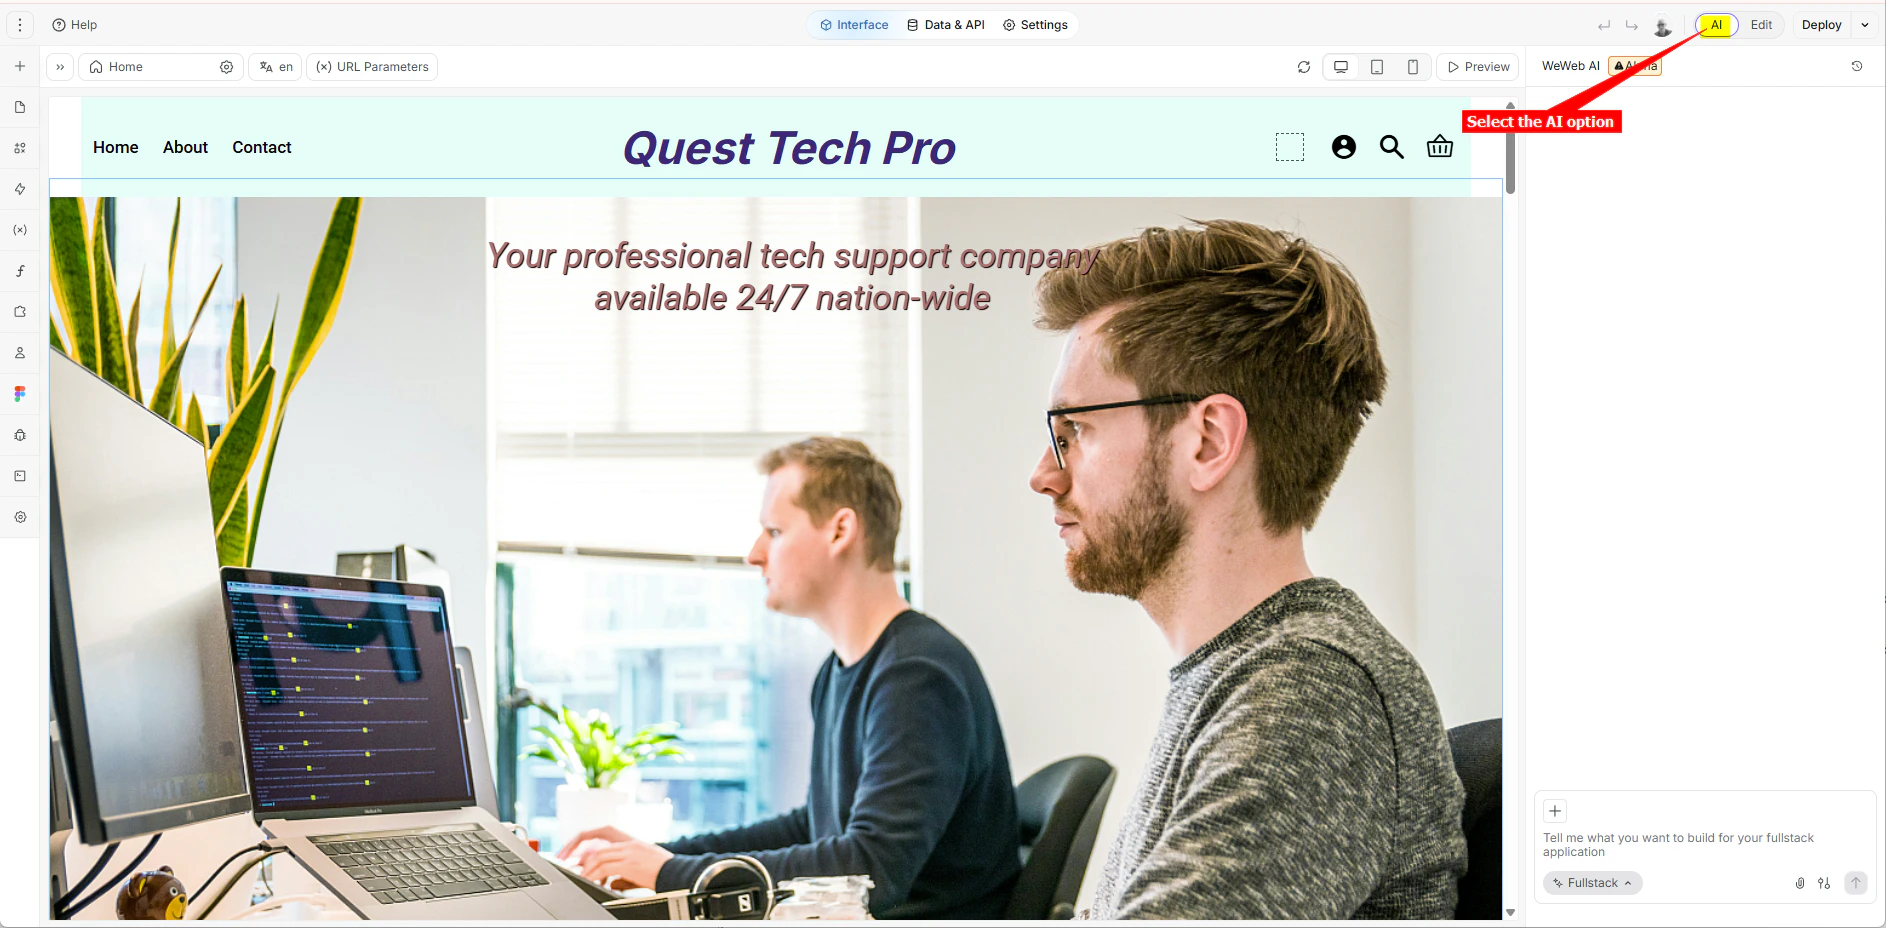
2. On the project editor page, ensure that the **AI** option is selected.
#### B. Using the FullStack AI prompt bar
1. Log into your WeWeb account as mentioned above and select your project to edit.
We are going to use WeWeb’s **FullStack AI prompt bar** to insert your SiteSpeakAI agent snippet site‑wide for us.
The prompt consists of an instruction, e.g. "Please add the following JS snippet to my app code:" followed by the snippet code as copied at the beginning of this tutorial. Note that the ##### part of the JS file URL will be your specific js script filename (36 characters including the 4 dashes).
**Tip**: Create the complete prompt in a text editor and then paste this into the AI prompt bar.
```
Please add the following JS snippet to my app code:
```
2. On the project editor page, ensure that the **AI** option is selected.
 Please note: At the moment the AI part of WeWeb is still in Alpha status, so it could inform you that it could not perform the task and then create a whole set of manual instructions for you to add it yourself. This is then basically the same process as described in first option where we added it manually in the project editor. You can clear the message and retry the process or just refer to Option A.
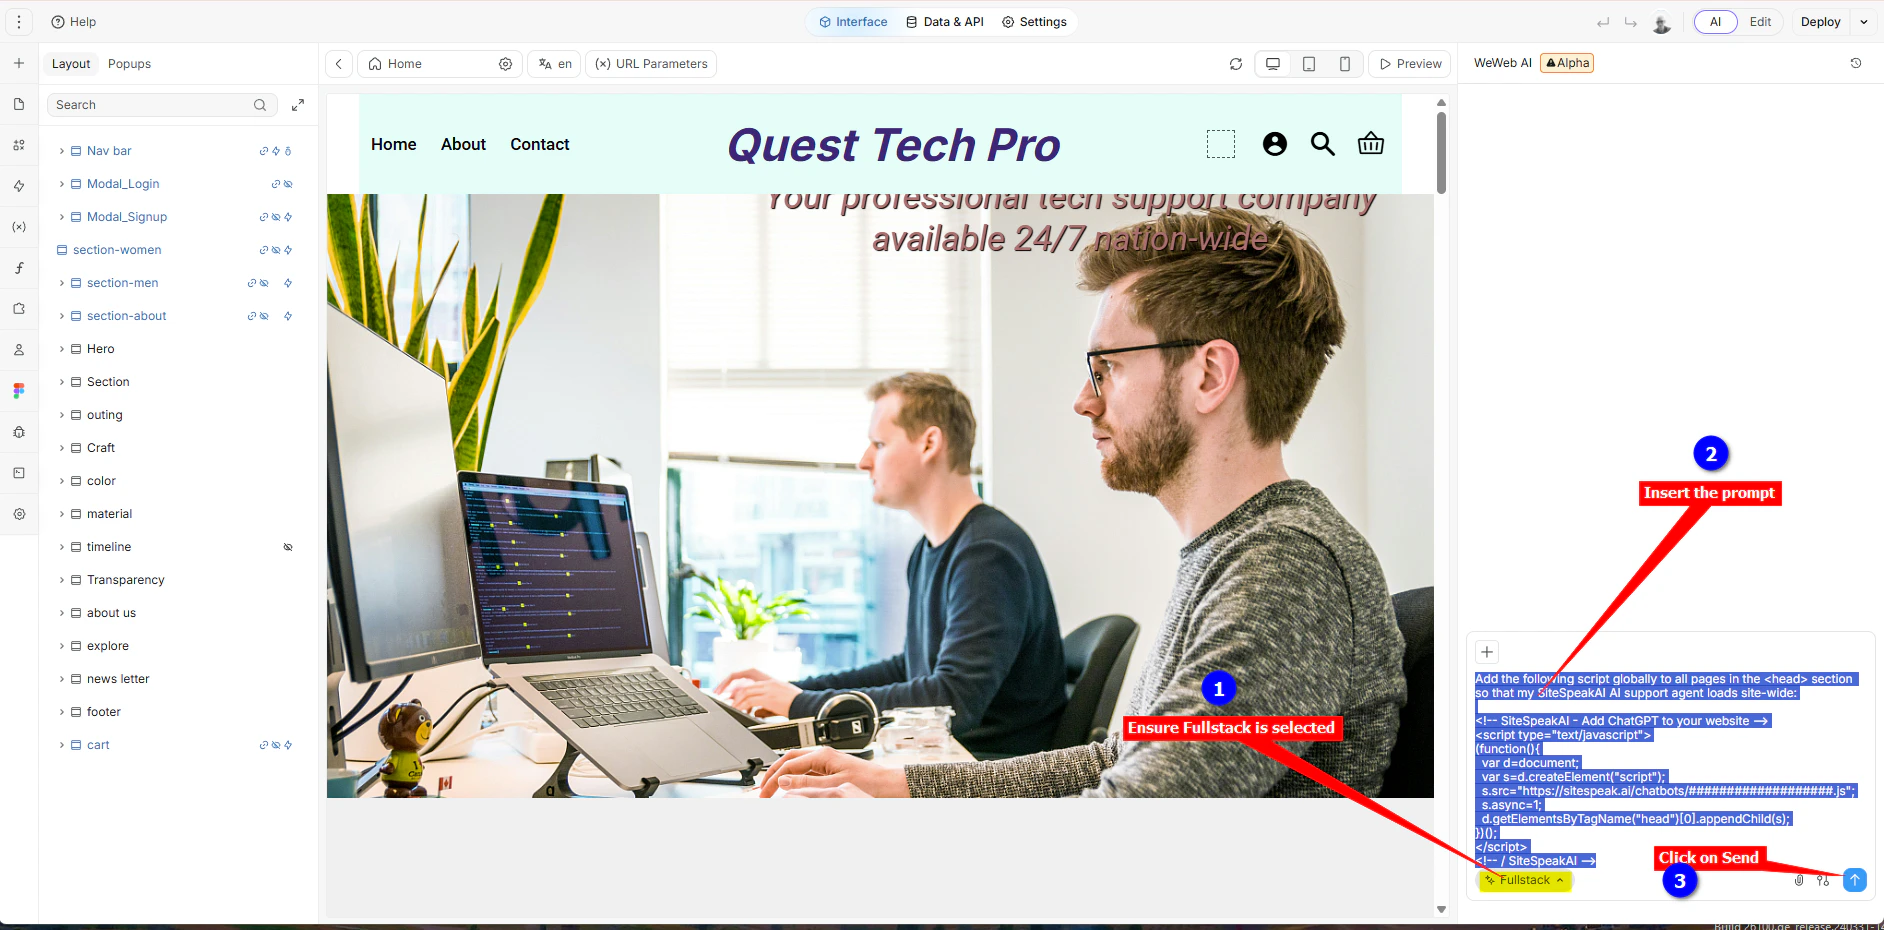
3. Make sure the `Fullstack` option is selected, insert the prompt into the **AI prompt bar** and click on **Send** (or just press **Enter**)
Please note: At the moment the AI part of WeWeb is still in Alpha status, so it could inform you that it could not perform the task and then create a whole set of manual instructions for you to add it yourself. This is then basically the same process as described in first option where we added it manually in the project editor. You can clear the message and retry the process or just refer to Option A.
3. Make sure the `Fullstack` option is selected, insert the prompt into the **AI prompt bar** and click on **Send** (or just press **Enter**)
 It will go through a whole process of creating a workflow and inserting your snippet.
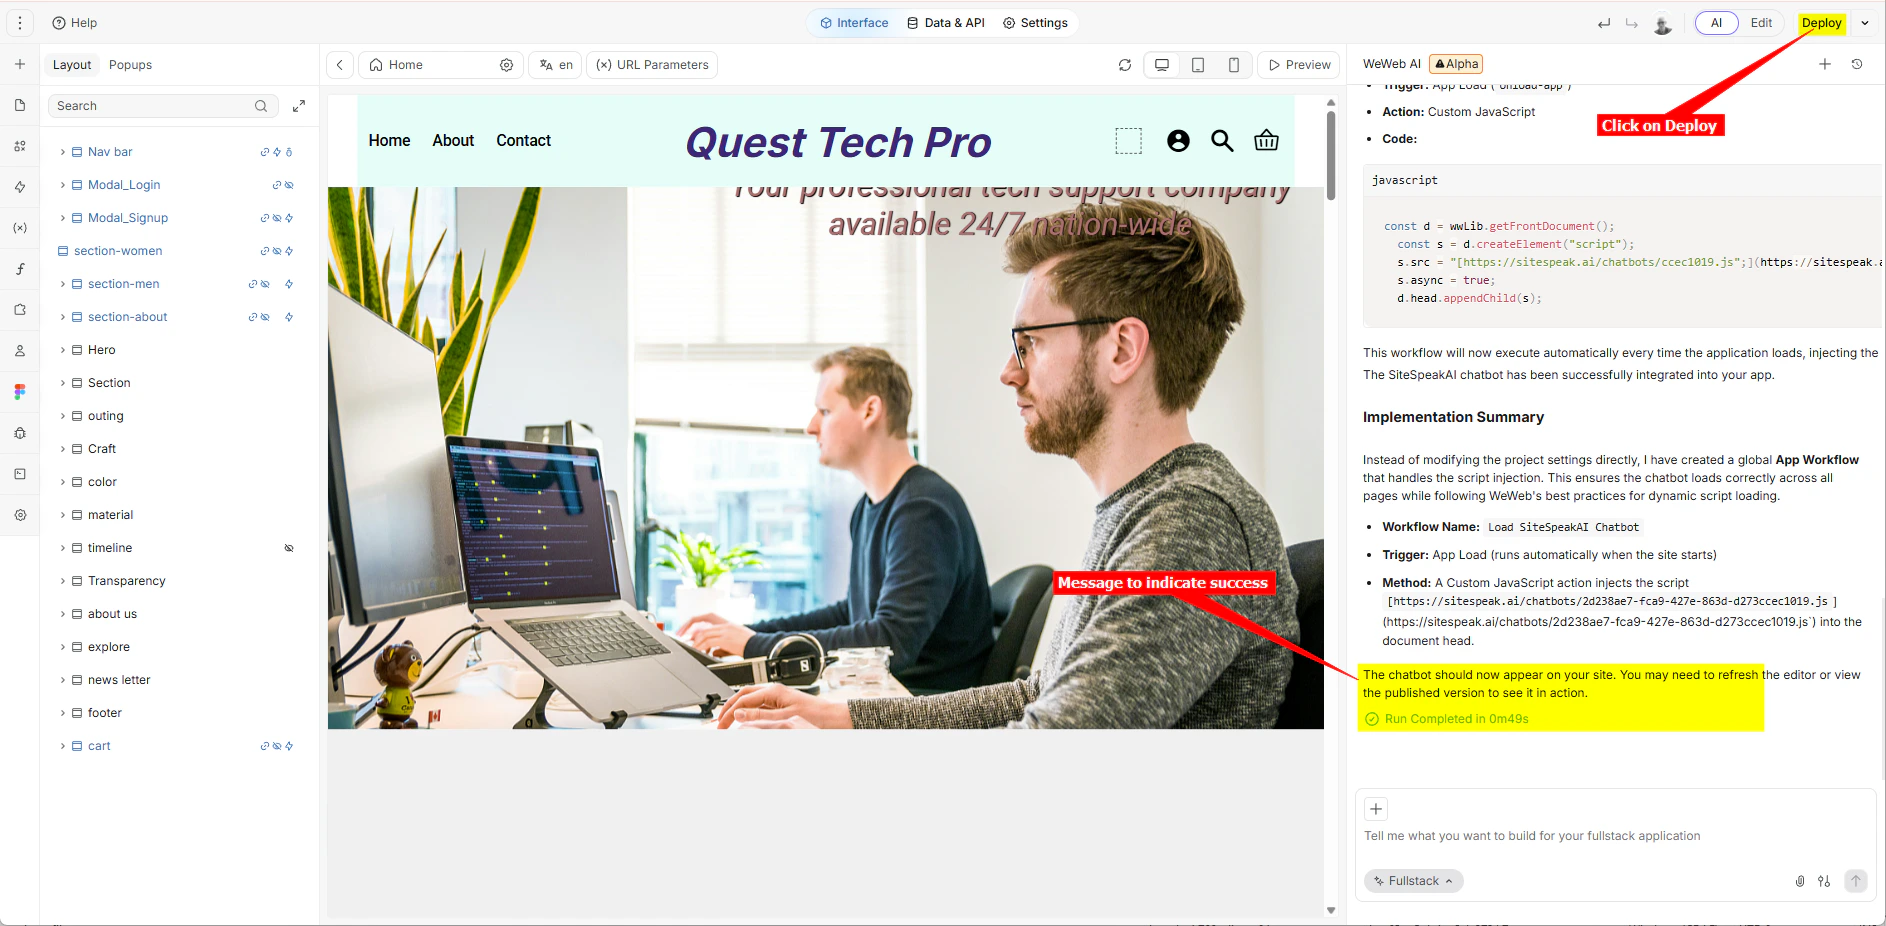
4. Finally it will indicate that the process was completed and then you can **Deploy** (Publish) your website.
It will go through a whole process of creating a workflow and inserting your snippet.
4. Finally it will indicate that the process was completed and then you can **Deploy** (Publish) your website.
 #### C. For both options
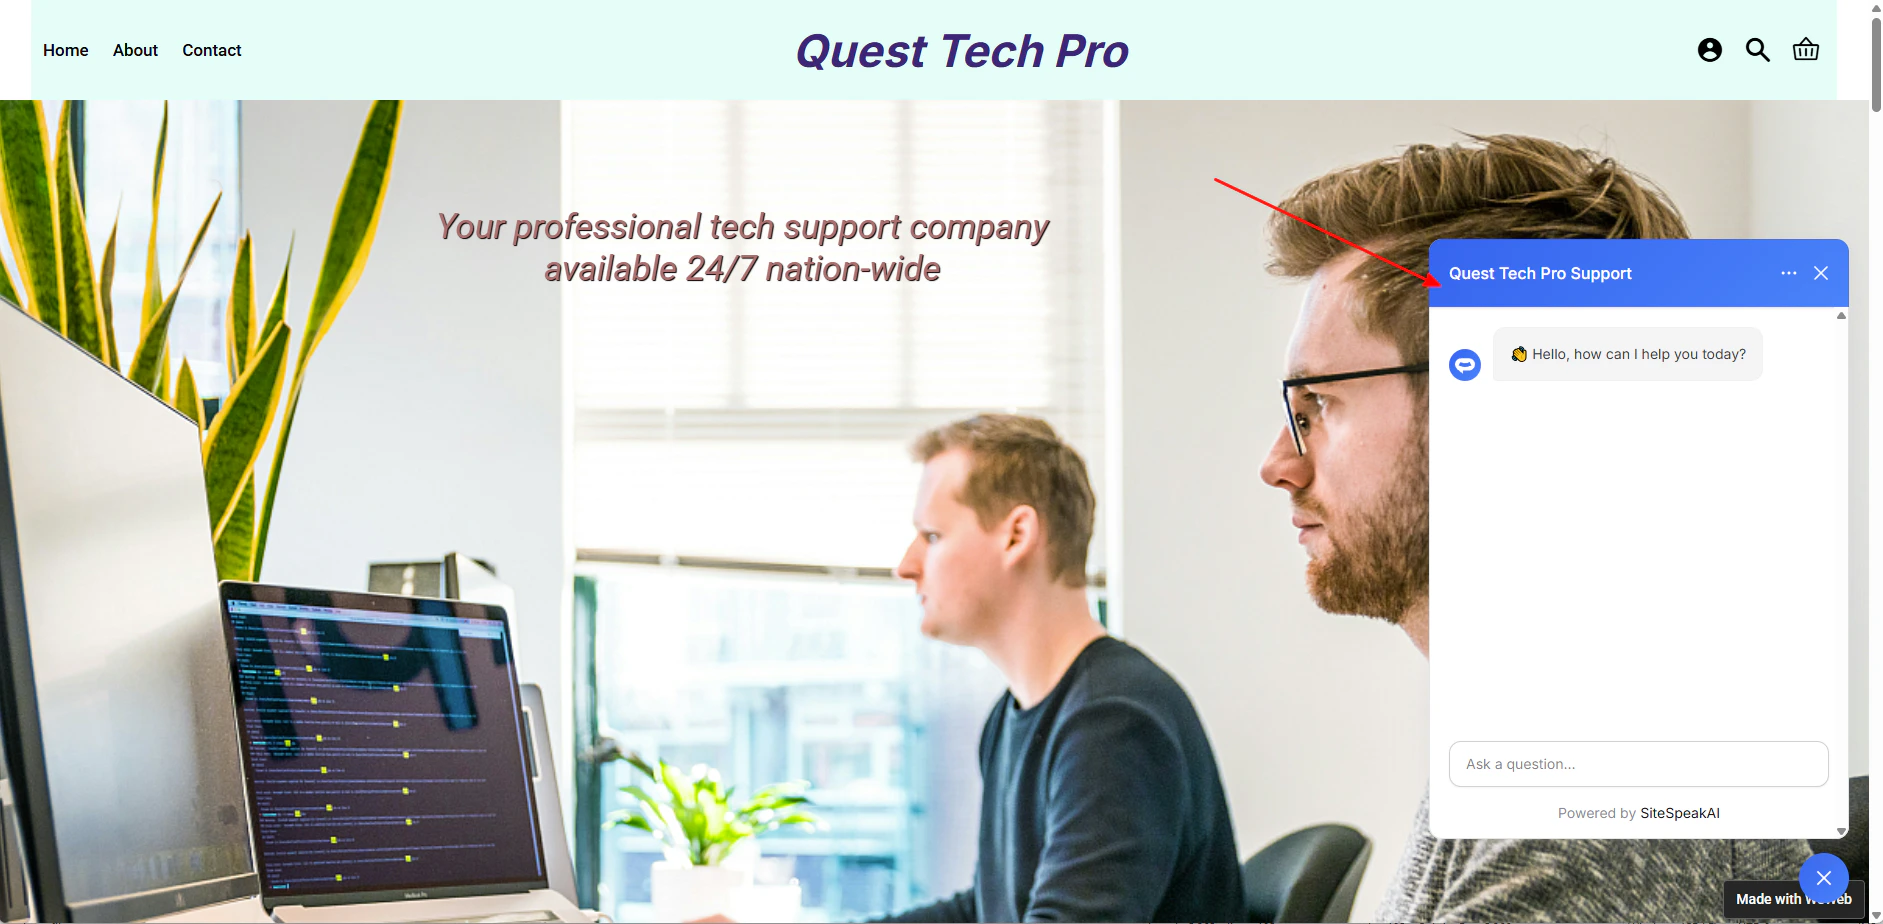
1. Your AI support agent button will now be displayed on your **WeWeb** webpage
#### C. For both options
1. Your AI support agent button will now be displayed on your **WeWeb** webpage
 2. If you click on the button it will display the AI support agent dialogue
 Your AI support agent has now been added to your **WeWeb** website and your customers/visitors can start interacting with it!
***
Join over 1000+ businesses, websites and startups automating their customer service and other tasks with a custom trained AI agent.
Your AI support agent has now been added to your **WeWeb** website and your customers/visitors can start interacting with it!
***
Join over 1000+ businesses, websites and startups automating their customer service and other tasks with a custom trained AI agent.