> ## Documentation Index
> Fetch the complete documentation index at: https://sitespeak.ai/docs/llms.txt
> Use this file to discover all available pages before exploring further.
# Connect SiteSpeakAI to HubSpot
> Automatically sync leads and contacts captured by your chatbot to HubSpot CRM.
SiteSpeakAI integrates with HubSpot to automatically create and update contacts in HubSpot when leads are captured by your chatbot. This keeps all your contacts in sync and up to date.
## Connect HubSpot
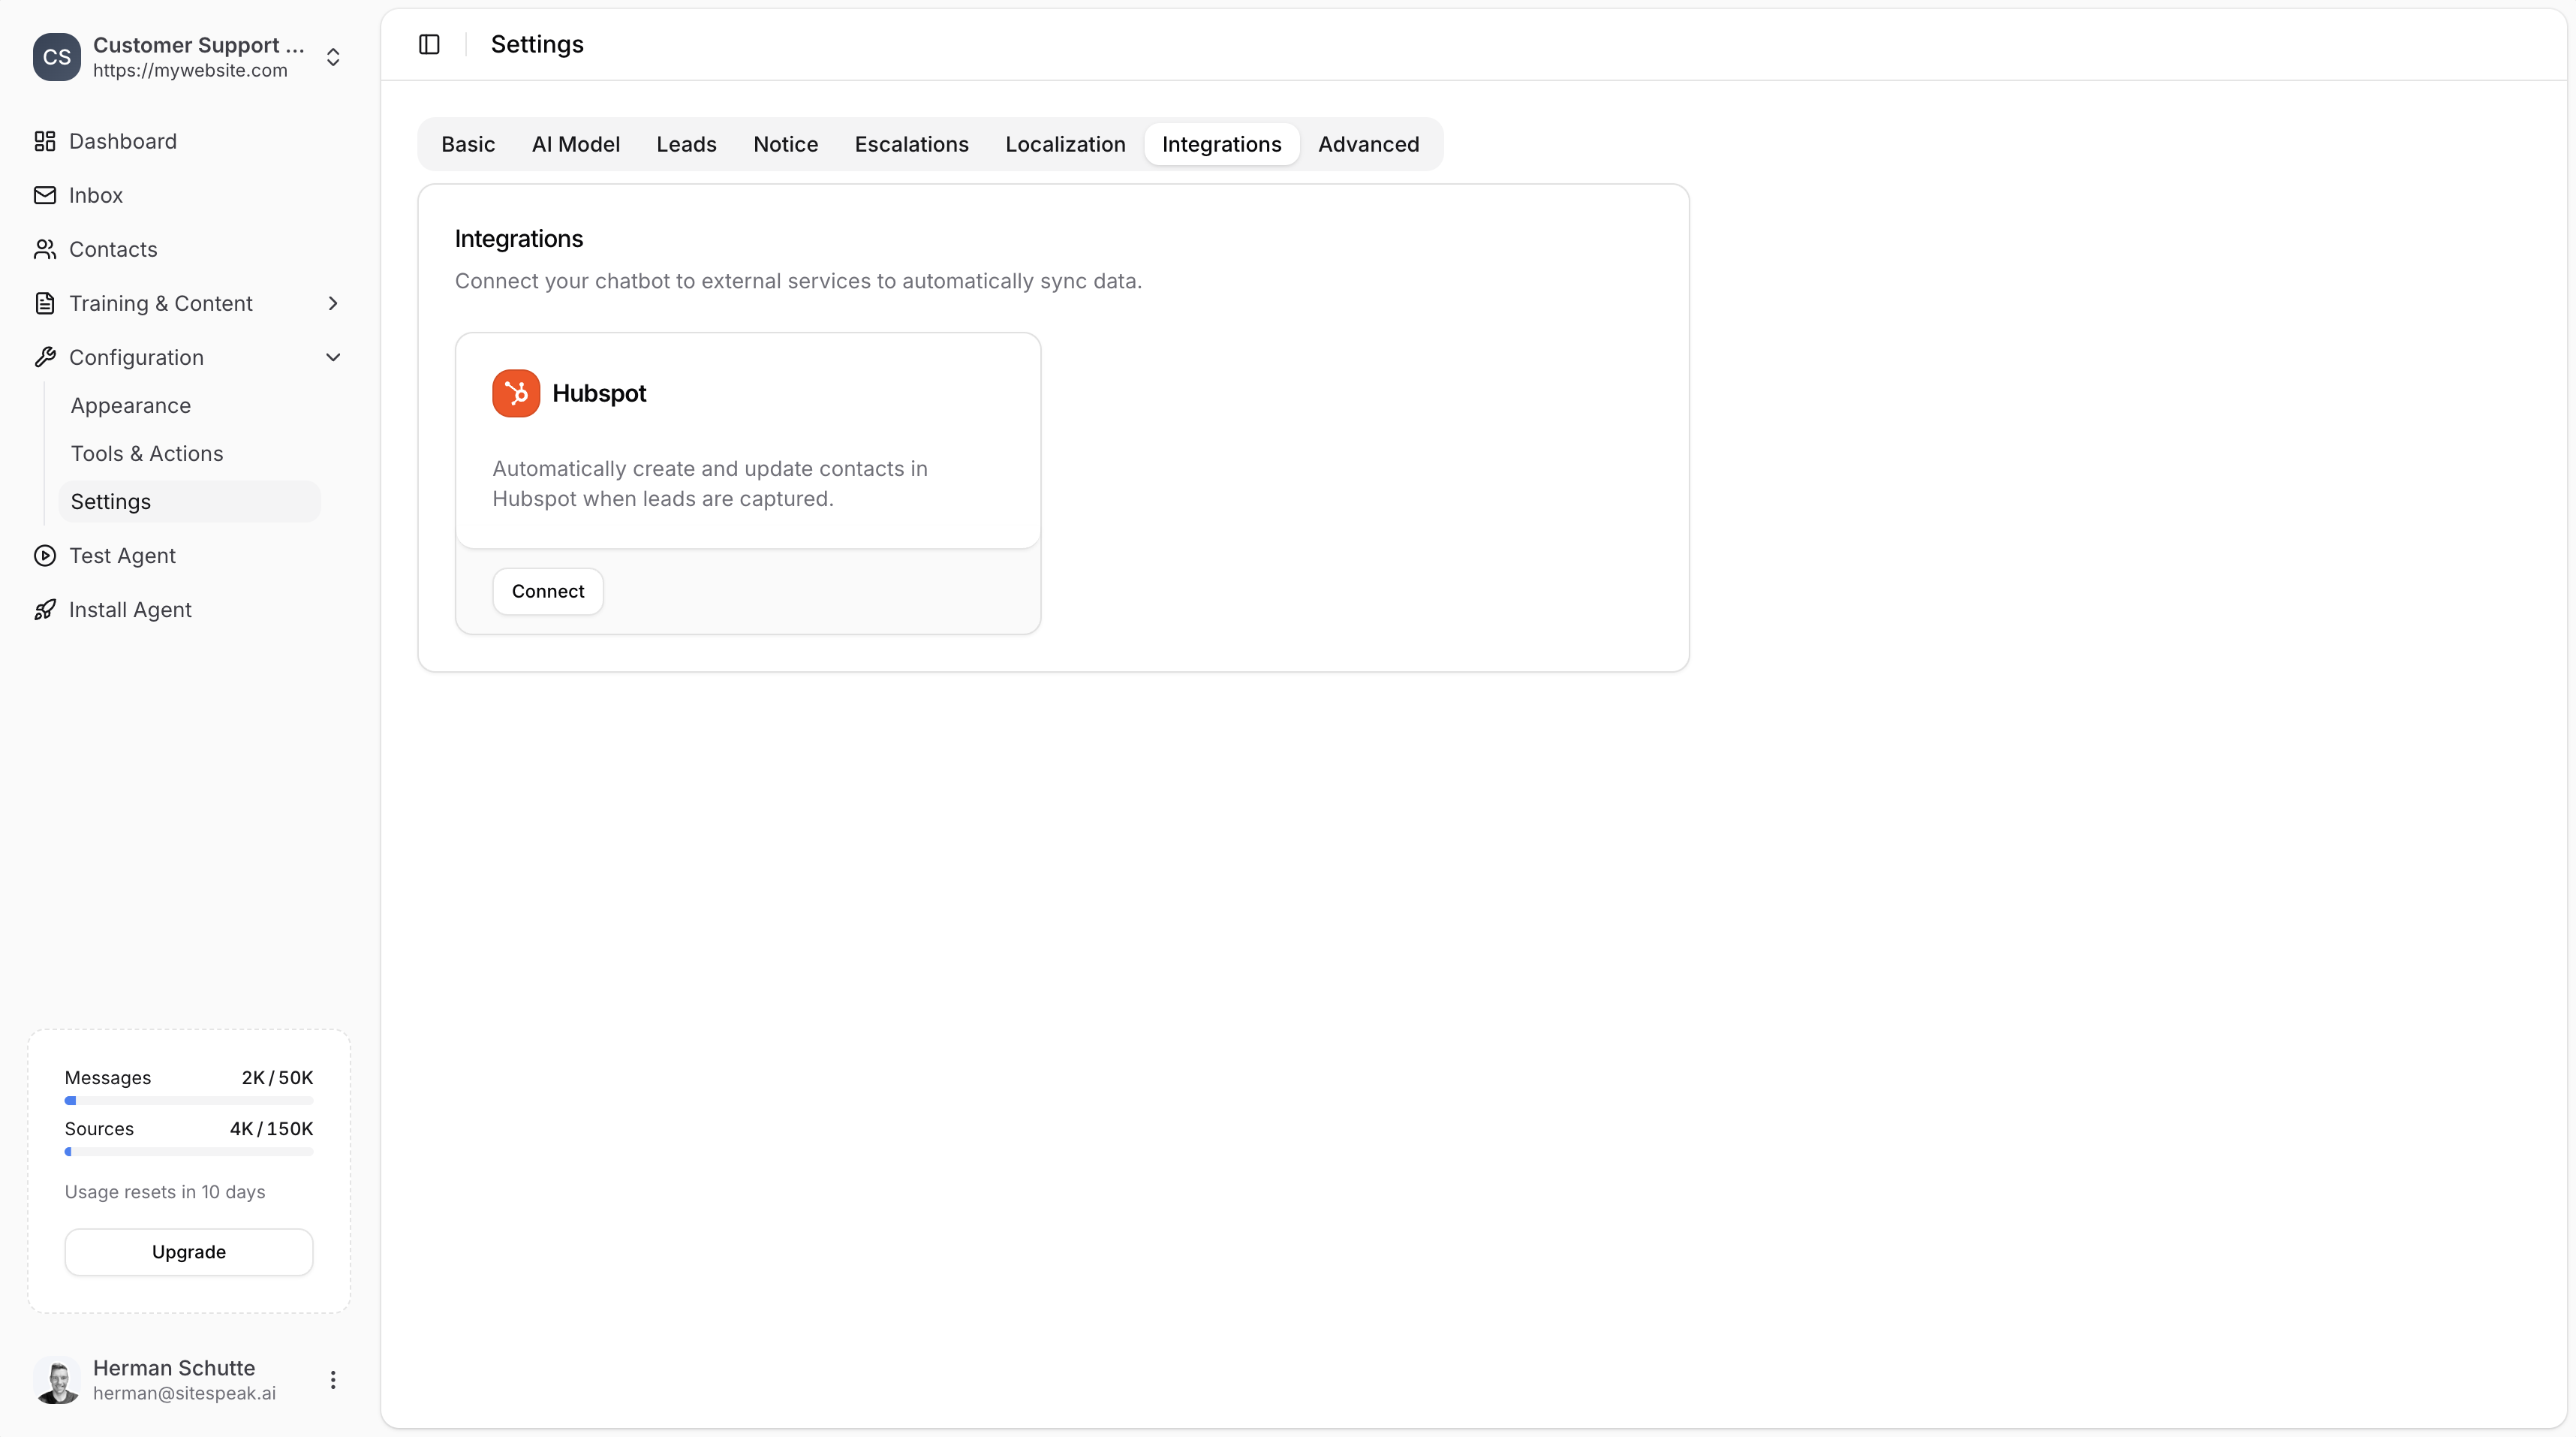
In your chatbot dashboard, go to **Configuration > Settings** and click the **Integrations** tab.
Locate the **HubSpot** integration card.
Click the **Connect** button.
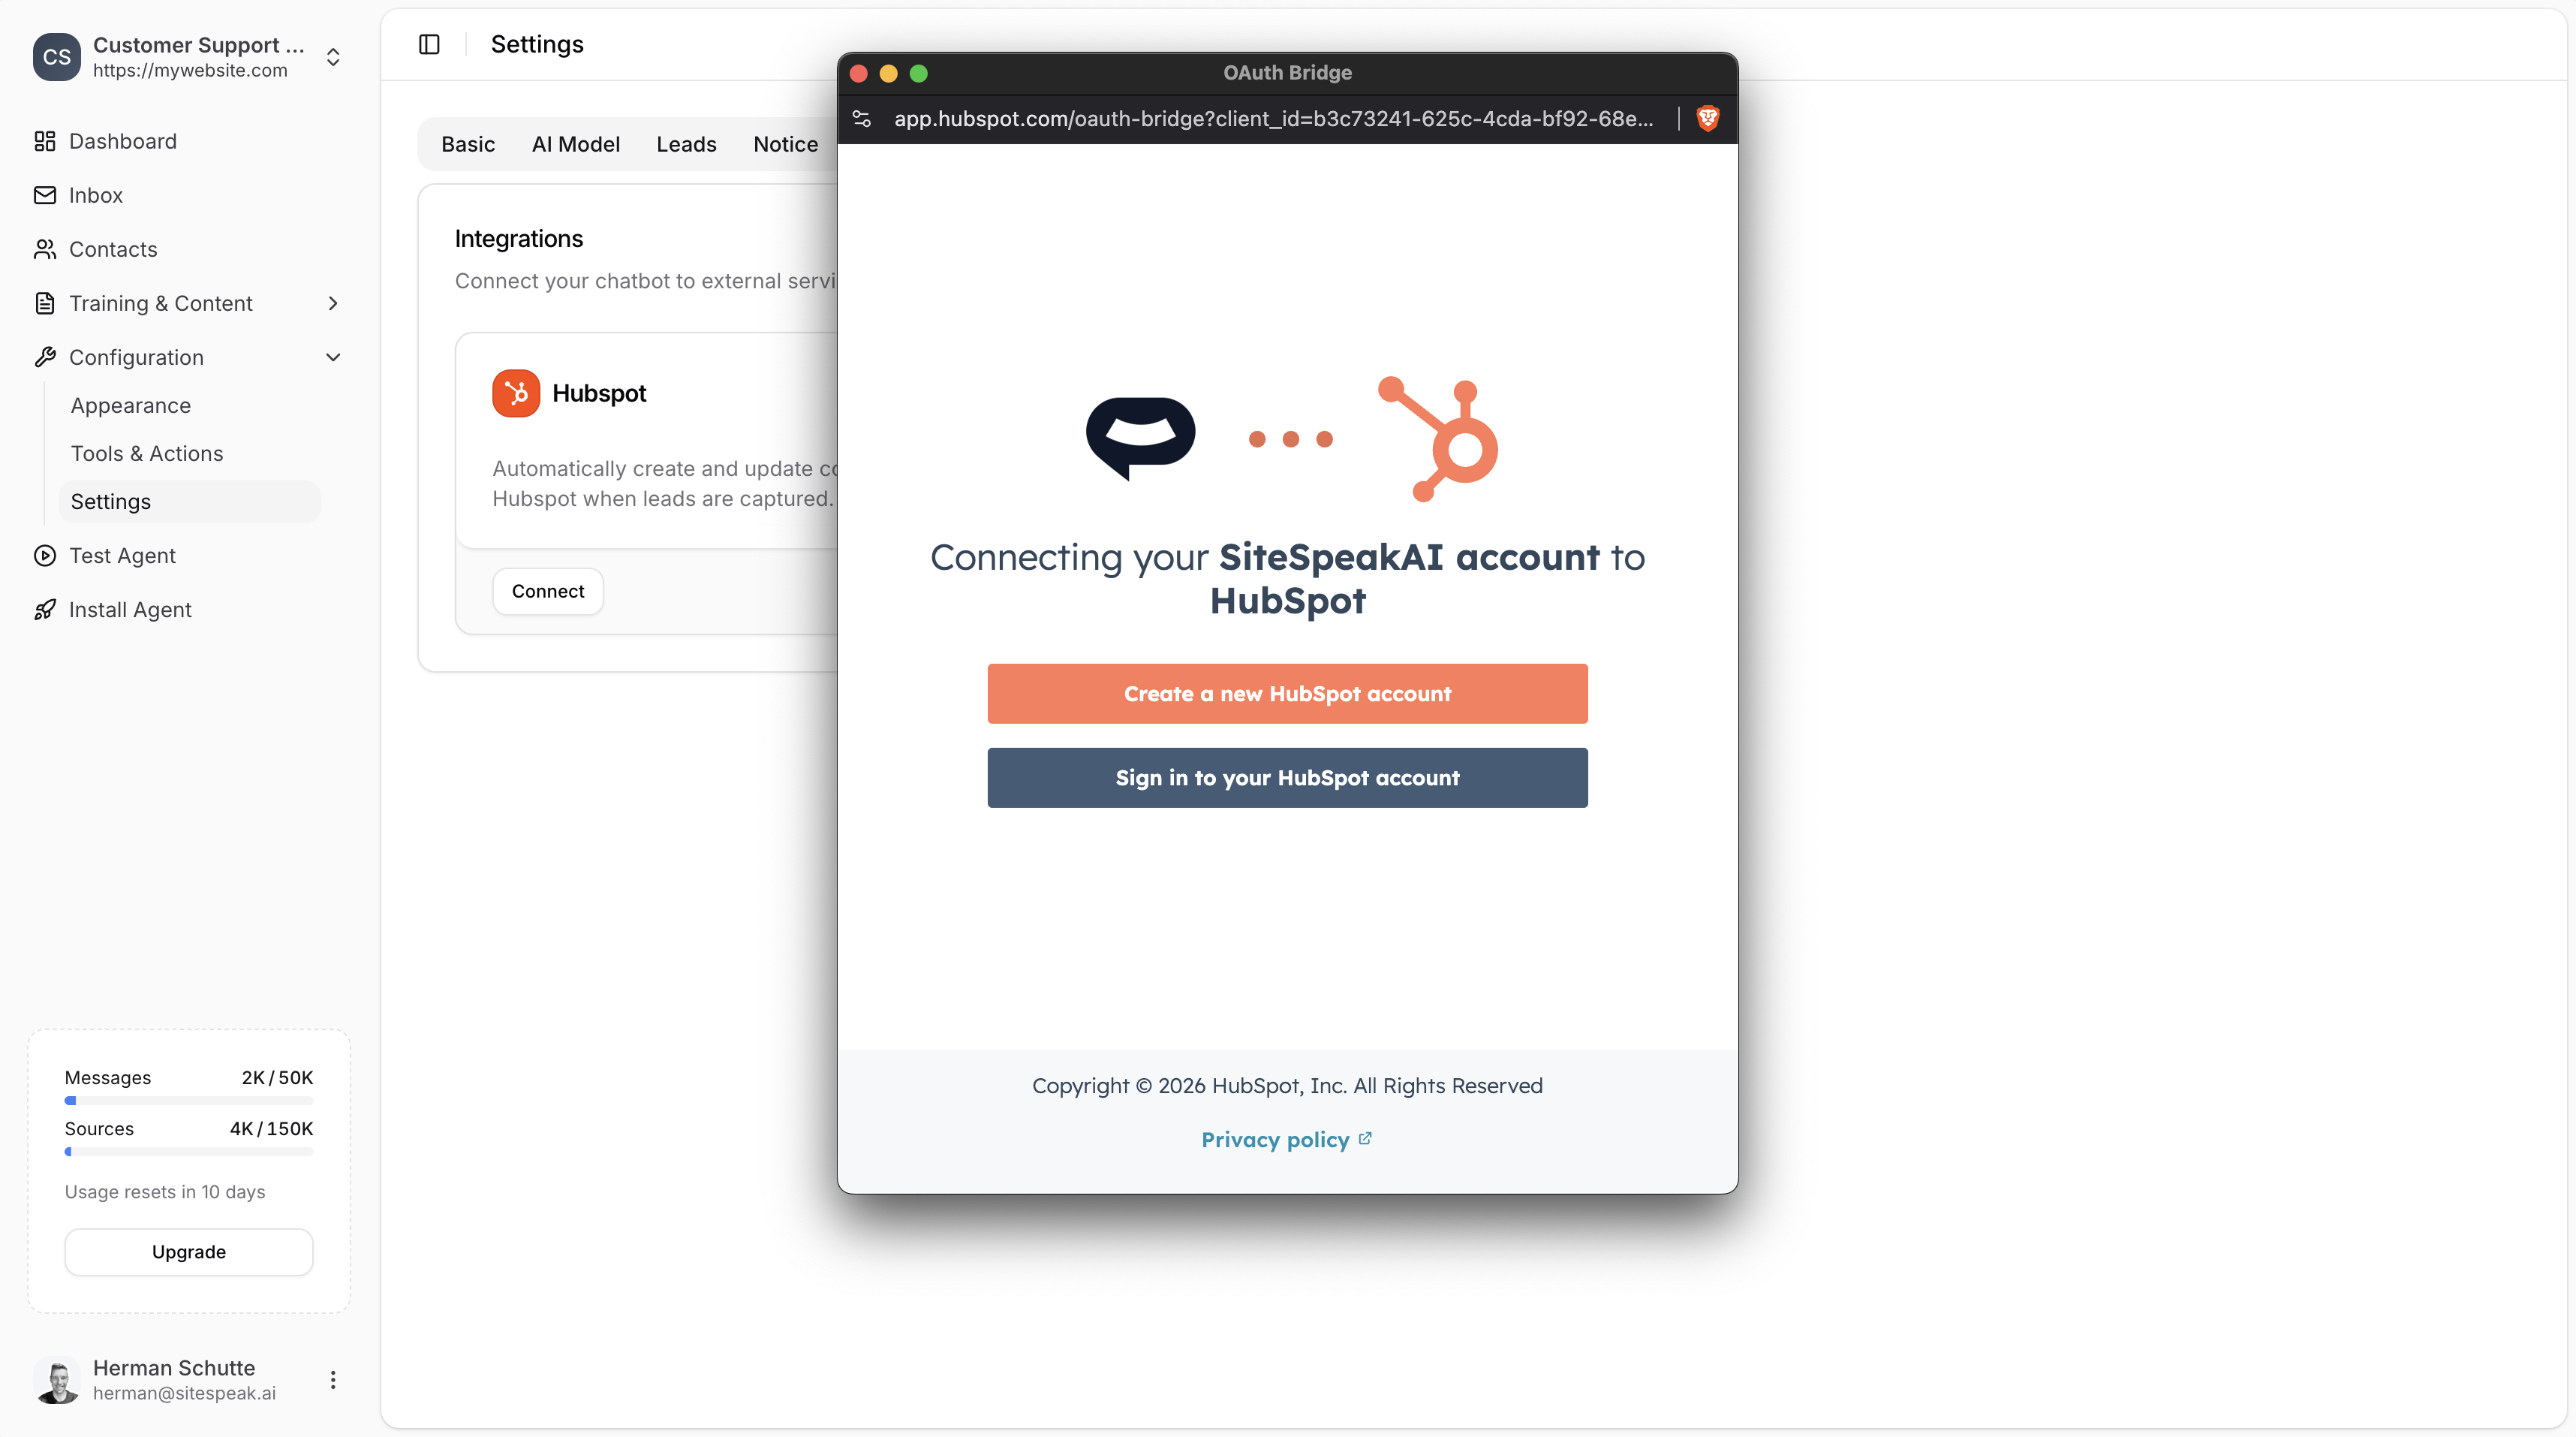
A popup will appear asking you to connect your SiteSpeakAI account to HubSpot. You can either:
* **Create a new HubSpot account** if you don't have one
* **Sign in to your HubSpot account** if you already have one
 ## Connected State
Once connected, you'll see:
* A green **Connected** badge
* Your HubSpot **Account** email
* Your HubSpot **Portal ID**
All newly captured leads will now automatically be added to your HubSpot contacts with a note containing the context of their conversation.
## Connected State
Once connected, you'll see:
* A green **Connected** badge
* Your HubSpot **Account** email
* Your HubSpot **Portal ID**
All newly captured leads will now automatically be added to your HubSpot contacts with a note containing the context of their conversation.
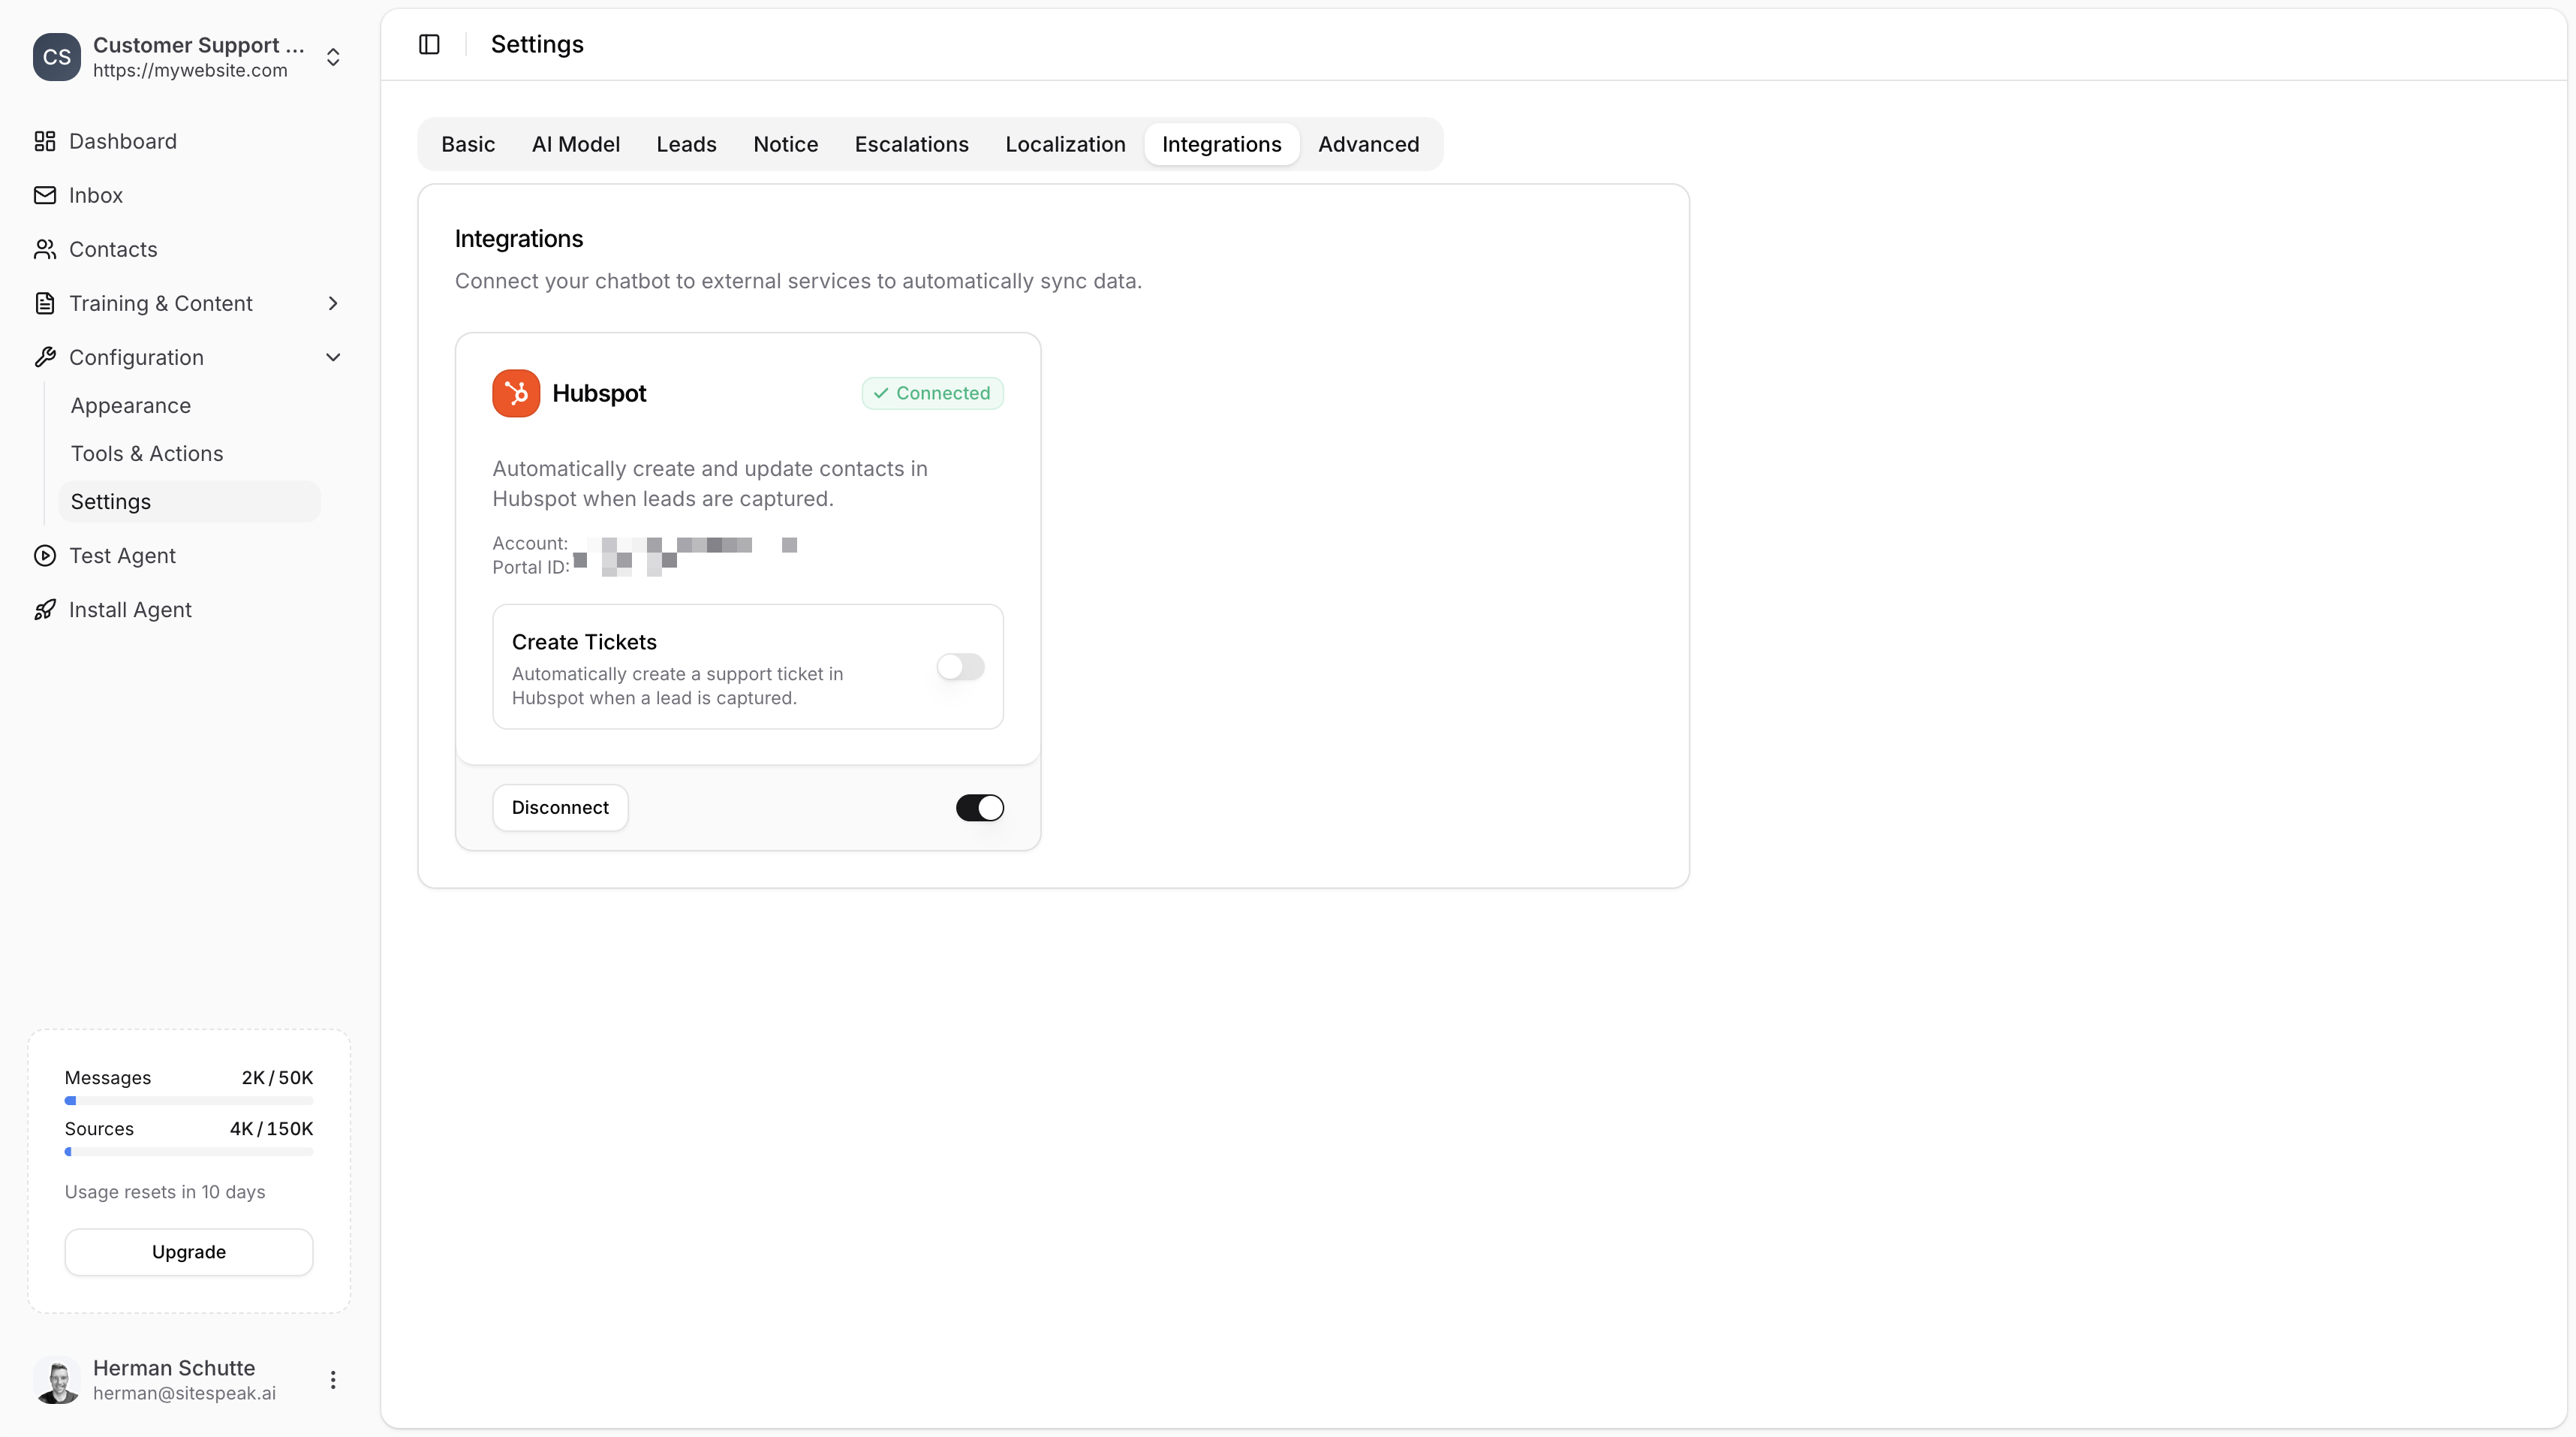 ## Enable Automatic Support Tickets
You can optionally enable automatic ticket creation:
In the connected HubSpot card, locate the **Create Tickets** section.
Enable the toggle to automatically create a support ticket in HubSpot when a lead is captured.
When enabled, each captured lead will also create a support ticket containing the chat history as context, so your support team can easily follow up.
## Enable Automatic Support Tickets
You can optionally enable automatic ticket creation:
In the connected HubSpot card, locate the **Create Tickets** section.
Enable the toggle to automatically create a support ticket in HubSpot when a lead is captured.
When enabled, each captured lead will also create a support ticket containing the chat history as context, so your support team can easily follow up.
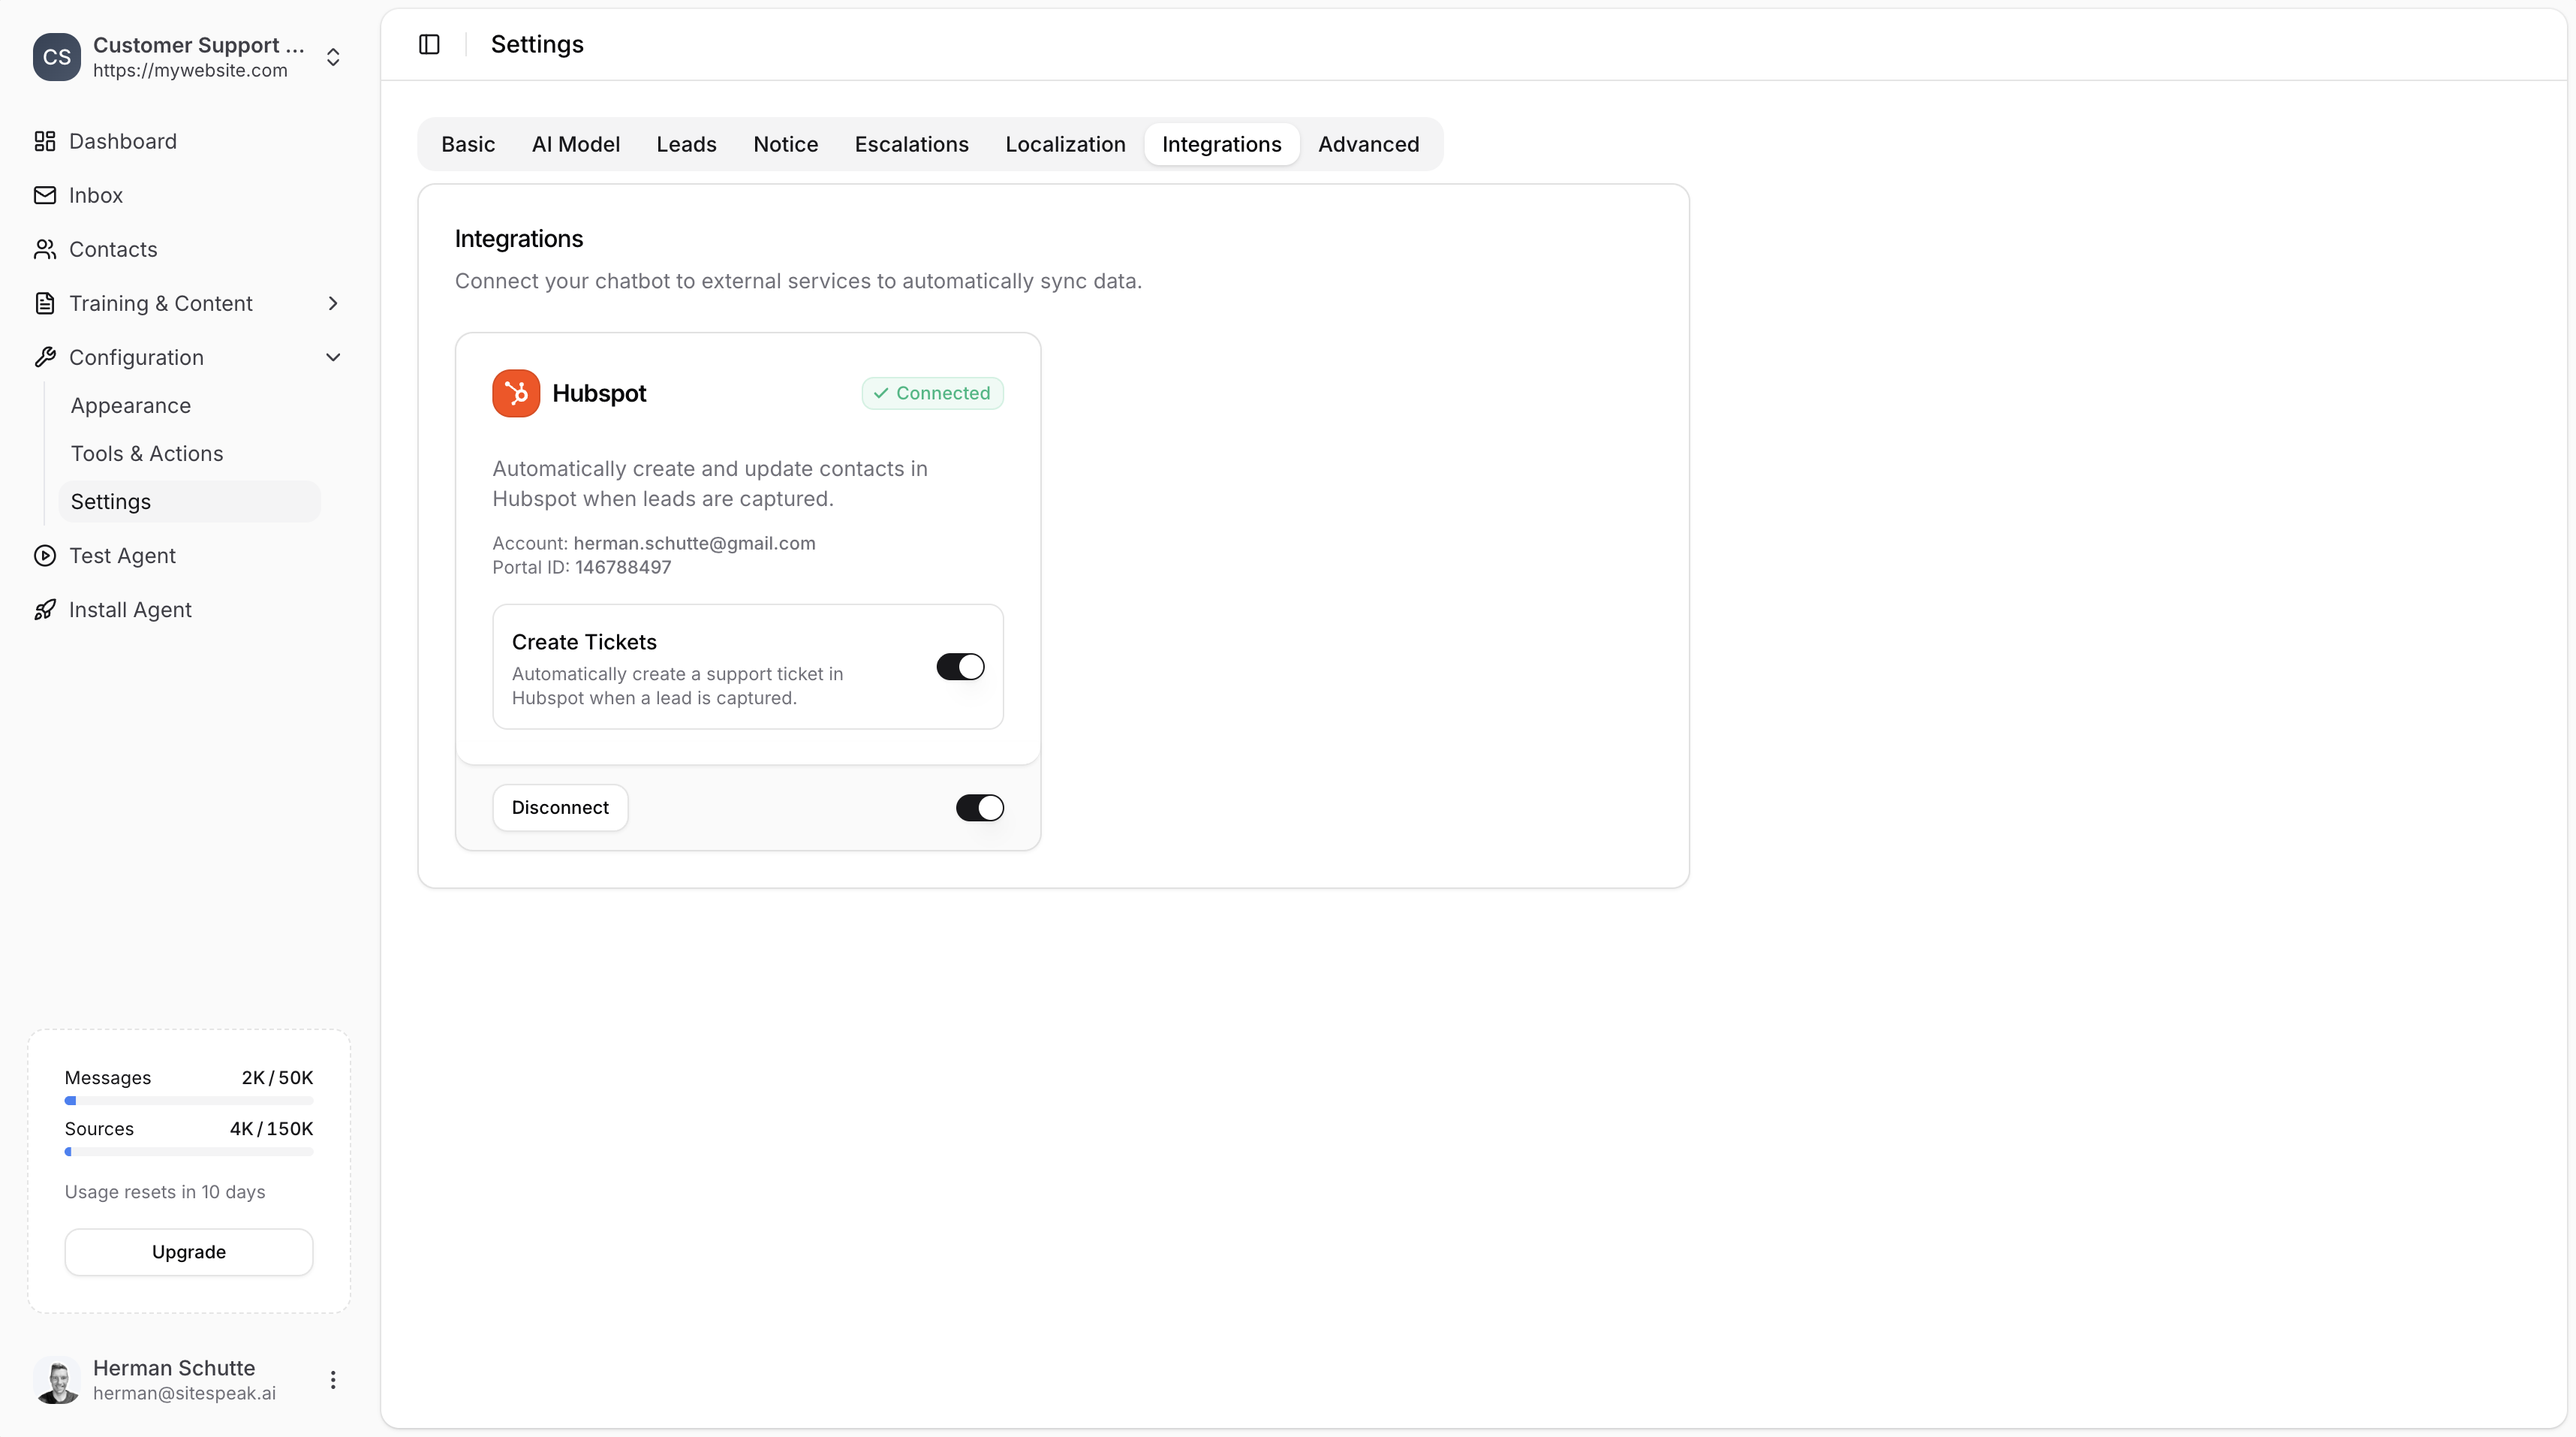 ## Disconnect HubSpot
To disconnect the integration, click the **Disconnect** button in the HubSpot card. You can also use the main toggle at the bottom of the card to temporarily disable syncing without disconnecting.
***
Join over 1000+ businesses, websites and startups automating their customer service and other tasks with a custom trained AI agent.
## Disconnect HubSpot
To disconnect the integration, click the **Disconnect** button in the HubSpot card. You can also use the main toggle at the bottom of the card to temporarily disable syncing without disconnecting.
***
Join over 1000+ businesses, websites and startups automating their customer service and other tasks with a custom trained AI agent.