> ## Documentation Index
> Fetch the complete documentation index at: https://sitespeak.ai/docs/llms.txt
> Use this file to discover all available pages before exploring further.
# Deploy & install your chatbot
> Add your AI chatbot to any website with a simple code snippet
Installing SiteSpeakAI on your website is easy and involves pasting a single code snippet into your website's HTML.
## Get your code snippet
Go to [sitespeak.ai](https://sitespeak.ai) and log in to your dashboard.
Choose your chatbot from the dropdown at the top of the sidebar.
Click on **Install Agent** in the sidebar.
Make sure the **JavaScript** tab is selected, then click **Copy Code**.
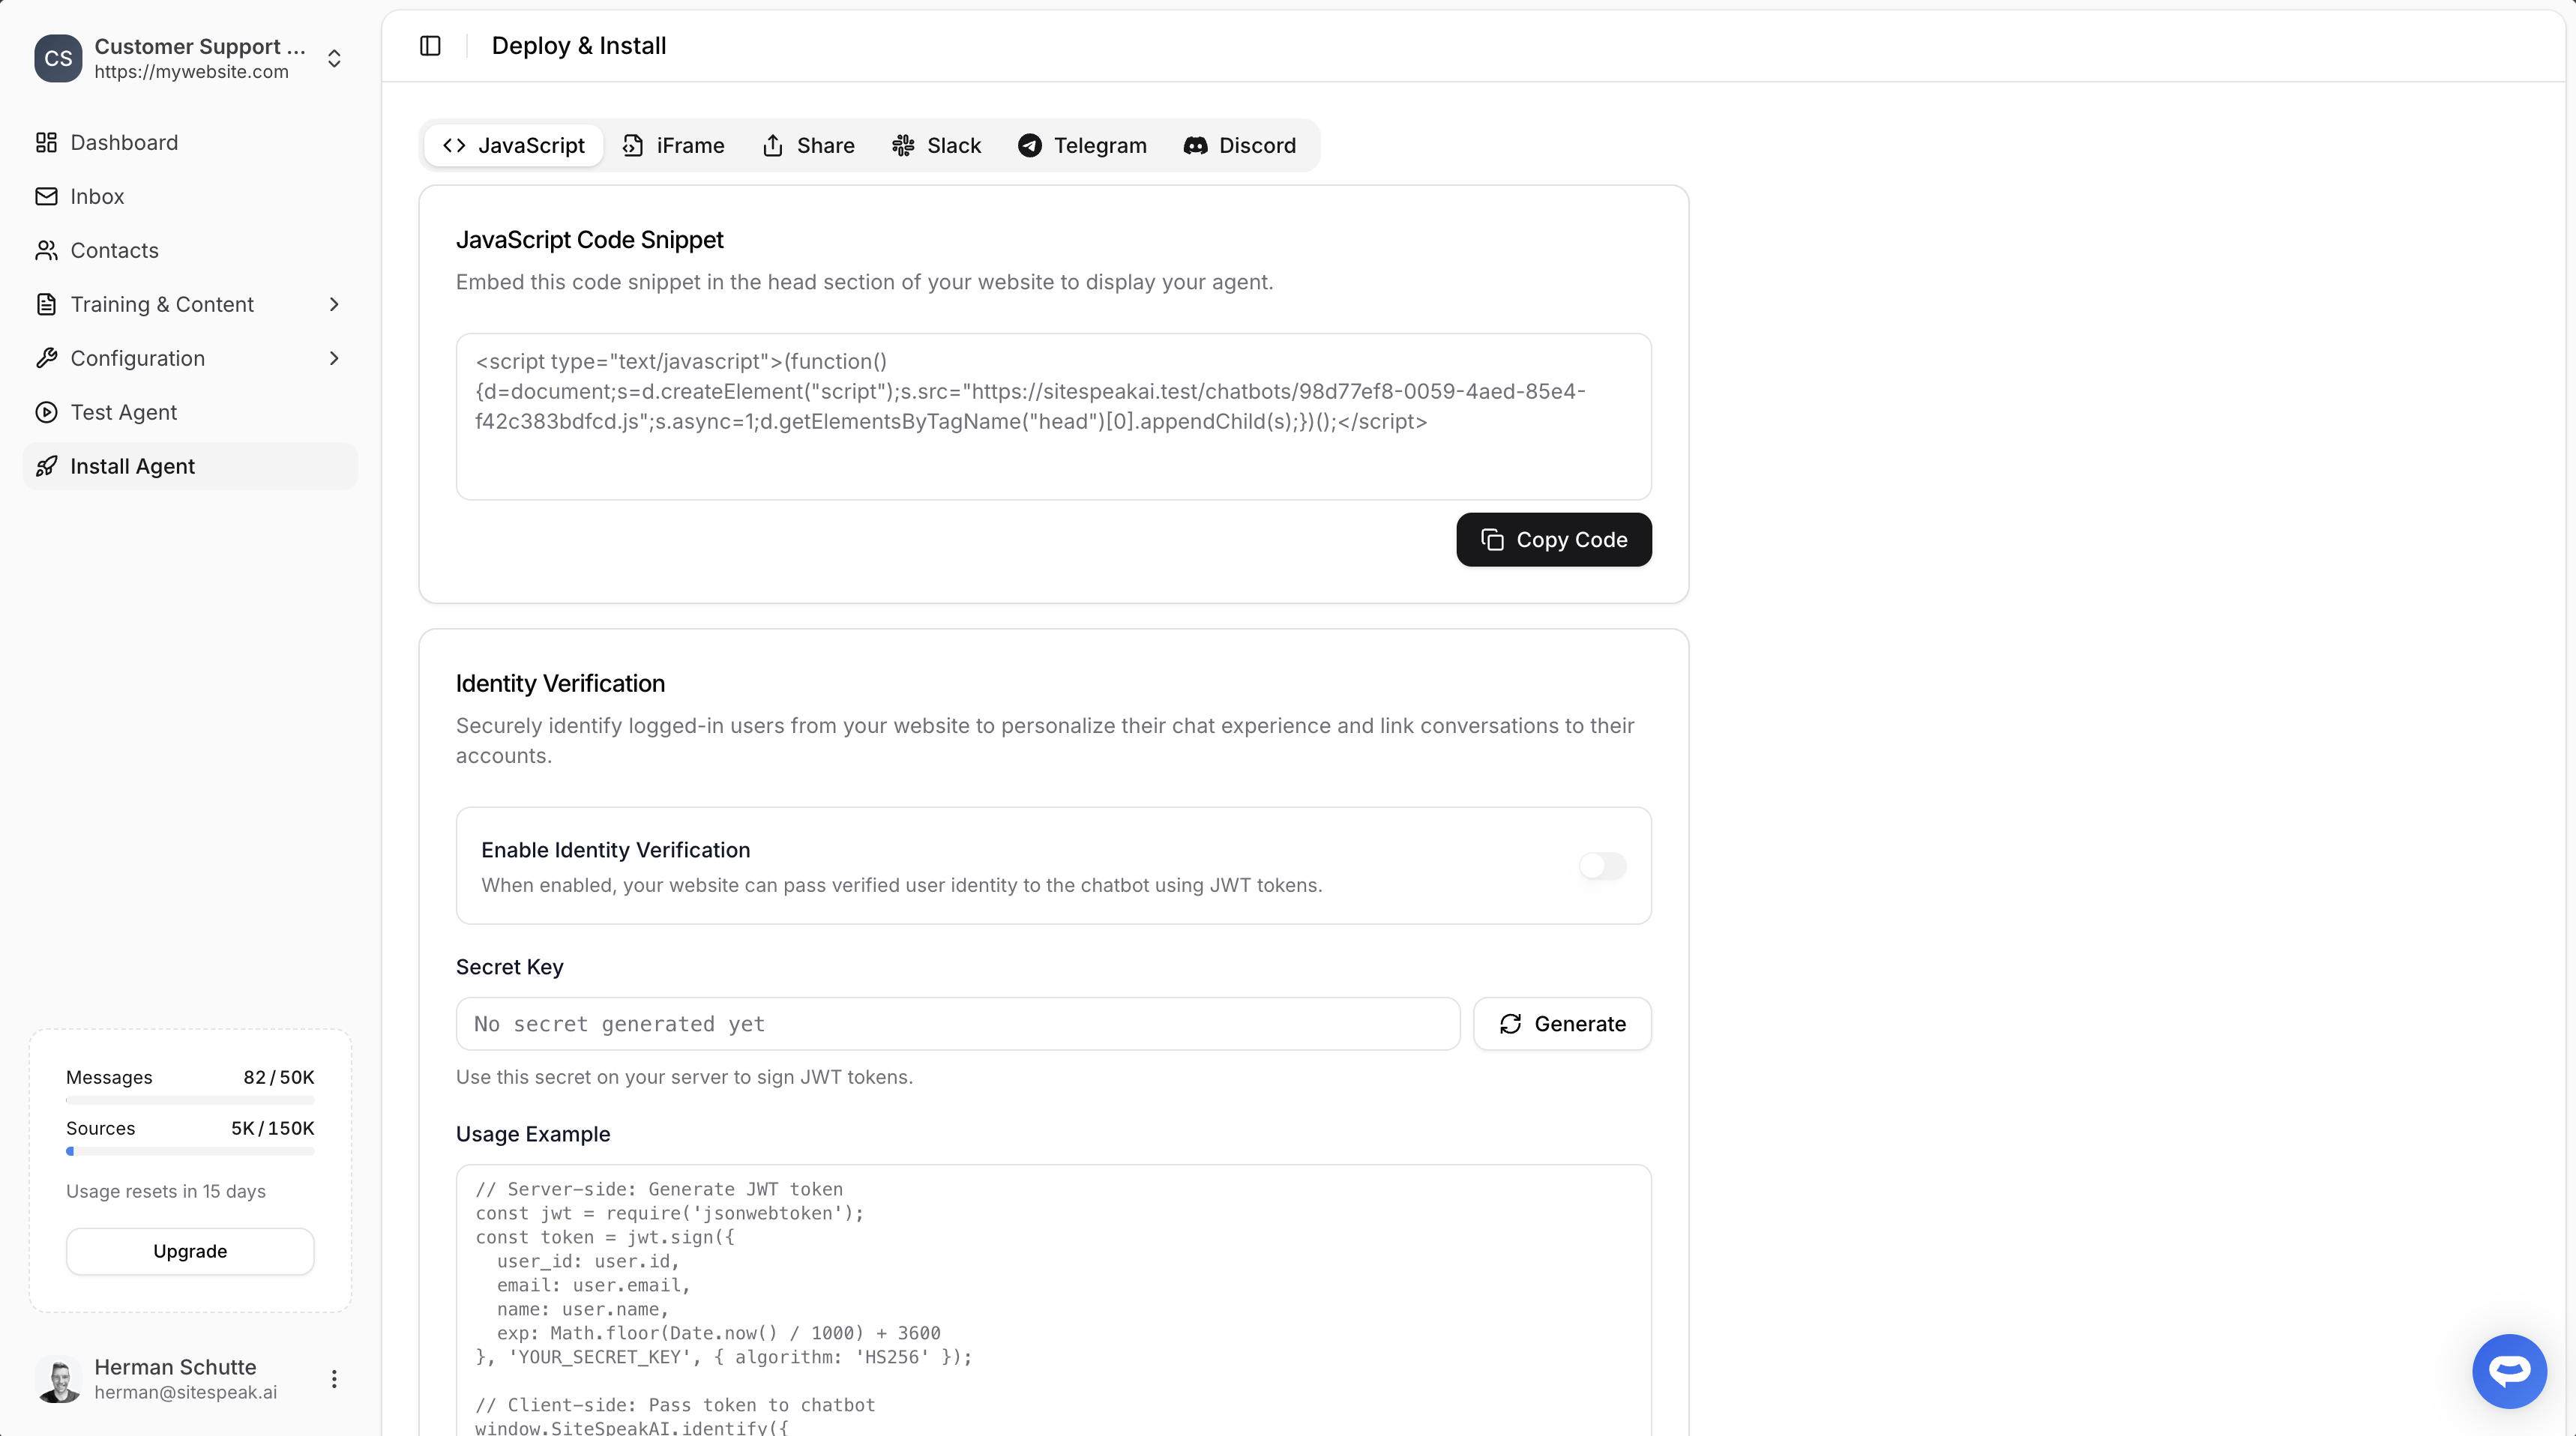 ## Add to your website
Paste the code snippet into the `` section of your website:
```html theme={null}
```
Replace `YOUR_CHATBOT_ID` with your actual chatbot ID from the dashboard.
Once added, your chatbot will appear on your website automatically.
## Alternative: iFrame embed
If you prefer to embed the chatbot as an iFrame (useful for embedding in specific page sections), switch to the **iFrame** tab in the Install Agent section.
## Add to your website
Paste the code snippet into the `` section of your website:
```html theme={null}
```
Replace `YOUR_CHATBOT_ID` with your actual chatbot ID from the dashboard.
Once added, your chatbot will appear on your website automatically.
## Alternative: iFrame embed
If you prefer to embed the chatbot as an iFrame (useful for embedding in specific page sections), switch to the **iFrame** tab in the Install Agent section.
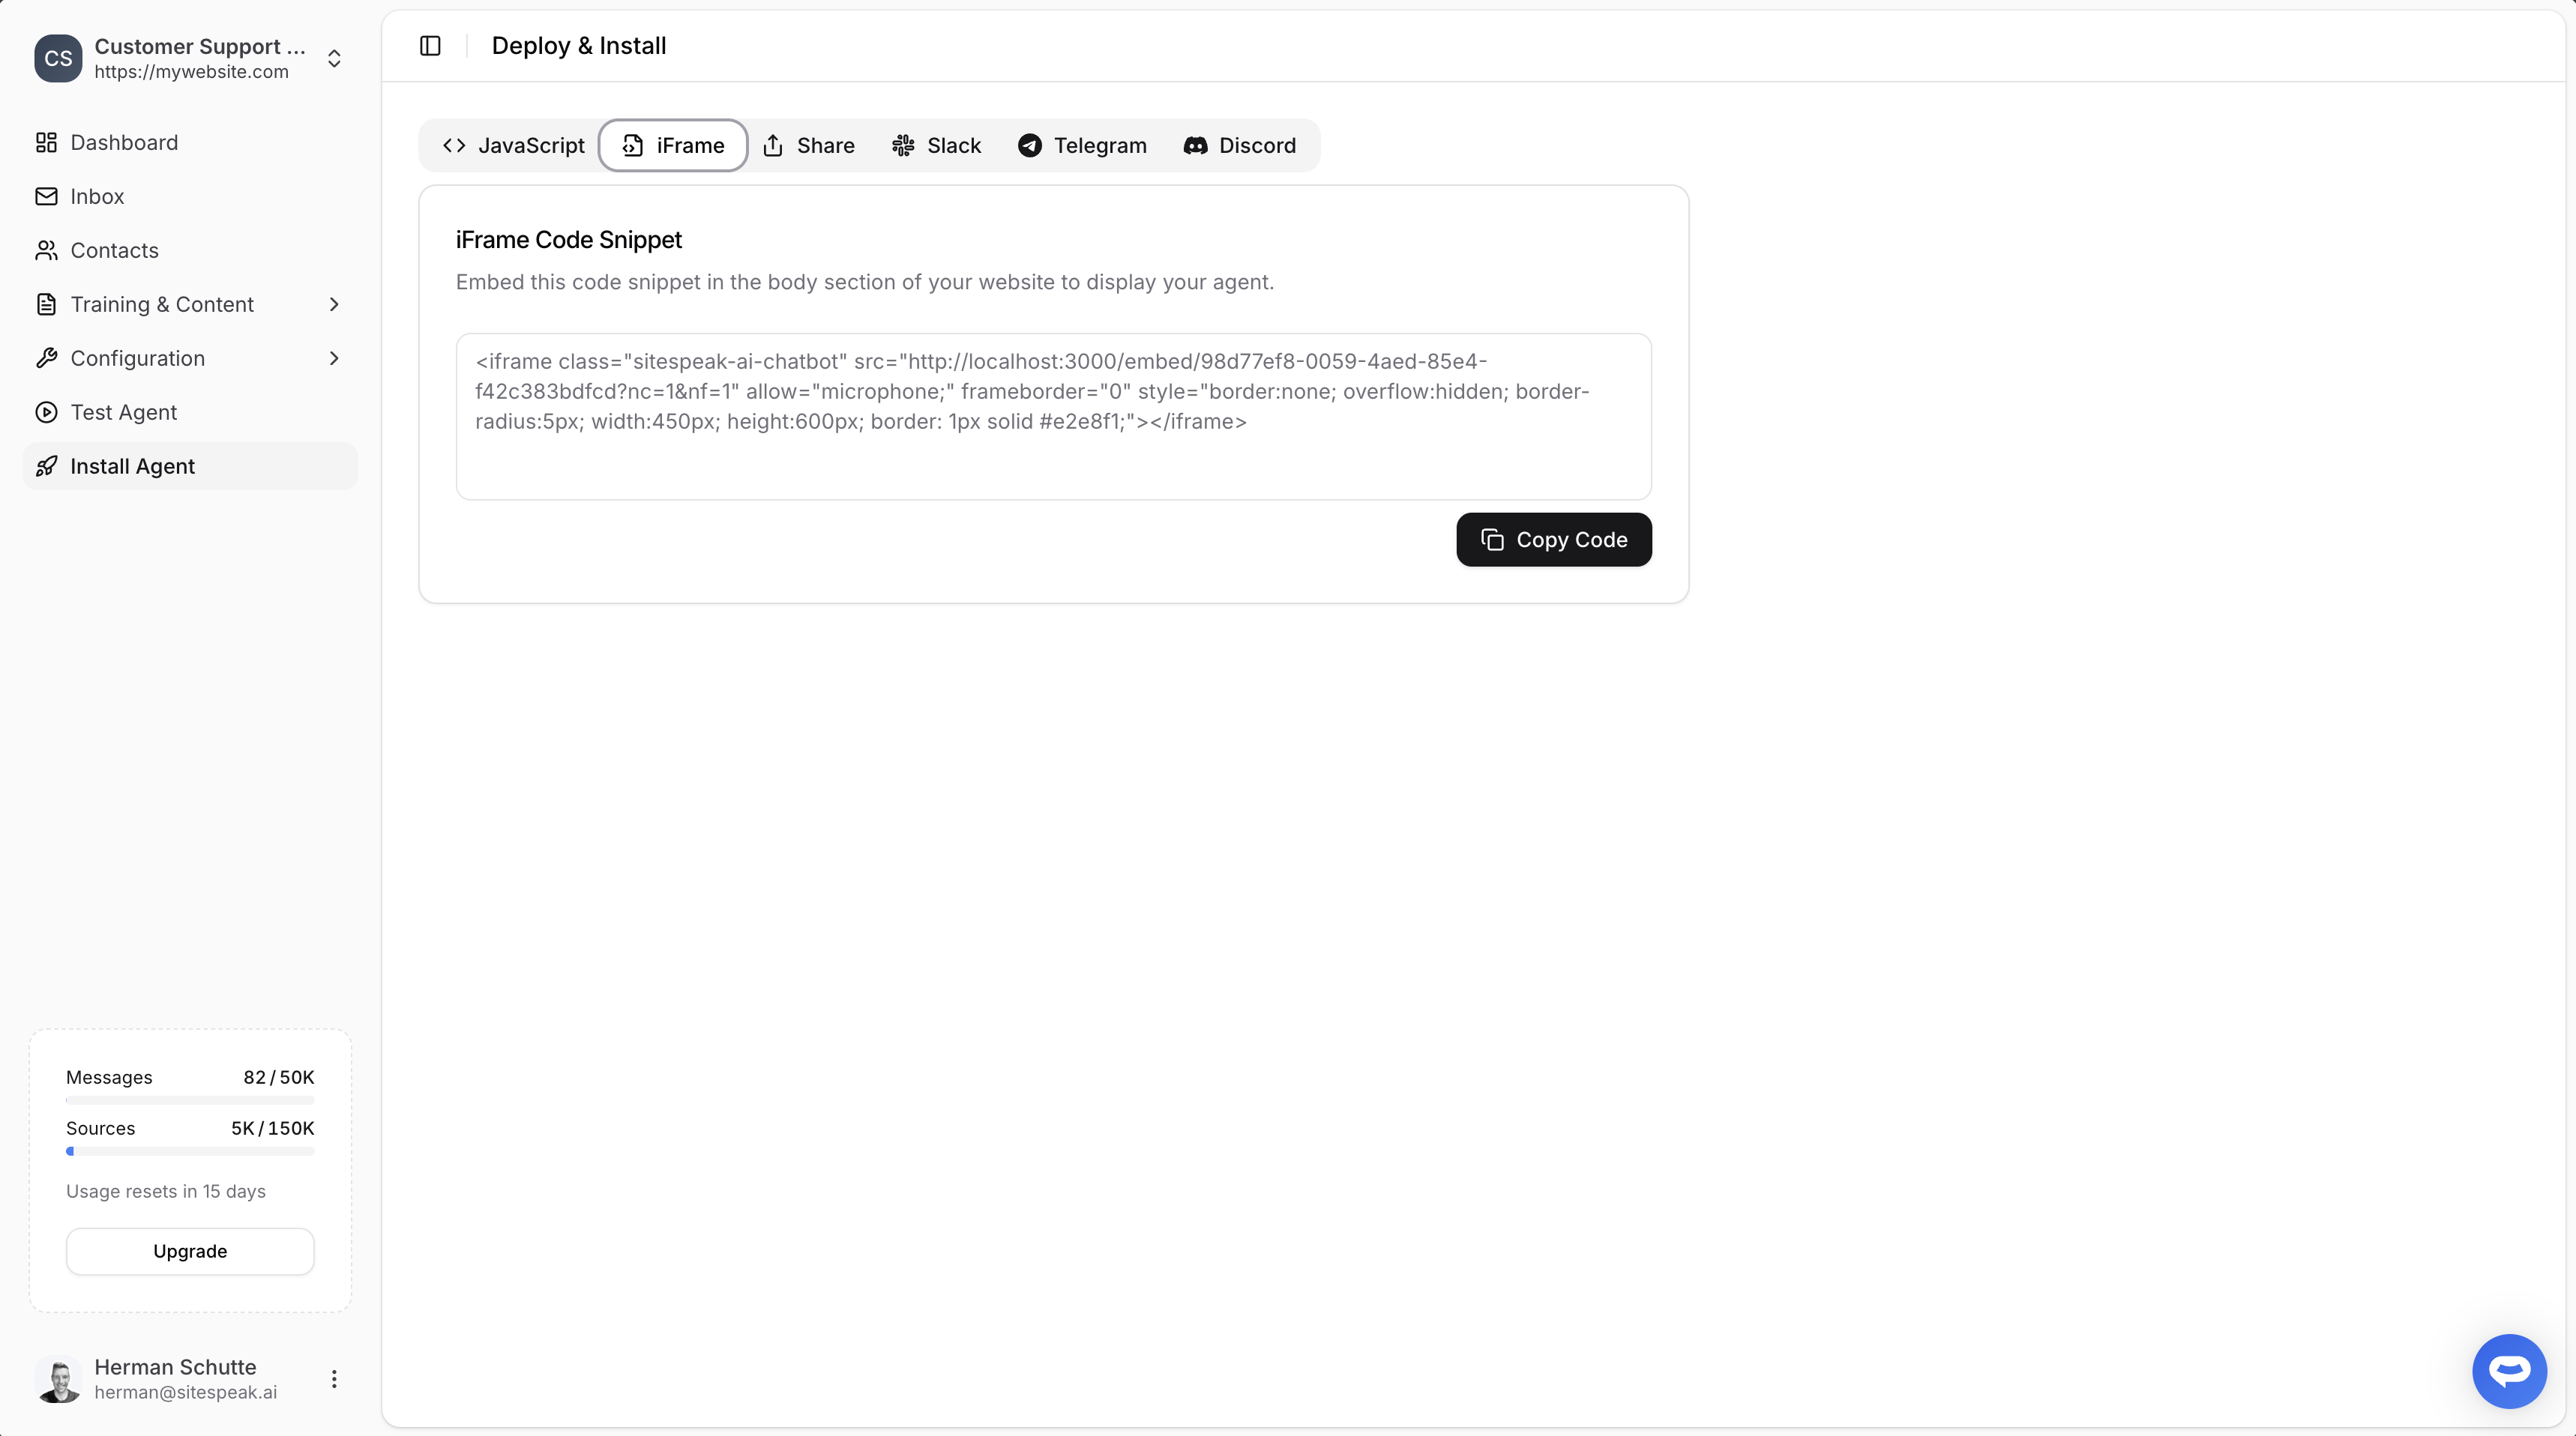 Paste the iFrame code into the `` section where you want the chatbot to appear:
```html theme={null}
```
## Identity verification
For a more personalized experience, you can securely identify logged-in users and link conversations to their accounts.
### Enable identity verification
1. In the **Install Agent** section, find **Identity Verification**
2. Toggle on **Enable Identity Verification**
3. Click **Generate** to create your secret key
4. Store the secret key securely on your server
Never expose your secret key in client-side code. It should only be used on your server.
### How it works
1. **Server-side**: Generate a JWT token with user information
2. **Client-side**: Pass the token to the chatbot
```javascript theme={null}
// Server-side: Generate JWT token
const jwt = require('jsonwebtoken');
const token = jwt.sign({
user_id: user.id,
email: user.email,
name: user.name,
exp: Math.floor(Date.now() / 1000) + 3600
}, 'YOUR_SECRET_KEY', { algorithm: 'HS256' });
// Client-side: Pass token to chatbot
window.SiteSpeakAI.identify({
token: token
});
```
Identity verification allows you to personalize welcome messages using [template tags](/managing-your-chatbot/personalise-welcome-message) and view conversation history per user.
## Platform-specific guides
Looking to install on a specific platform? Check out our detailed guides:
Install on WordPress sites
Add to your Shopify store
Install on Webflow sites
Connect to Slack workspace
## Next steps
Match your chatbot to your brand
Turn visitors into qualified leads
***
Join over 1000+ businesses, websites and startups automating their customer service and other tasks with a custom trained AI agent.
Paste the iFrame code into the `` section where you want the chatbot to appear:
```html theme={null}
```
## Identity verification
For a more personalized experience, you can securely identify logged-in users and link conversations to their accounts.
### Enable identity verification
1. In the **Install Agent** section, find **Identity Verification**
2. Toggle on **Enable Identity Verification**
3. Click **Generate** to create your secret key
4. Store the secret key securely on your server
Never expose your secret key in client-side code. It should only be used on your server.
### How it works
1. **Server-side**: Generate a JWT token with user information
2. **Client-side**: Pass the token to the chatbot
```javascript theme={null}
// Server-side: Generate JWT token
const jwt = require('jsonwebtoken');
const token = jwt.sign({
user_id: user.id,
email: user.email,
name: user.name,
exp: Math.floor(Date.now() / 1000) + 3600
}, 'YOUR_SECRET_KEY', { algorithm: 'HS256' });
// Client-side: Pass token to chatbot
window.SiteSpeakAI.identify({
token: token
});
```
Identity verification allows you to personalize welcome messages using [template tags](/managing-your-chatbot/personalise-welcome-message) and view conversation history per user.
## Platform-specific guides
Looking to install on a specific platform? Check out our detailed guides:
Install on WordPress sites
Add to your Shopify store
Install on Webflow sites
Connect to Slack workspace
## Next steps
Match your chatbot to your brand
Turn visitors into qualified leads
***
Join over 1000+ businesses, websites and startups automating their customer service and other tasks with a custom trained AI agent.