> ## Documentation Index
> Fetch the complete documentation index at: https://sitespeak.ai/docs/llms.txt
> Use this file to discover all available pages before exploring further.
# Languages & Localization
> Configure your chatbot to support multiple languages and customize all interface text for each language.
SiteSpeakAI supports full multi-language localization, allowing you to customize all labels, messages, and text displayed in your chatbot for each language your visitors use.
## Accessing Localization Settings
In your chatbot dashboard, click **Configuration** in the sidebar.
Click on the **Settings** tab.
Navigate to the **Localization** tab.
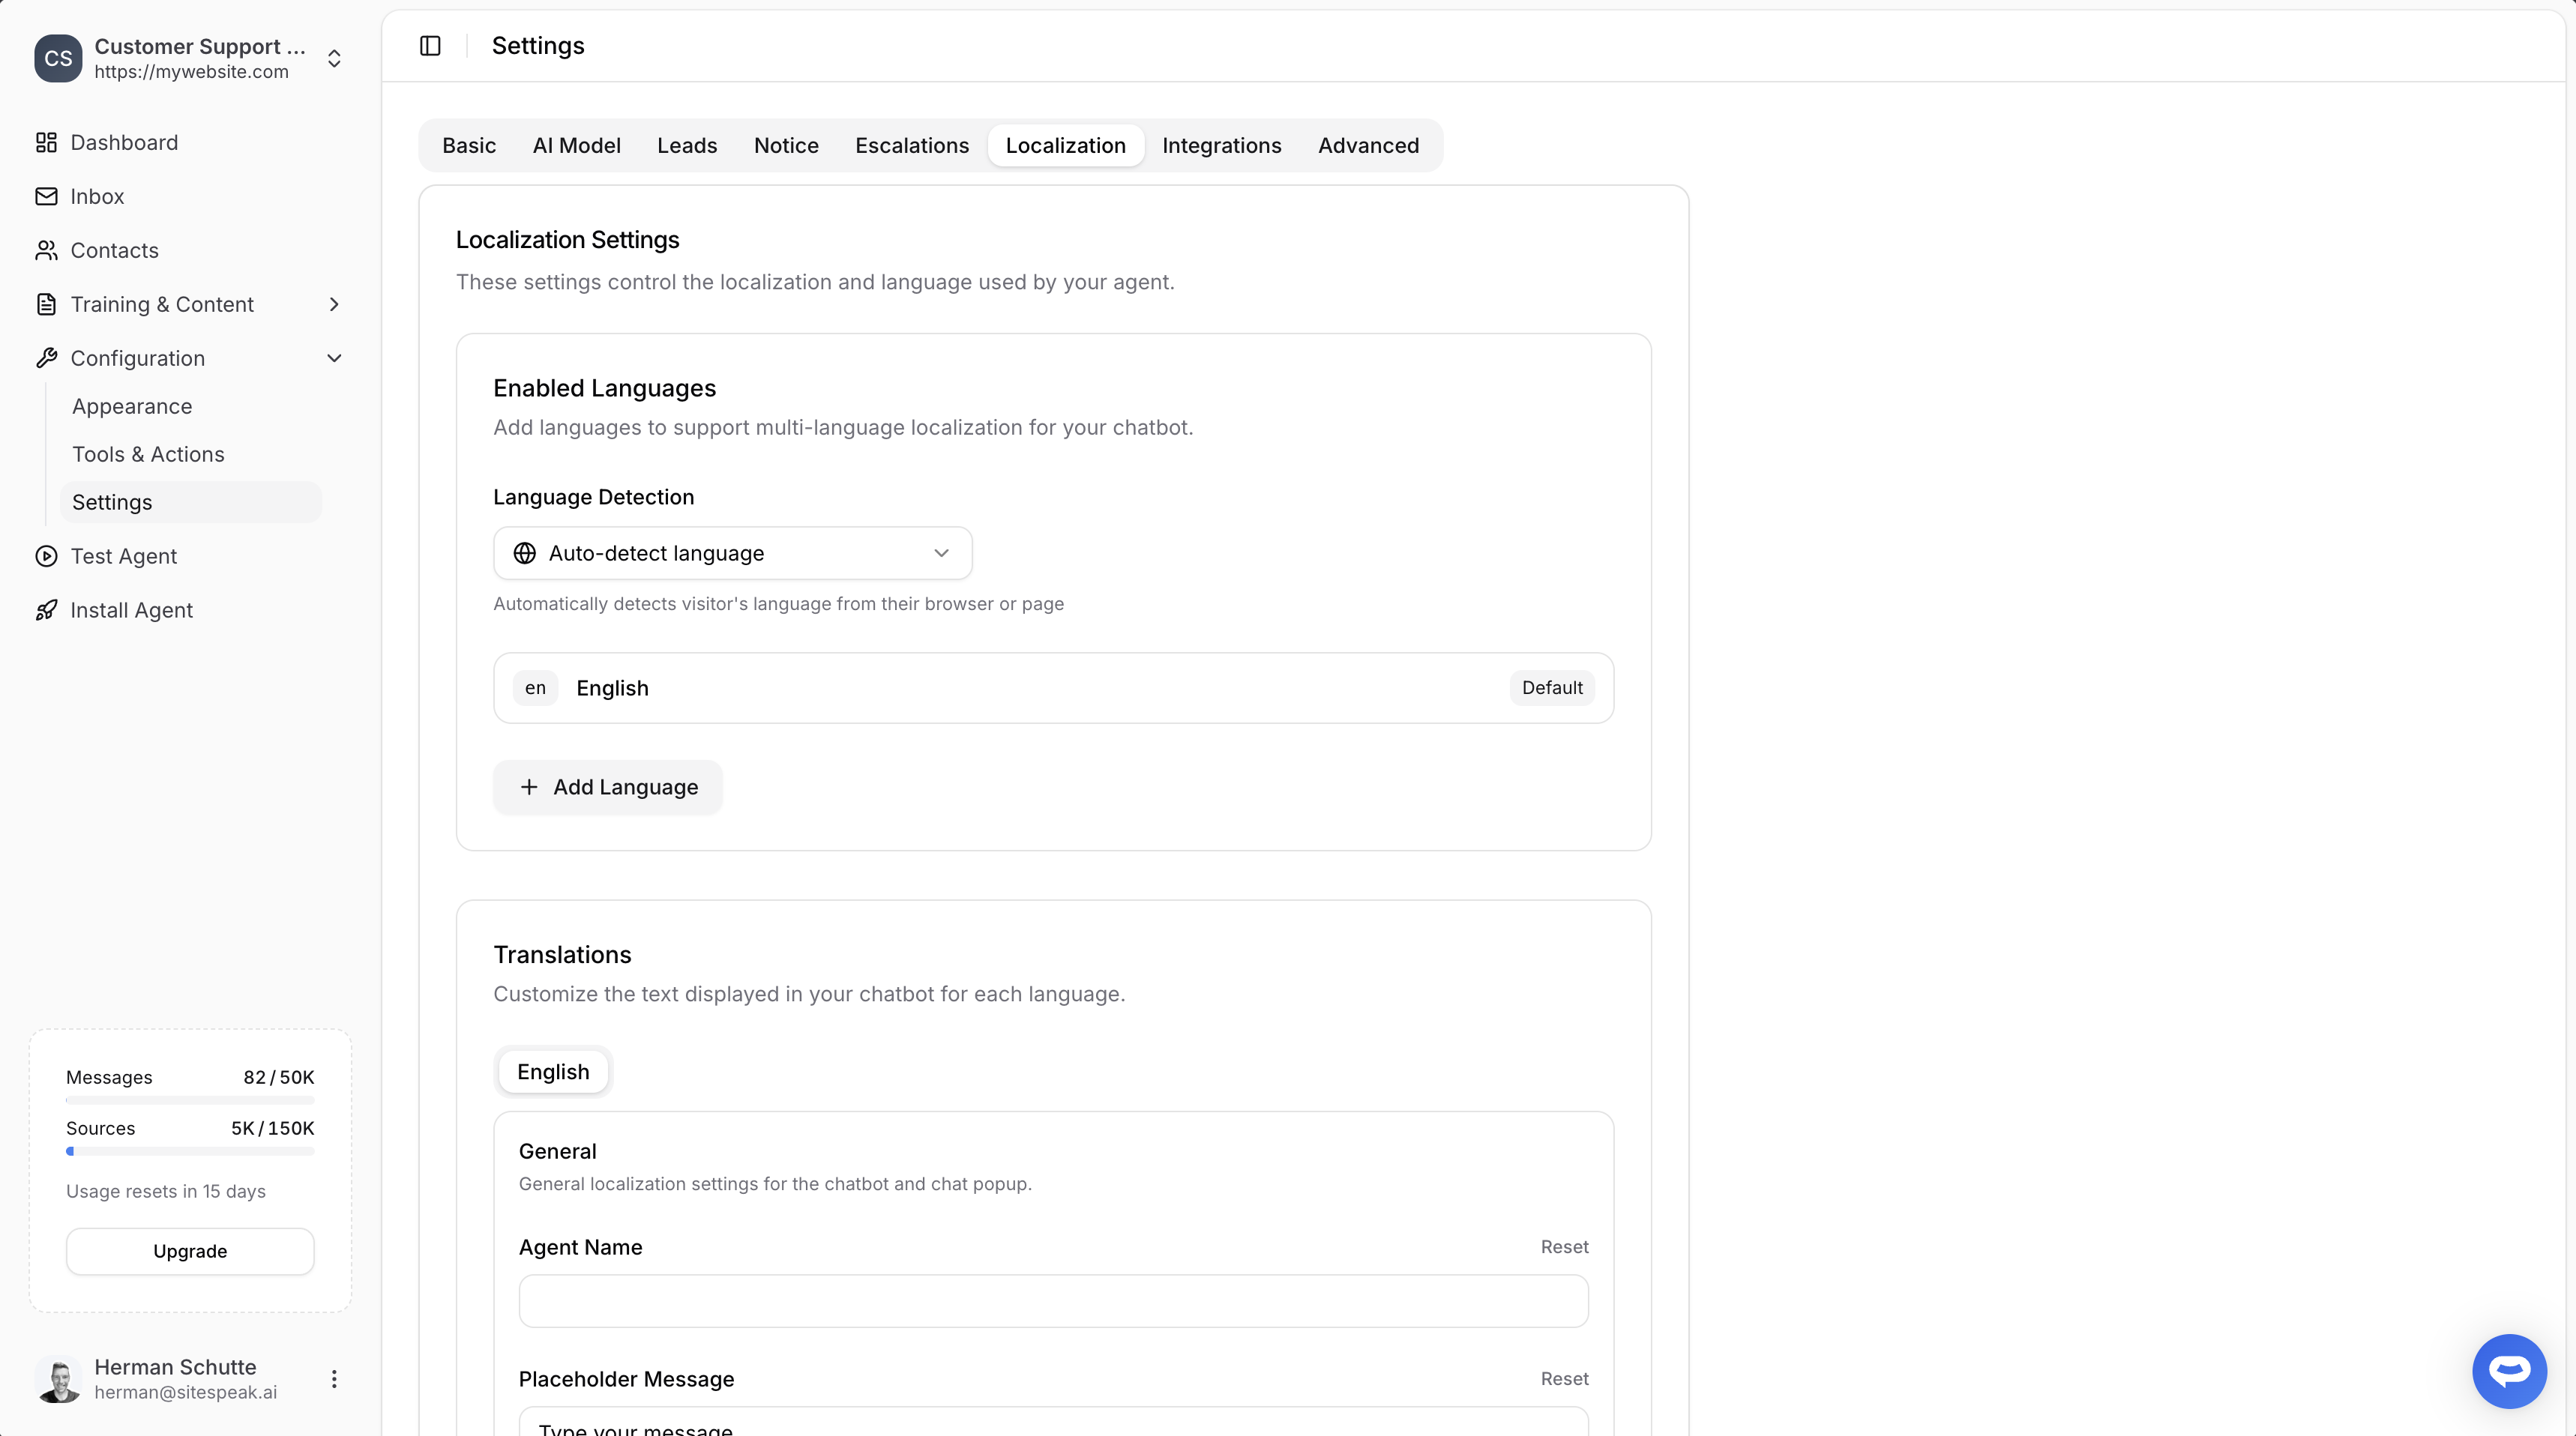 ***
## Enabled Languages
Add multiple languages to support visitors from different regions. Your chatbot will display all labels and messages in the visitor's preferred language.
### Language Detection
Choose how your chatbot determines which language to display:
* **Auto-detect language**: Automatically detects the visitor's language from their browser or page settings
* **Specific language**: Force the chatbot to always display in a particular language
### Adding a New Language
In the **Enabled Languages** section, click the **+ Add Language** button.
Specify the language code (e.g., `fr` for French, `de` for German) and language name.
Click the **Add** button to add the new language.
### Setting a Default Language
One language is marked as **Default**. This is used when:
* The visitor's language cannot be detected
* The visitor's language hasn't been configured in your chatbot
***
## Translations
Customize all text displayed in your chatbot for each language. This ensures a fully localized experience for your visitors.
### Customizable Fields
The Translations section lets you customize:
**General**
* Agent Name
* Placeholder Message (input field text)
* Welcome Messages
* Footer Text
**Lead Capture**
* Form title and description
* Field labels (Name, Email, Phone, etc.)
* Submit button text
**Escalation**
* Escalation request messages
* Confirmation messages
* Unavailable messages
**Email Notifications**
* Email subject line
* Greeting and introduction message
* Contact information labels (Name, Email, Phone, Internal User ID)
* Last question label
* Button text, footer, sign off, and sender name
**Feedback**
* Feedback prompts
* Thank you messages
**Widget Menu** (the `…` menu in the chatbot header)
* `menu` - aria-label / tooltip on the `…` button
* `new_chat` - "Start New Chat" item and the floating pill in Recent Chats
* `view_recent_chats` - "Recent Chats" item
* `delete_chat` - "Delete Chat" item
* `recent_chats` - header title in the recent-chats view
* `no_conversations` - empty state when there are no past conversations
* `back` - aria-label on the back arrow
See [Visitor Recent Chats](/managing-your-chatbot/visitor-recent-chats) for what these labels control.
**Errors & System**
* Error messages
* Rate limit messages
* Loading states
### Editing Translations
In the **Translations** section, click on the language tab you want to edit (e.g., **English**, **French**).
Modify any of the text fields. Each field has a **Reset** button to restore the default text.
Click the **Save** button to store your translations.
You can add as many languages as you need. Each language gets its own complete set of customizable text fields.
***
## Email Notification Localization
Escalation notification emails sent to your team can also be localized. These emails are sent in your chatbot's **default language** when a visitor requests human assistance.
### Available Placeholders
Use the following placeholders in your email notification text. They will be replaced with actual values when the email is sent:
| Placeholder | Description |
| ------------------- | ---------------------------------------------------------- |
| `{{inbox_link}}` | Full URL to the visitor's inbox |
| `{{visitor_name}}` | Visitor's full name (or "Unknown visitor" if not provided) |
| `{{visitor_email}}` | Visitor's email address |
| `{{visitor_phone}}` | Visitor's phone number |
| `{{last_question}}` | The visitor's last message |
| `{{chatbot_name}}` | Name of the chatbot |
| `{{app_name}}` | Application name (SiteSpeakAI) |
### Customizable Email Fields
You can customize the following parts of the escalation email:
* **Email Subject** - e.g., `{{chatbot_name}}: Visitor needs human assistance`
* **Greeting** - e.g., `Hello!`
* **Introduction Message** - Supports markdown links, e.g., `Visit your [inbox]({{inbox_link}})`
* **Last Question Label** - Label shown above the visitor's last message
* **Contact Information Labels** - Labels for name, email, phone, and internal user ID
* **Button Text** - The call-to-action button text
* **Footer, Sign Off, and Sender Name** - Closing content of the email
The introduction message field supports markdown, so you can include links like `[inbox]({{inbox_link}})` that will render as clickable links in the email.
***
## How It Works
Once you've configured multiple languages:
1. **Visitor arrives**: When a visitor opens your chatbot, their browser language is detected
2. **Language matched**: If you've configured that language, all interface text displays in their language
3. **AI responds**: The AI also responds in the detected language, using your training content
4. **Fallback**: If the language isn't configured, the default language is used
***
## AI Language Support
Beyond interface localization, your chatbot's AI can understand and respond in virtually any language:
* The AI automatically detects the language of incoming messages
* Responses are generated in the same language the visitor uses
* For best results in specific languages, add training content in those languages
### Supported Languages
The AI supports all major languages including:
* English, Spanish, French, German, Portuguese, Italian, Dutch
* Chinese, Japanese, Korean
* Arabic, Hebrew, Hindi
* And many more...
Interface localization (labels and buttons) requires you to configure each language. AI responses work in any language automatically.
***
## Best Practices
* **Start with your primary language**: Configure your default language completely before adding others
* **Be consistent**: Use the same tone and terminology across all languages
* **Test thoroughly**: Preview your chatbot in each configured language
* **Consider regional variations**: Create separate entries for variants like `en-US` and `en-GB` if needed
***
Join over 1000+ businesses, websites and startups automating their customer service and other tasks with a custom trained AI agent.
***
## Enabled Languages
Add multiple languages to support visitors from different regions. Your chatbot will display all labels and messages in the visitor's preferred language.
### Language Detection
Choose how your chatbot determines which language to display:
* **Auto-detect language**: Automatically detects the visitor's language from their browser or page settings
* **Specific language**: Force the chatbot to always display in a particular language
### Adding a New Language
In the **Enabled Languages** section, click the **+ Add Language** button.
Specify the language code (e.g., `fr` for French, `de` for German) and language name.
Click the **Add** button to add the new language.
### Setting a Default Language
One language is marked as **Default**. This is used when:
* The visitor's language cannot be detected
* The visitor's language hasn't been configured in your chatbot
***
## Translations
Customize all text displayed in your chatbot for each language. This ensures a fully localized experience for your visitors.
### Customizable Fields
The Translations section lets you customize:
**General**
* Agent Name
* Placeholder Message (input field text)
* Welcome Messages
* Footer Text
**Lead Capture**
* Form title and description
* Field labels (Name, Email, Phone, etc.)
* Submit button text
**Escalation**
* Escalation request messages
* Confirmation messages
* Unavailable messages
**Email Notifications**
* Email subject line
* Greeting and introduction message
* Contact information labels (Name, Email, Phone, Internal User ID)
* Last question label
* Button text, footer, sign off, and sender name
**Feedback**
* Feedback prompts
* Thank you messages
**Widget Menu** (the `…` menu in the chatbot header)
* `menu` - aria-label / tooltip on the `…` button
* `new_chat` - "Start New Chat" item and the floating pill in Recent Chats
* `view_recent_chats` - "Recent Chats" item
* `delete_chat` - "Delete Chat" item
* `recent_chats` - header title in the recent-chats view
* `no_conversations` - empty state when there are no past conversations
* `back` - aria-label on the back arrow
See [Visitor Recent Chats](/managing-your-chatbot/visitor-recent-chats) for what these labels control.
**Errors & System**
* Error messages
* Rate limit messages
* Loading states
### Editing Translations
In the **Translations** section, click on the language tab you want to edit (e.g., **English**, **French**).
Modify any of the text fields. Each field has a **Reset** button to restore the default text.
Click the **Save** button to store your translations.
You can add as many languages as you need. Each language gets its own complete set of customizable text fields.
***
## Email Notification Localization
Escalation notification emails sent to your team can also be localized. These emails are sent in your chatbot's **default language** when a visitor requests human assistance.
### Available Placeholders
Use the following placeholders in your email notification text. They will be replaced with actual values when the email is sent:
| Placeholder | Description |
| ------------------- | ---------------------------------------------------------- |
| `{{inbox_link}}` | Full URL to the visitor's inbox |
| `{{visitor_name}}` | Visitor's full name (or "Unknown visitor" if not provided) |
| `{{visitor_email}}` | Visitor's email address |
| `{{visitor_phone}}` | Visitor's phone number |
| `{{last_question}}` | The visitor's last message |
| `{{chatbot_name}}` | Name of the chatbot |
| `{{app_name}}` | Application name (SiteSpeakAI) |
### Customizable Email Fields
You can customize the following parts of the escalation email:
* **Email Subject** - e.g., `{{chatbot_name}}: Visitor needs human assistance`
* **Greeting** - e.g., `Hello!`
* **Introduction Message** - Supports markdown links, e.g., `Visit your [inbox]({{inbox_link}})`
* **Last Question Label** - Label shown above the visitor's last message
* **Contact Information Labels** - Labels for name, email, phone, and internal user ID
* **Button Text** - The call-to-action button text
* **Footer, Sign Off, and Sender Name** - Closing content of the email
The introduction message field supports markdown, so you can include links like `[inbox]({{inbox_link}})` that will render as clickable links in the email.
***
## How It Works
Once you've configured multiple languages:
1. **Visitor arrives**: When a visitor opens your chatbot, their browser language is detected
2. **Language matched**: If you've configured that language, all interface text displays in their language
3. **AI responds**: The AI also responds in the detected language, using your training content
4. **Fallback**: If the language isn't configured, the default language is used
***
## AI Language Support
Beyond interface localization, your chatbot's AI can understand and respond in virtually any language:
* The AI automatically detects the language of incoming messages
* Responses are generated in the same language the visitor uses
* For best results in specific languages, add training content in those languages
### Supported Languages
The AI supports all major languages including:
* English, Spanish, French, German, Portuguese, Italian, Dutch
* Chinese, Japanese, Korean
* Arabic, Hebrew, Hindi
* And many more...
Interface localization (labels and buttons) requires you to configure each language. AI responses work in any language automatically.
***
## Best Practices
* **Start with your primary language**: Configure your default language completely before adding others
* **Be consistent**: Use the same tone and terminology across all languages
* **Test thoroughly**: Preview your chatbot in each configured language
* **Consider regional variations**: Create separate entries for variants like `en-US` and `en-GB` if needed
***
Join over 1000+ businesses, websites and startups automating their customer service and other tasks with a custom trained AI agent.