> ## Documentation Index
> Fetch the complete documentation index at: https://sitespeak.ai/docs/llms.txt
> Use this file to discover all available pages before exploring further.
# Add Calendly Booking Action
> Enable your AI agent to check availability and make bookings on your Calendly calendar.
The Calendly action allows your AI agent to check your calendar availability and help visitors book appointments directly through the chatbot.
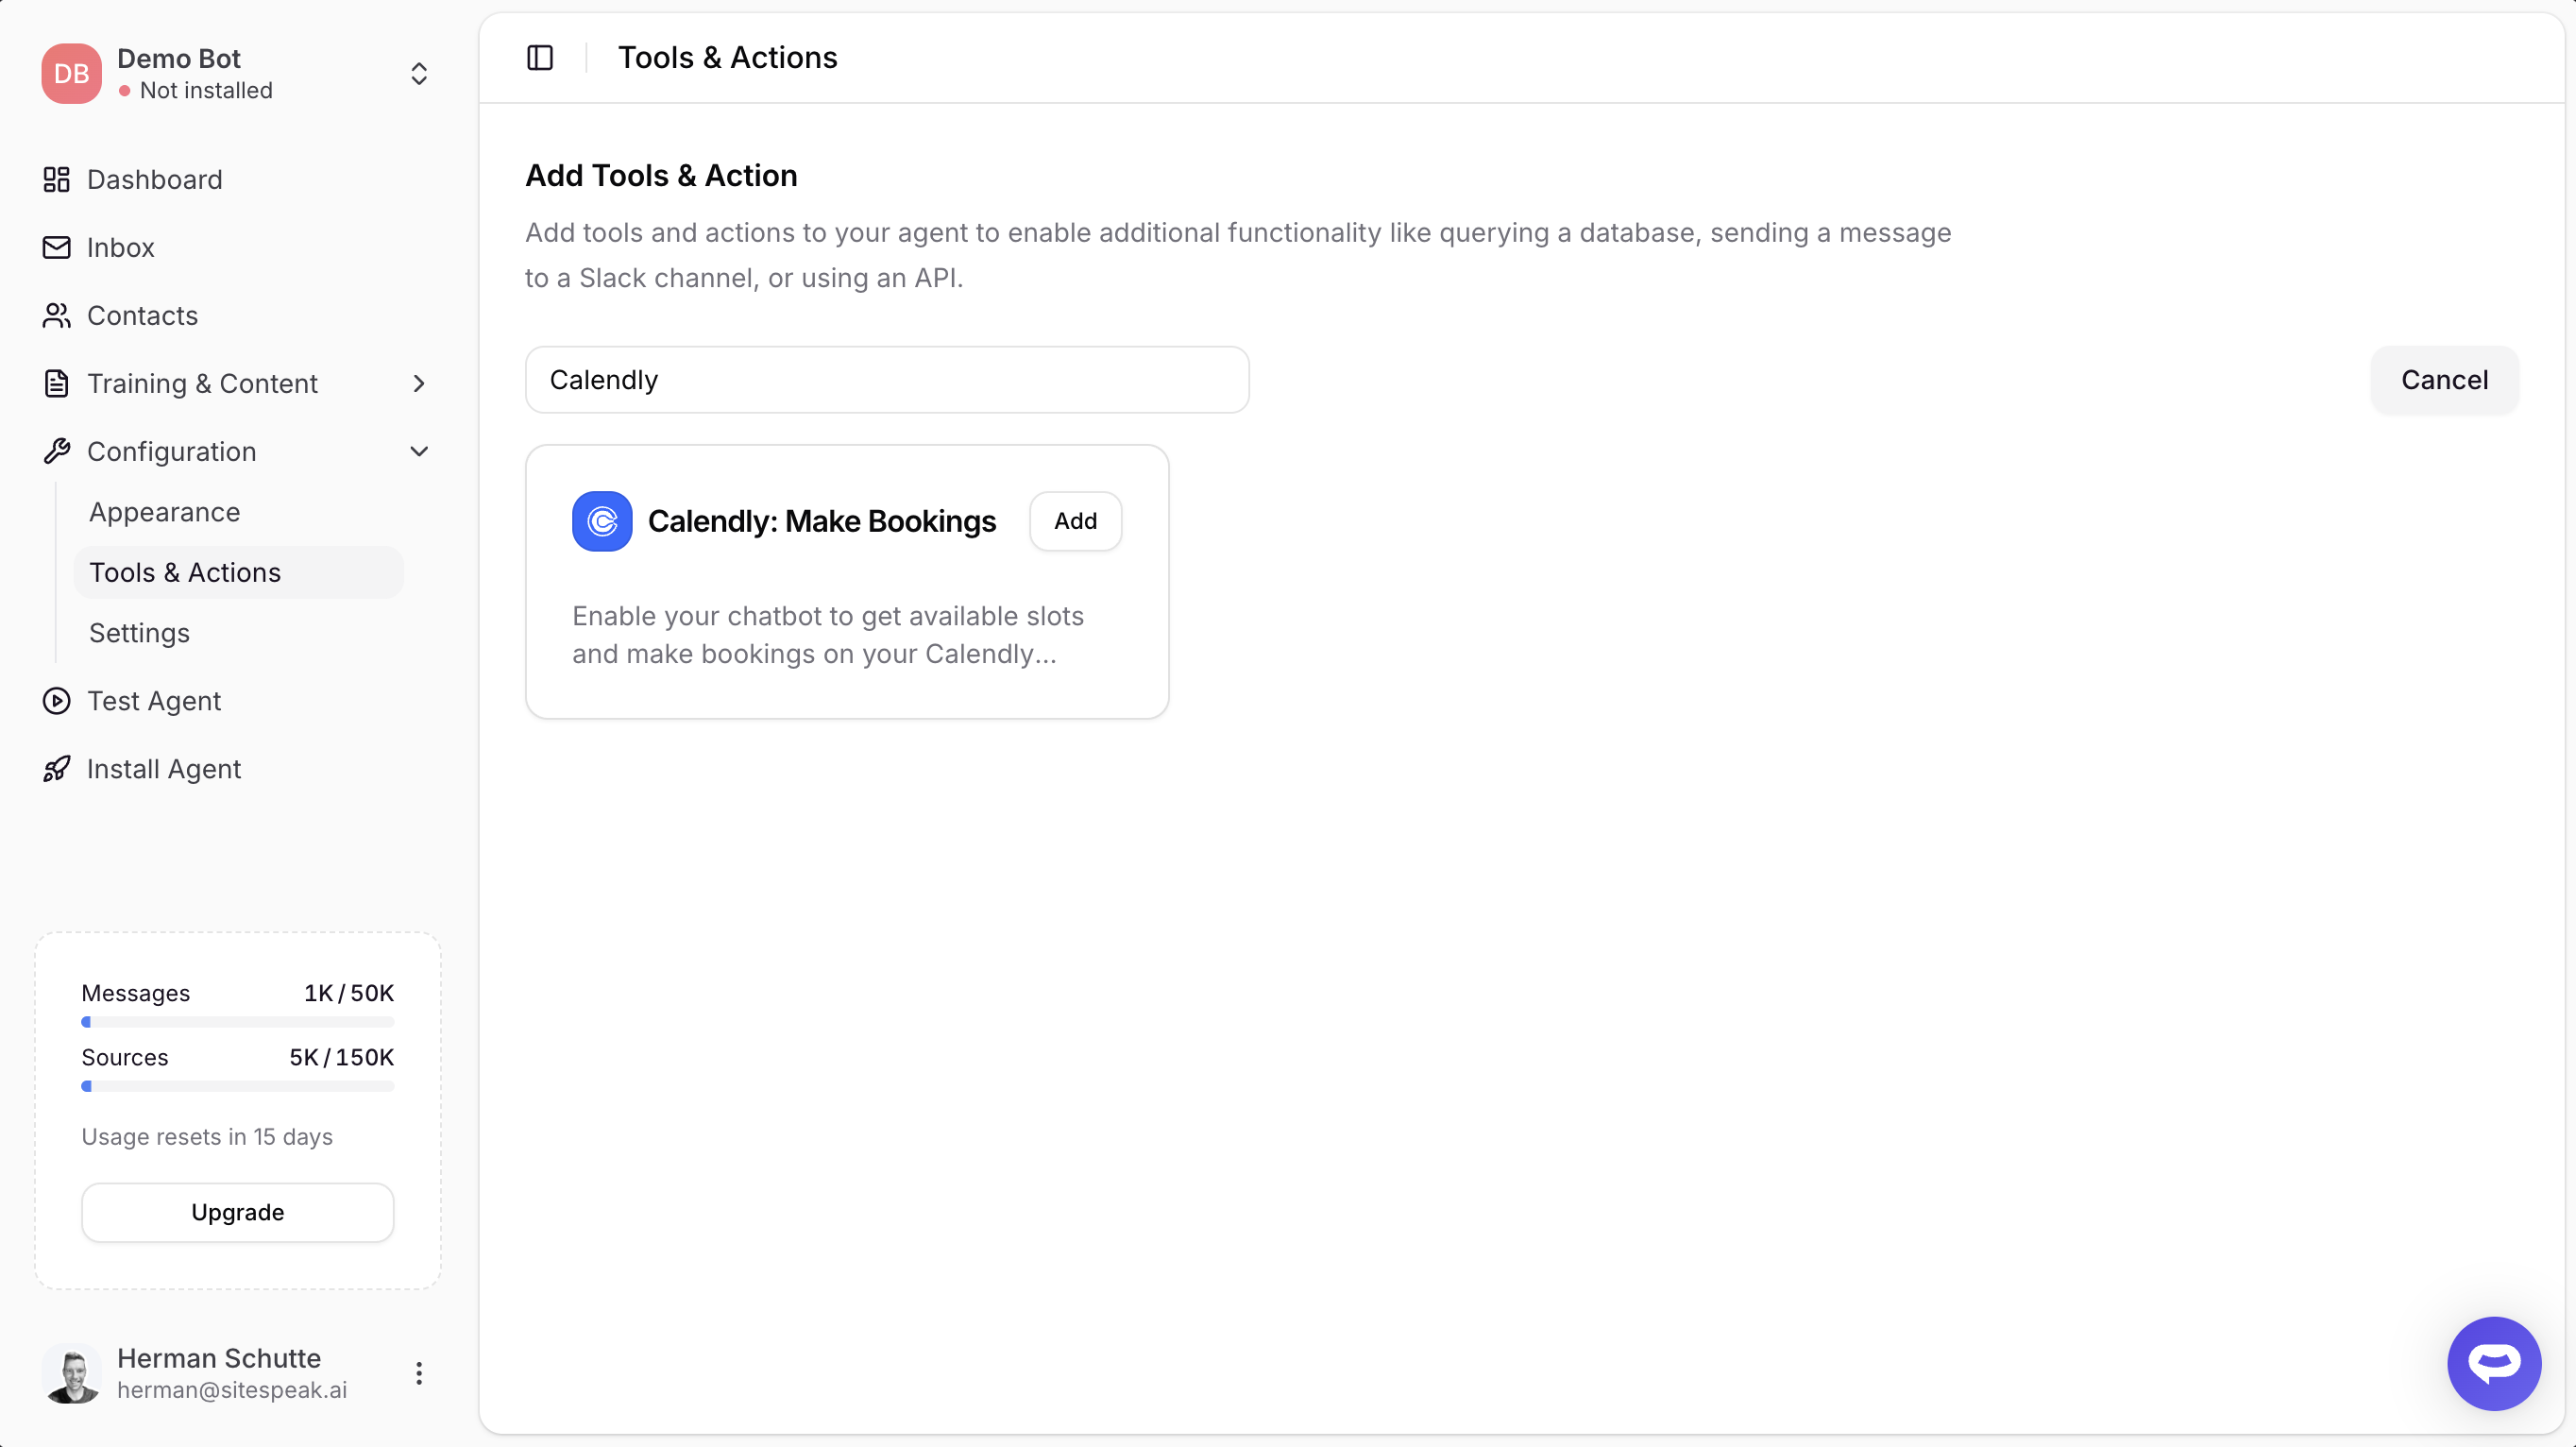 ## Adding the Calendly Action
In your chatbot dashboard, go to **Configuration > Tools & Actions**.
Find **Calendly: Make Bookings** and click **Add**.
***
## Configuration
## Adding the Calendly Action
In your chatbot dashboard, go to **Configuration > Tools & Actions**.
Find **Calendly: Make Bookings** and click **Add**.
***
## Configuration
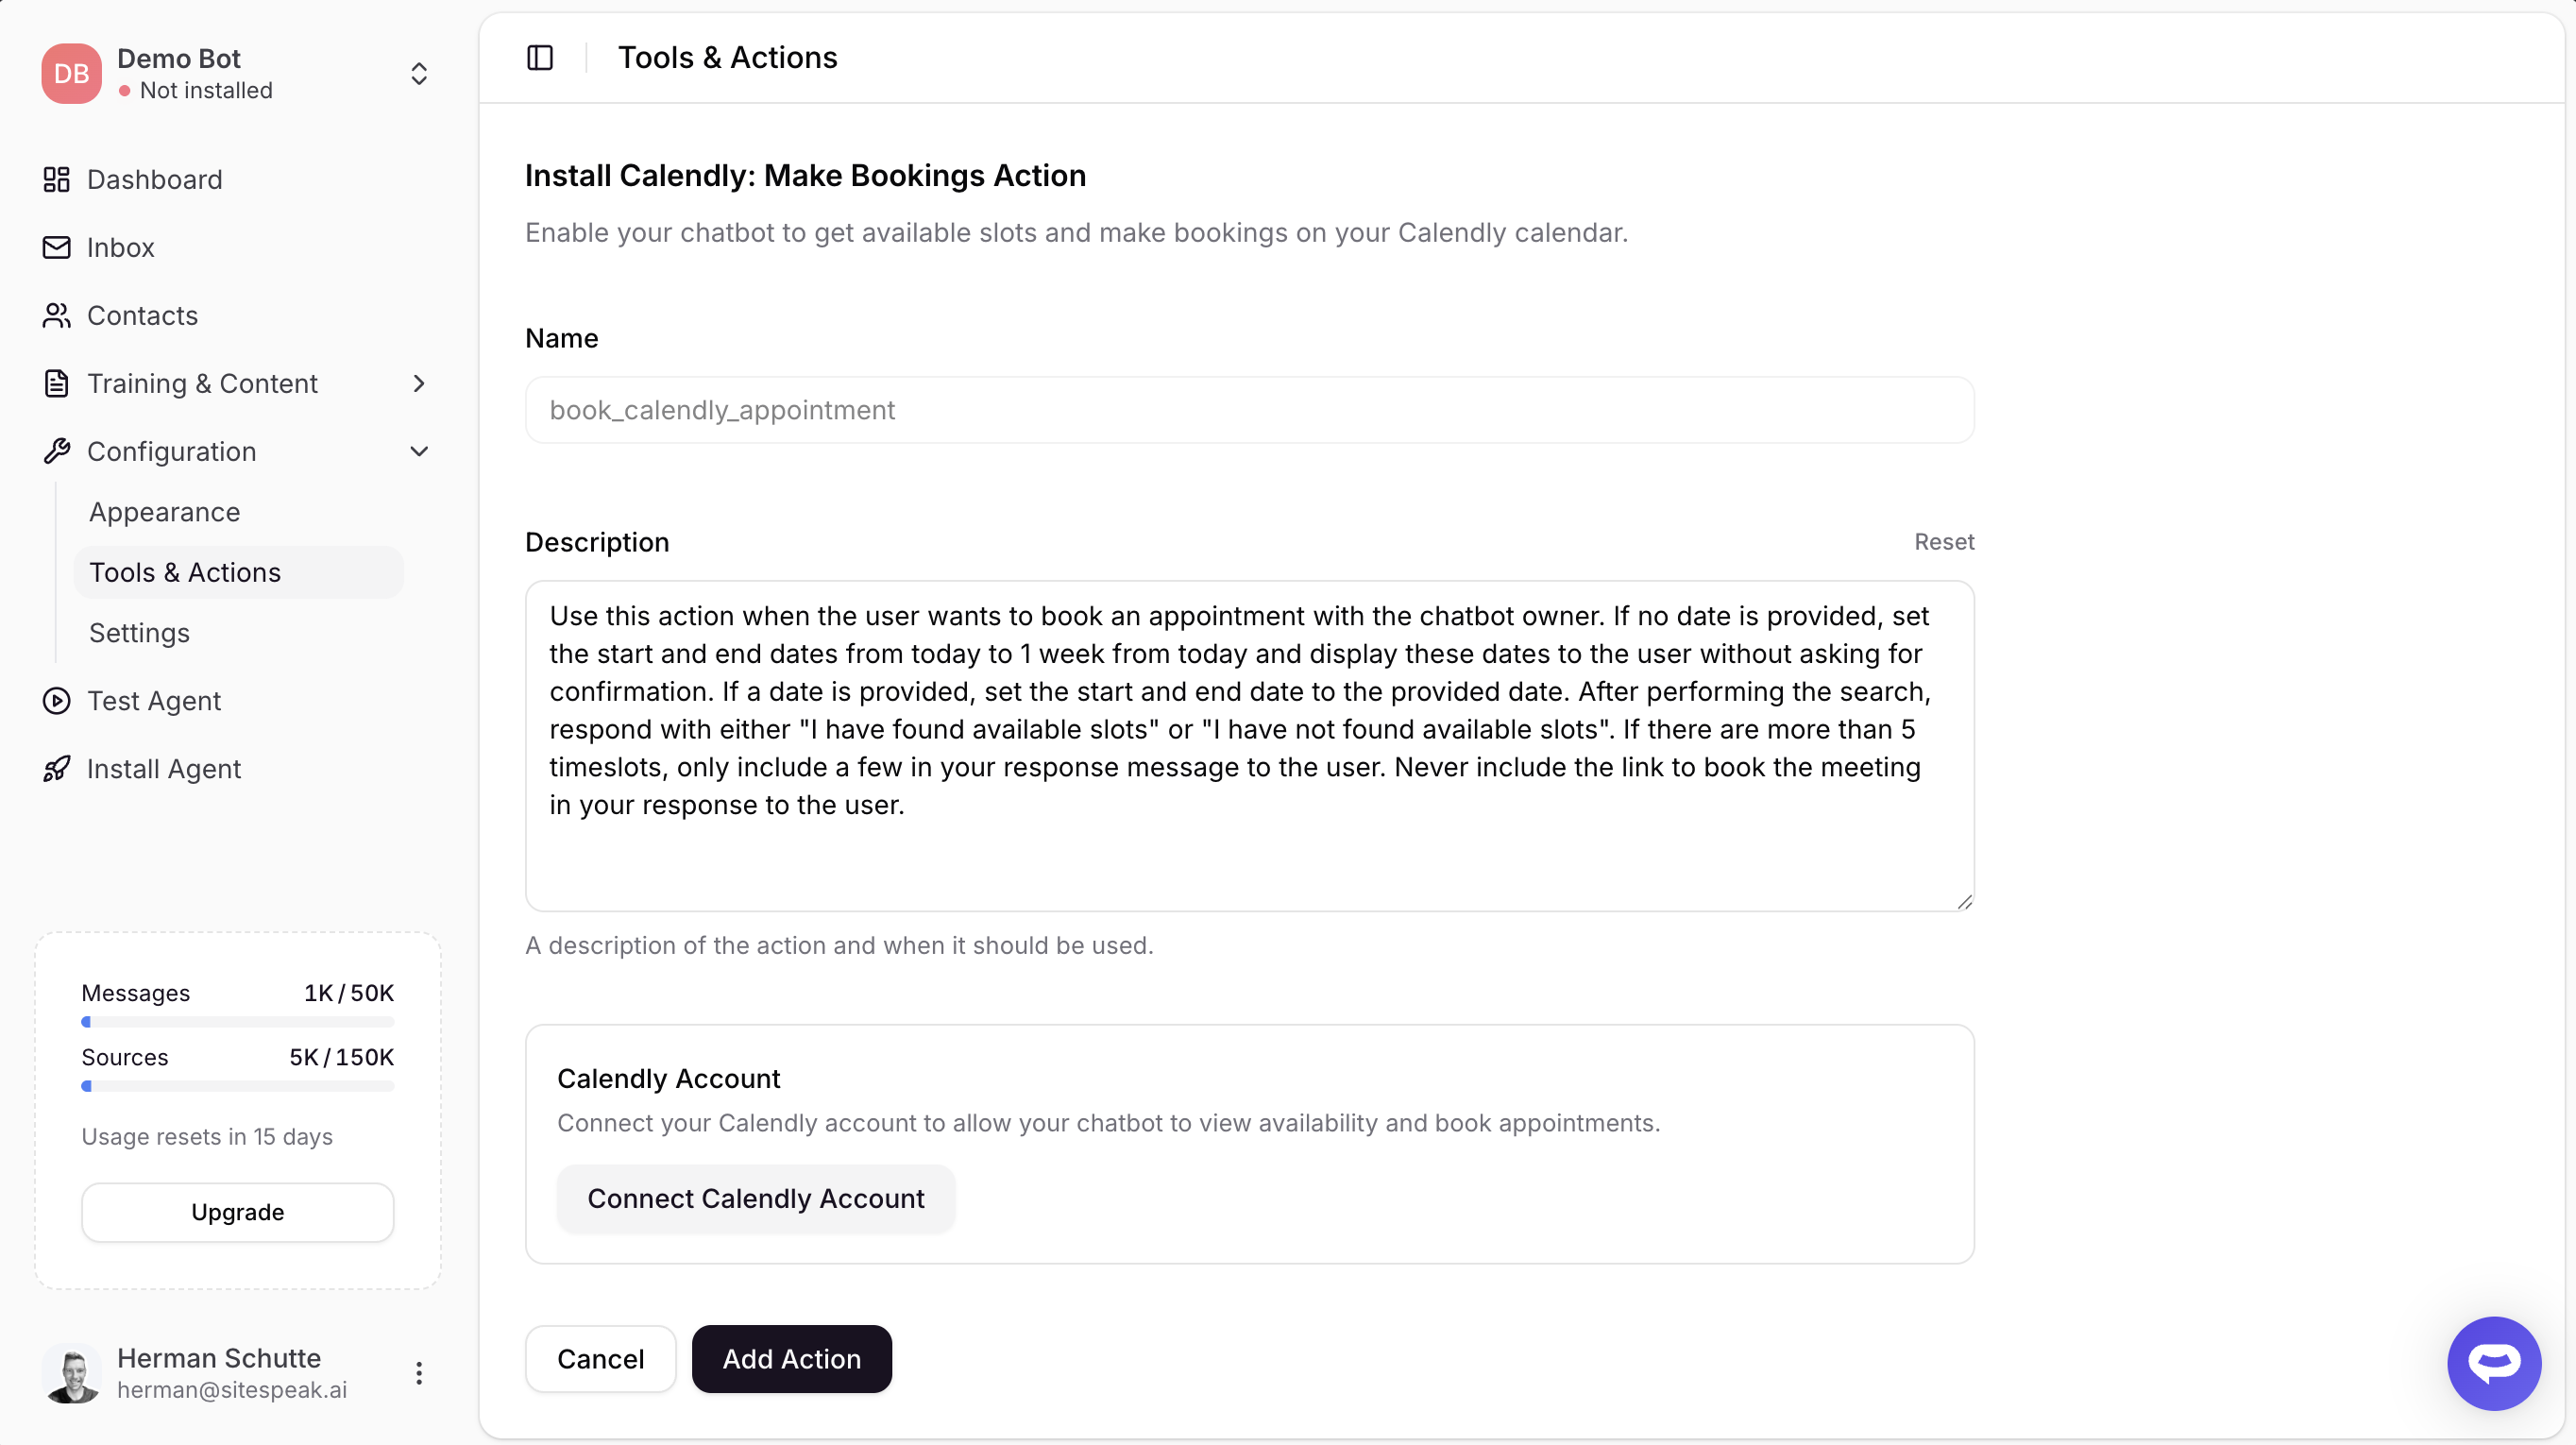 ### Name
A descriptive name for the action. Default: `book_calendly_appointment`
### Description
A description of the action and when it should be used. The default description guides the agent on how to handle booking requests, date ranges, and displaying available slots.
### Calendly Account
Click **Connect Calendly Account** to connect your Calendly account via OAuth. You will be redirected to Calendly to authorize access.
Once connected, your event type will be automatically selected. If you have multiple event types, you will be prompted to choose which one visitors can book.
***
## Free vs Paid Calendly Plans
The Calendly action works with both free and paid Calendly plans, but the booking experience differs.
### Paid Plans (Standard, Teams, Enterprise)
On paid plans, the entire booking flow happens inline within the chatbot:
1. Visitor asks to book an appointment
2. Agent shows available time slots in a calendar
3. Visitor selects a date and time
4. Visitor fills in their name, email, and optional notes
5. Booking is created automatically and added to your calendar
### Free Plan
On free plans, availability checking works the same way, but Calendly's Scheduling API is not available for creating bookings. Instead:
1. Visitor asks to book an appointment
2. Agent shows available time slots in a calendar
3. Visitor selects a date and time
4. Visitor fills in their name and email
5. A Calendly booking page opens in a new tab (pre-filled with their details)
6. Visitor completes the booking on Calendly's page
For the best visitor experience, we recommend using a paid Calendly plan. This keeps the entire booking flow within the chatbot without redirecting to an external page.
***
## Save the Action
Once you've connected your Calendly account and selected an event type, click **Add Action** to enable it.
Your chatbot will now be able to:
* Check availability on your Calendly calendar
* Show available time slots to visitors
* Allow visitors to book appointments
Bookings will automatically be added to your Calendly calendar.
***
Join over 1000+ businesses, websites and startups automating their customer service and other tasks with a custom trained AI agent.
### Name
A descriptive name for the action. Default: `book_calendly_appointment`
### Description
A description of the action and when it should be used. The default description guides the agent on how to handle booking requests, date ranges, and displaying available slots.
### Calendly Account
Click **Connect Calendly Account** to connect your Calendly account via OAuth. You will be redirected to Calendly to authorize access.
Once connected, your event type will be automatically selected. If you have multiple event types, you will be prompted to choose which one visitors can book.
***
## Free vs Paid Calendly Plans
The Calendly action works with both free and paid Calendly plans, but the booking experience differs.
### Paid Plans (Standard, Teams, Enterprise)
On paid plans, the entire booking flow happens inline within the chatbot:
1. Visitor asks to book an appointment
2. Agent shows available time slots in a calendar
3. Visitor selects a date and time
4. Visitor fills in their name, email, and optional notes
5. Booking is created automatically and added to your calendar
### Free Plan
On free plans, availability checking works the same way, but Calendly's Scheduling API is not available for creating bookings. Instead:
1. Visitor asks to book an appointment
2. Agent shows available time slots in a calendar
3. Visitor selects a date and time
4. Visitor fills in their name and email
5. A Calendly booking page opens in a new tab (pre-filled with their details)
6. Visitor completes the booking on Calendly's page
For the best visitor experience, we recommend using a paid Calendly plan. This keeps the entire booking flow within the chatbot without redirecting to an external page.
***
## Save the Action
Once you've connected your Calendly account and selected an event type, click **Add Action** to enable it.
Your chatbot will now be able to:
* Check availability on your Calendly calendar
* Show available time slots to visitors
* Allow visitors to book appointments
Bookings will automatically be added to your Calendly calendar.
***
Join over 1000+ businesses, websites and startups automating their customer service and other tasks with a custom trained AI agent.