> ## Documentation Index
> Fetch the complete documentation index at: https://sitespeak.ai/docs/llms.txt
> Use this file to discover all available pages before exploring further.
# Capture Leads Action
> Enable your AI chatbot to collect contact information from visitors and add them to your Contacts.
The **Capture Leads** action enables your AI support agent to collect information from visitors and add them to your Contacts. Use this to prompt visitors for contact information at the right moment, such as when they're interested in enterprise pricing or need further assistance.
## How it Works
When a visitor's query matches the action's description, your chatbot will display a lead capture form. After submission, their details are saved to your Contacts where you can view and export them.
You can add multiple Capture Leads actions with different configurations to collect different information for different scenarios.
## Add a Capture Leads Action
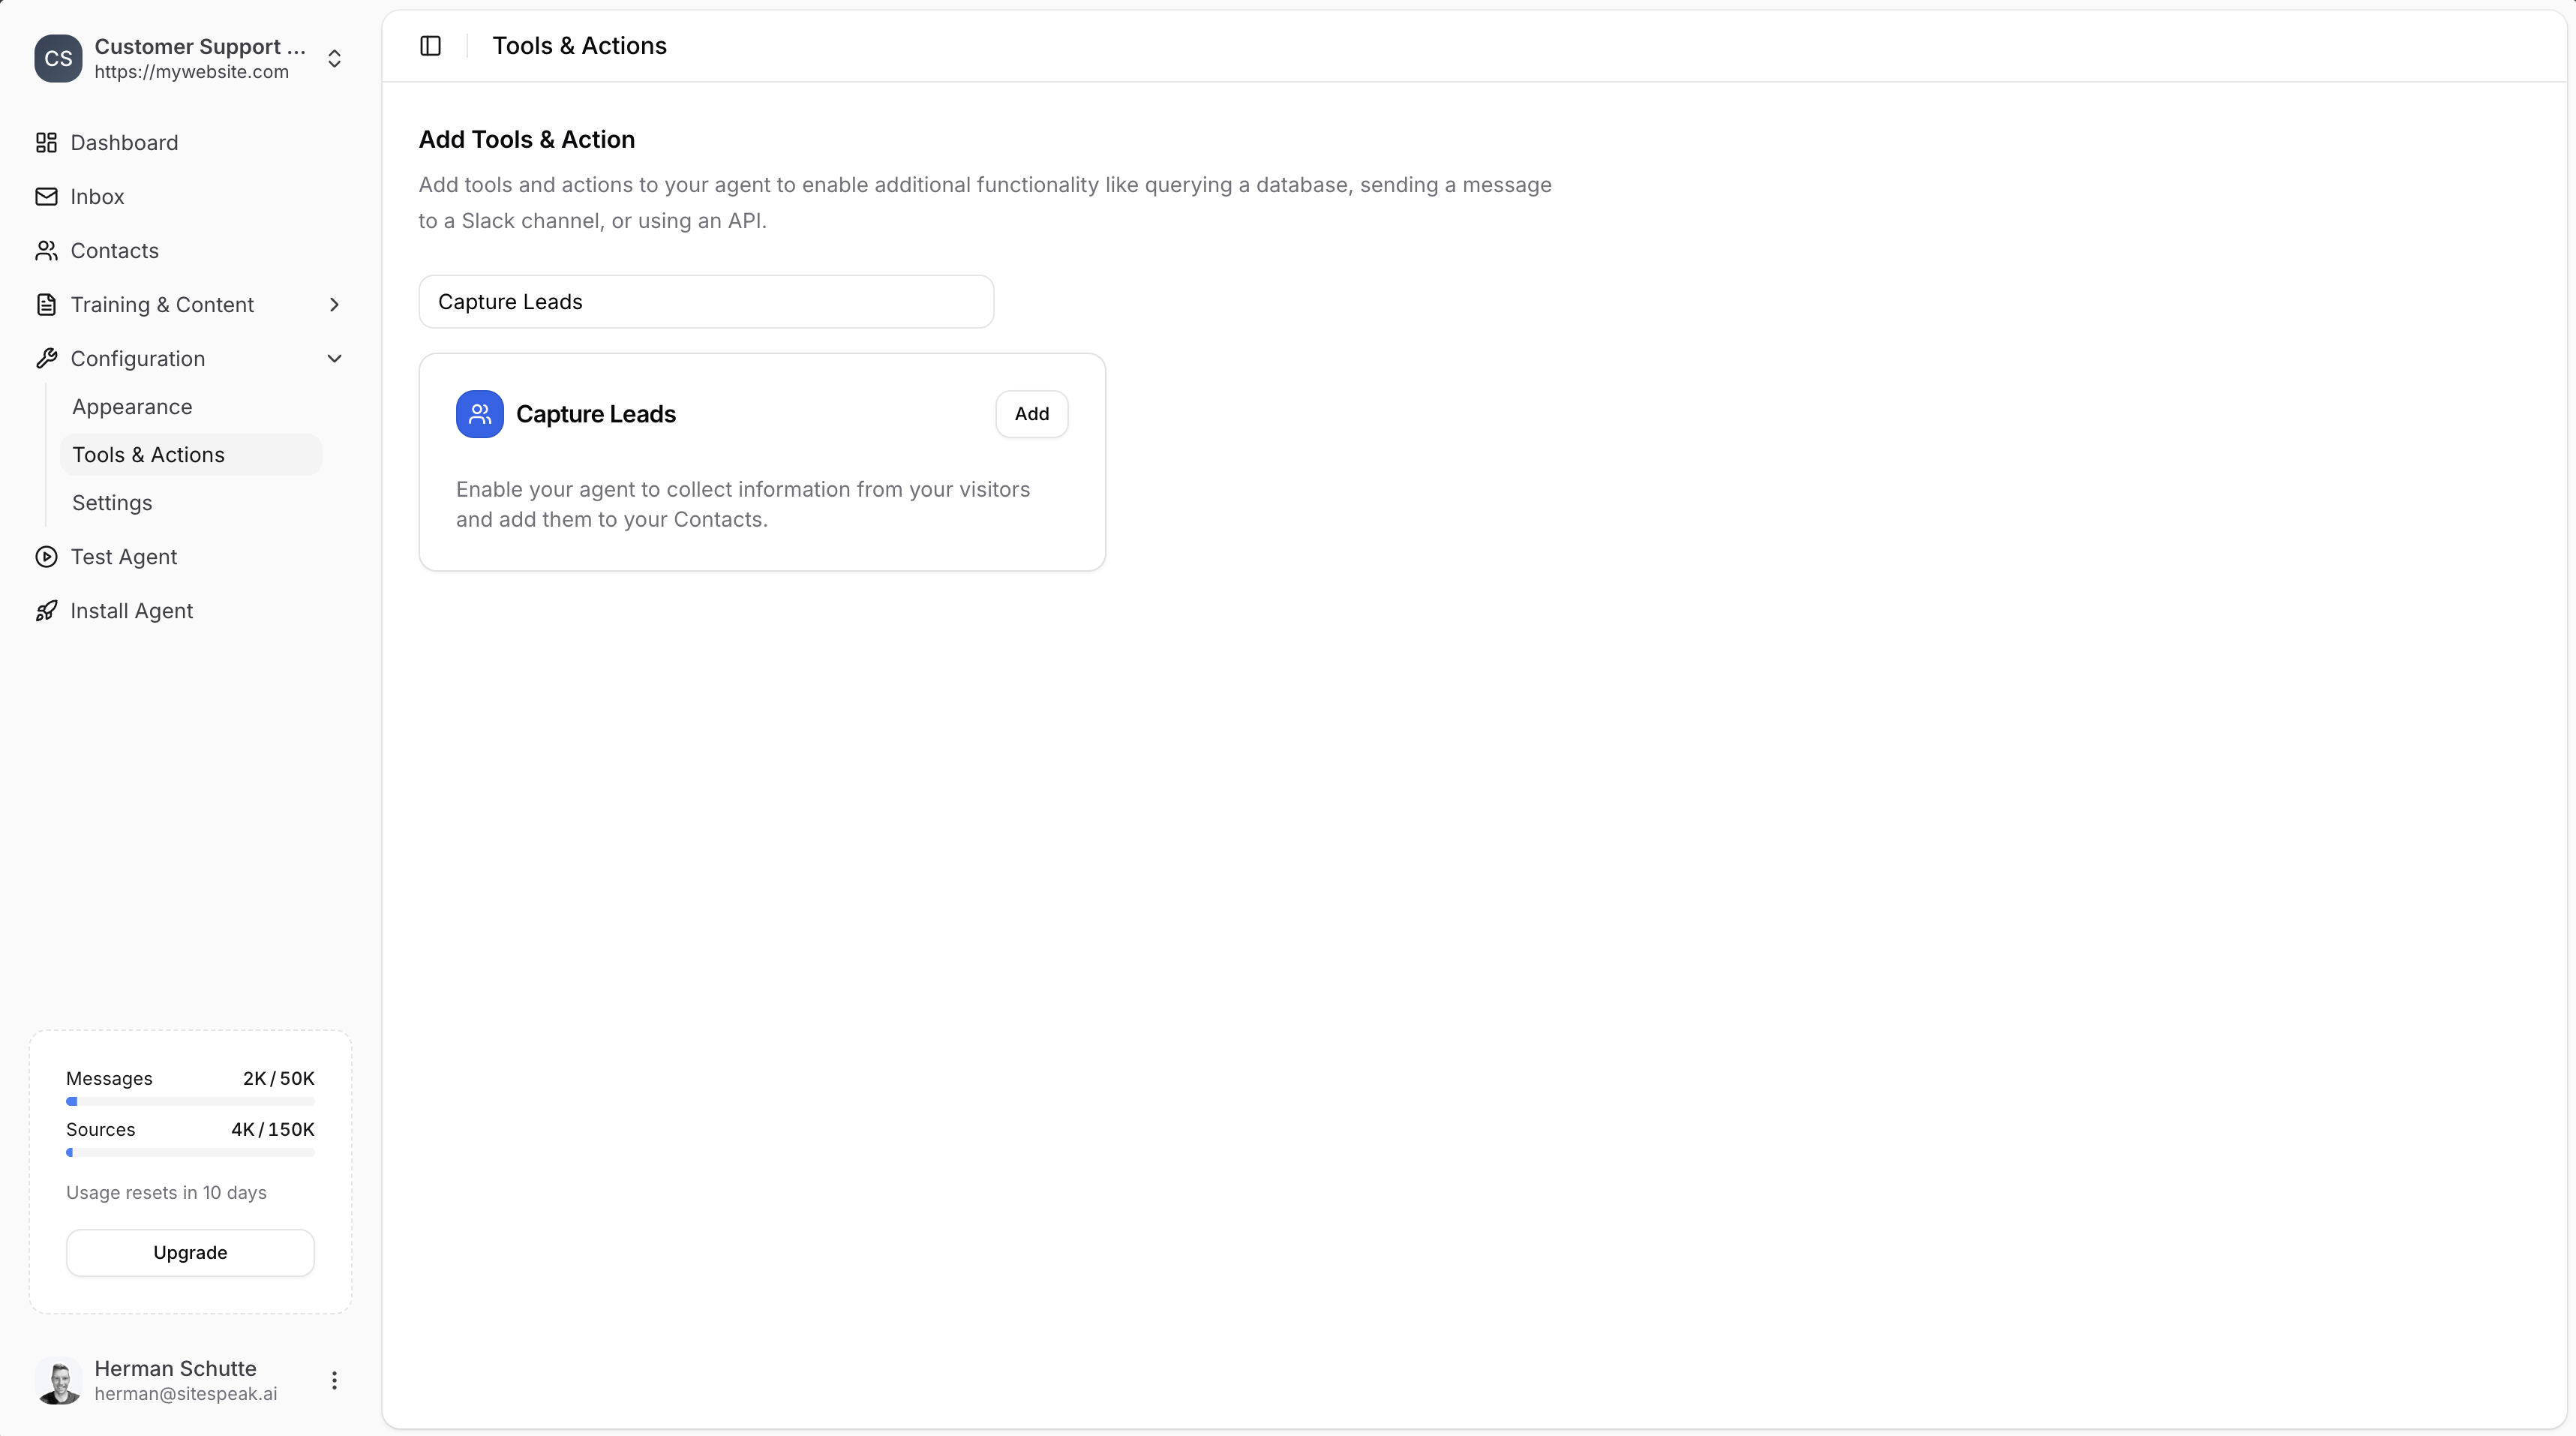
In your chatbot dashboard, click **Configuration** in the sidebar, then select **Tools & Actions**.
Click the **+ Add Action** button.
Type "Capture Leads" in the search field to filter the available actions.
Click **Add** next to **Capture Leads**.
 ### Configure the Action
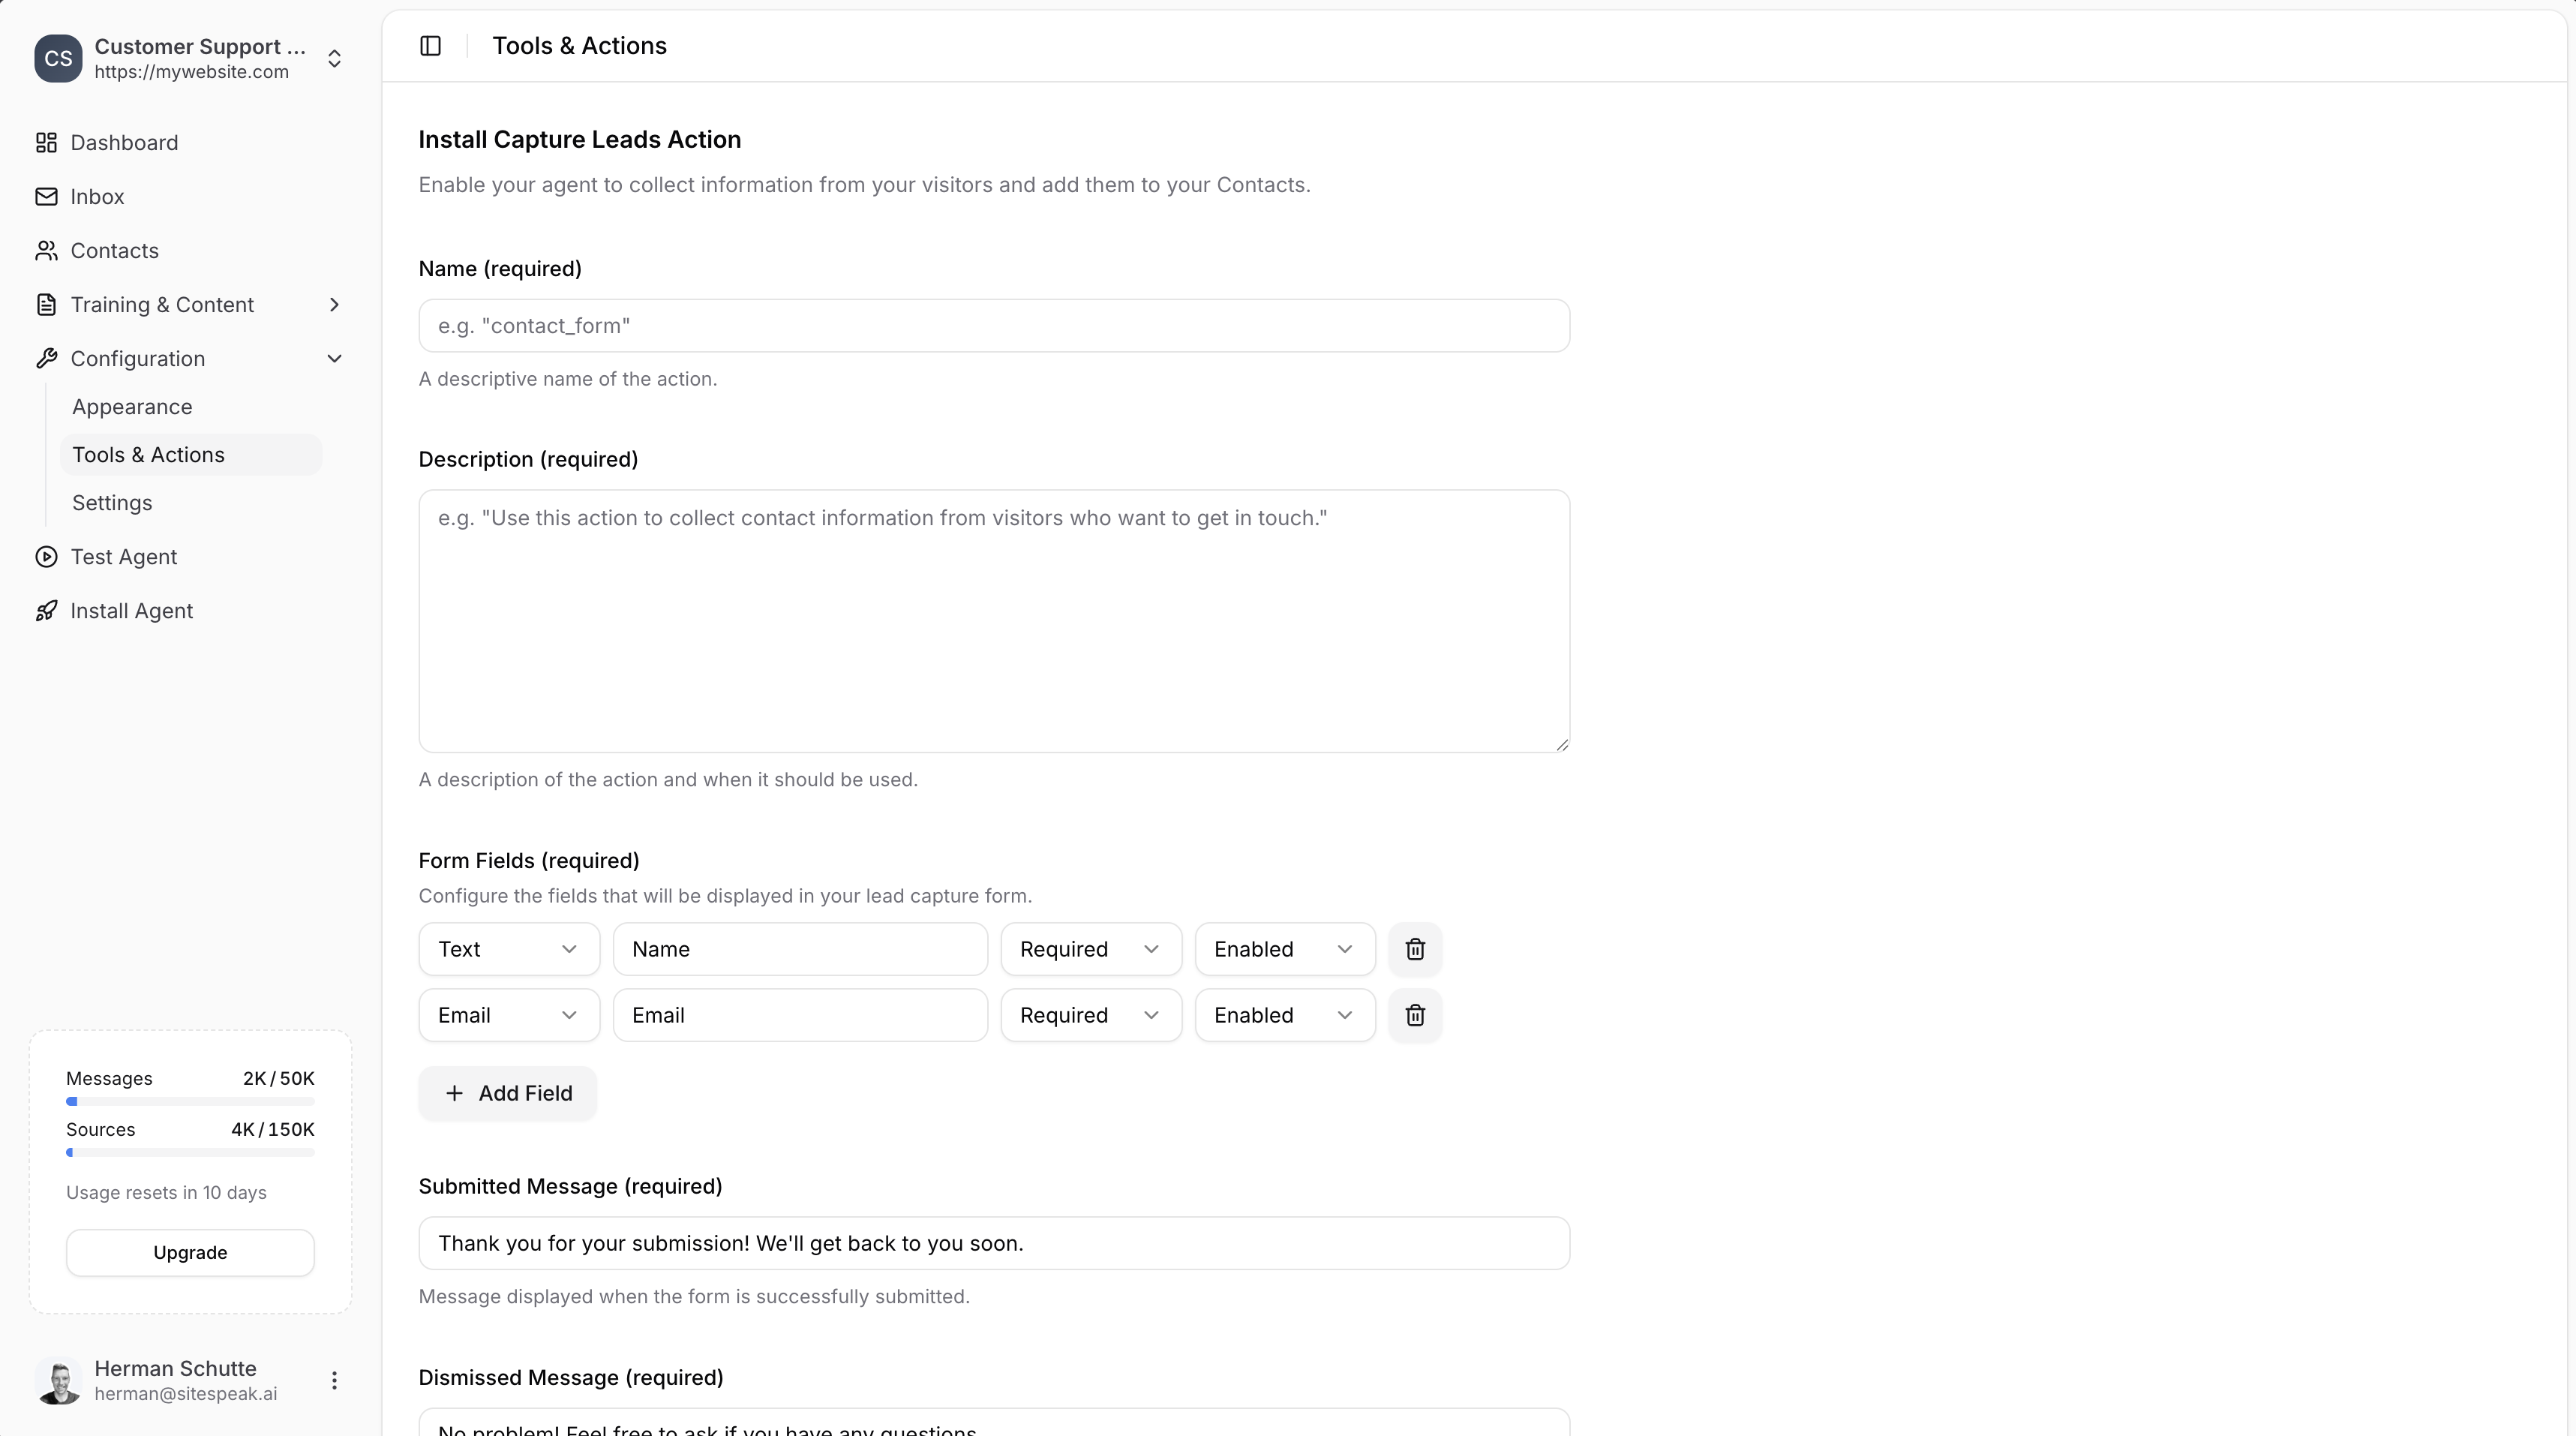
* **Name**: Give your action a descriptive name (e.g., `contact_form`)
* **Description**: Describe when the AI should show this form (e.g., "Use this action to collect contact information from visitors who want to get in touch.")
Set up the fields to display in your lead capture form:
* **Type**: Select the field type (Text, Email, etc.)
* **Label**: The field name shown to visitors (e.g., "Name", "Email")
* **Required/Optional**: Whether the field must be filled in
* **Enabled/Disabled**: Whether the field is shown
Click **+ Add Field** to add more fields.
* **Submitted Message**: Message shown when the form is submitted (e.g., "Thank you for your submission! We'll get back to you soon.")
* **Dismissed Message**: Message shown if the visitor dismisses the form (e.g., "No problem! Feel free to ask if you have any questions.")
Toggle **Enable Email Notifications** to receive an email every time a visitor submits a form and a lead is captured.
By default, notifications are sent to the escalation email addresses configured in your chatbot's general settings. To send notifications to different recipients, enter one or more email addresses in the **Notification Emails** field separated by commas.
Click the **Add Action** button to save and enable the action.
### Configure the Action
* **Name**: Give your action a descriptive name (e.g., `contact_form`)
* **Description**: Describe when the AI should show this form (e.g., "Use this action to collect contact information from visitors who want to get in touch.")
Set up the fields to display in your lead capture form:
* **Type**: Select the field type (Text, Email, etc.)
* **Label**: The field name shown to visitors (e.g., "Name", "Email")
* **Required/Optional**: Whether the field must be filled in
* **Enabled/Disabled**: Whether the field is shown
Click **+ Add Field** to add more fields.
* **Submitted Message**: Message shown when the form is submitted (e.g., "Thank you for your submission! We'll get back to you soon.")
* **Dismissed Message**: Message shown if the visitor dismisses the form (e.g., "No problem! Feel free to ask if you have any questions.")
Toggle **Enable Email Notifications** to receive an email every time a visitor submits a form and a lead is captured.
By default, notifications are sent to the escalation email addresses configured in your chatbot's general settings. To send notifications to different recipients, enter one or more email addresses in the **Notification Emails** field separated by commas.
Click the **Add Action** button to save and enable the action.
 ***
## Viewing Captured Leads
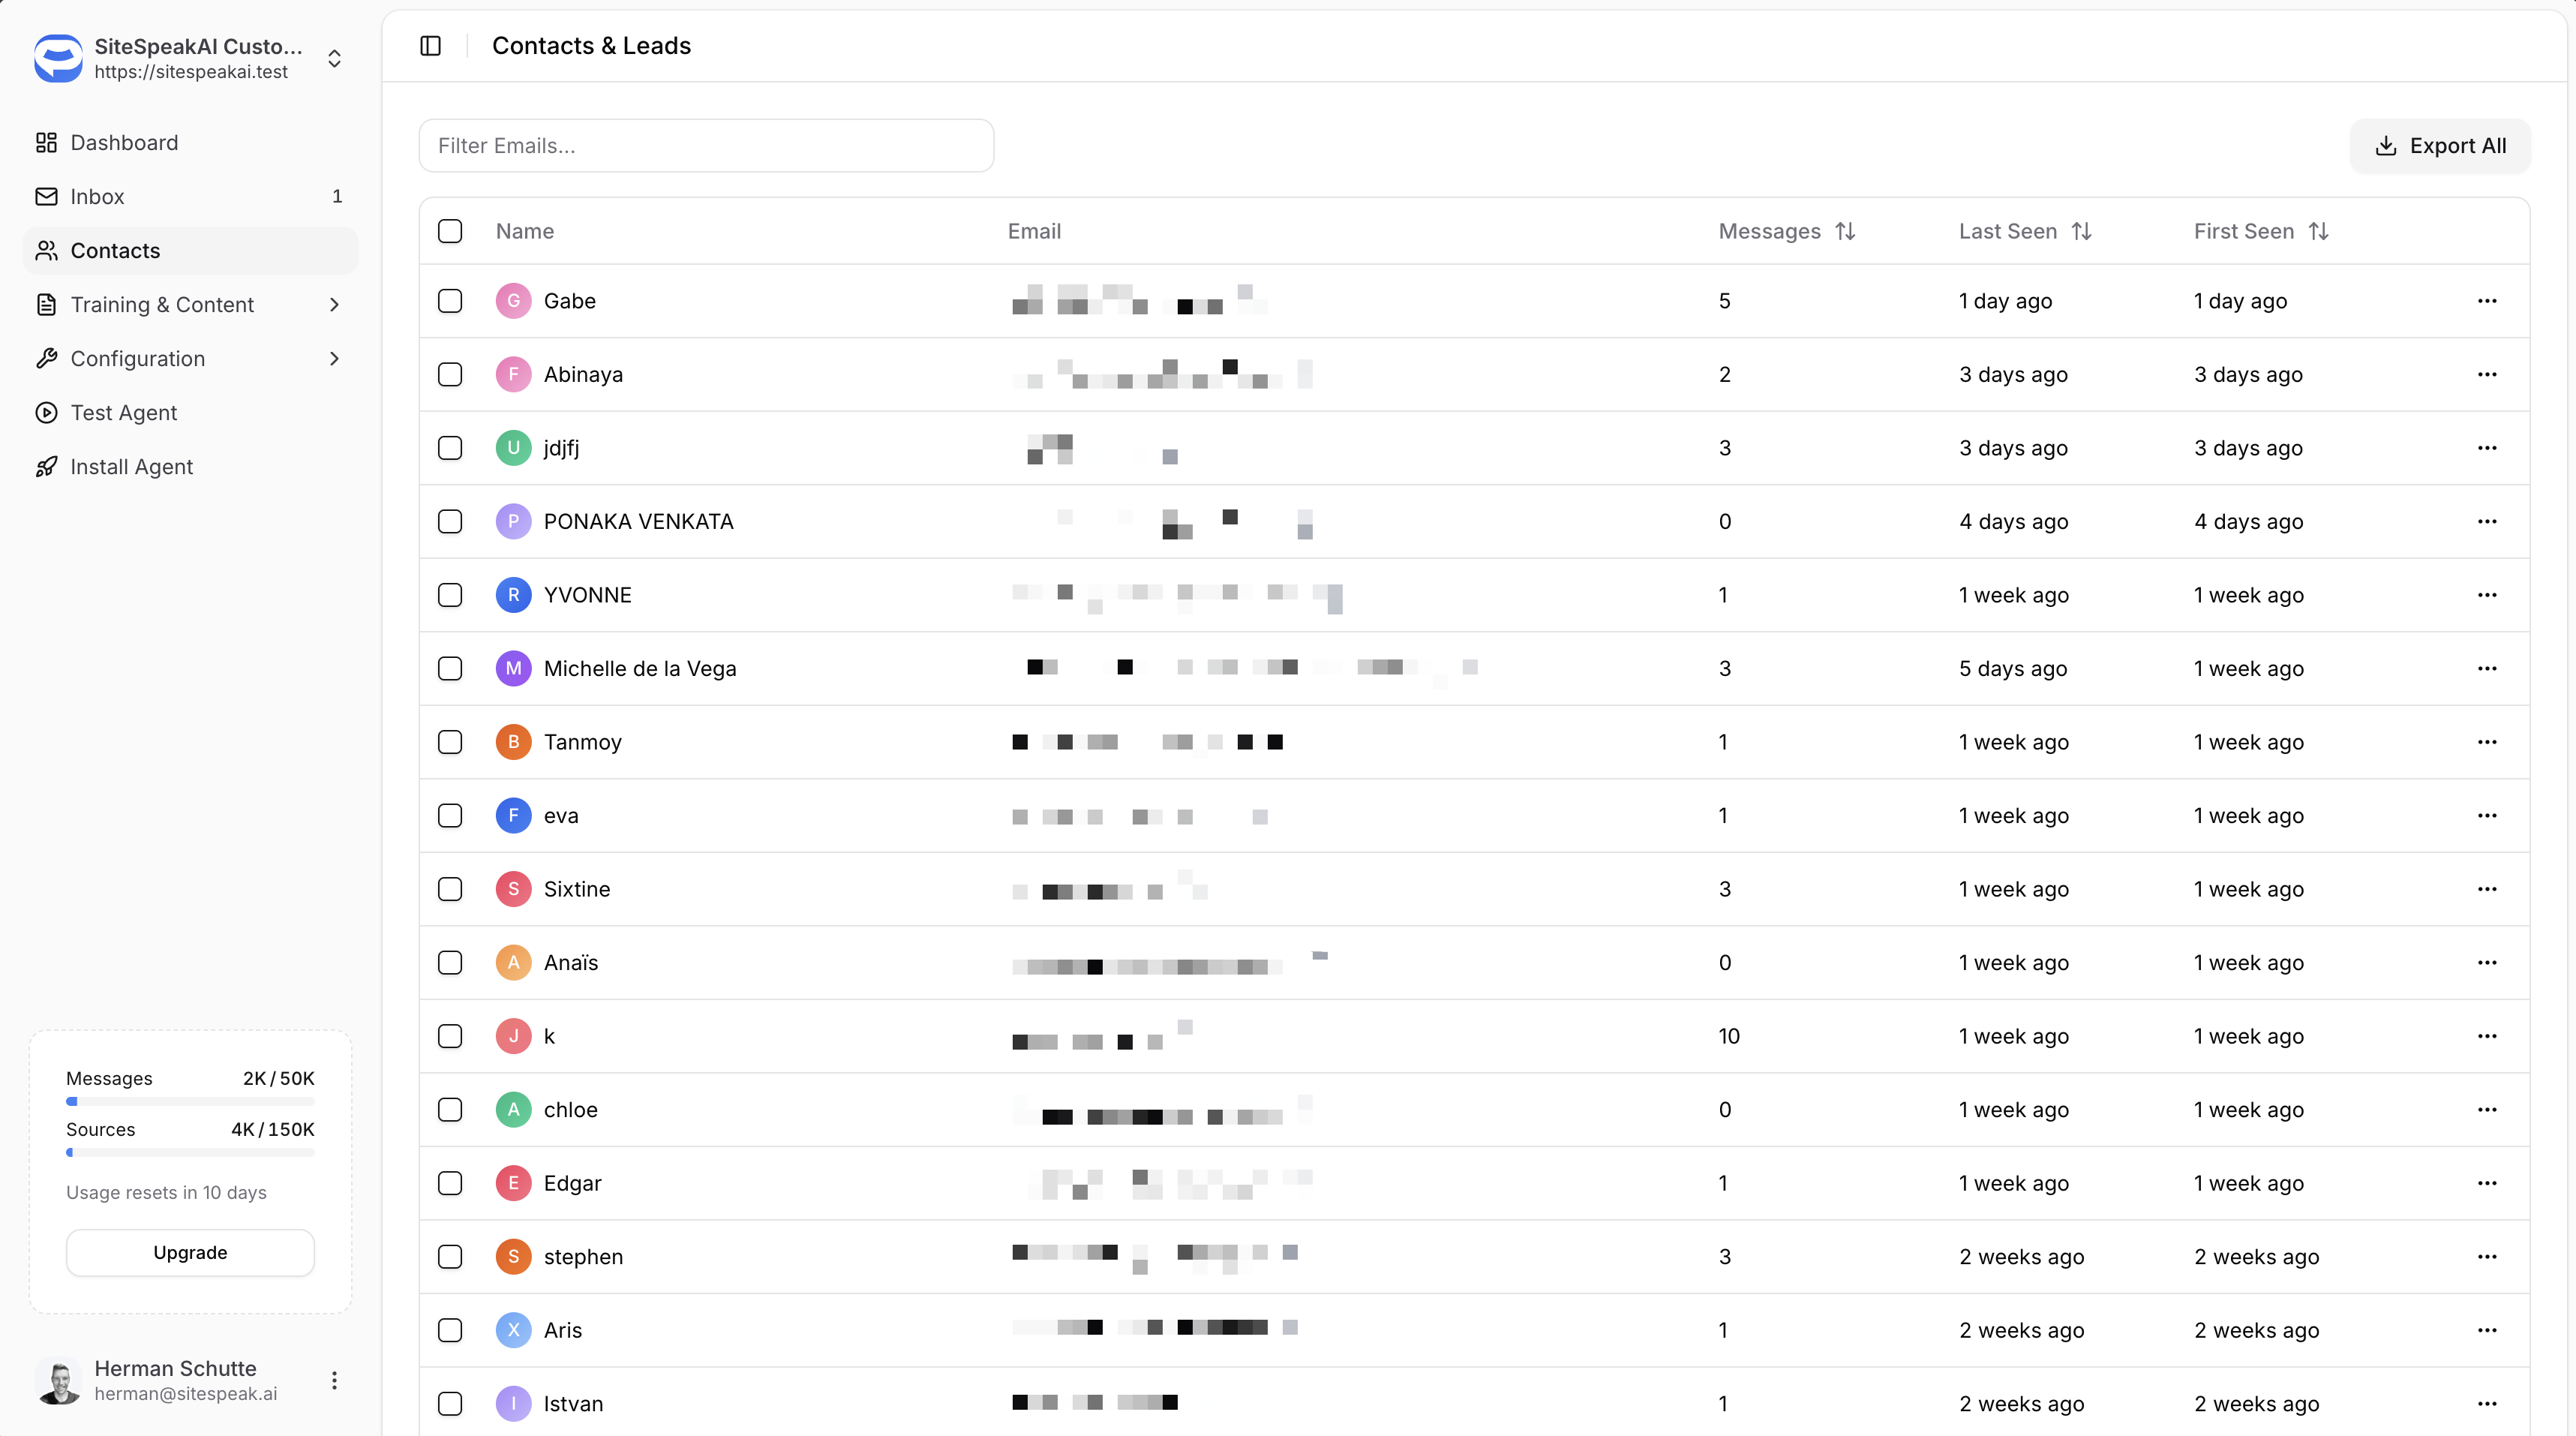
After visitors complete your form, their details appear in the **Contacts** section of your chatbot dashboard. From there you can:
* View all captured leads and their submitted information
* Export your contacts and leads to CSV
***
## Viewing Captured Leads
After visitors complete your form, their details appear in the **Contacts** section of your chatbot dashboard. From there you can:
* View all captured leads and their submitted information
* Export your contacts and leads to CSV
 ***
## Example Use Cases
* **Enterprise inquiries**: Capture contact details when visitors ask about enterprise pricing or custom solutions
* **Support escalation**: Collect information when visitors need human assistance for complex issues
* **Newsletter signups**: Prompt visitors to subscribe when they show interest in updates
* **Demo requests**: Gather details when visitors want to schedule a product demo
Create multiple Capture Leads actions with different forms for different scenarios. For example, one for sales inquiries (collecting company name) and another for support requests (collecting issue details).
***
Join over 1000+ businesses, websites and startups automating their customer service and other tasks with a custom trained AI agent.
***
## Example Use Cases
* **Enterprise inquiries**: Capture contact details when visitors ask about enterprise pricing or custom solutions
* **Support escalation**: Collect information when visitors need human assistance for complex issues
* **Newsletter signups**: Prompt visitors to subscribe when they show interest in updates
* **Demo requests**: Gather details when visitors want to schedule a product demo
Create multiple Capture Leads actions with different forms for different scenarios. For example, one for sales inquiries (collecting company name) and another for support requests (collecting issue details).
***
Join over 1000+ businesses, websites and startups automating their customer service and other tasks with a custom trained AI agent.