> ## Documentation Index
> Fetch the complete documentation index at: https://sitespeak.ai/docs/llms.txt
> Use this file to discover all available pages before exploring further.
# Add a Custom API Action to Your AI Agent
> Enable your AI agent to retrieve information or perform actions using any API endpoint.
The Custom API Action allows your AI agent to connect to any API endpoint to retrieve information or perform actions. This is useful for integrating with your own backend services, third-party APIs, or any system that exposes an API.
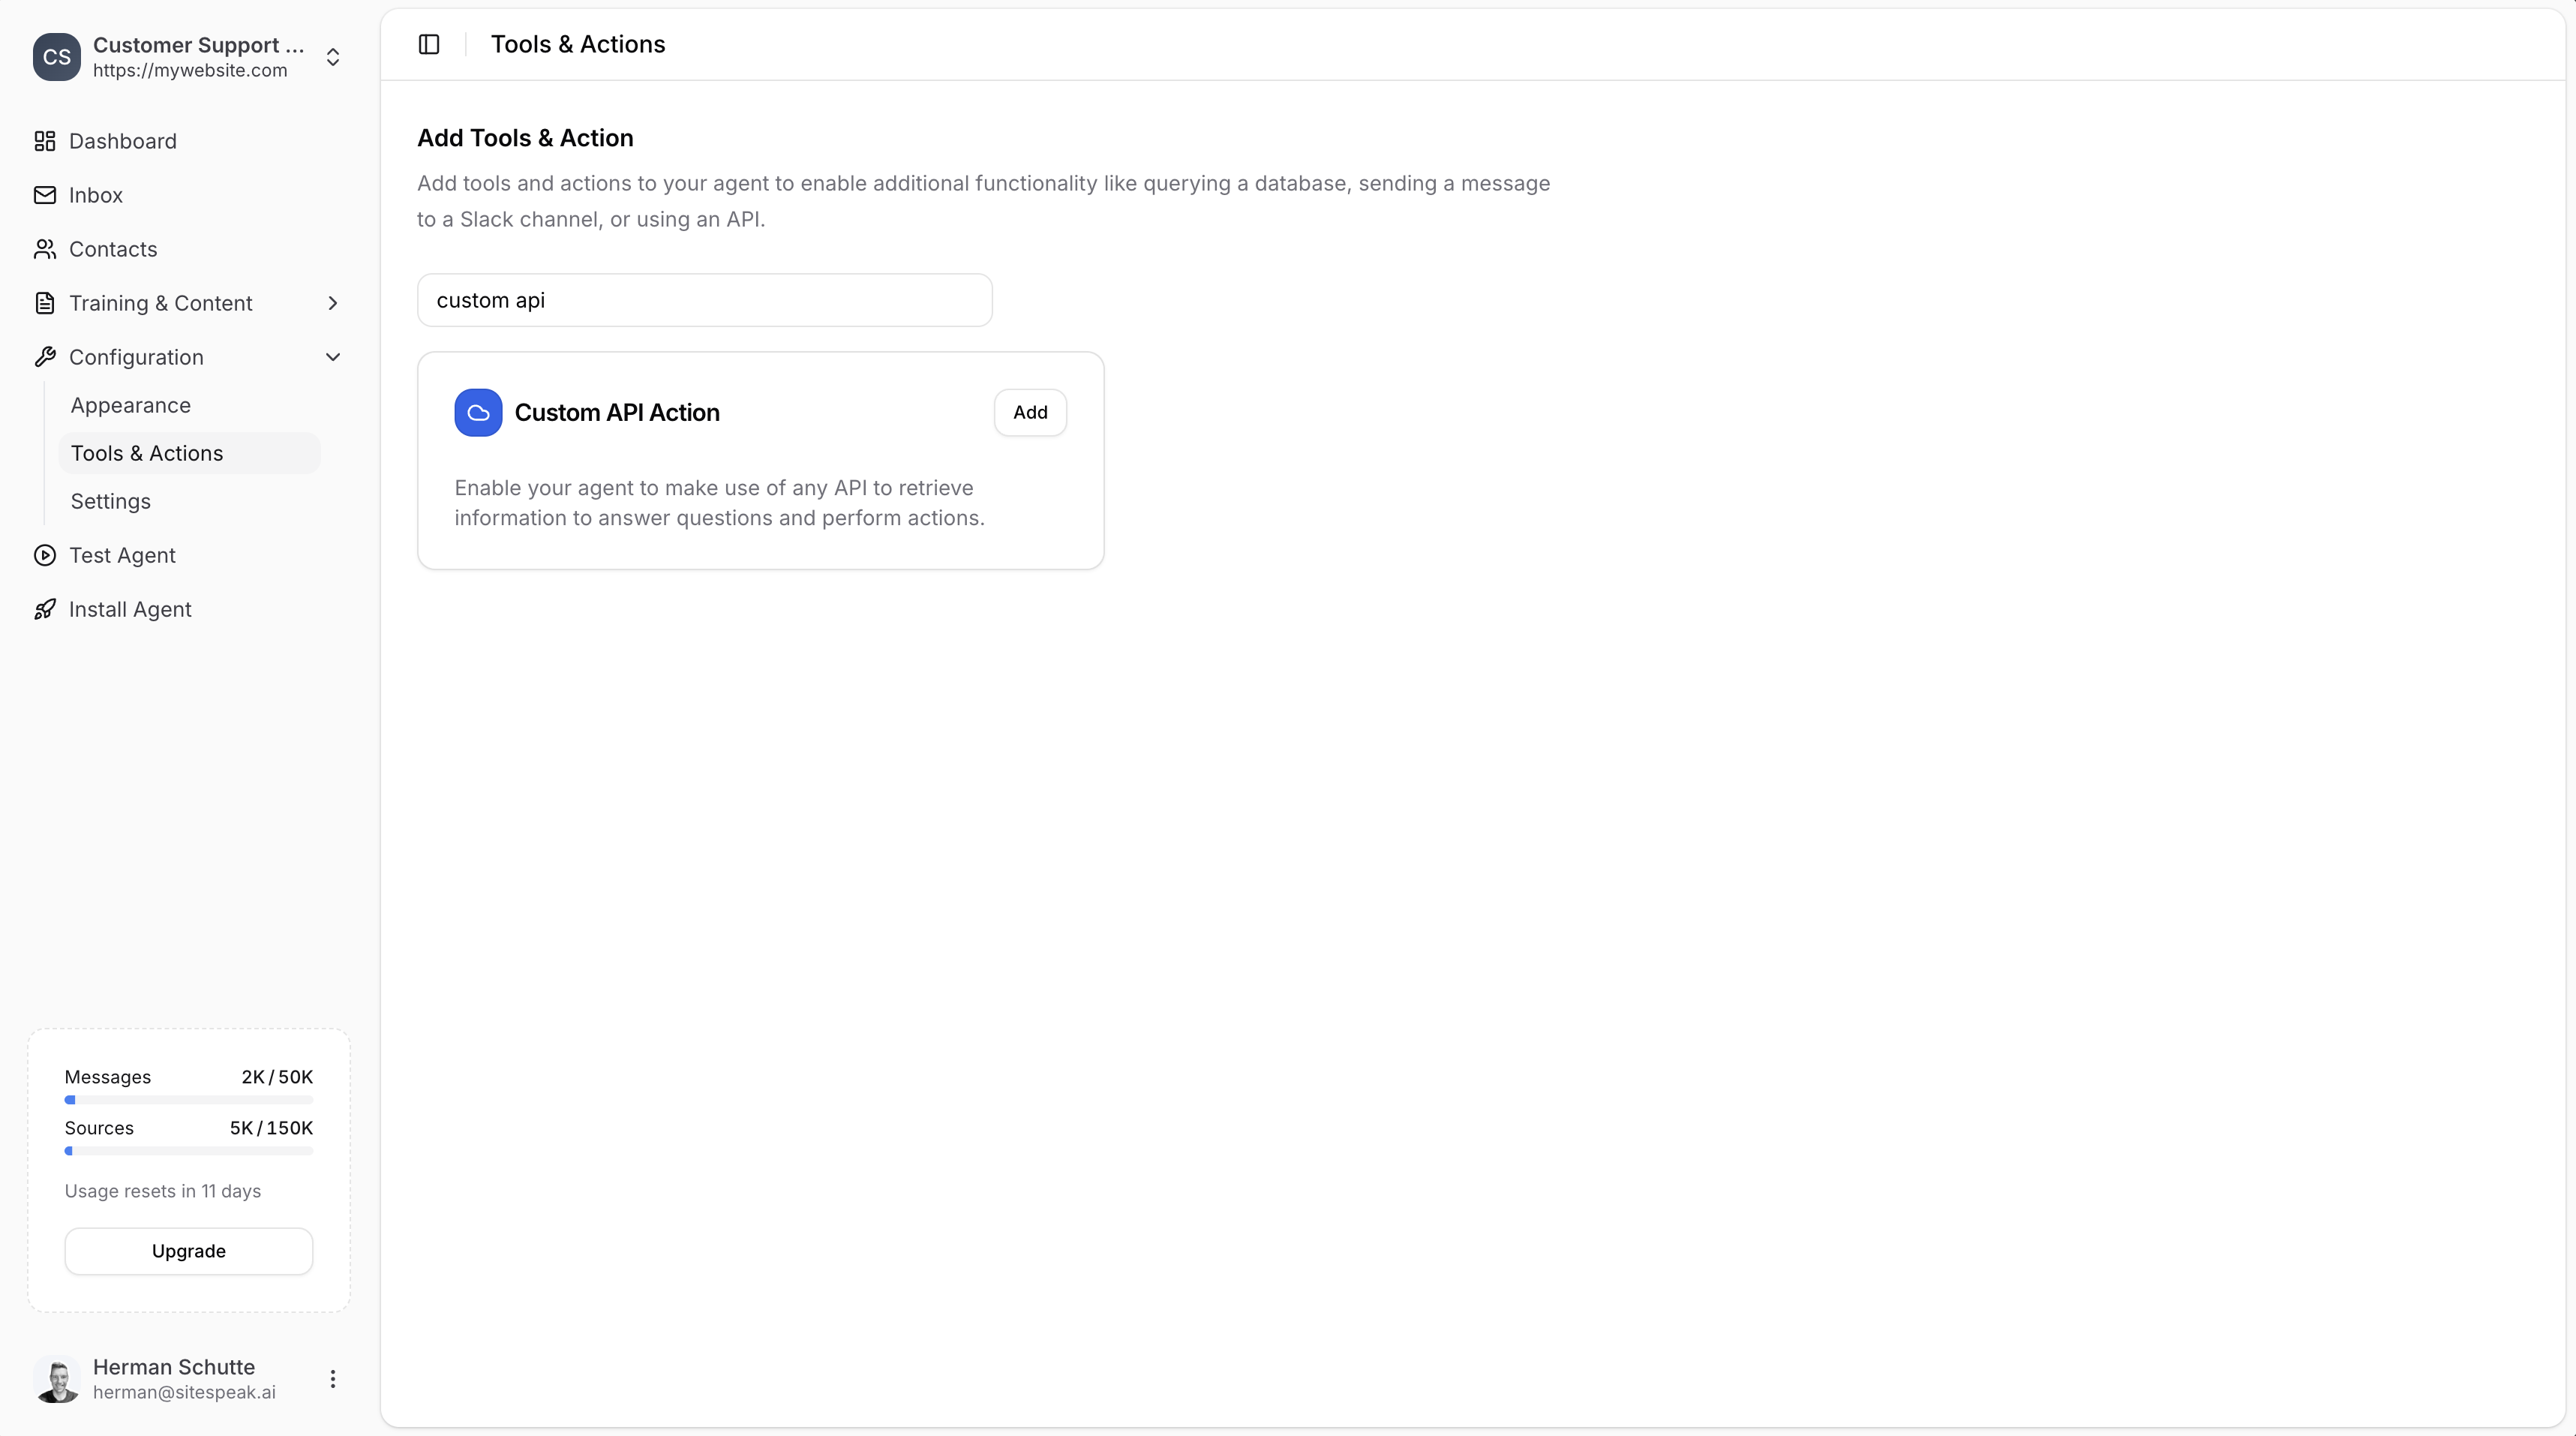
## Adding a Custom API Action
In your chatbot dashboard, go to **Configuration → Tools & Actions**.
Find the **Custom API Action** card and click **Add**.
 ***
## Configuration
After selecting the action to add, you will need to configure the following settings:
***
## Configuration
After selecting the action to add, you will need to configure the following settings:
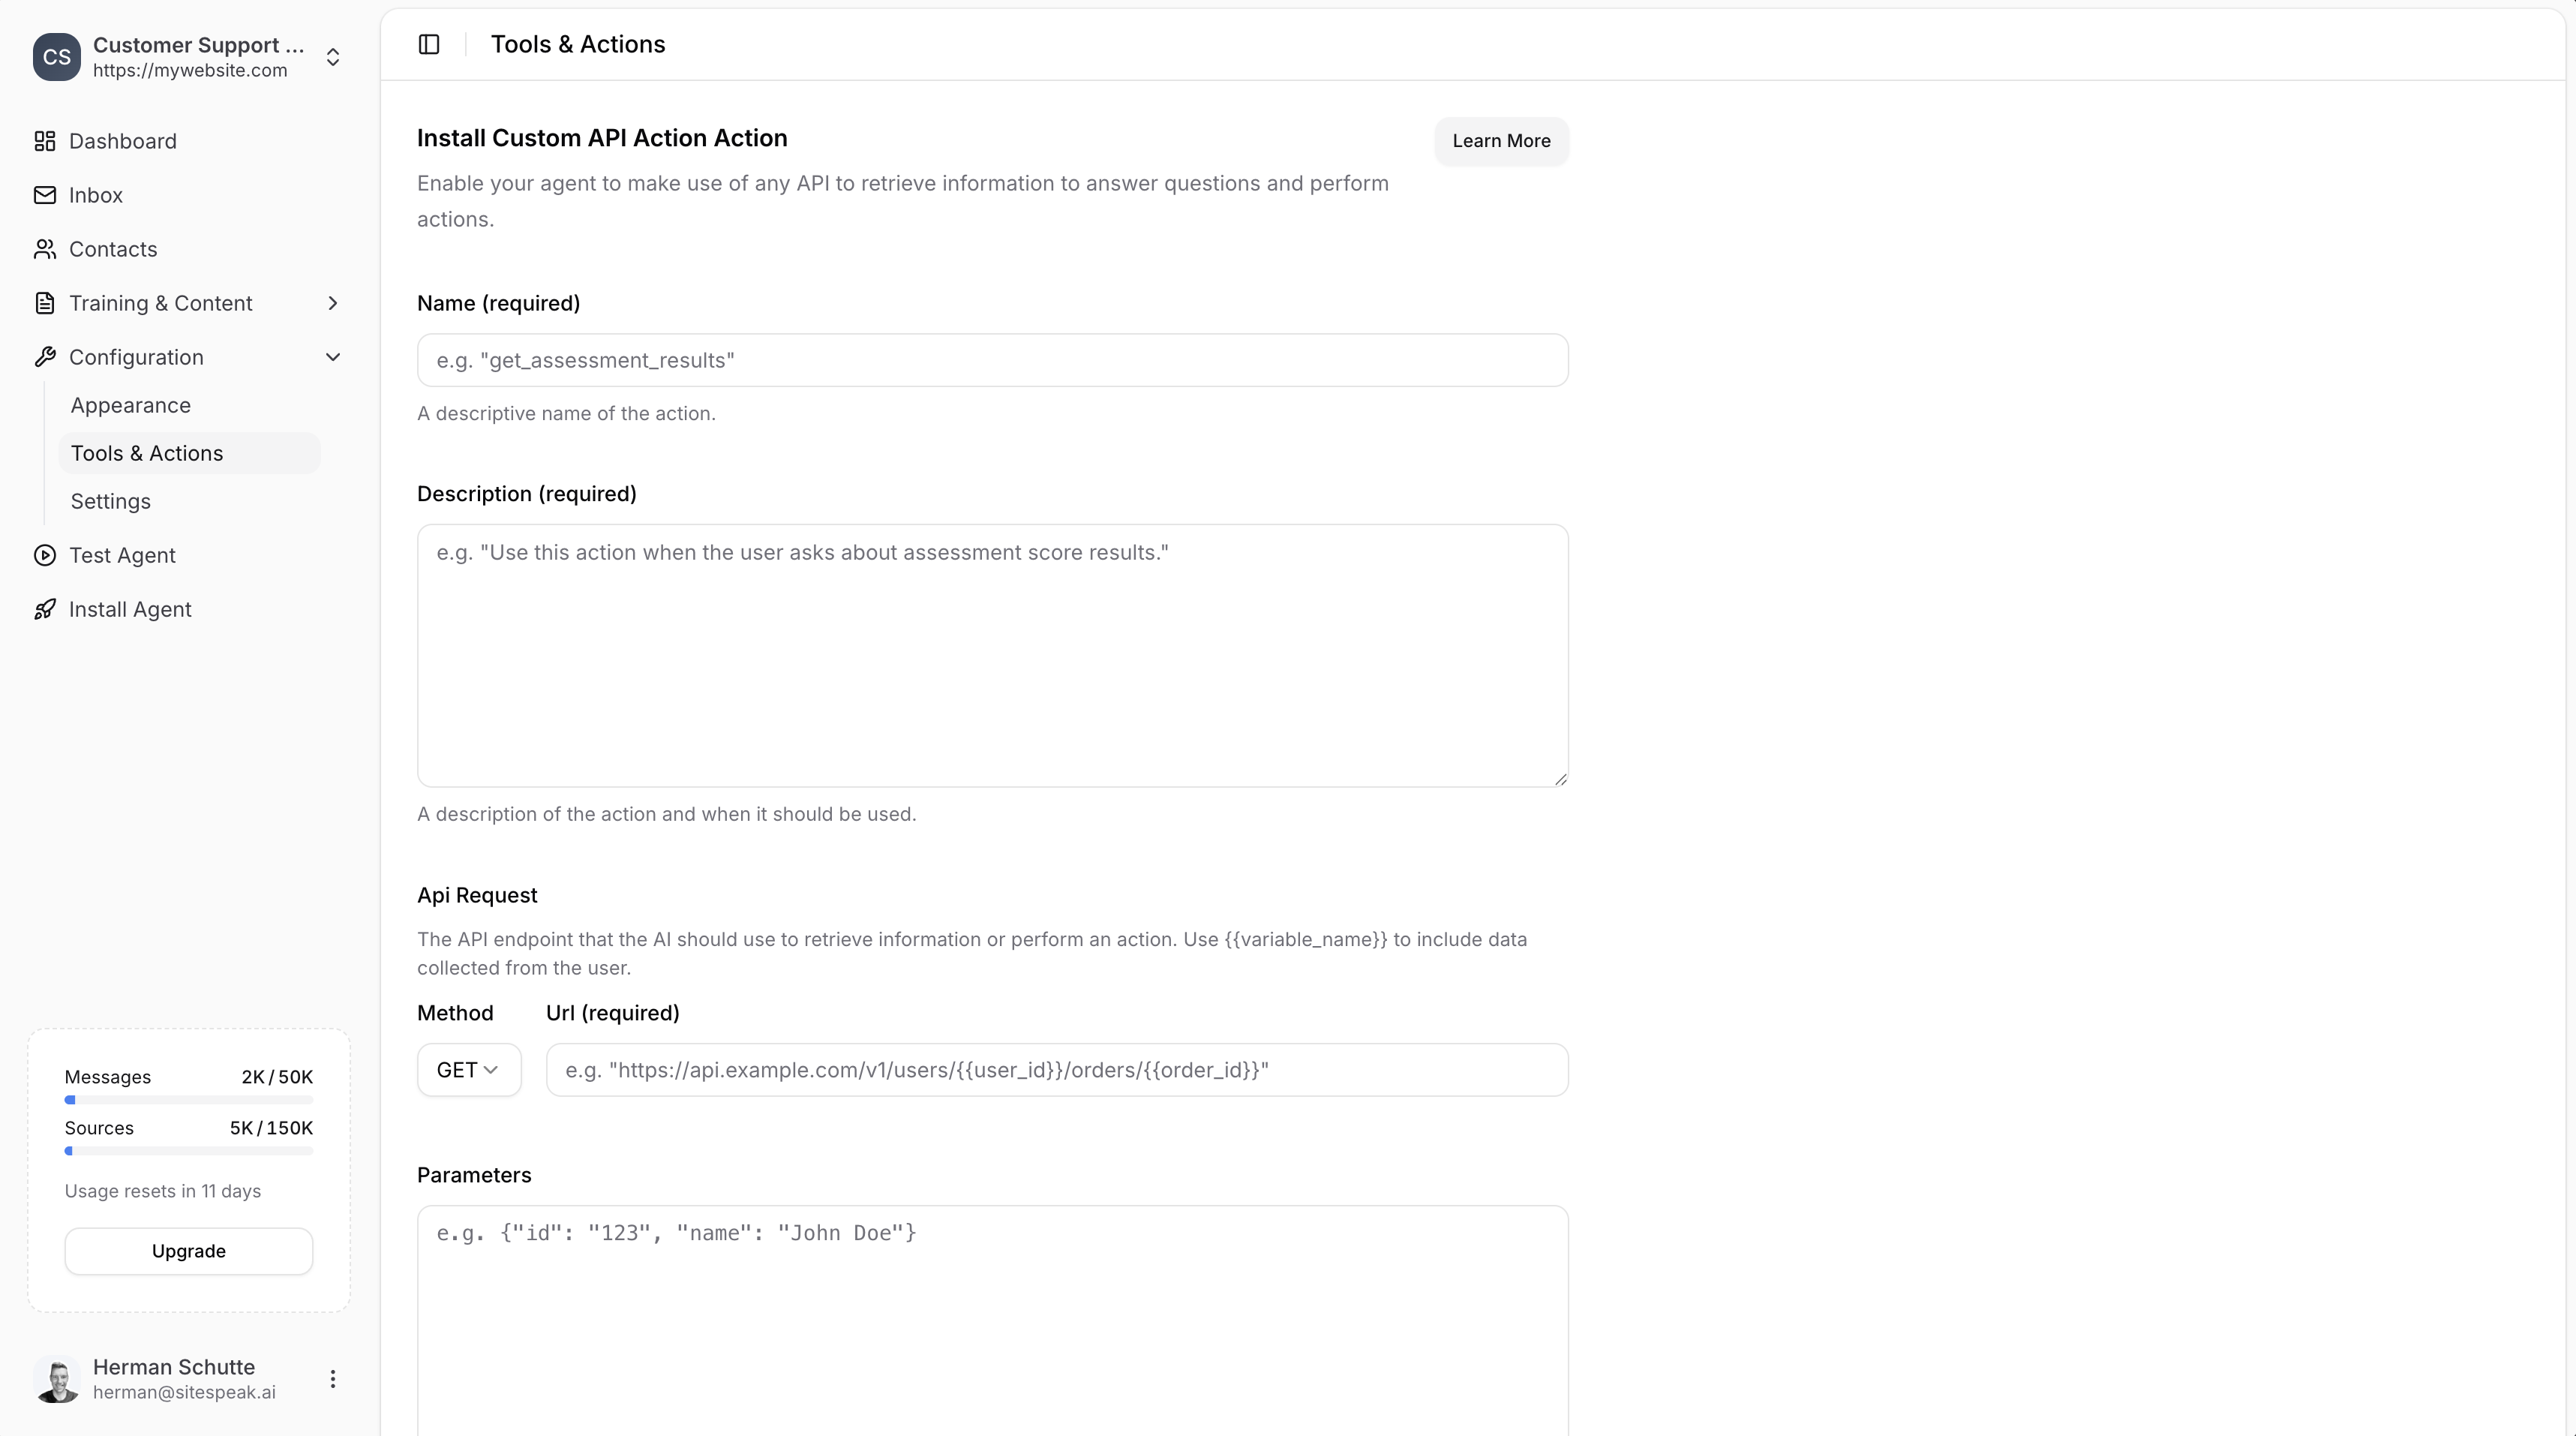 ### Name (required)
A descriptive name of the action.
**Example:** `get_assessment_results`
### Description (required)
A description of the action and when it should be used.
**Example:** `Use this action when the user asks about assessment score results.`
Make sure the **Name** and **Description** are descriptive so that the agent will know exactly when to use this action.
### API Request
The API endpoint that the AI should use to retrieve information or perform an action.
#### Method
Select the HTTP method: **GET**, **POST**, **PUT**, **PATCH**, or **DELETE**.
#### URL (required)
The API endpoint URL. You can use template strings like `{{variable_name}}` to include data collected from the user.
**Example:** `https://api.example.com/v1/users/{{user_id}}/orders/{{order_id}}`
### Parameters
Parameters to send with the request if required. Use `{{variable_name}}` to include data collected from the user. Must be a valid JSON object.
**Example:**
```json theme={null}
{"id": "123", "name": "John Doe"}
```
### Headers
Headers to send with the request if required. Must be a valid JSON object.
**Example:**
```json theme={null}
{"Authorization": "Bearer your_access_token"}
```
***
## Save the Action
Once you've completed the required details for the API request, click on the **Add Action** button to add and enable the action for your AI agent.
Your agent will now be able to use this API action to retrieve information or perform actions based on visitor questions.
***
## Using Template Variables
For the API **URL** and **Parameters**, you can use template strings to have the agent fill in values based on information retrieved from the user:
* `{{user_id}}` - Will be replaced with the user's ID
* `{{order_id}}` - Will be replaced with an order ID
* `{{email}}` - Will be replaced with the user's email
You can also use the [Identity Verification API](/managing-your-chatbot/deploy-and-install) to automatically provide user information to the chatbot.
***
Join over 1000+ businesses, websites and startups automating their customer service and other tasks with a custom trained AI agent.
### Name (required)
A descriptive name of the action.
**Example:** `get_assessment_results`
### Description (required)
A description of the action and when it should be used.
**Example:** `Use this action when the user asks about assessment score results.`
Make sure the **Name** and **Description** are descriptive so that the agent will know exactly when to use this action.
### API Request
The API endpoint that the AI should use to retrieve information or perform an action.
#### Method
Select the HTTP method: **GET**, **POST**, **PUT**, **PATCH**, or **DELETE**.
#### URL (required)
The API endpoint URL. You can use template strings like `{{variable_name}}` to include data collected from the user.
**Example:** `https://api.example.com/v1/users/{{user_id}}/orders/{{order_id}}`
### Parameters
Parameters to send with the request if required. Use `{{variable_name}}` to include data collected from the user. Must be a valid JSON object.
**Example:**
```json theme={null}
{"id": "123", "name": "John Doe"}
```
### Headers
Headers to send with the request if required. Must be a valid JSON object.
**Example:**
```json theme={null}
{"Authorization": "Bearer your_access_token"}
```
***
## Save the Action
Once you've completed the required details for the API request, click on the **Add Action** button to add and enable the action for your AI agent.
Your agent will now be able to use this API action to retrieve information or perform actions based on visitor questions.
***
## Using Template Variables
For the API **URL** and **Parameters**, you can use template strings to have the agent fill in values based on information retrieved from the user:
* `{{user_id}}` - Will be replaced with the user's ID
* `{{order_id}}` - Will be replaced with an order ID
* `{{email}}` - Will be replaced with the user's email
You can also use the [Identity Verification API](/managing-your-chatbot/deploy-and-install) to automatically provide user information to the chatbot.
***
Join over 1000+ businesses, websites and startups automating their customer service and other tasks with a custom trained AI agent.