Add your AI support agent to your Blogger website
In SiteSpeakAI
Select your chatbot from the dropdown menu at the top, click on the Install Agent section in the sidebar, then click on the Copy Code button to copy your code snippet.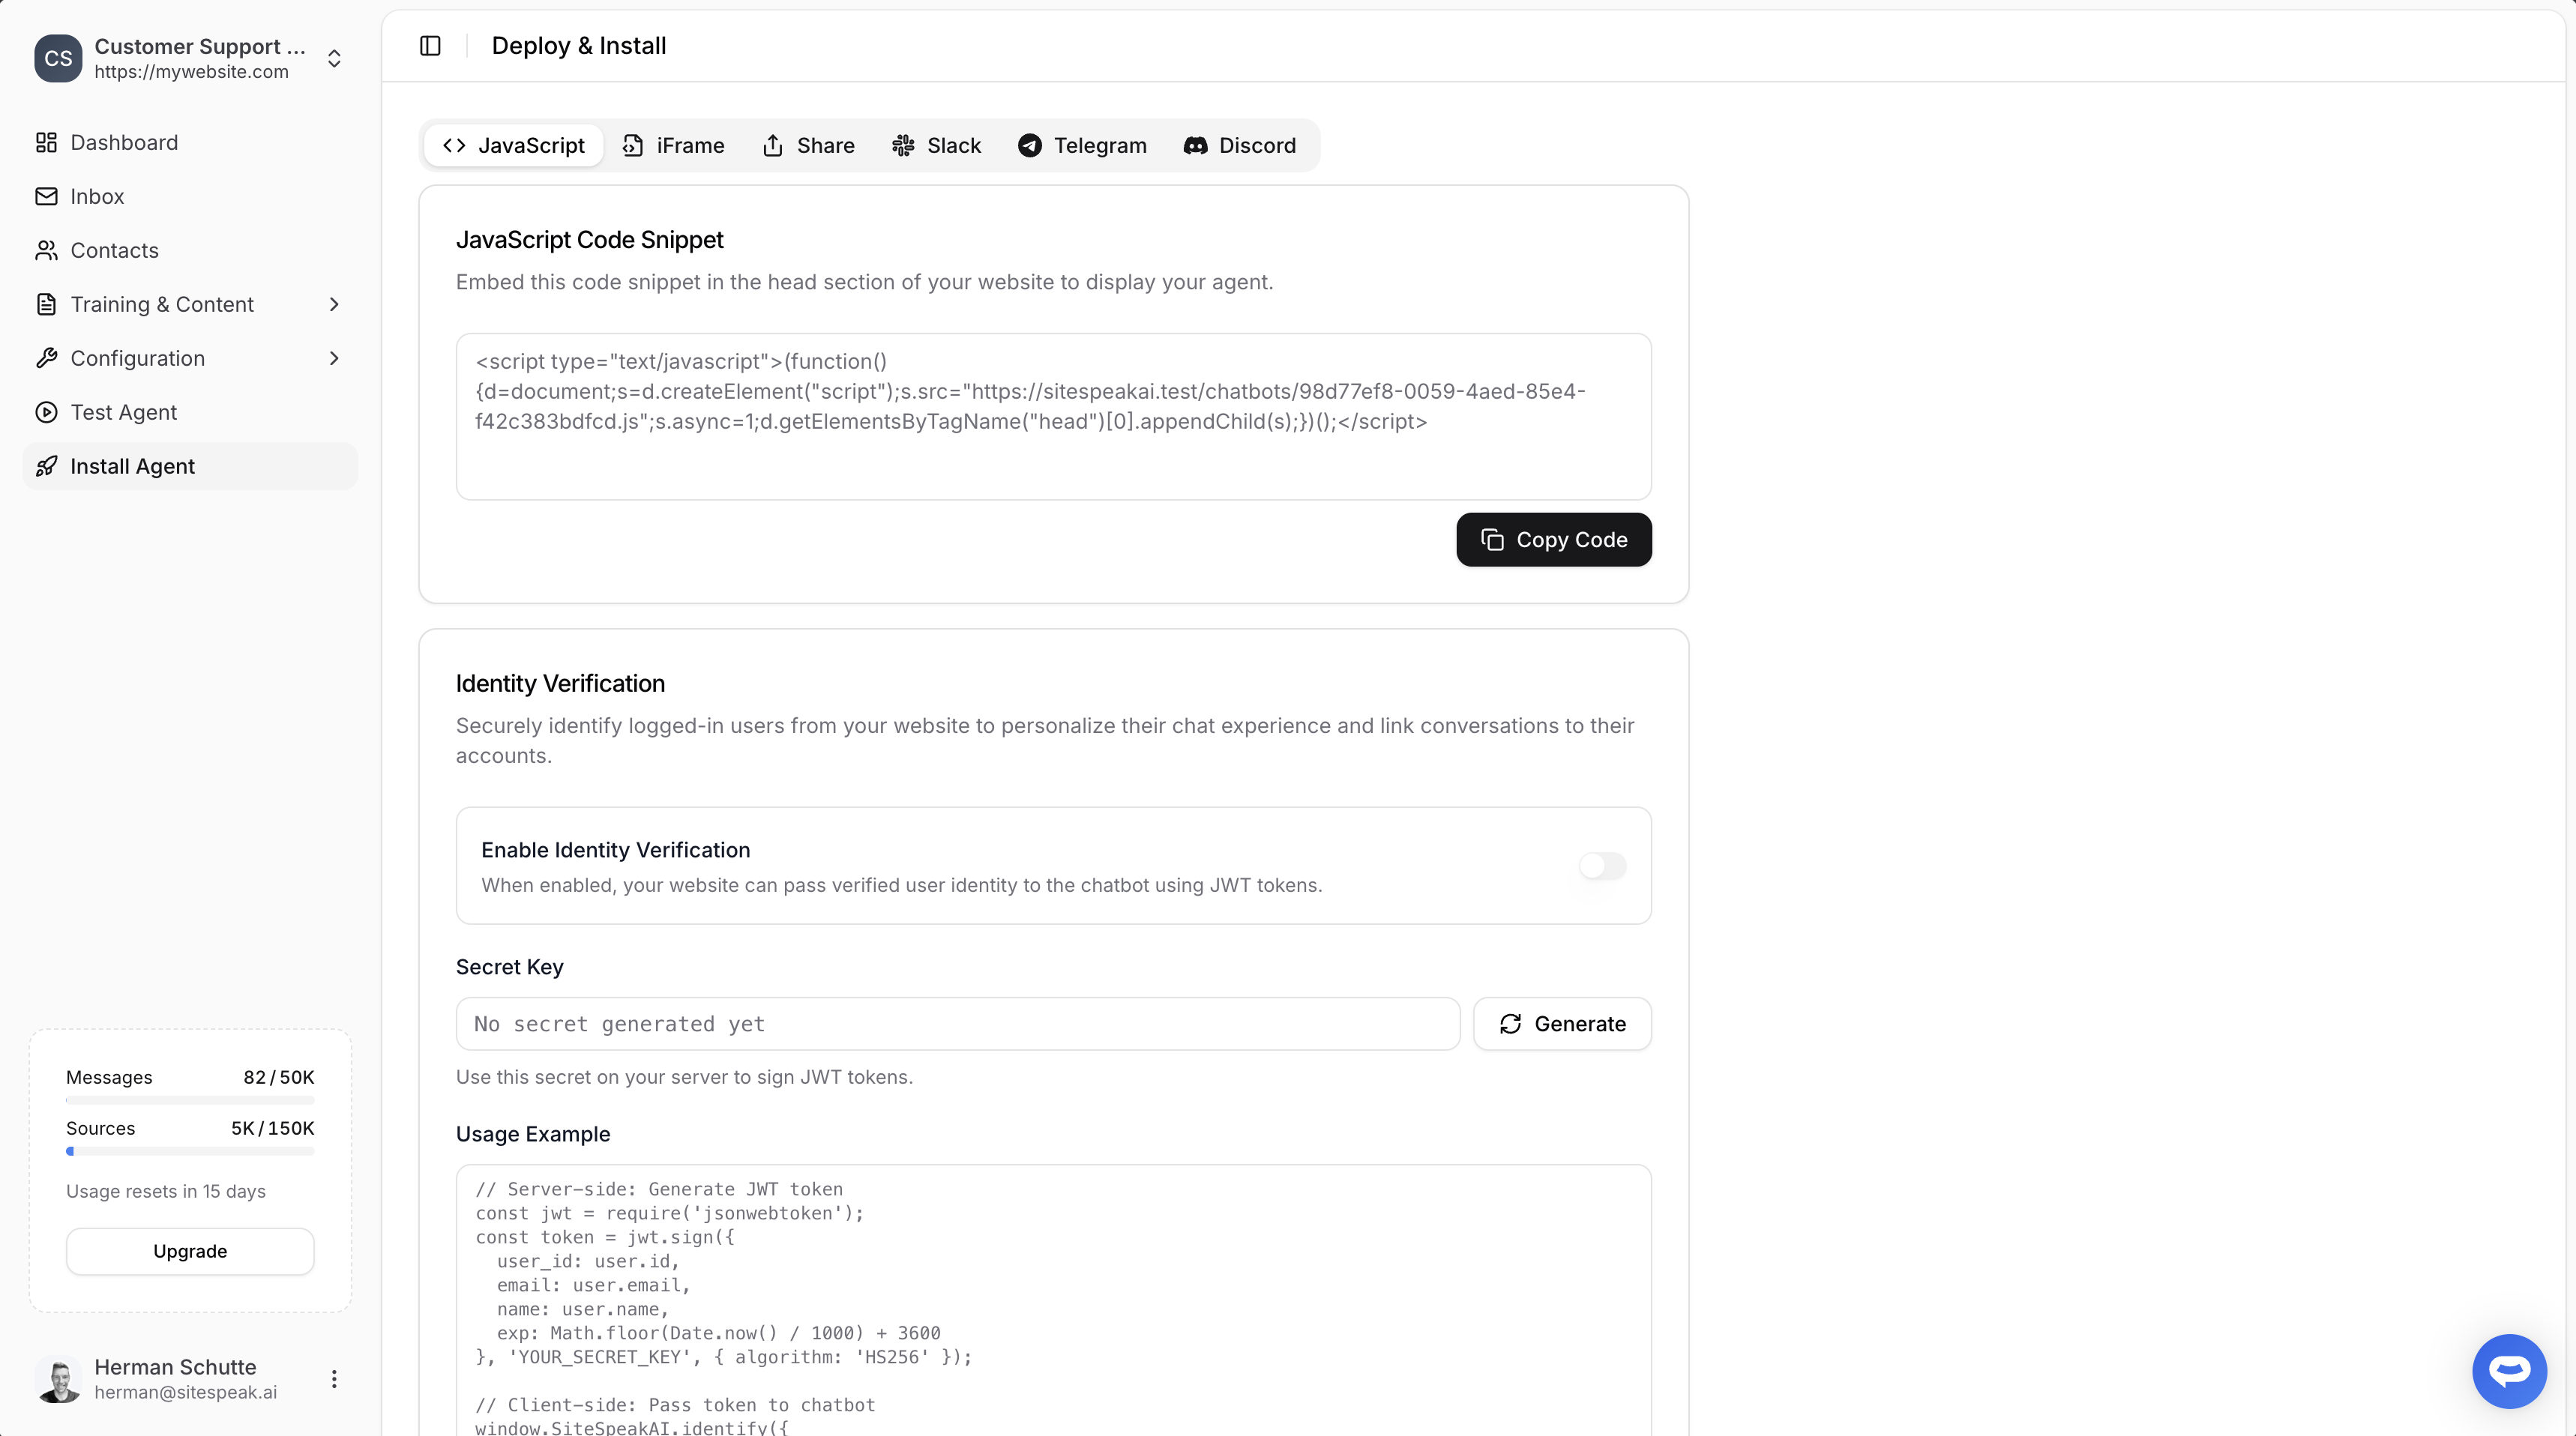
In Blogger
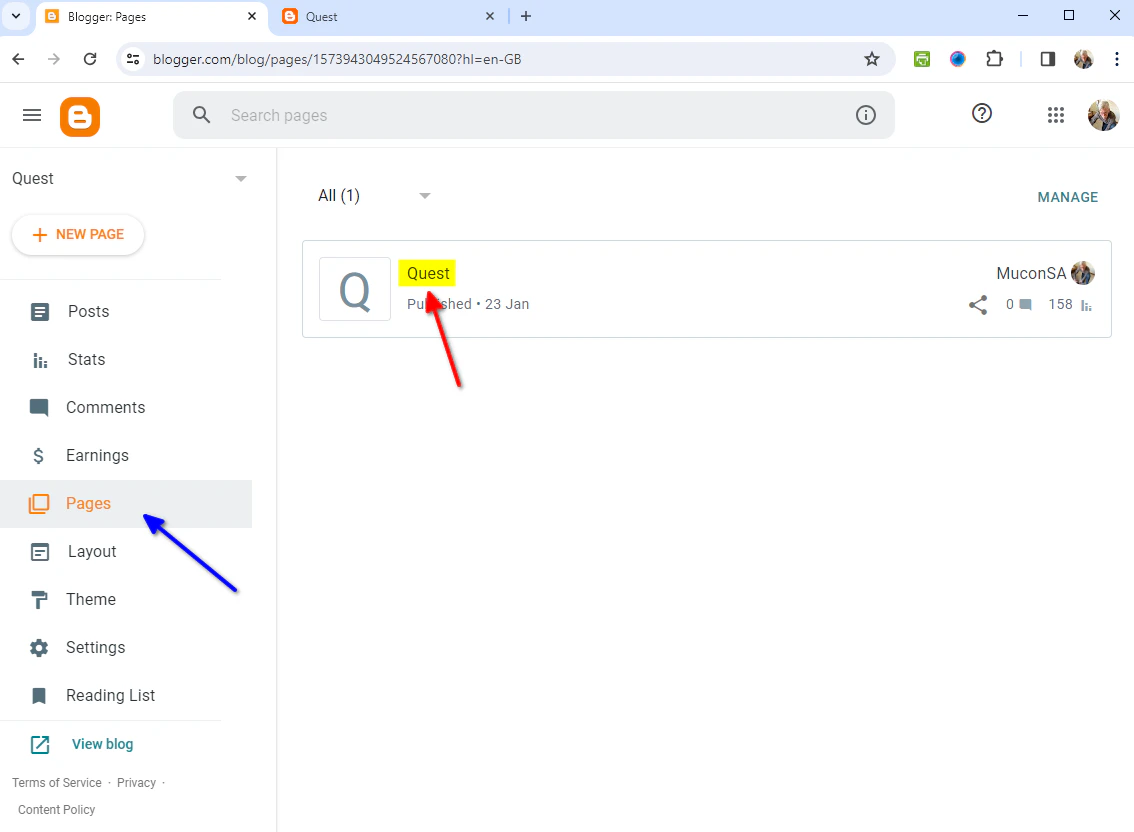
- On your dashboard, click on Pages and select the page you want to edit
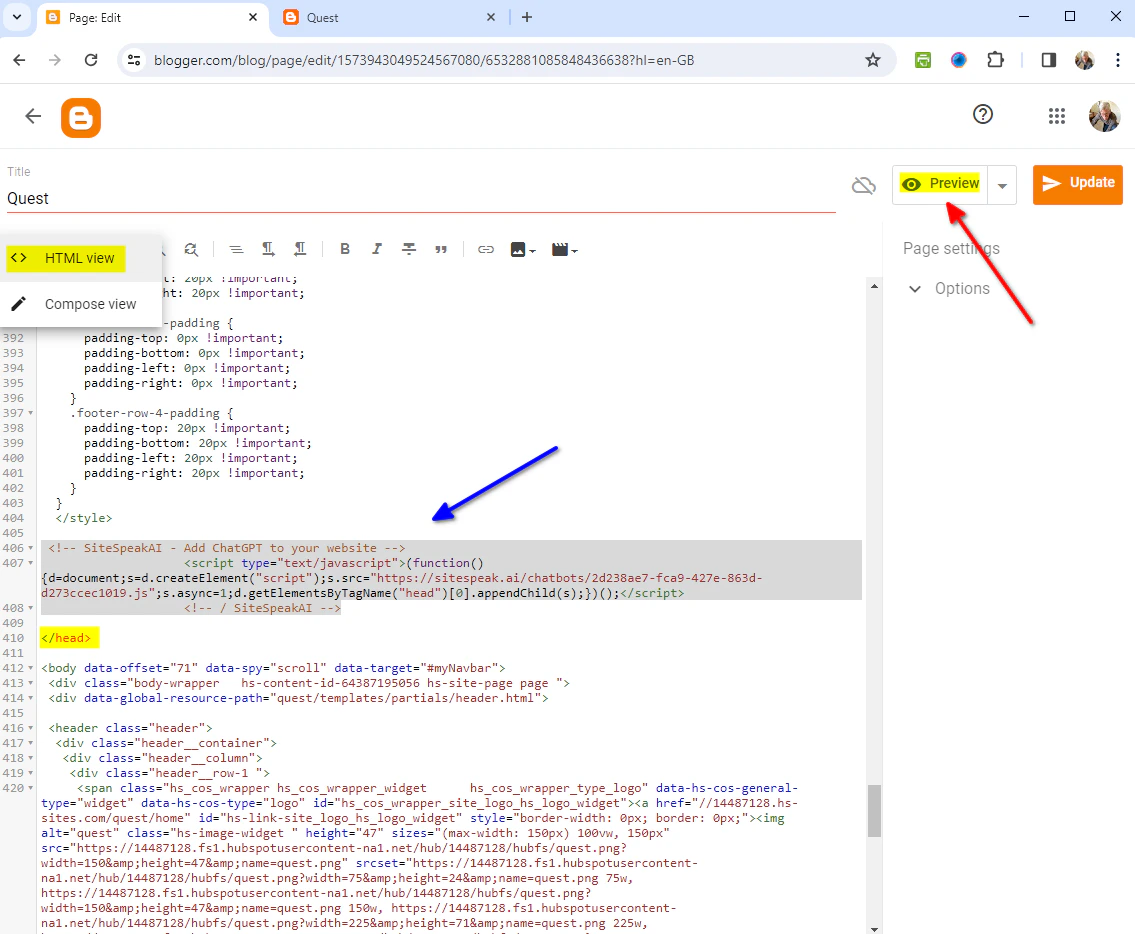
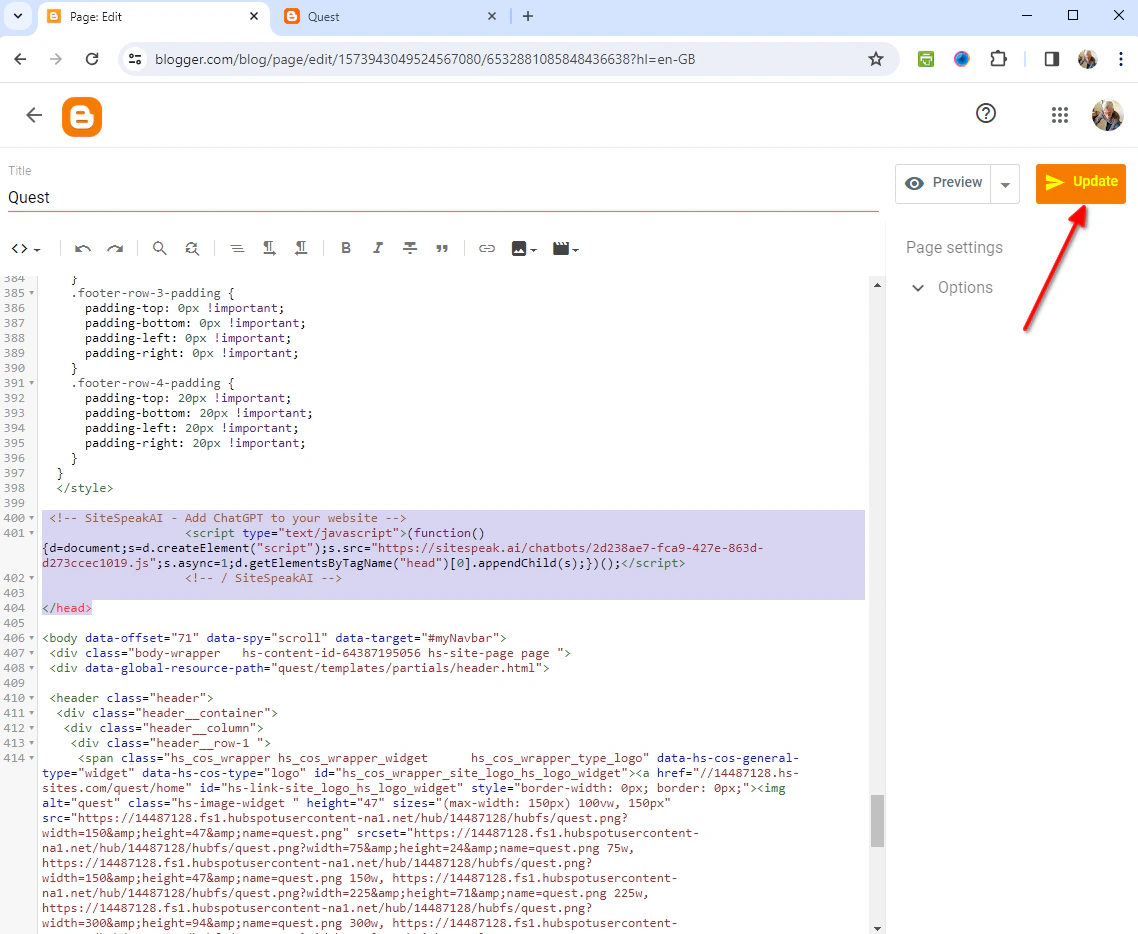
- In the editor dialogue, make sure </> HTML view is selected and insert your snippet just above the closing
</head>tag. Click on Preview to display a preview of your page
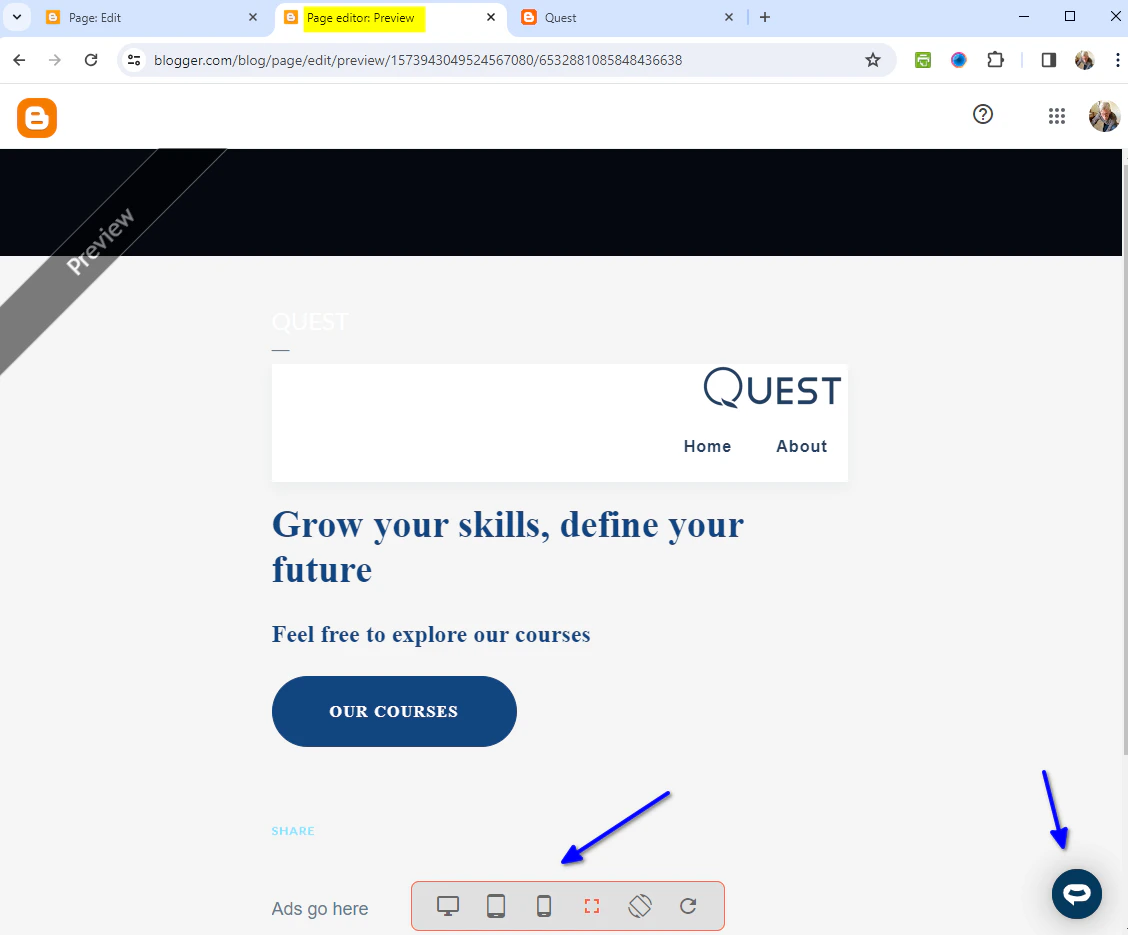
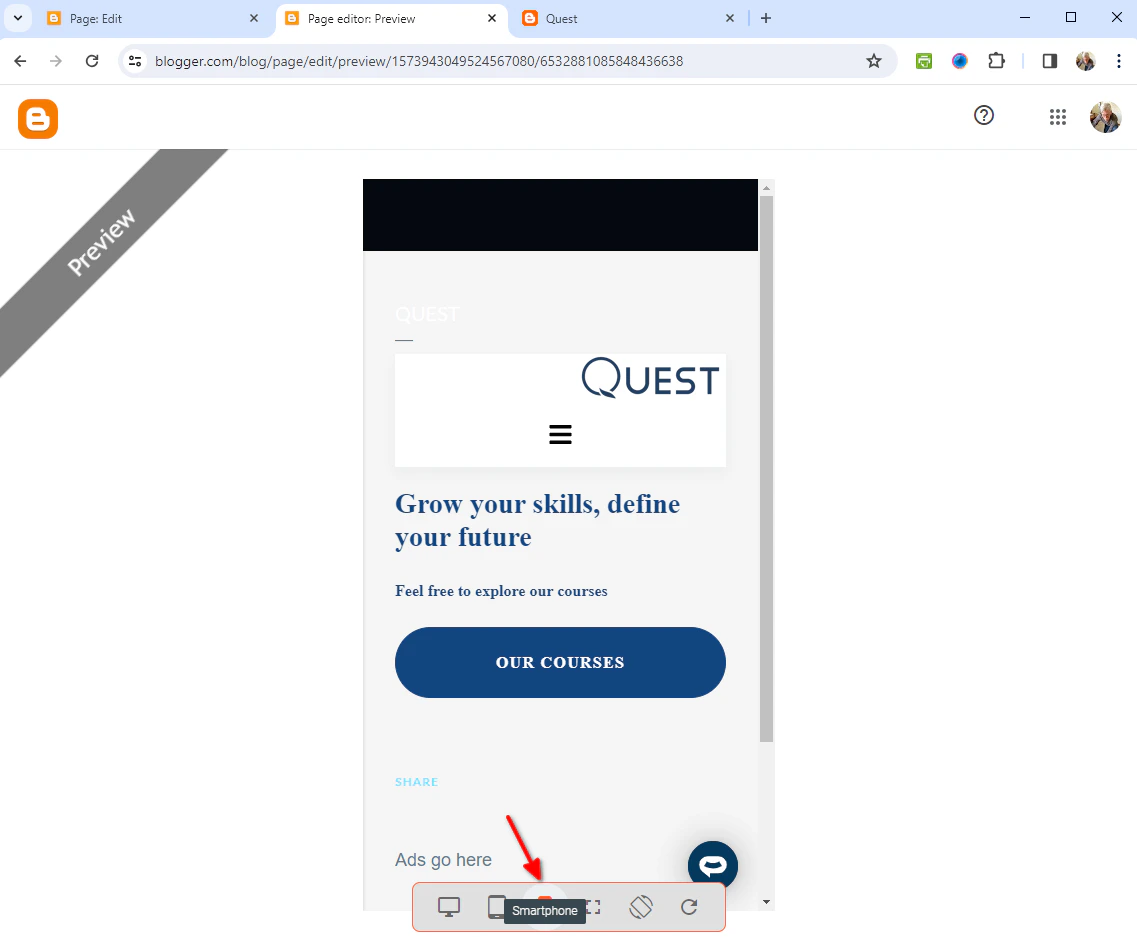
- The preview display allows viewing on different media sizes (Desktop, tablet as well as smartphone). It also displays your Chatbot button but note that the button is not active and cannot be clicked on
- Preview viewing on a tablet

- Preview viewing on a smartphone
- Return to the editor and click on Update to update your live page
-
Your AI support agent button will now be displayed on your live Blogger website page
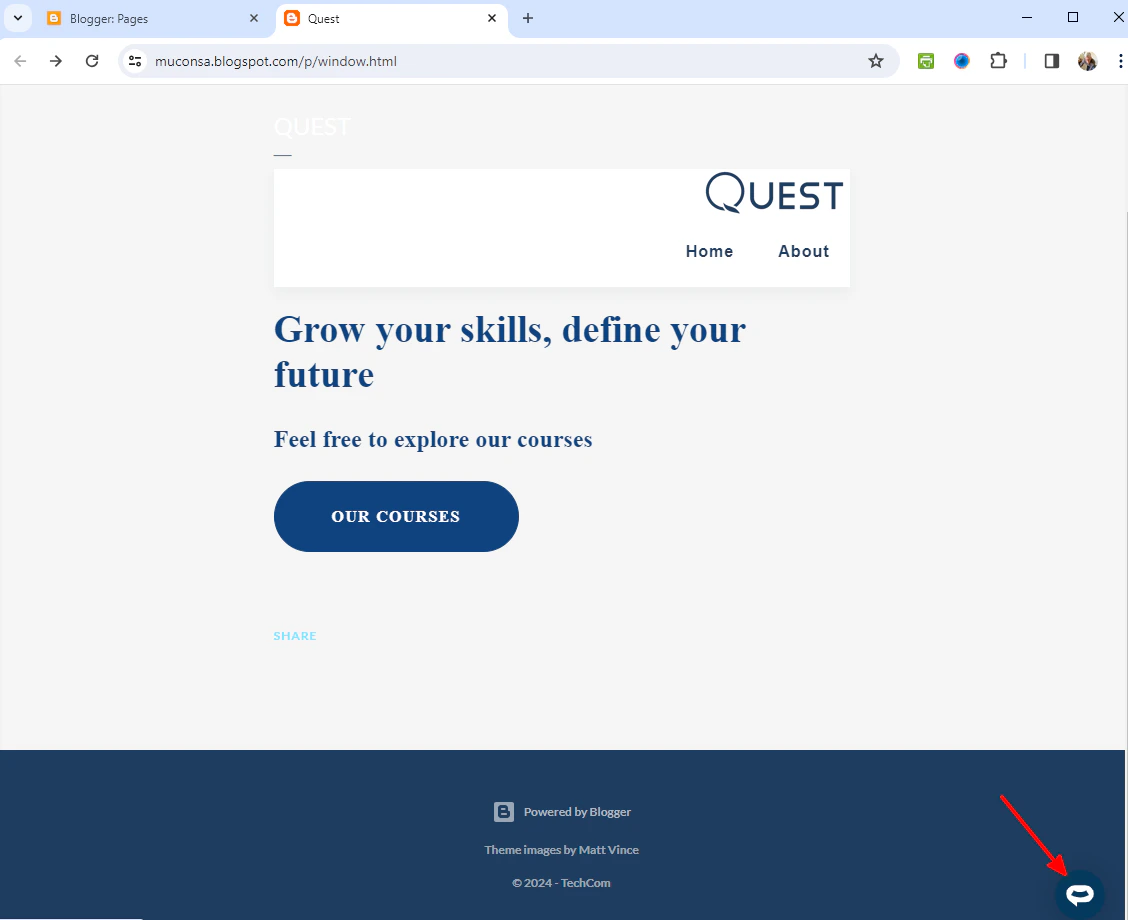
-
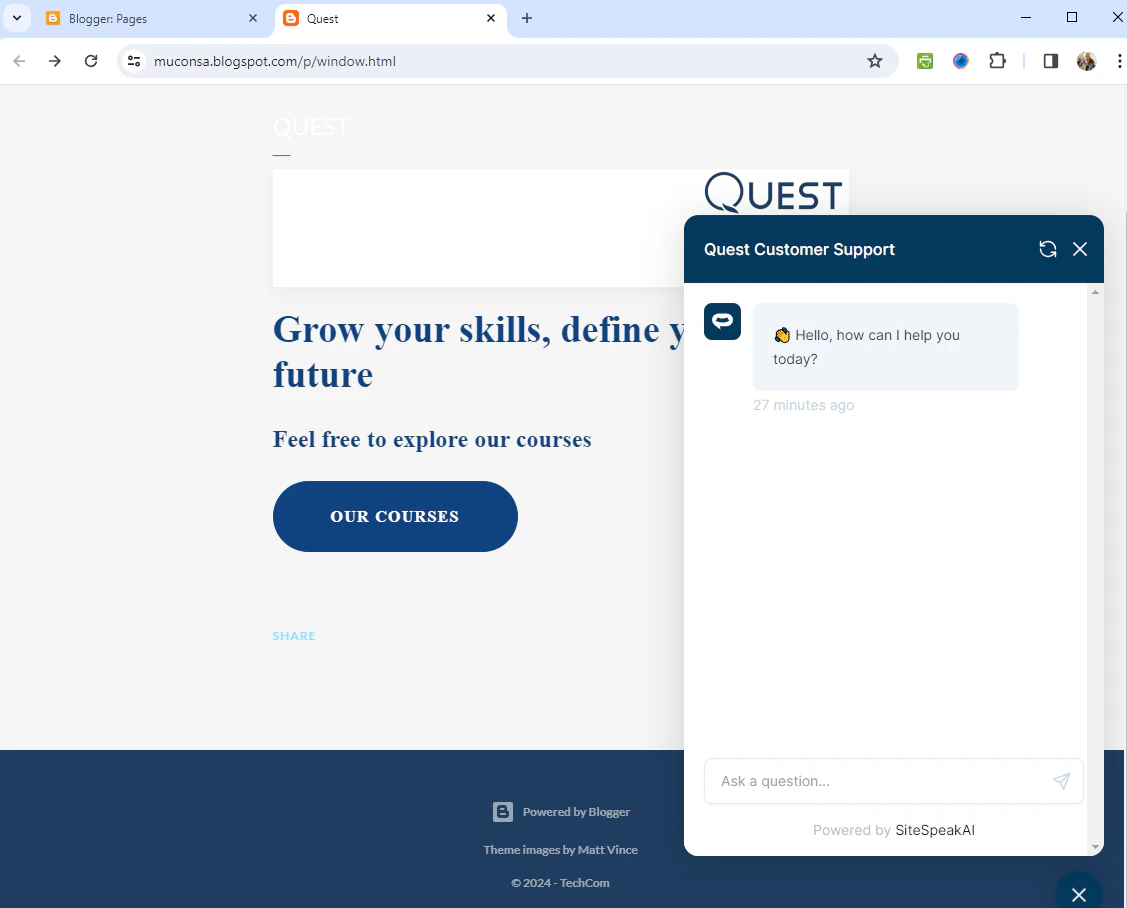
If you click on the button it will display the AI support agent dialogue
Ready to automate your customer service with AI?
Join over 1000+ businesses, websites and startups automating their customer service and other tasks with a custom trained AI agent.