

Video transcript
Video transcript
Visitors on your WordPress site have questions. What does this cost? Do you ship to my country? How do I talk to a person?A SiteSpeak AI agent can answer these questions for you, at any time. This video shows how to make the agent, test it, and add it to your WordPress site. It also shows how to collect leads, and how to make the answers better.Step 1. Make the agent. Log in to SiteSpeak. Type a name for your agent. Type the URL of your WordPress site. SiteSpeak finds your pages and selects the main pages for you. Click Save and Continue. SiteSpeak trains the agent on these pages. This takes a few minutes.Step 2. Test the agent. Before you add the agent to your site, test it. Open Test Agent. Ask three questions that your visitors ask. For example, ask about prices, shipping, and contact details. Read each answer. If an answer is not correct, add the missing information in Training and Content.Step 3. Brand the agent. Open Appearance. Set the Accent Color to your brand color. Under Icons, upload your logo. Type a Welcome Message. For example: Hi, ask me about our products, prices, or shipping. Now the agent looks like part of your site.Step 4. Add the agent to WordPress. Open Install Agent, and copy the JavaScript code snippet. In your WordPress dashboard, click Pages. Open the page where you want the agent. At the bottom of the page, type a forward slash, and choose Custom HTML. Paste the snippet in the Custom HTML block. Click Save. The chat button is now on this page. To show the agent on more pages, add the block to each page.Step 5. Collect leads. Open Settings, and go to the Leads tab. Turn on Enable Lead Capture. Add the fields that you need, for example name and email. Now the agent asks for these details before the chat starts. You can see each lead in Contacts. Lead capture is available on the paid plans.Step 6. Send difficult questions to your team. Some questions need a person. For example, a custom order, or a complaint. Open Settings, and go to Escalations. Turn on Enable Escalations. Type the email address of your team. When a visitor asks for a person, the agent sends the conversation to your team. You can read and reply to all conversations in the Inbox. Escalations are available on the Pro plan and higher.Step 7. Make the answers better. Open the Dashboard. Look at Top Unanswered Questions. These are the questions that the agent could not answer. For each question, add the missing information. Or add an Updated Answer. Do this each week. Then the agent can answer more questions each week.You can start with a free plan at sitespeak.ai.
Add your AI support agent to your WordPress website
In SiteSpeakAI
Select your chatbot from the dropdown menu at the top, click on the Install Agent section in the sidebar, then click on the Copy Code button to copy your code snippet.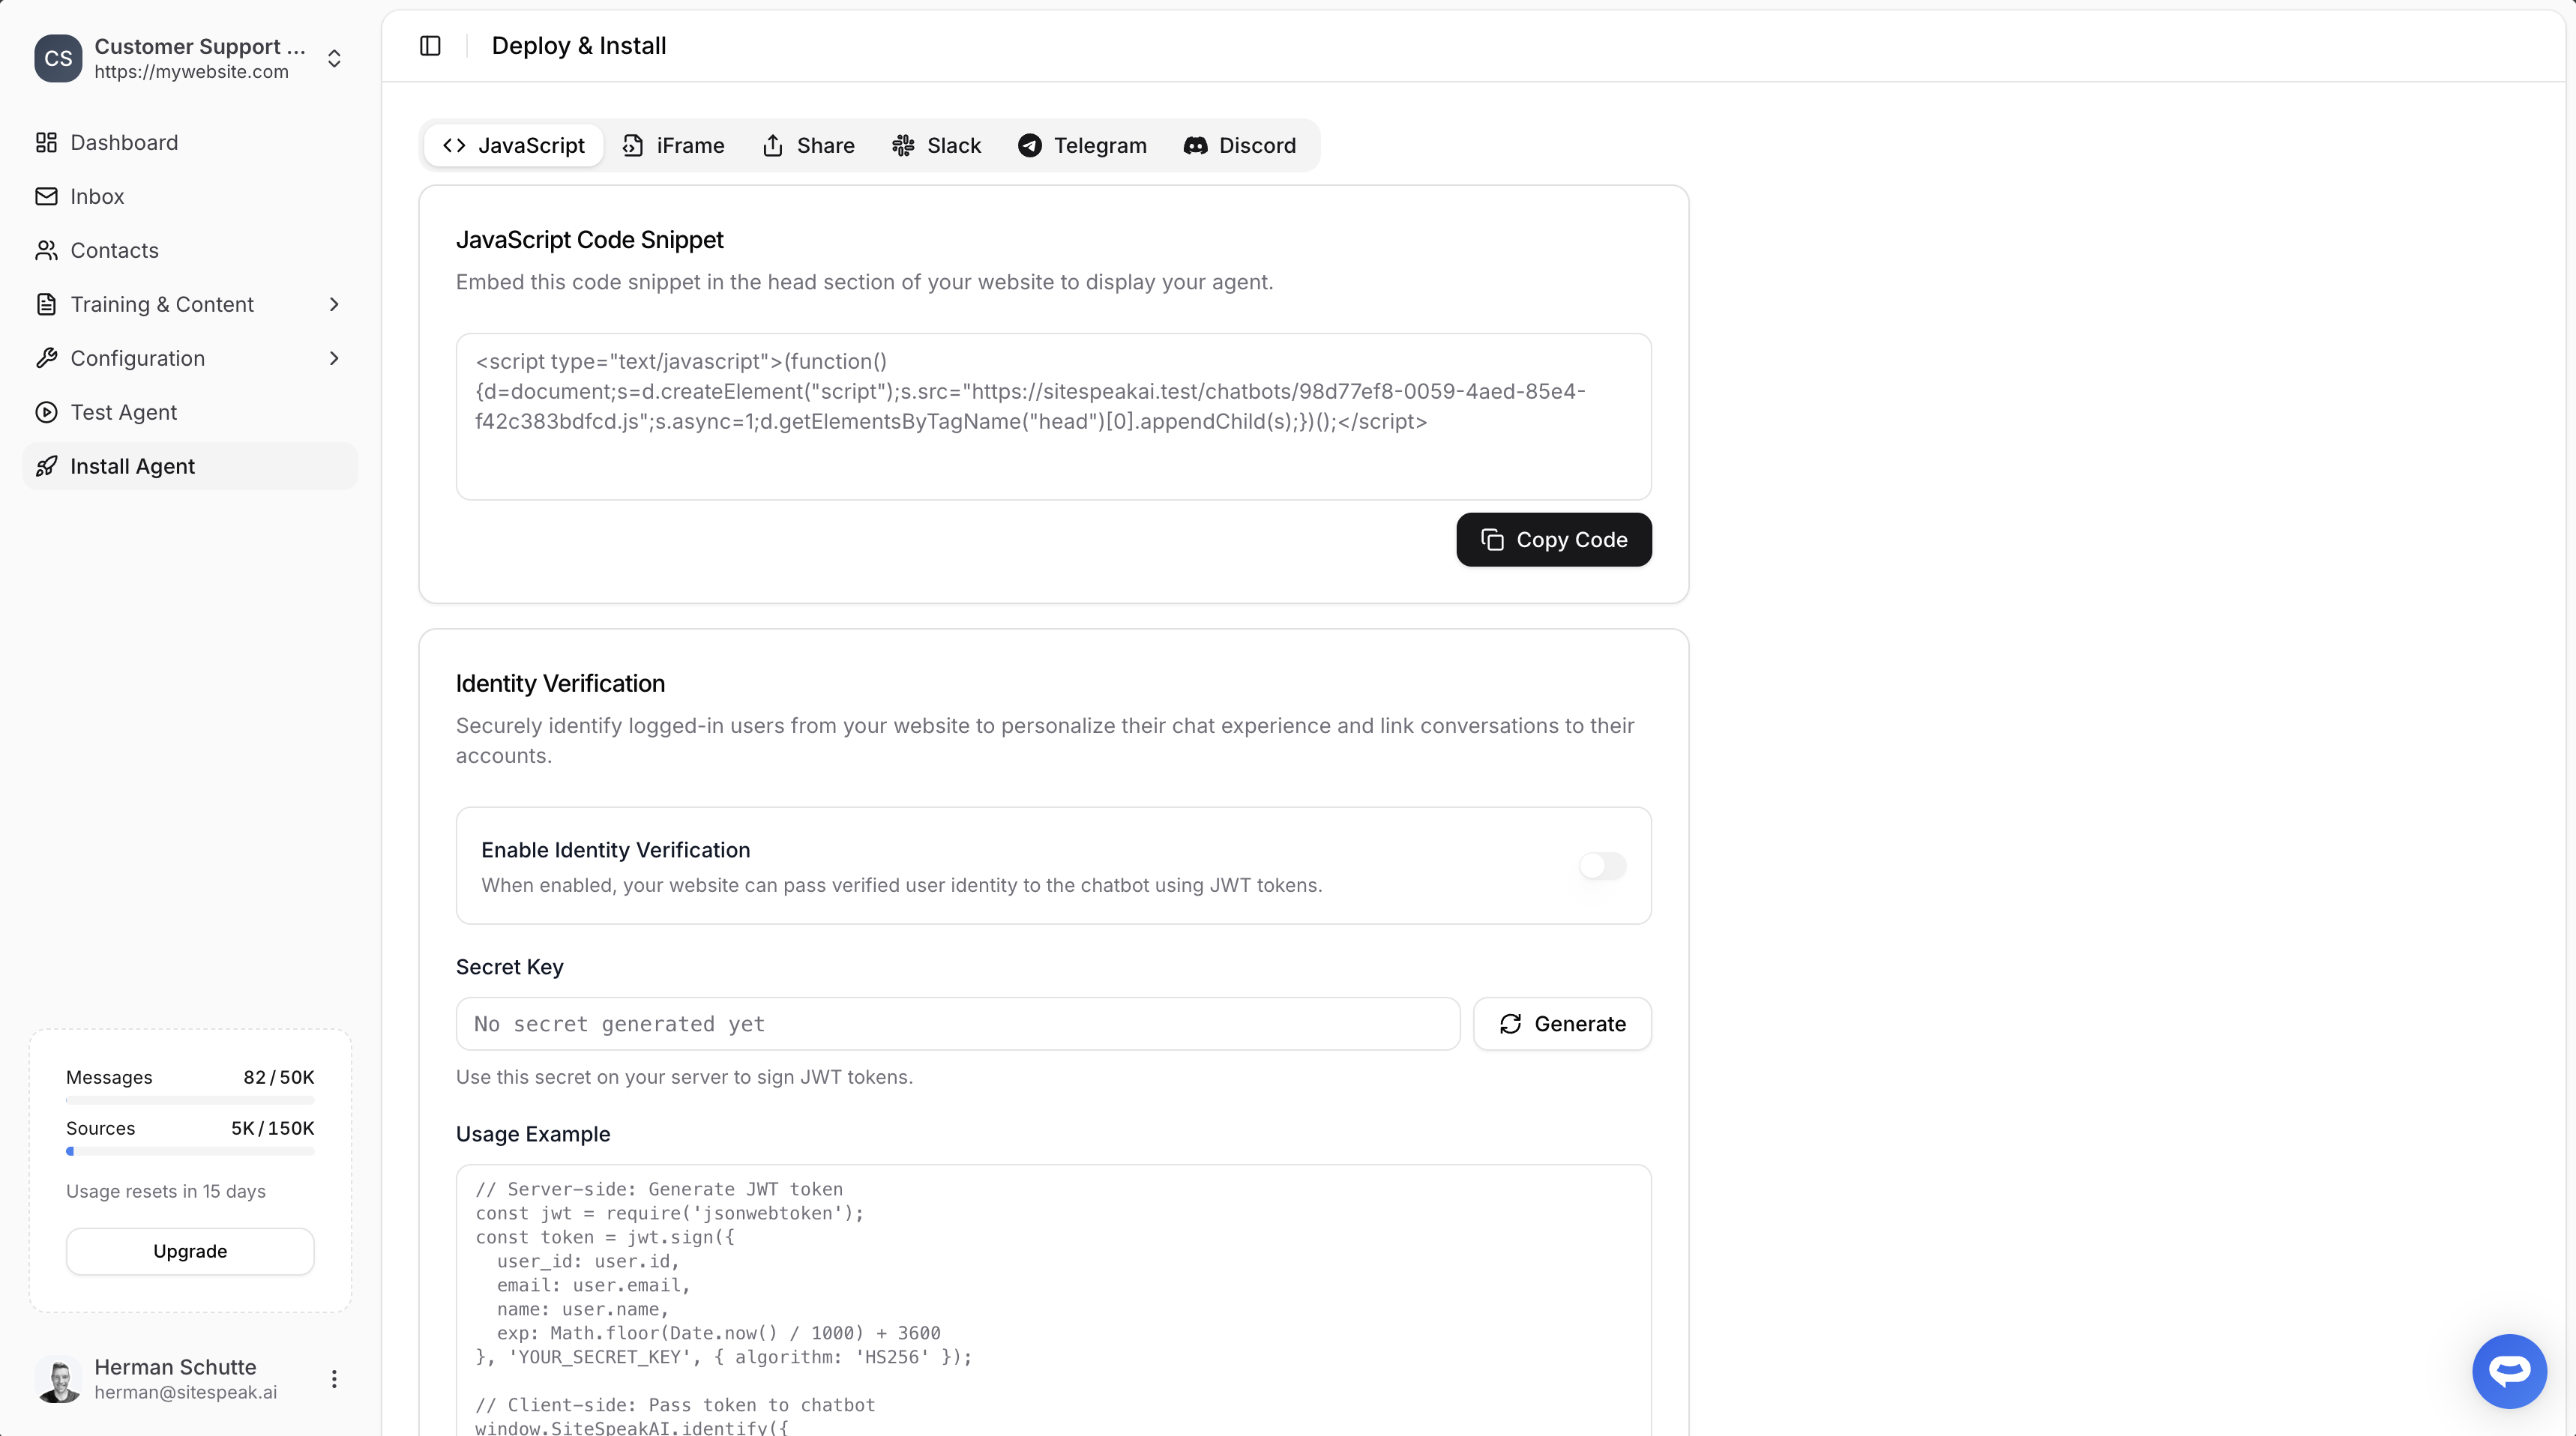
In WordPress
- Click on Pages
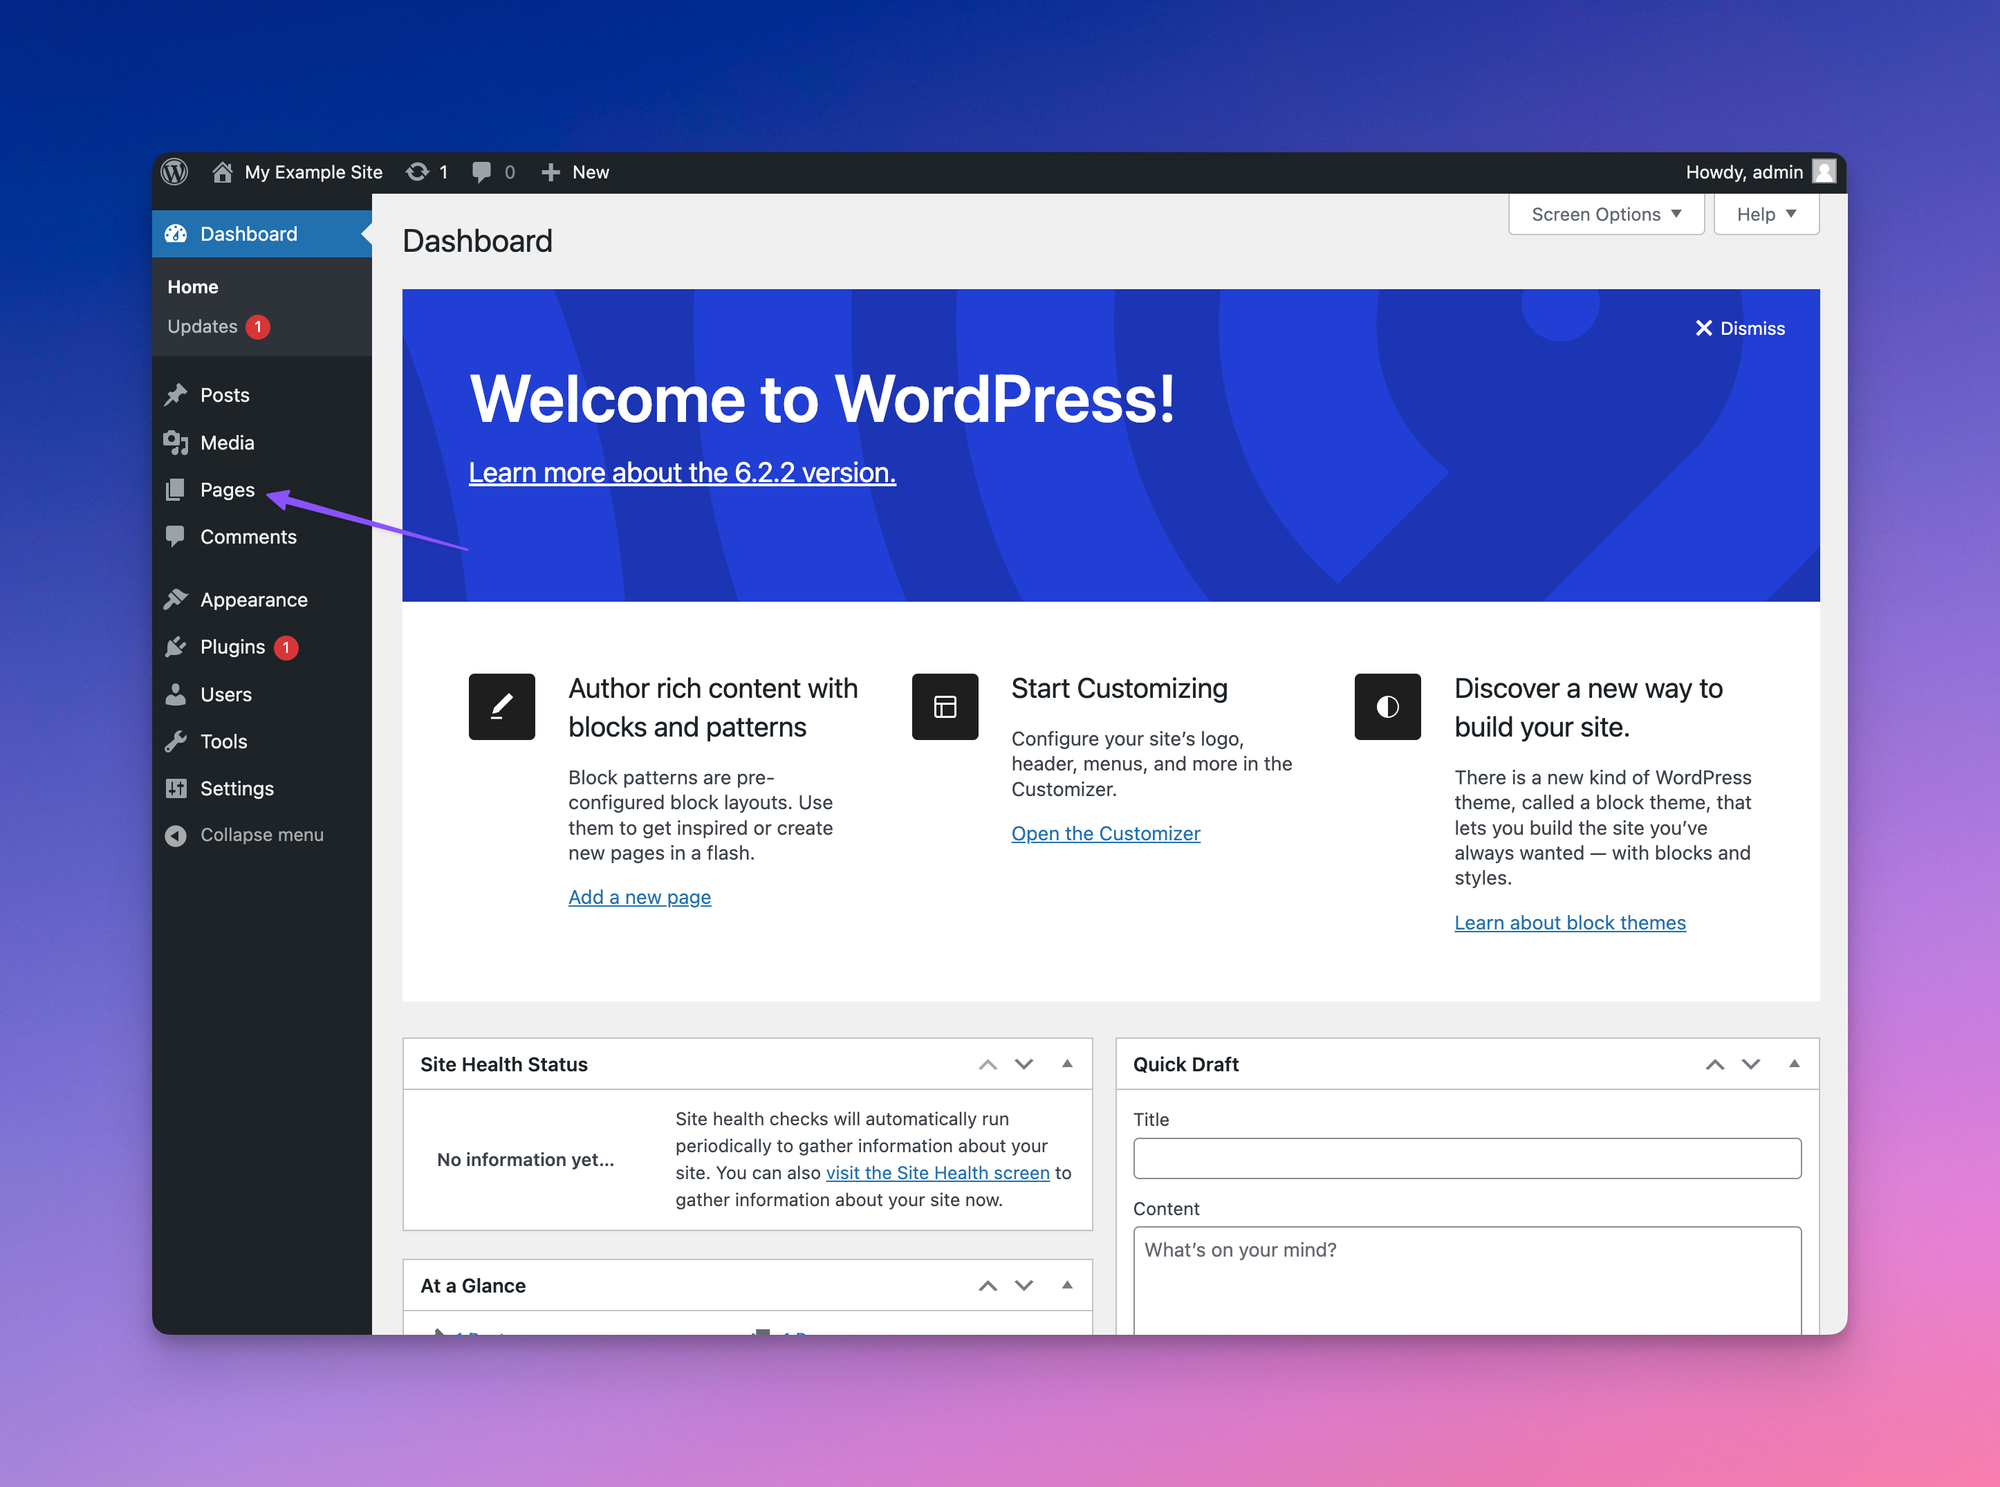
- Select the page you would like to have the AI support agent displayed on
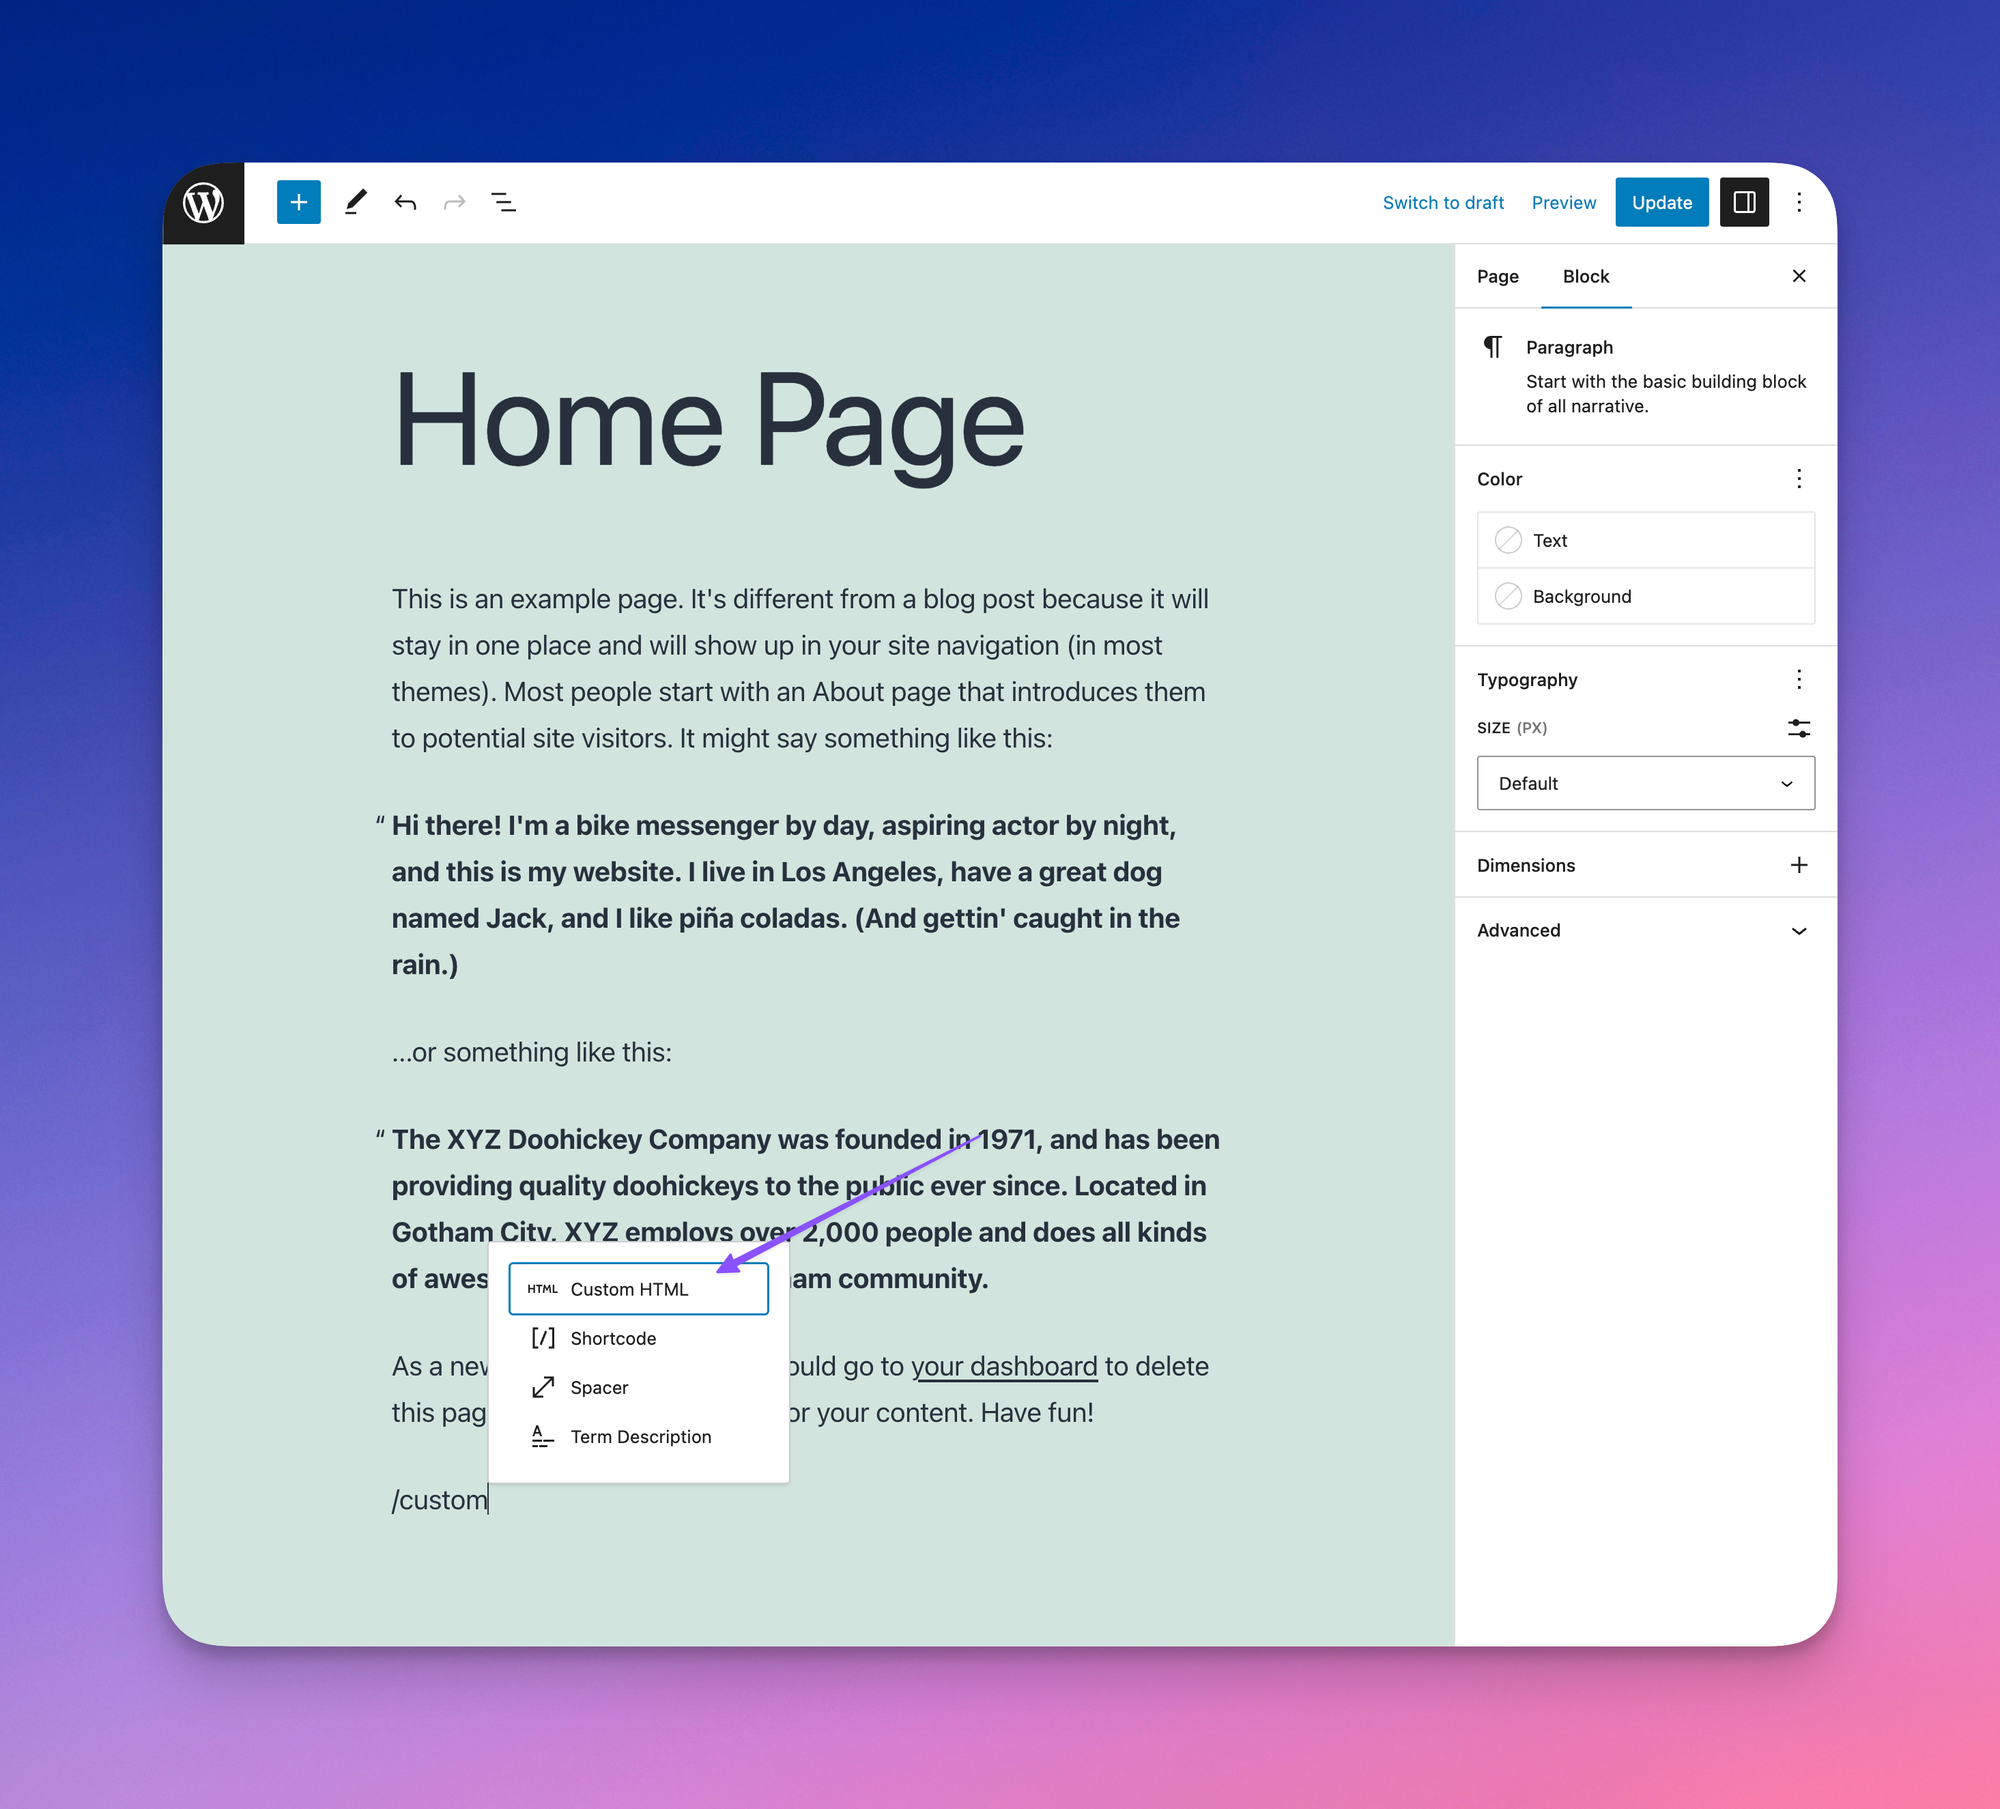
- At the bottom of the page, type / to bring up the block selector and choose Custom HTML
- Paste the SiteSpeakAI code snippet
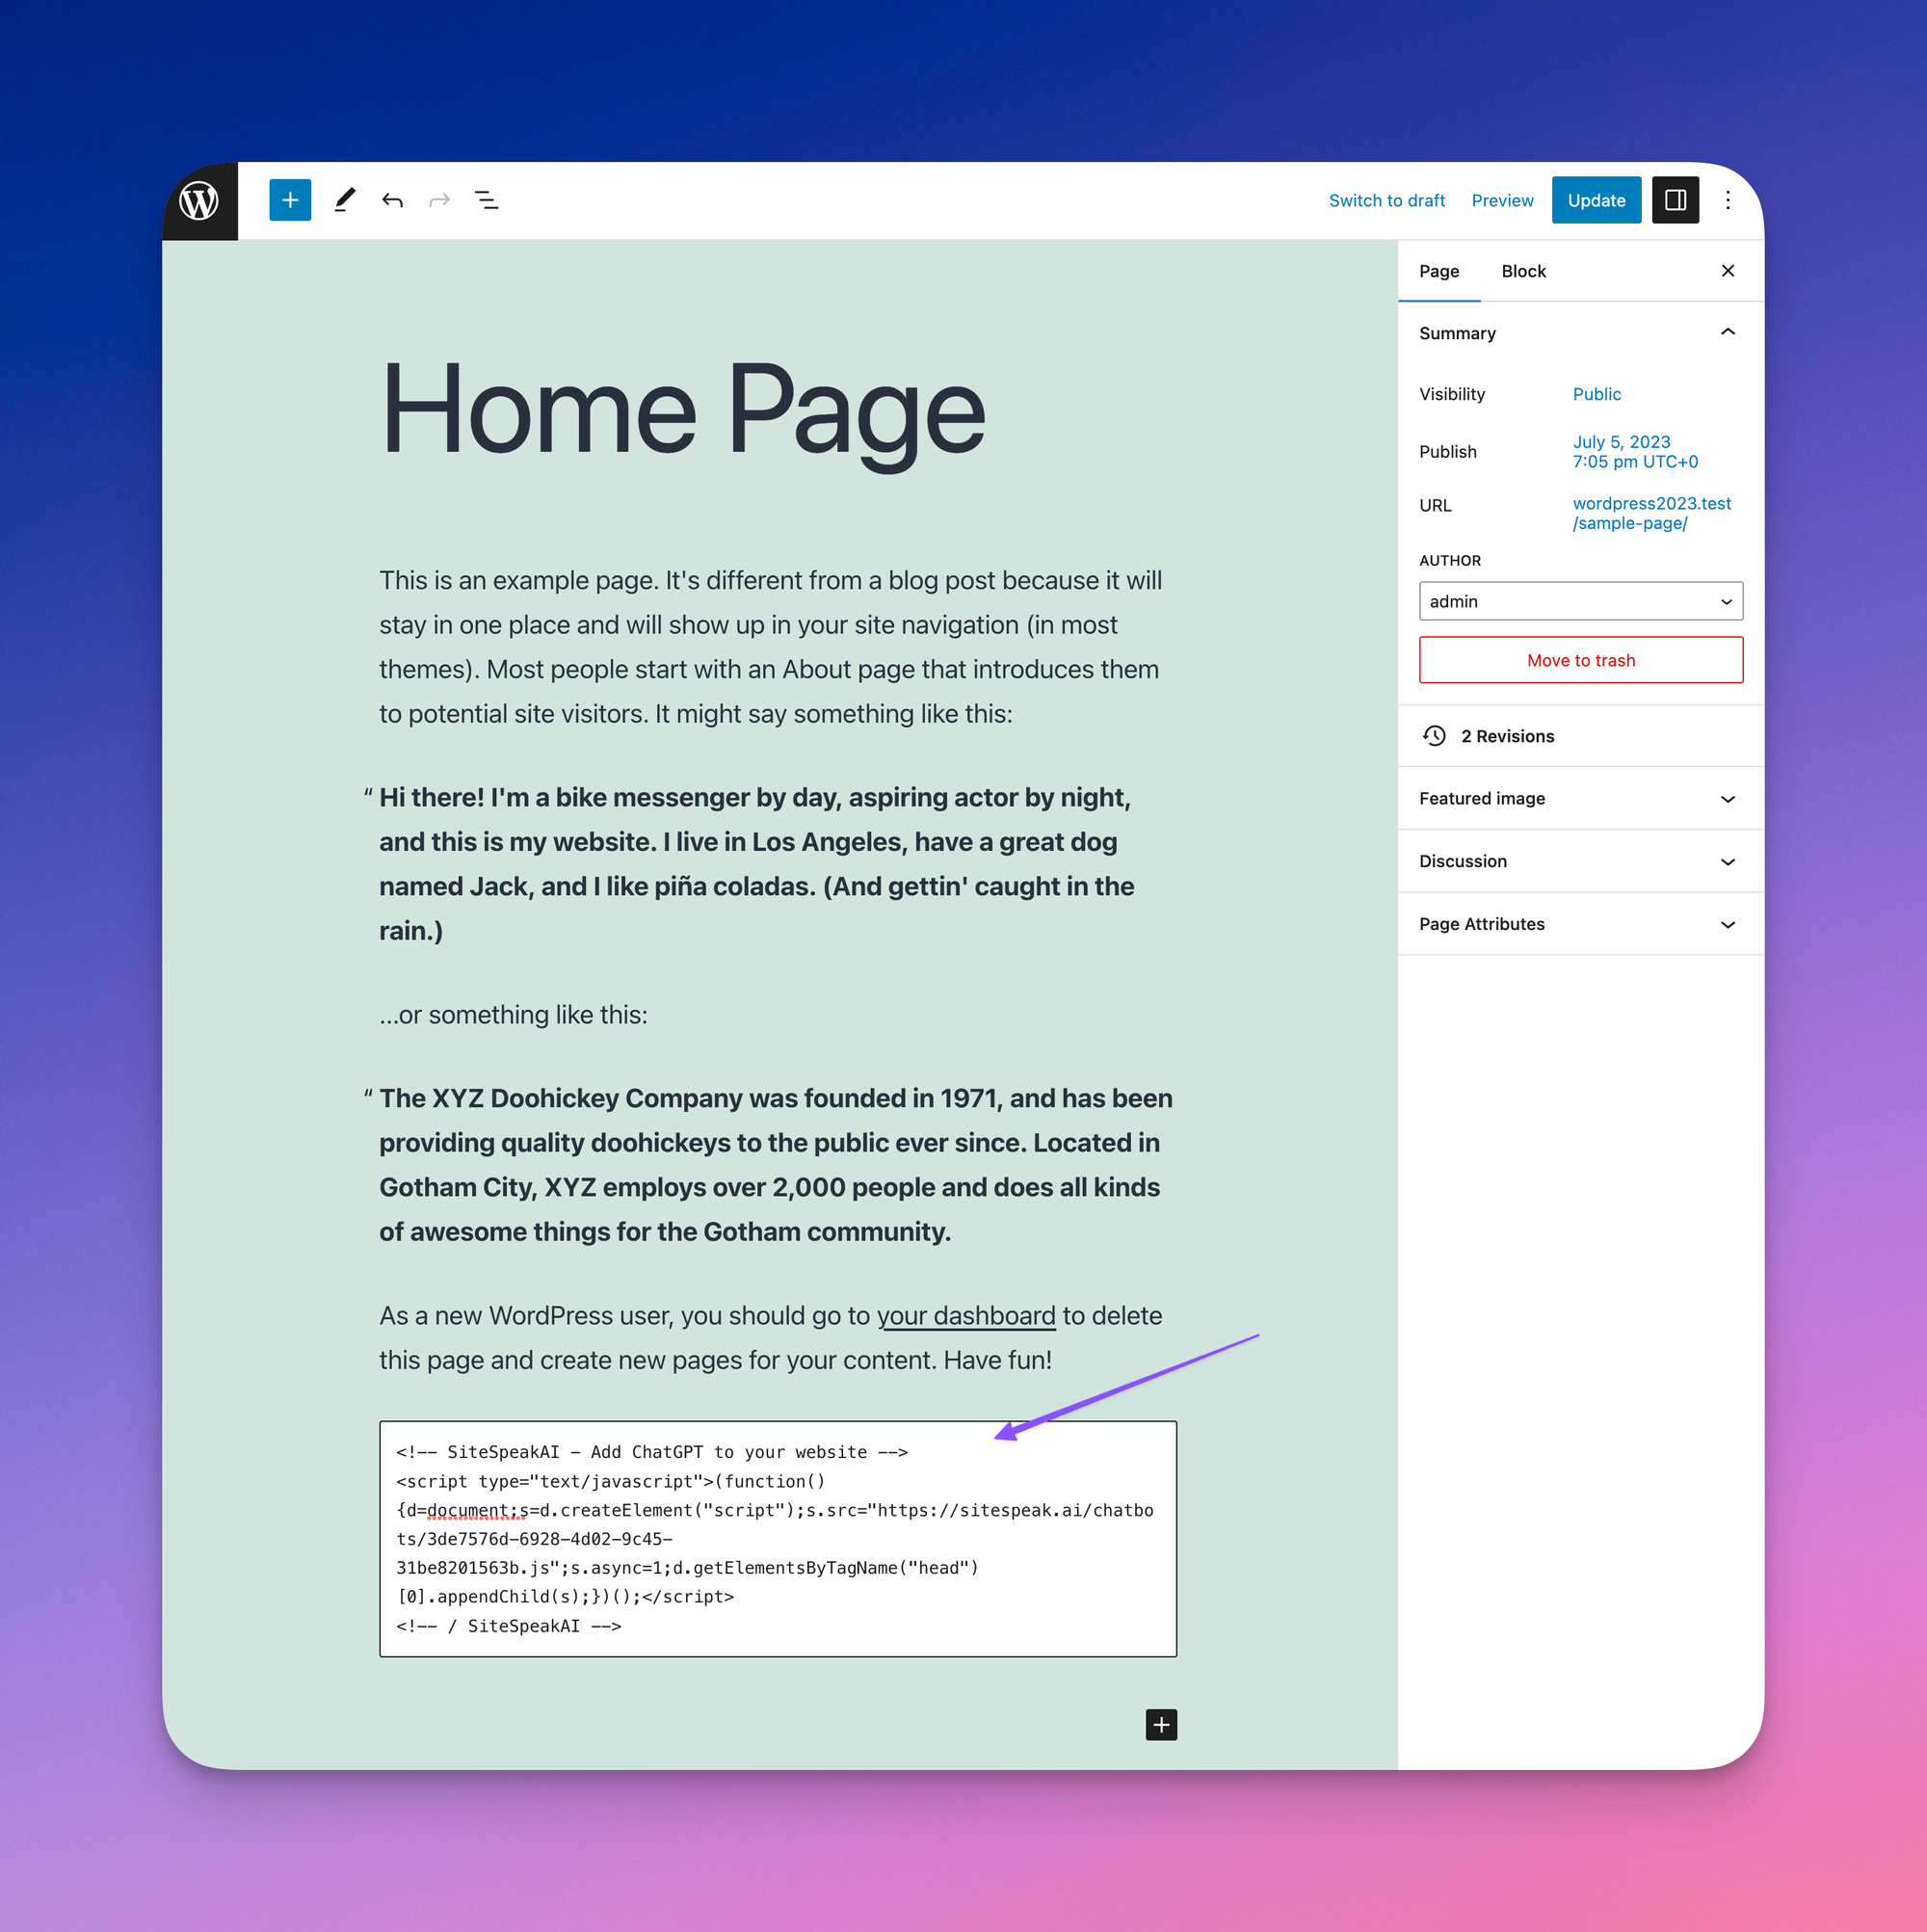
- Update the page to save your changes
Ready to automate your customer service with AI?
Join over 1000+ businesses, websites and startups automating their customer service and other tasks with a custom trained AI agent.