Add your AI support agent to your Elementor website
In SiteSpeakAI
Select your chatbot from the dropdown menu at the top, click on the Install Agent section in the sidebar, then click on the Copy Code button to copy your code snippet.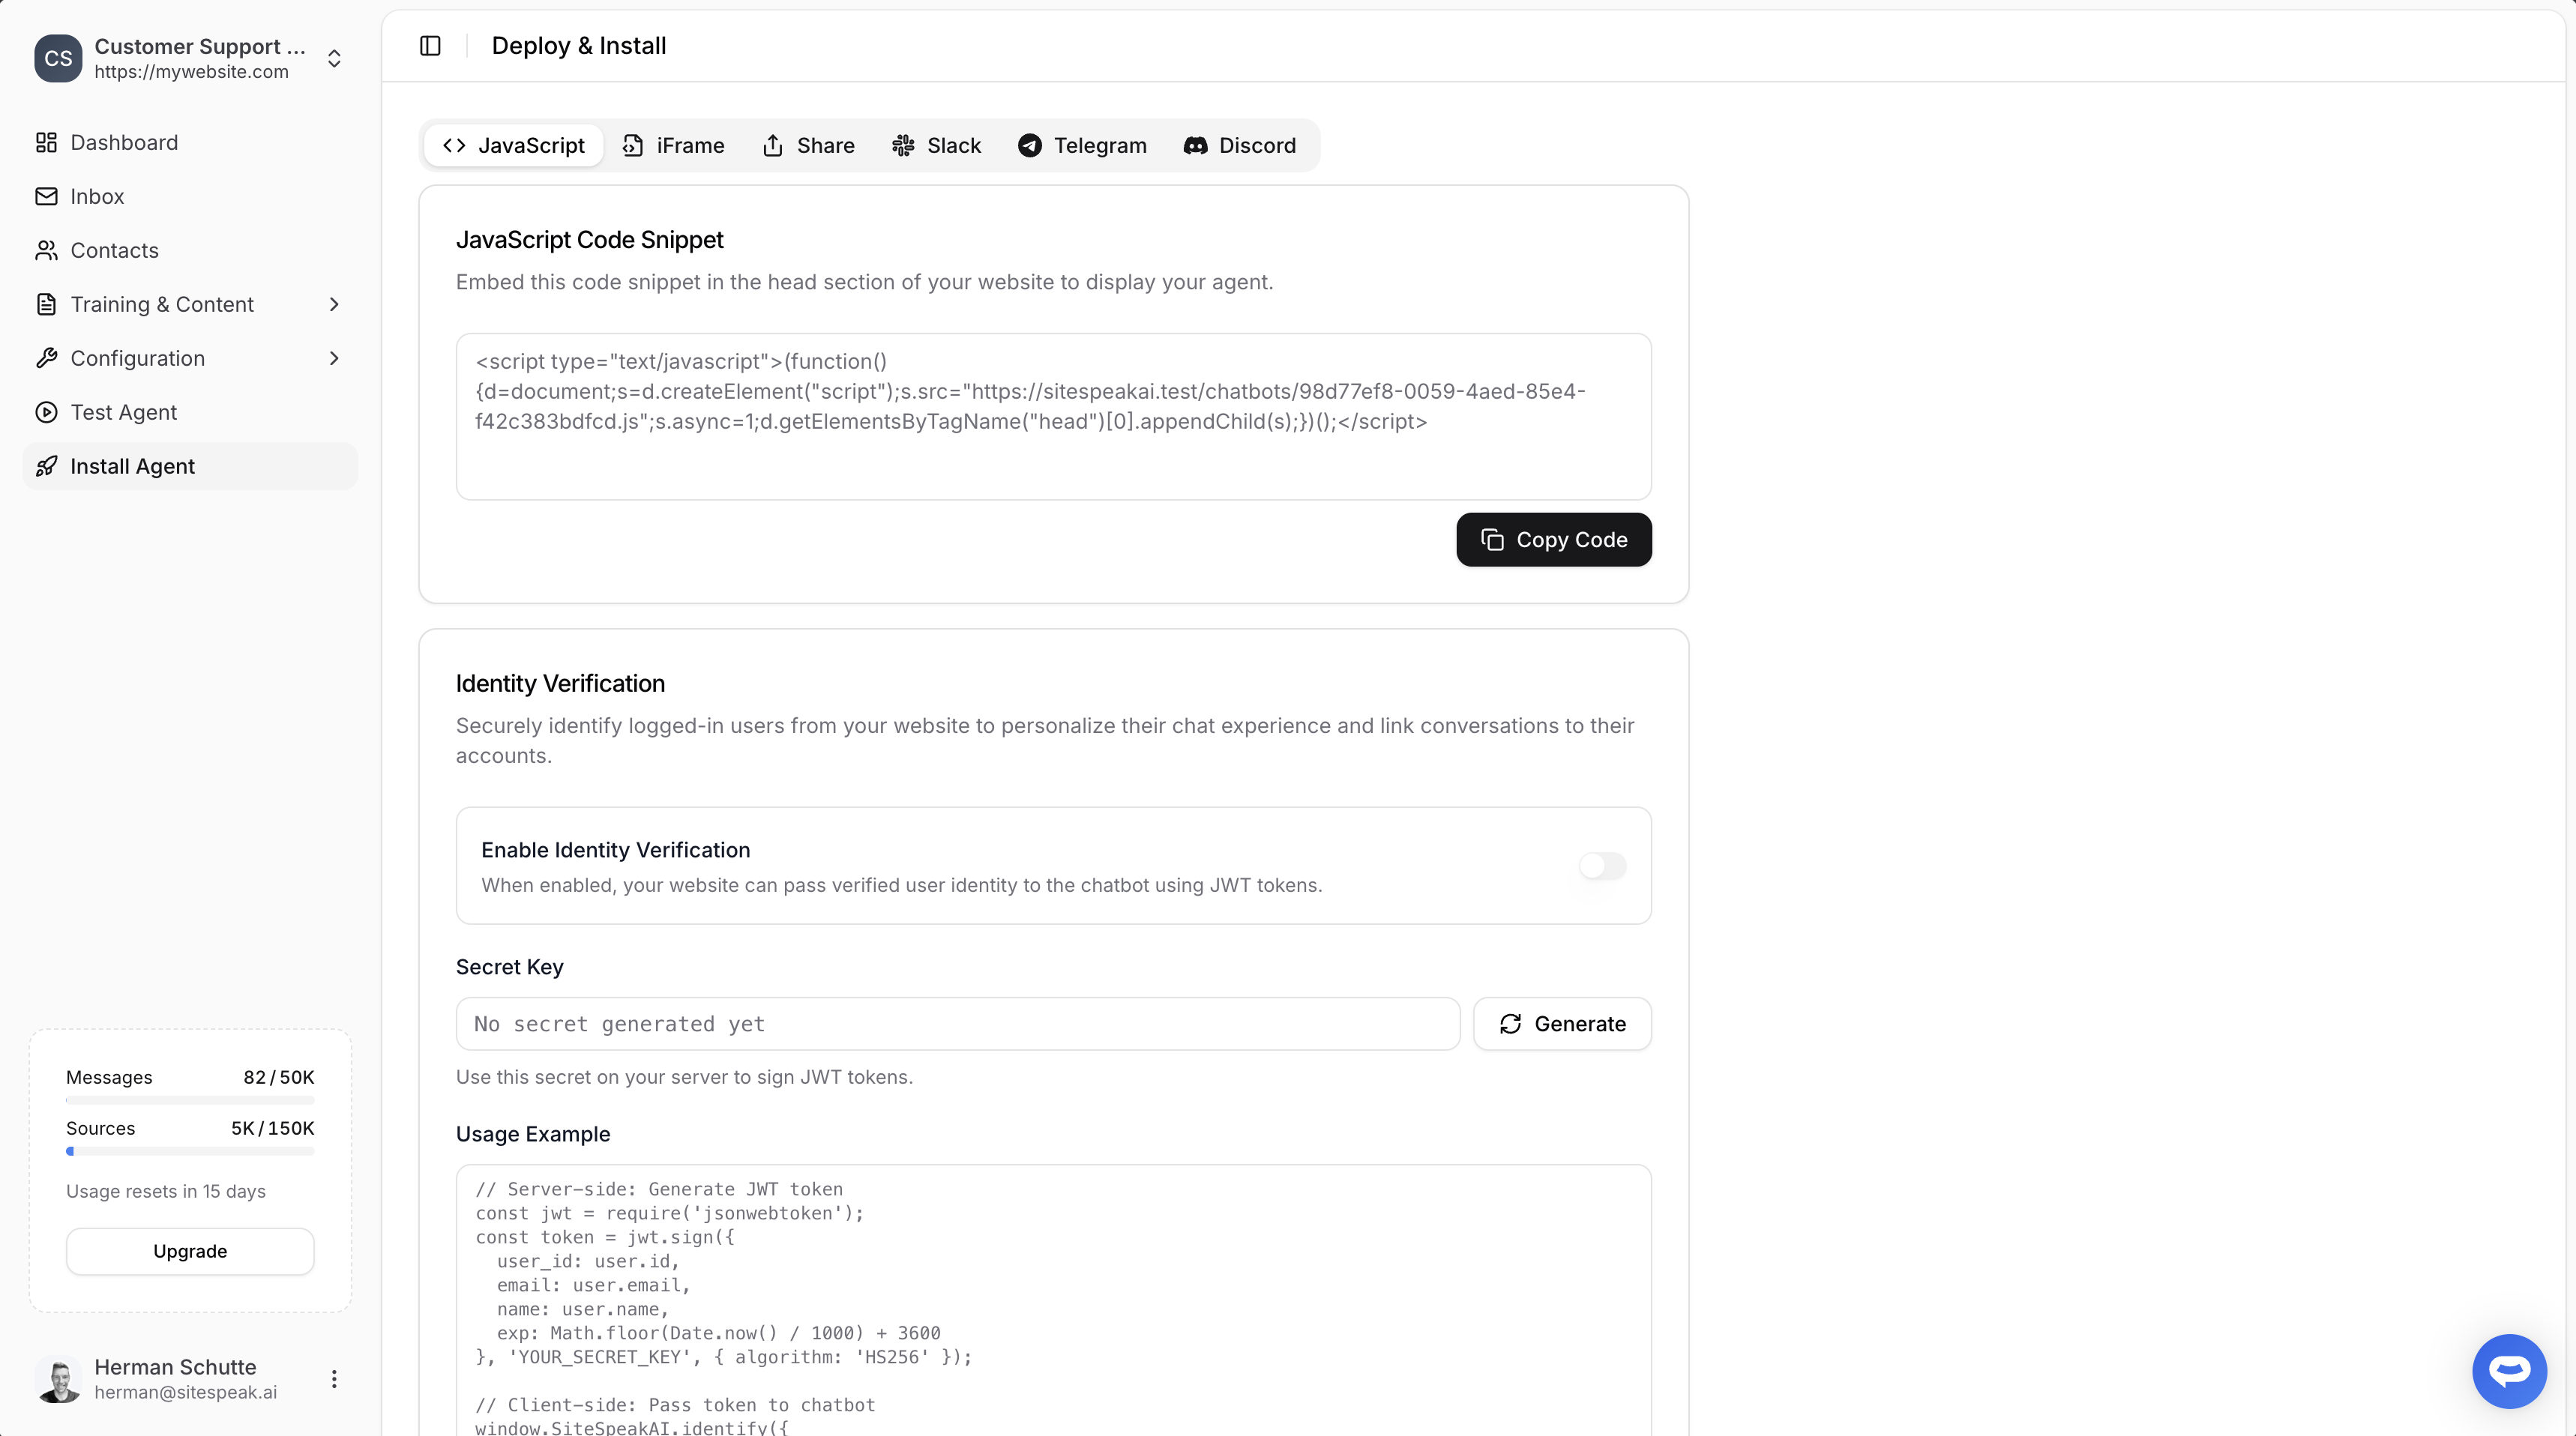
In Elementor
With Elementor you have two (2) options to embed your AI support agent code snippet:- Using the Elementor Editor to add an HTML element containing your snippet per page in a selected section on your page (this option is also available if you have the free Elementor plugin installed)
- Using the Elementor Code editor to add the code snippet as a code element to your website. You can select where it should be displayed, i.e. on the entire site or per page. Note that this option is only available with the Elementor Pro (paid) subscription.
A. Using the Elementor Editor option
-
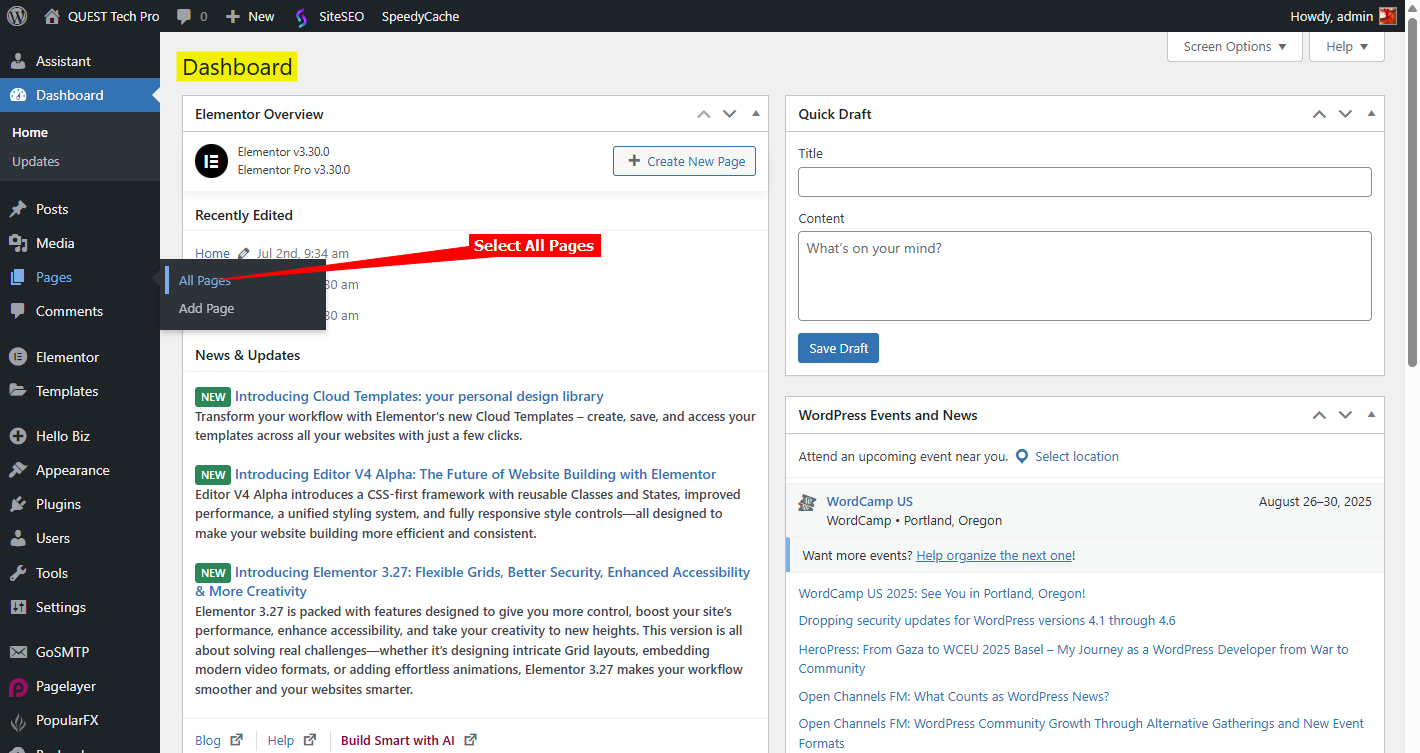
Log into your WordPress account and on the Dashboard, select Pages → All Pages on the leftside menu
-
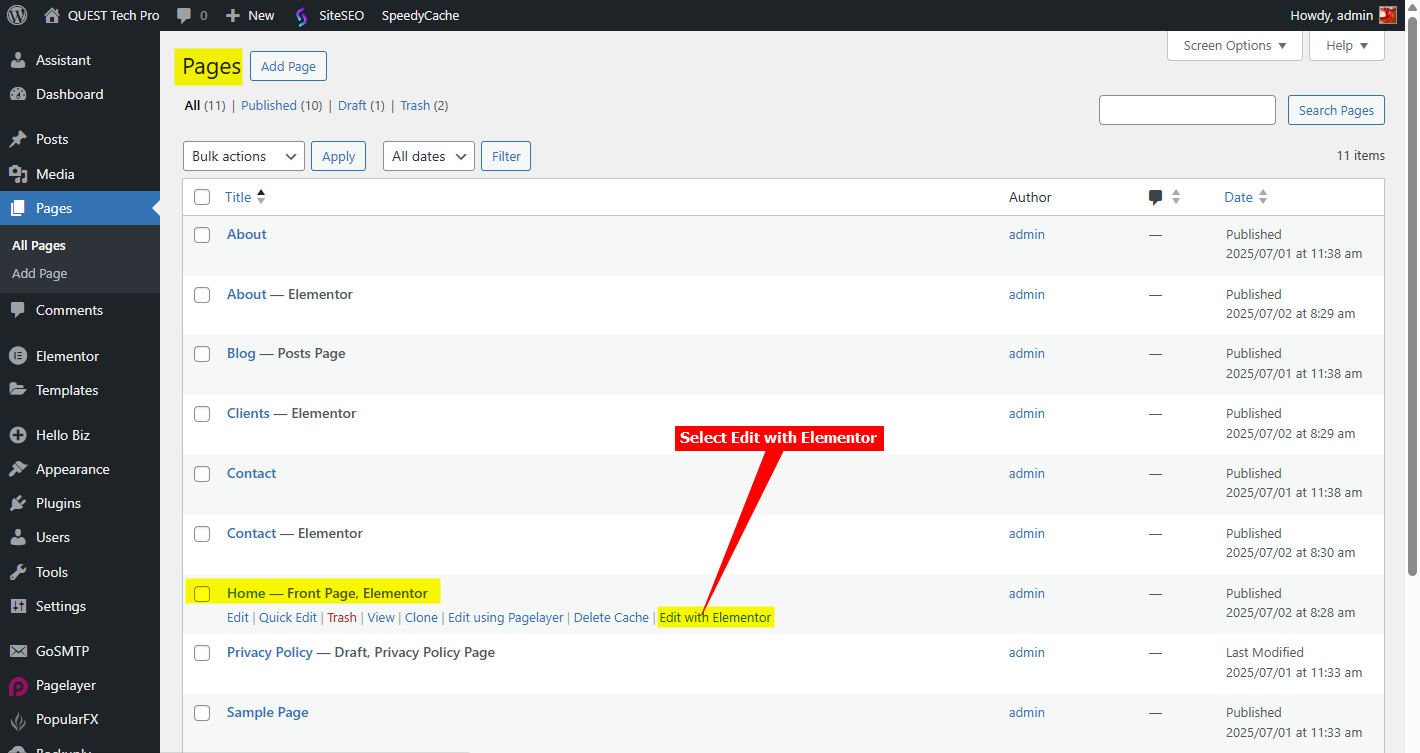
Scroll down on the list of available pages until you find the page you want to add your snippet to. Move your mouse over the page entry and select Edit with Elementor
-
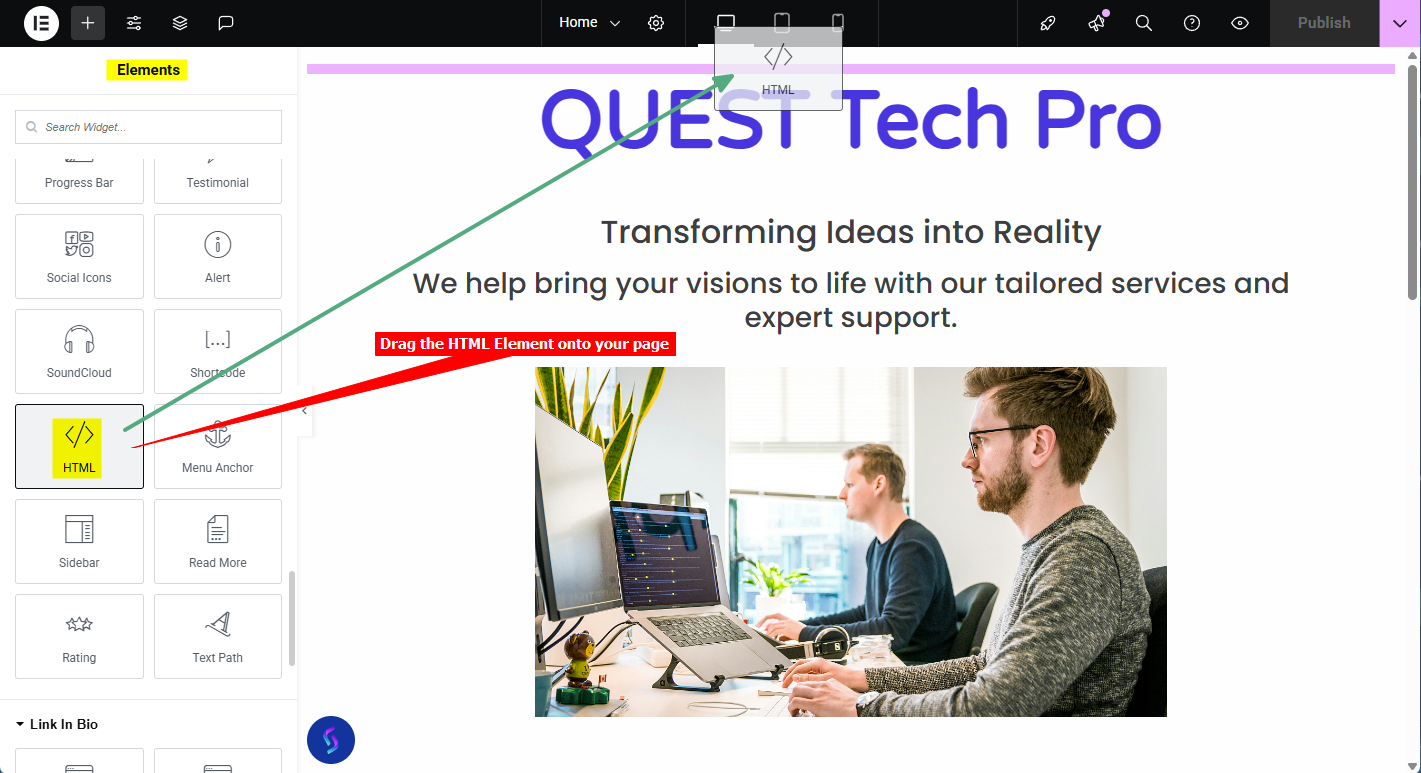
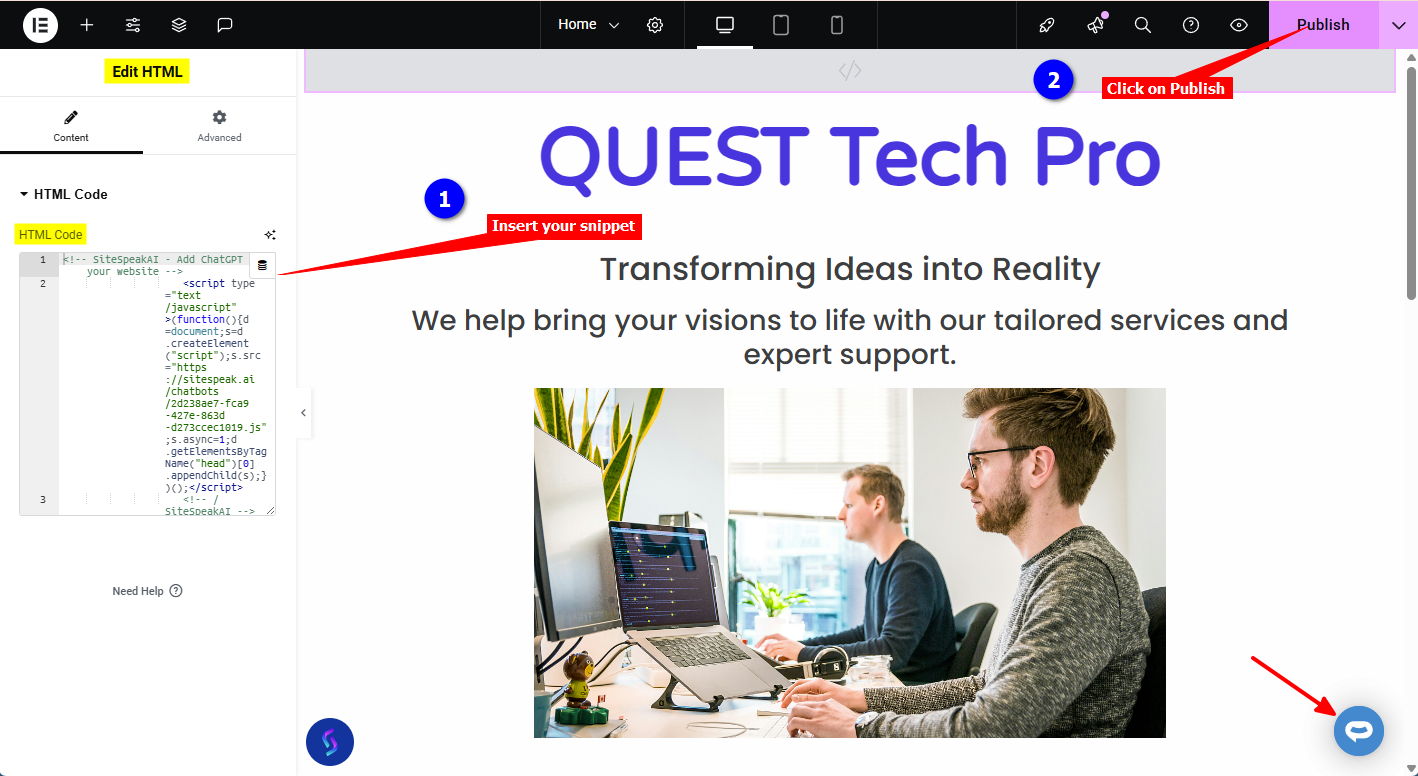
Scroll down on the list of Elements and drag the HTML element onto your page
-
Insert your code snippet in the HTML Code text box. The Preview will display the AI support agent button on the right hand bottom side of the page. To see the button on your live page, click on Publish and view your live page
B. Using the Elementor Code option
-
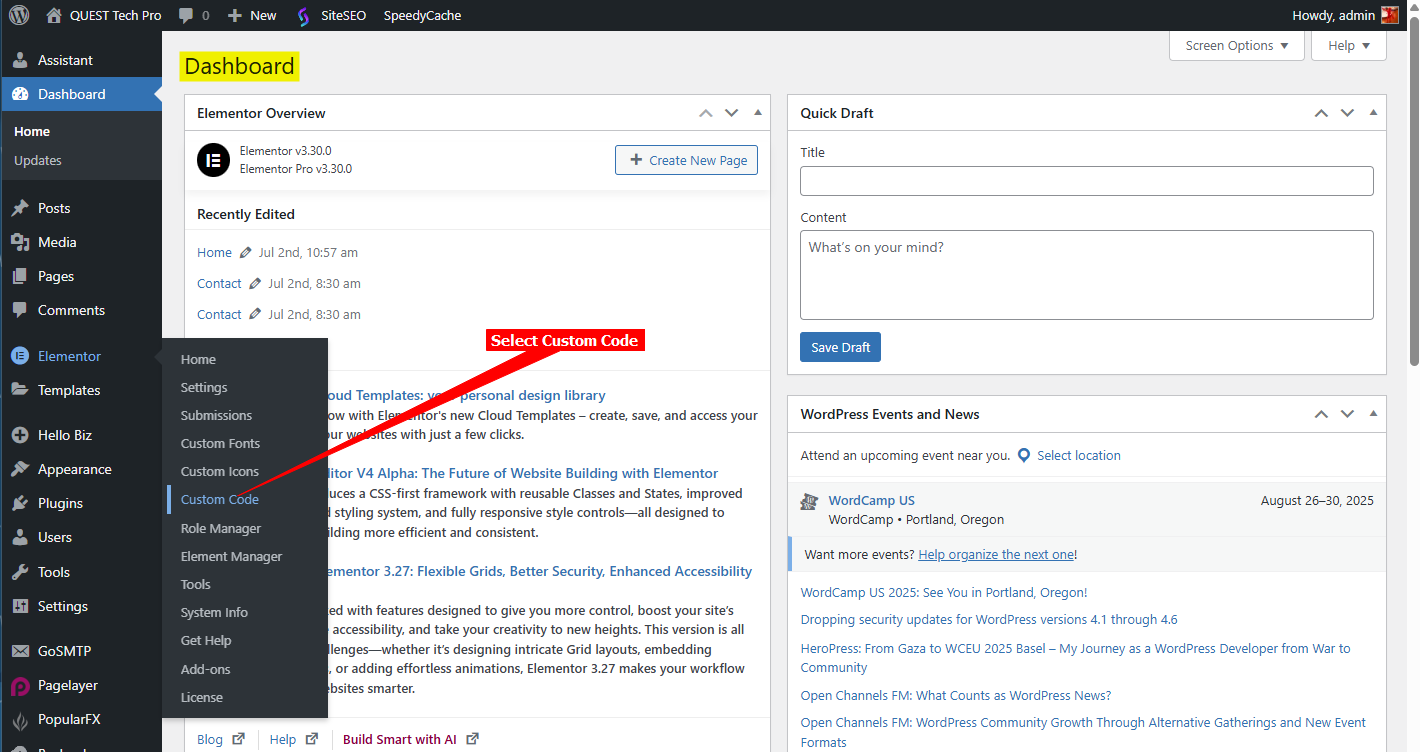
Log into your WordPress account and on the Dashboard, select Elementor → Custom Code on the leftside menu
-
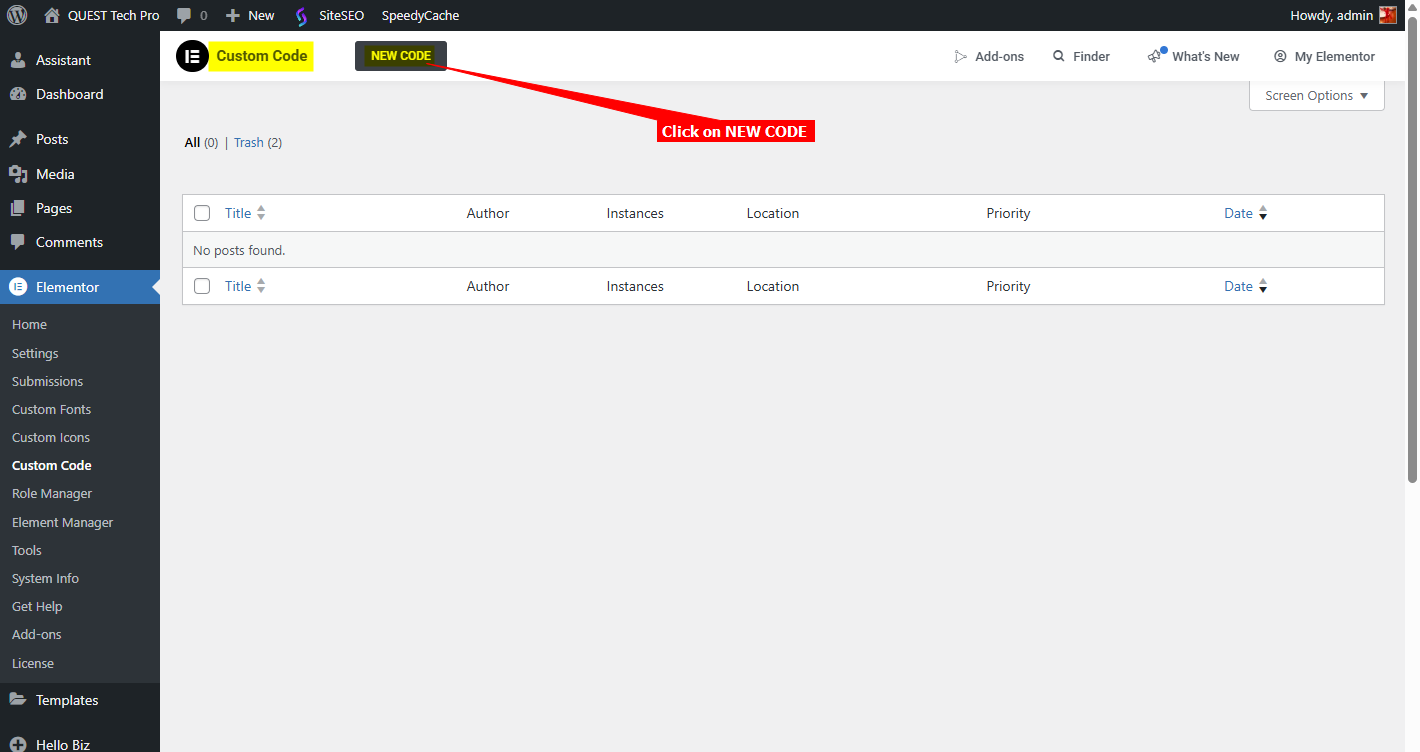
Click on NEW CODE
-
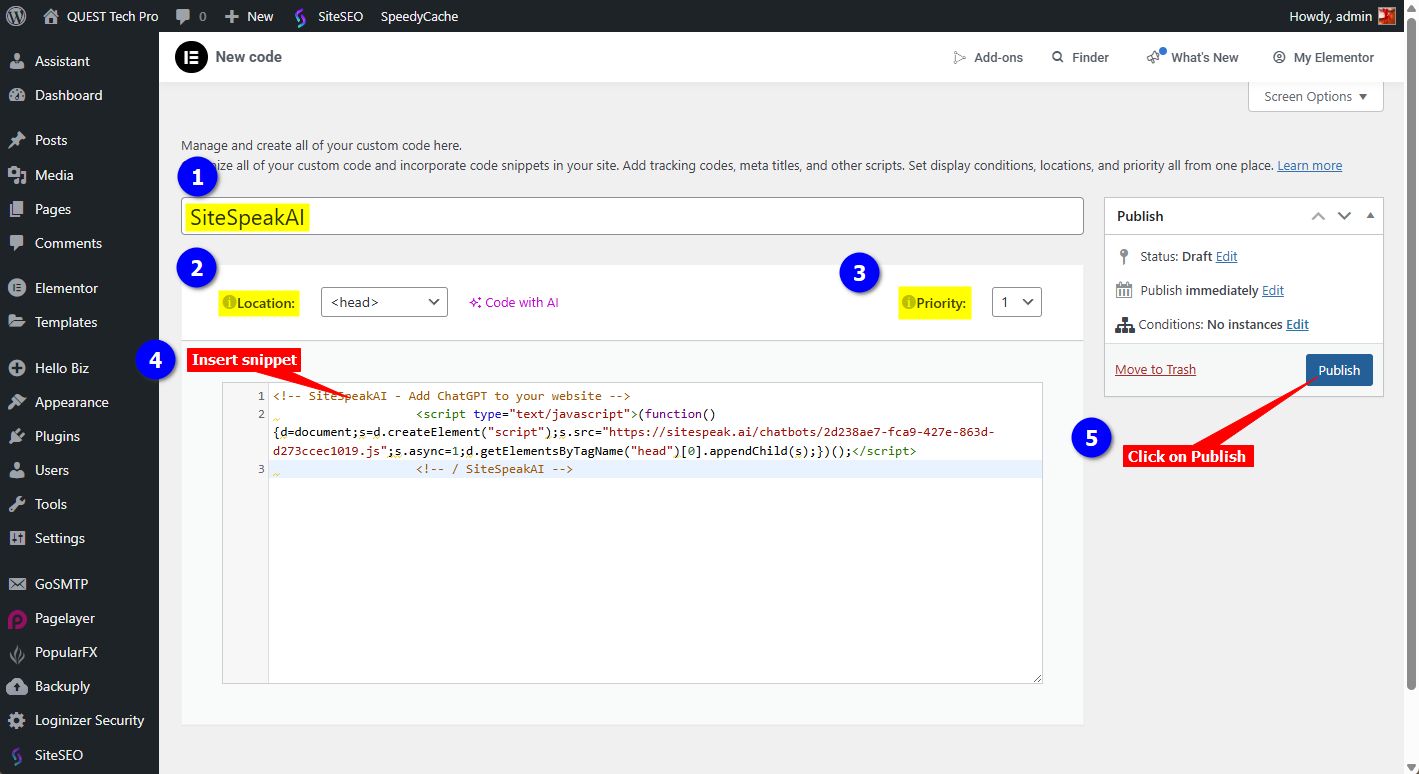
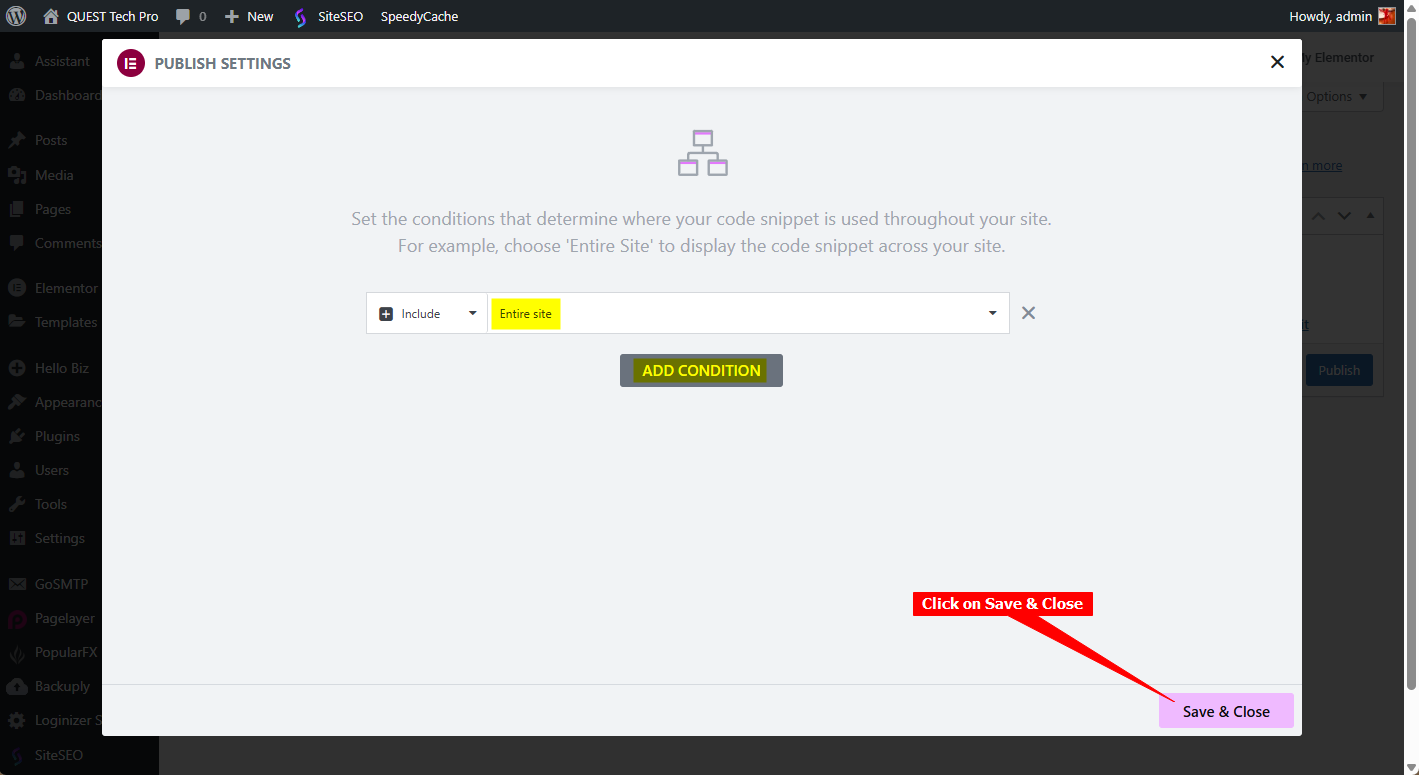
Add a Title (for your reference), choose the Location (<head>, <body>-Start or <body>-End), optionally set a Priority (1-10) to control injection order, insert your code snippet and click on Publish
-
You can add a Condition (where the code snippet must be displayed, the default is Entire site) and click on Save & Close
C. For both options
Whatever option you have used, your AI support agent will now be active on your website.-
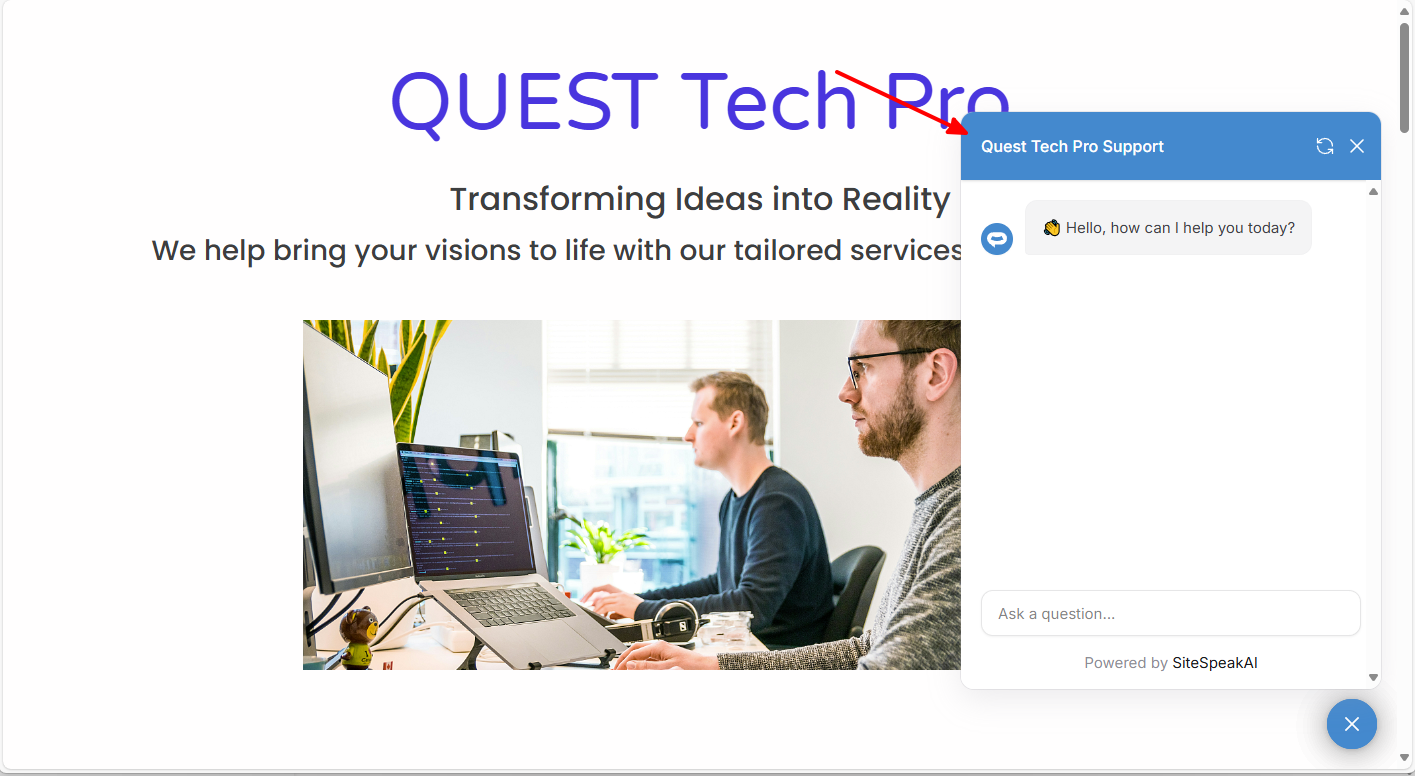
Your AI support agent button will now be displayed on your Elementor website page

-
If you click on the button it will display the AI support agent dialogue
Ready to automate your customer service with AI?
Join over 1000+ businesses, websites and startups automating their customer service and other tasks with a custom trained AI agent.