How to add a ChatGPT chatbot to ezsite
You want to embed your custom trained chatbot in your ezsite website page. Here's how to add ChatGPT to ezsite with SiteSpeakAI.
Add your chatbot to your ezsite website
In SiteSpeakAI
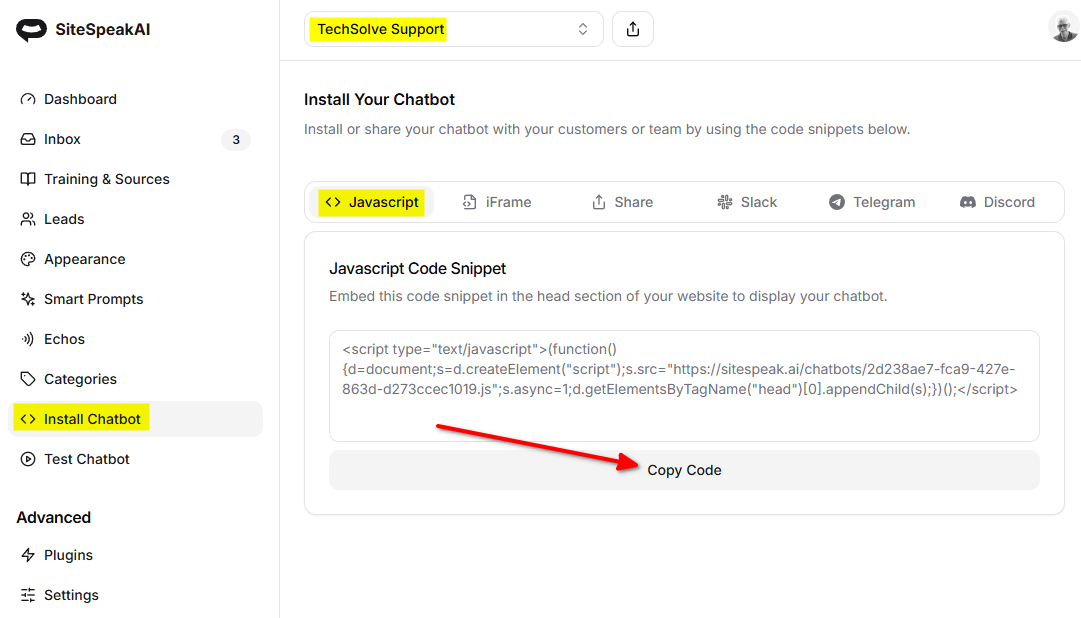
Select your chatbot from the dropdown menu at the top, click on the Install Chatbot section in the sidebar and then click on the Copy Code button to copy your code snippet.
In ezsite
Please note: ezsite doesn't provide sections/blocks to add custom html to your website. It however allows you to view and edit the source code of the website source files (html, js and css). This is not for the fainthearted so you will have to be careful when editing these files. In our case we are only going to edit the index.html file and insert the chatbot snippet in the <head> element of the file. We suggest you make a backup of your website files before you make any changes to the file. This is done by using the Download Files option on the Code Edit page (we will get to that in a bit).
-
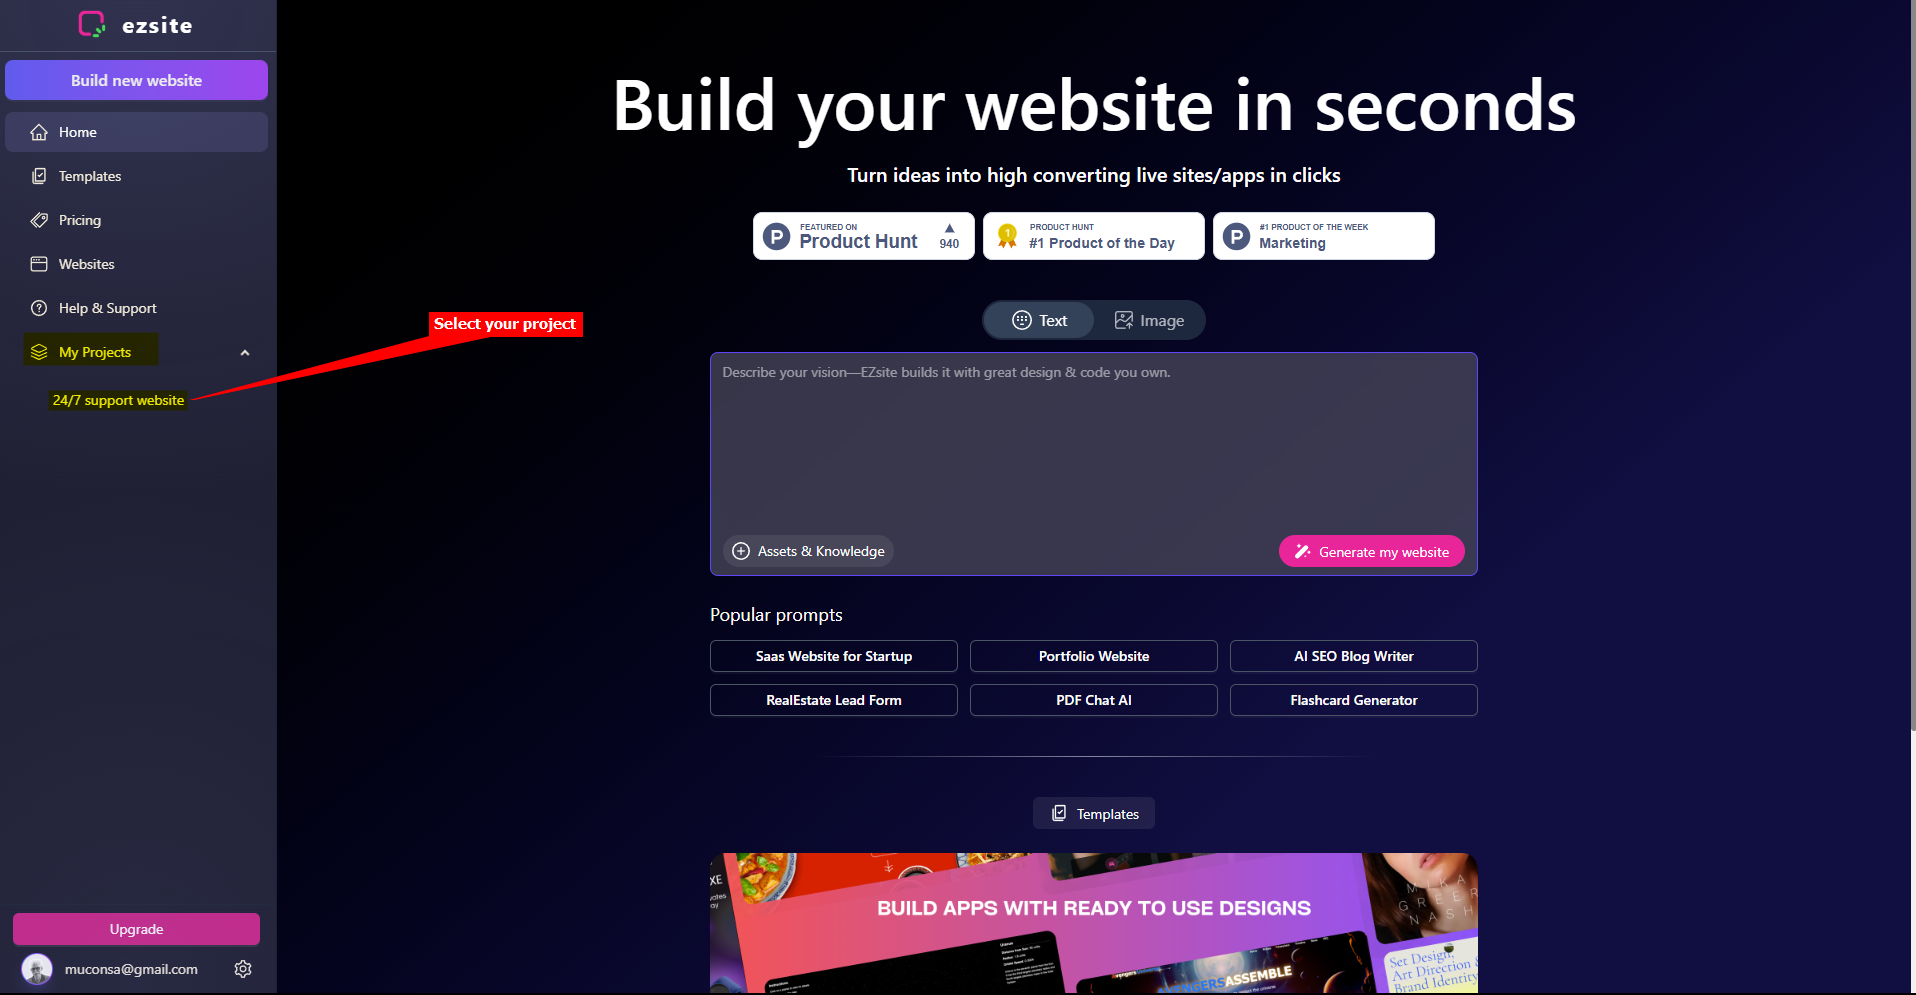
Log into your ezsite account and select your project under My Projects on the dashboard
-
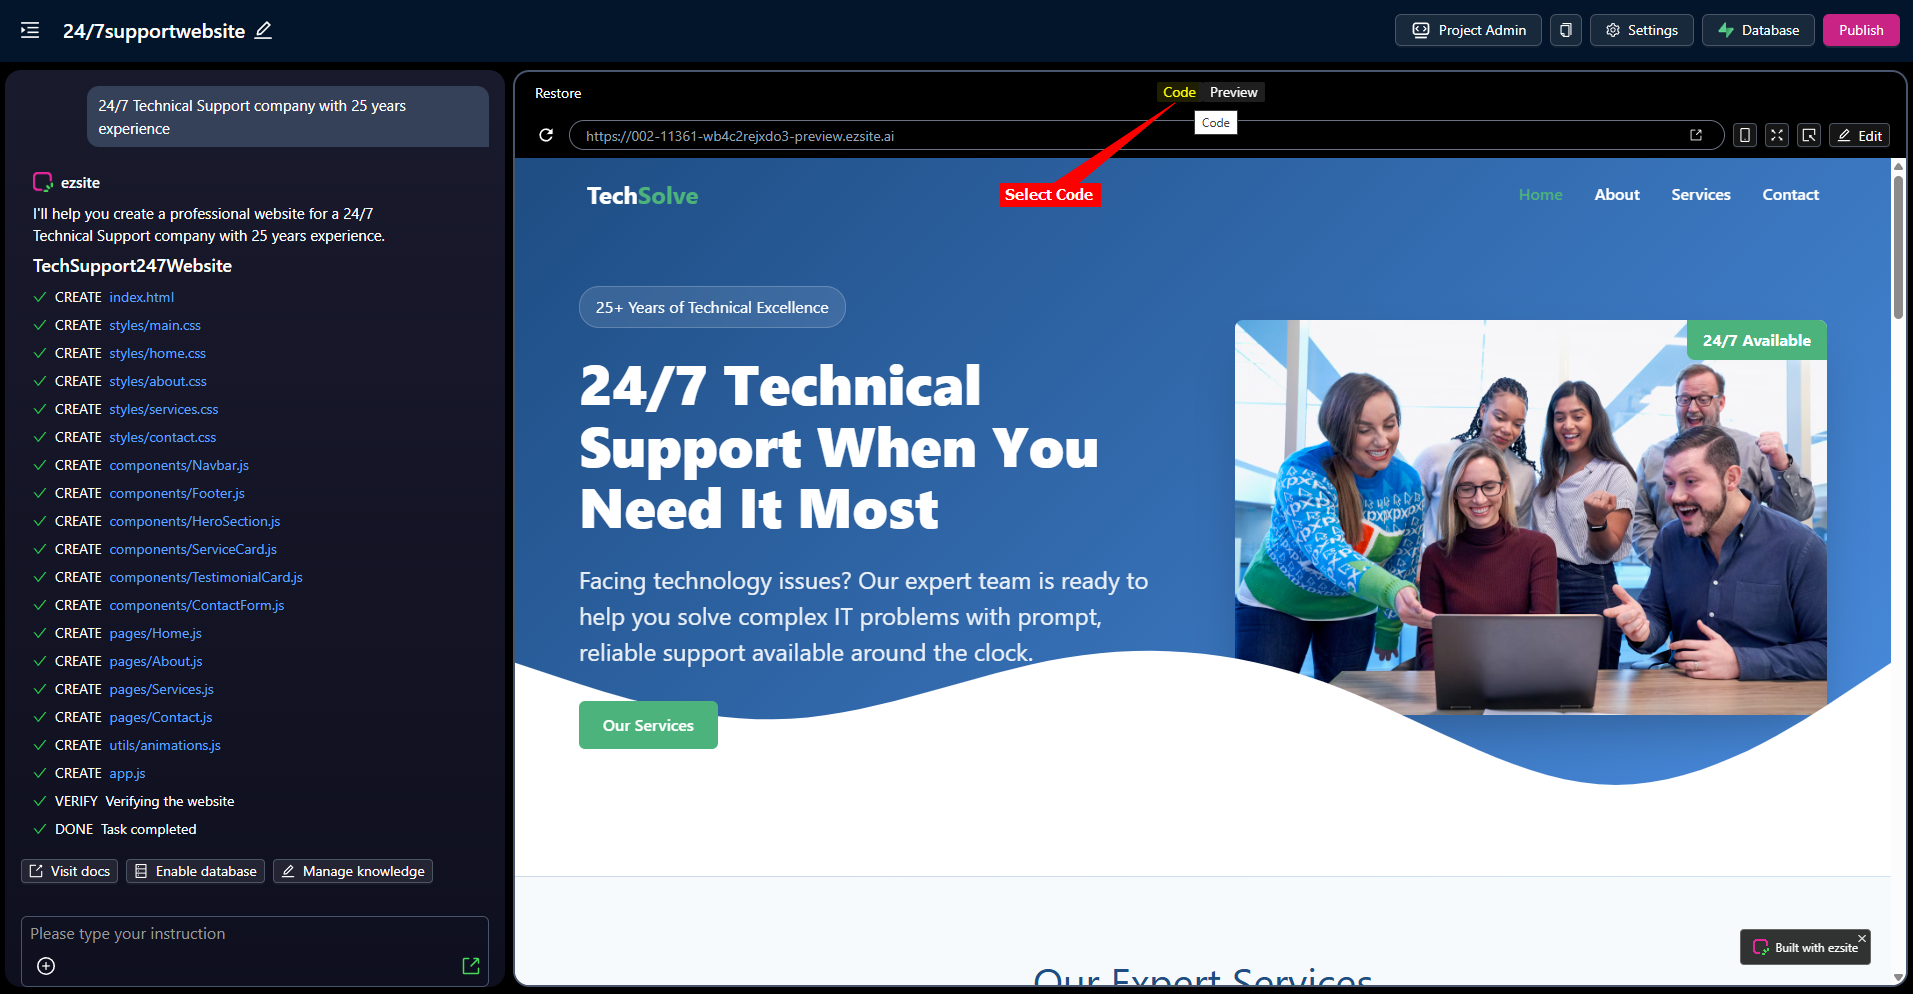
On the Preview display of your website (the default page will be the Home page), select Code to allow viewing and editing your source files
-
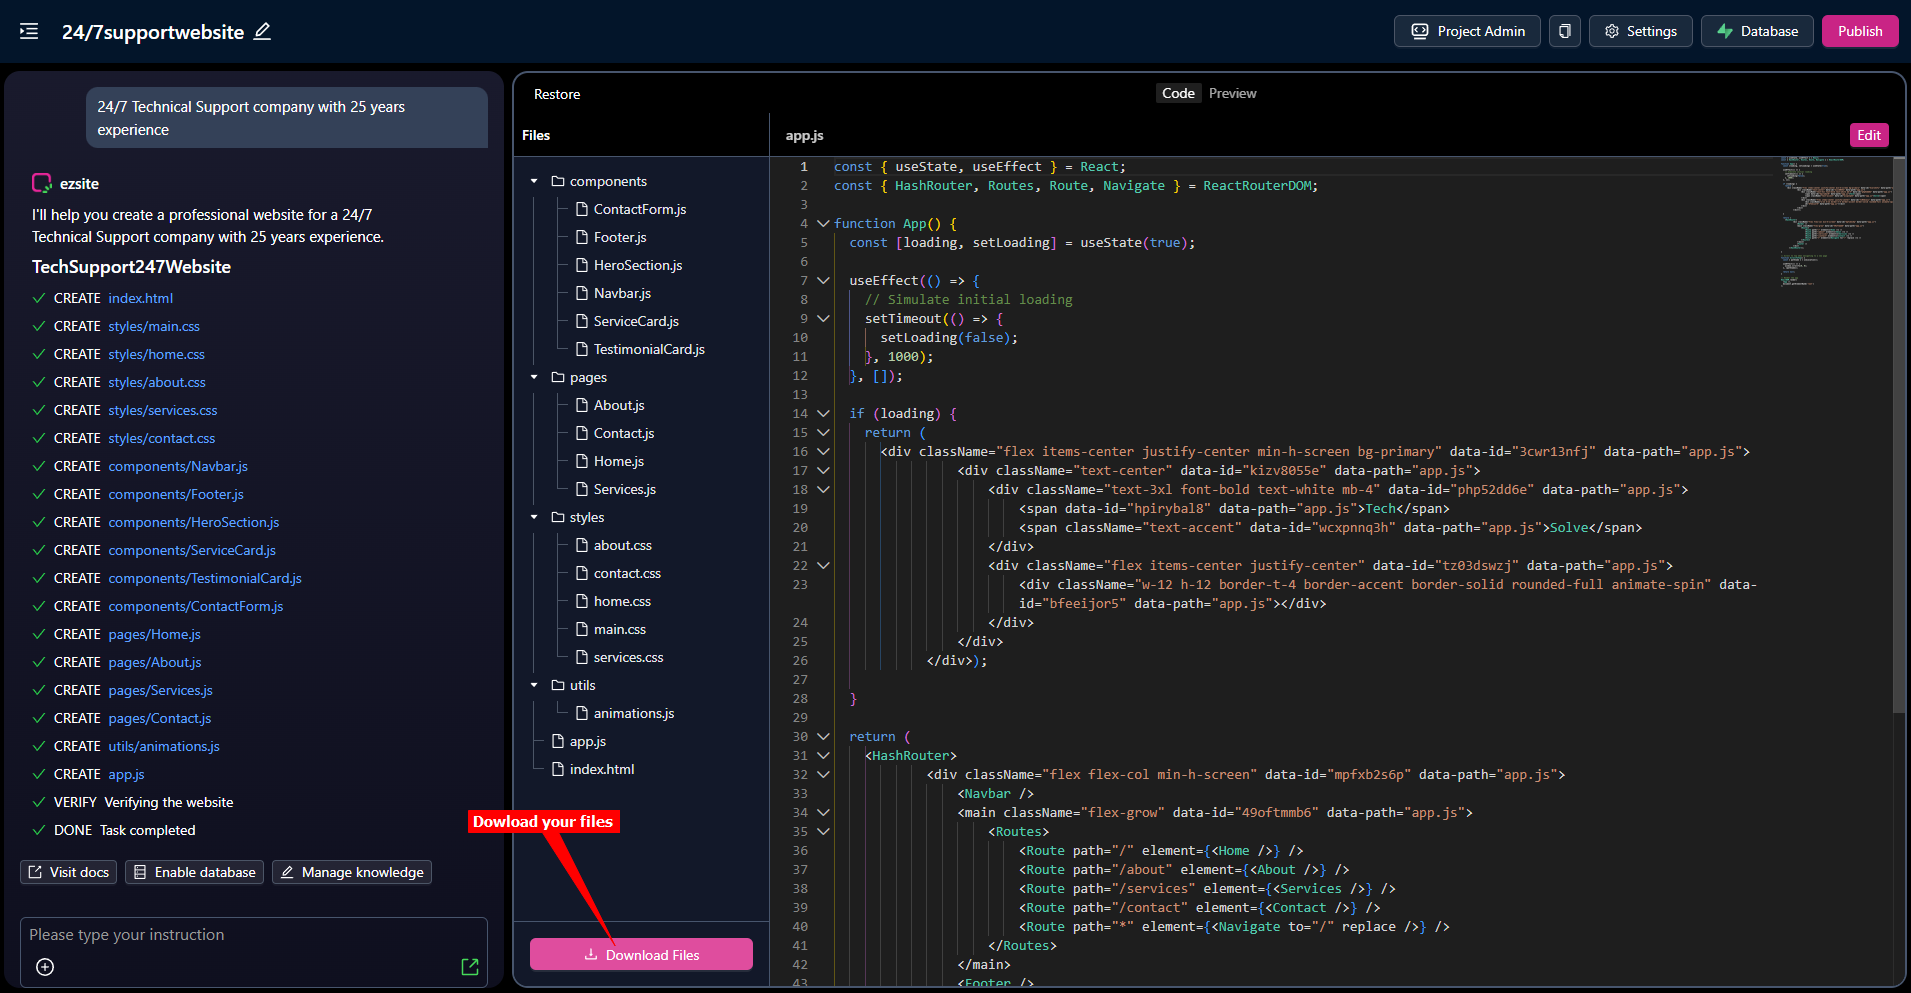
Use Download Files to create a backup of your source files (to use in case something went wrong with your editing!). This creates a ZIP file containg all your website source files. Save it somewhere where you can easily retrieve it if necessary
-
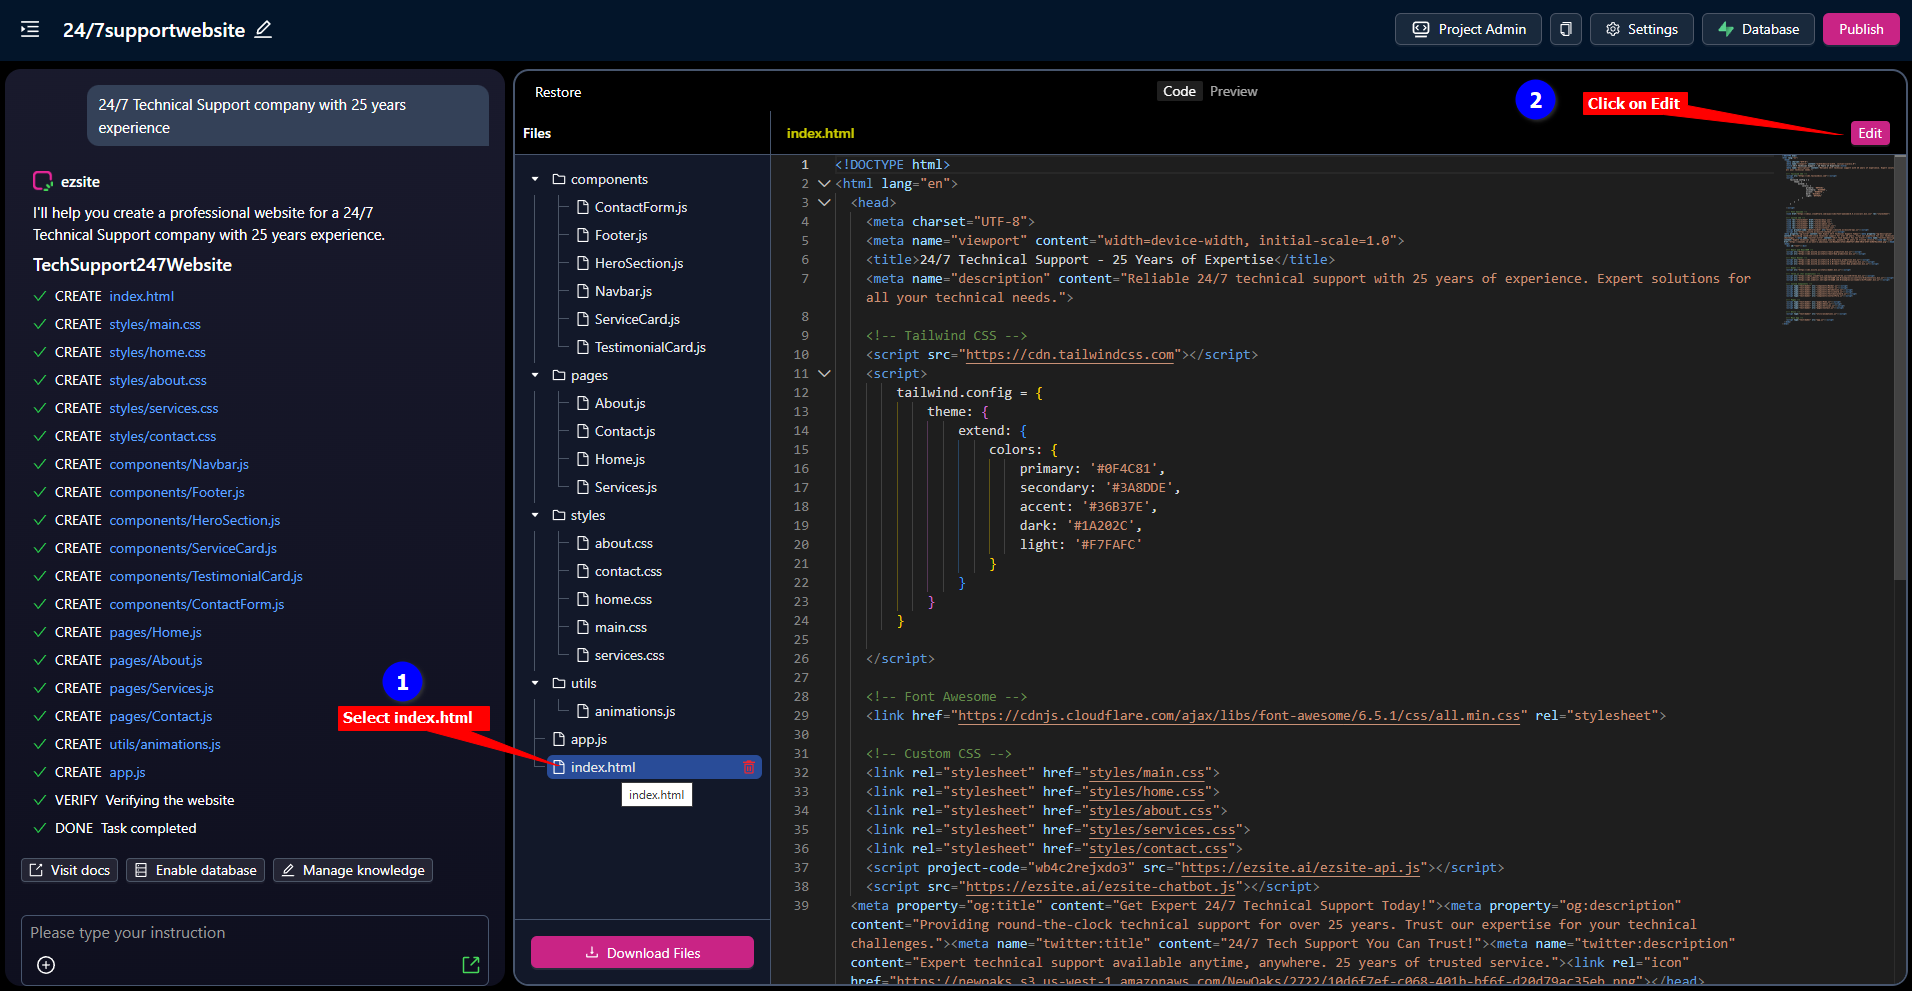
Select the index.html file. The contents will be displayed in view-only mode in the right pane. Click on Edit to allow you to edit the file contents
-
Insert your snippet in the
<head>element in the index.html file (here we have added it just before the<!-- Tailwind CSS -->remark). Click on Save to save your modified source code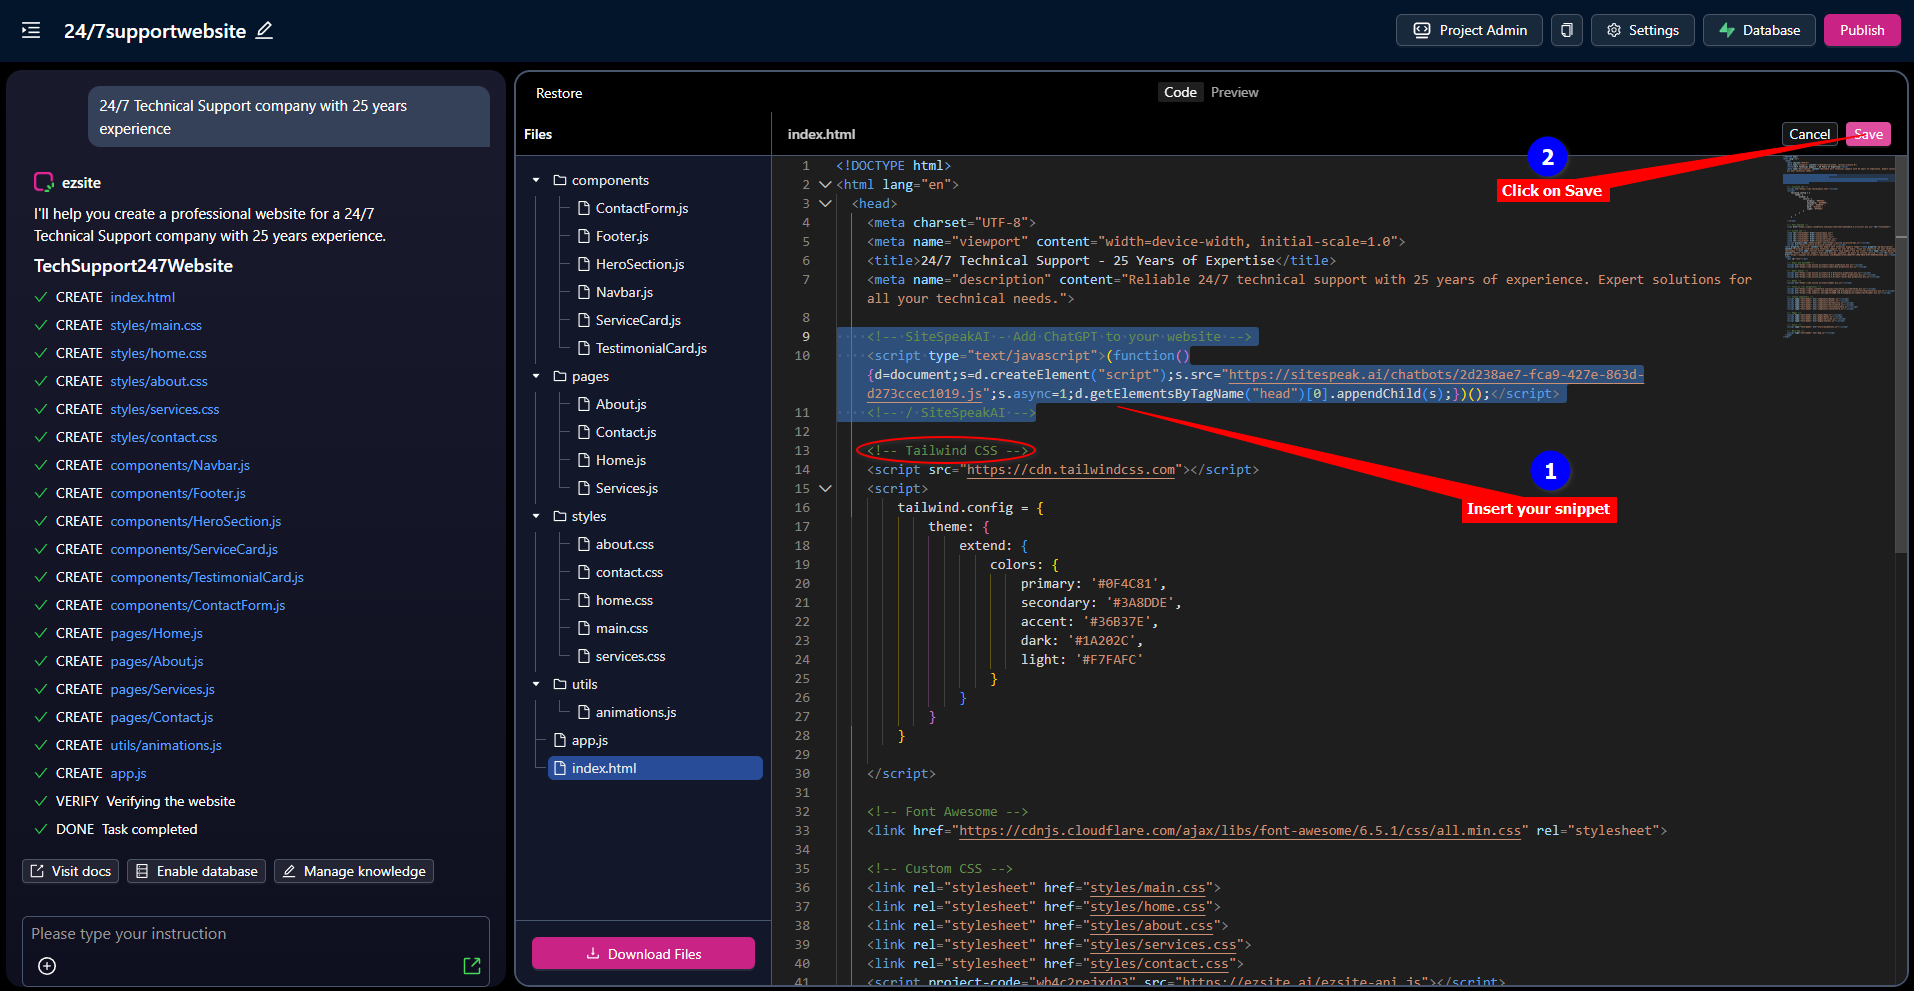
-
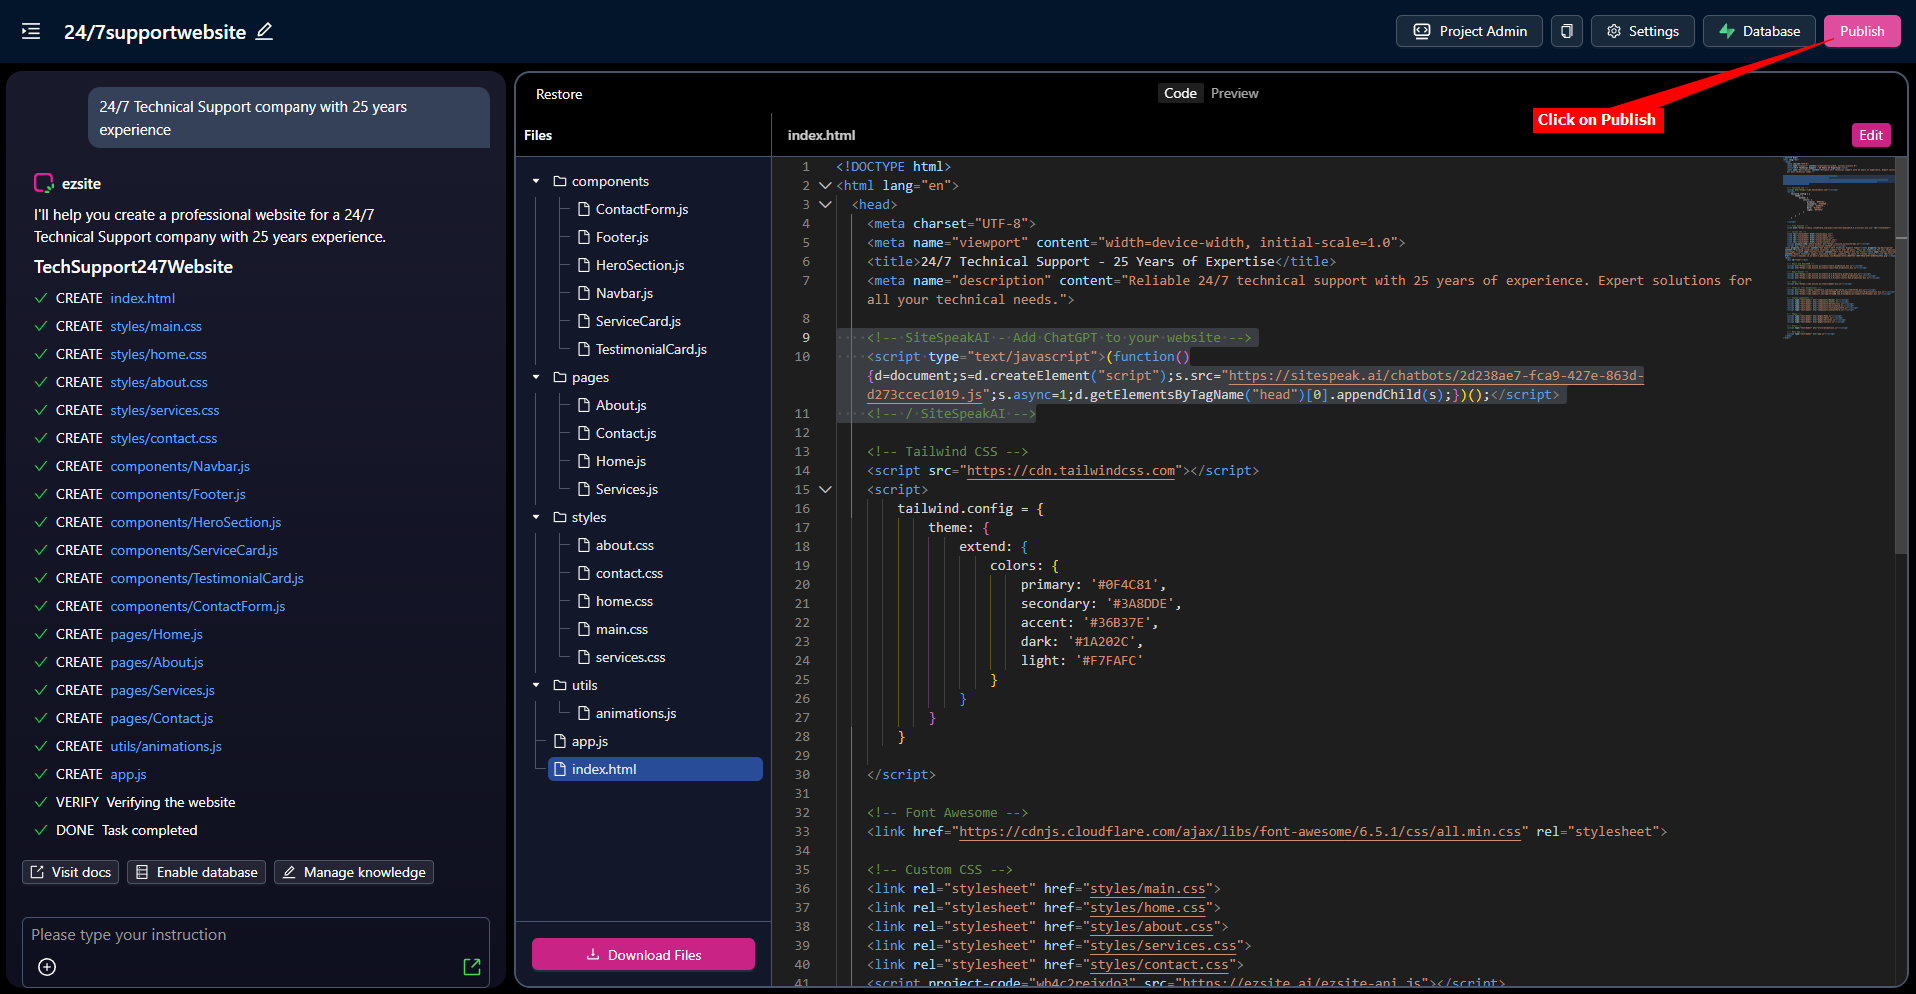
To make your modification available on your live website, click on Publish
-
Your chatbot button will now be displayed on your ezsite website page

-
If you click on the button it will display the chatbot dialogue
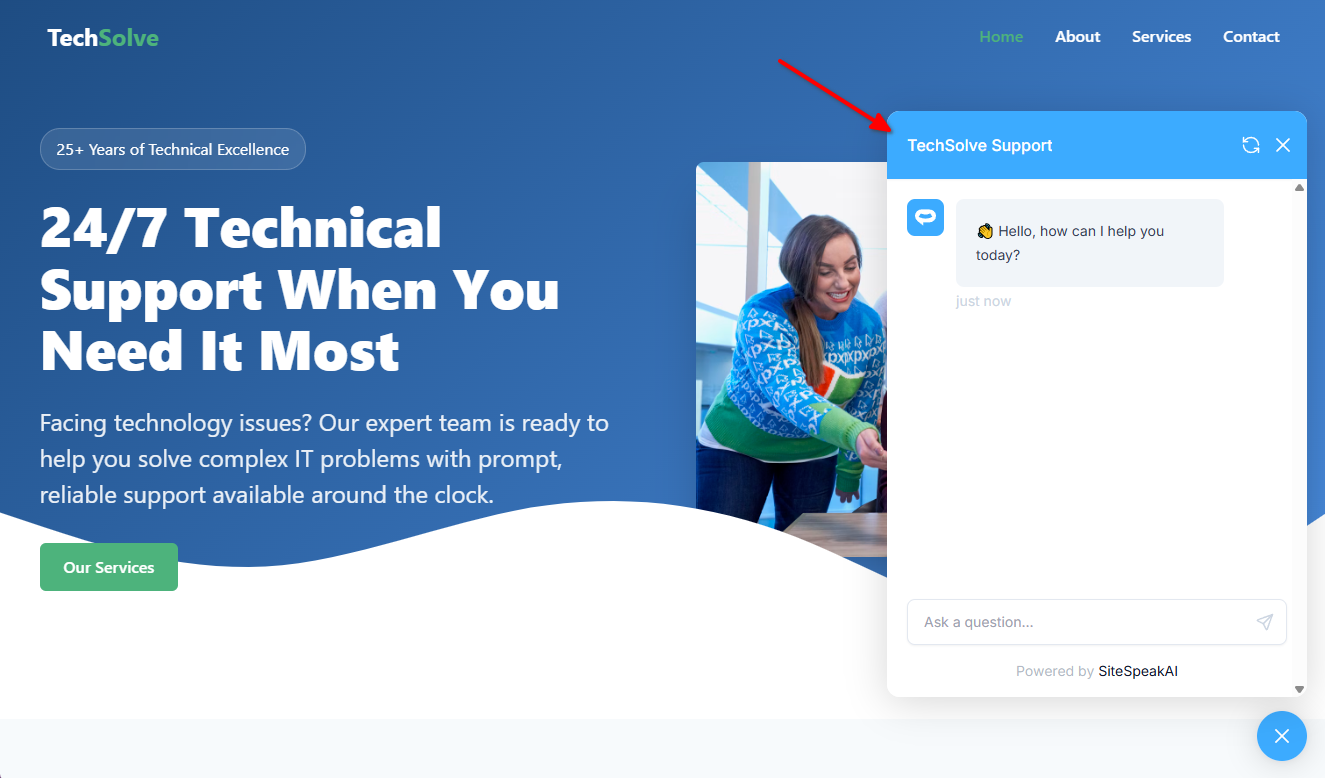
Your chatbot is now added to your ezsite website and your visitors/customers can start interacting with it!
Not finding what you need? Reach out to our support team for help.
Contact Support