Add your AI support agent to your Koha website
- A bit of information:
OPAC stands for Online Public Access Catalog, which is an online database of materials held by a library or group of libraries. All references to OPAC means this is what the online user (visitor or registered patron) will see, thus when you add the AI support agent to the OPAC preferences, it will be available on all the pages displayed for online users.
In SiteSpeakAI
- Please note:
Koha doesn’t allow the standard SiteSpeakAI snippet to be added to the OPACUserJS value, only the JavaScript function code snippet. In the next step where get the JS snippet for your AI support agent, we will only copy the actual function code part of the snippet.Log into your SiteSpeakAI account and select your agent from the dropdown menu at the top, click on the Install Agent section in the sidebar, select the Javascript tab and then copy the function code part of the Javascript snippet (DO NOT click on Copy Code!!). You will use this later when we insert your snippet.
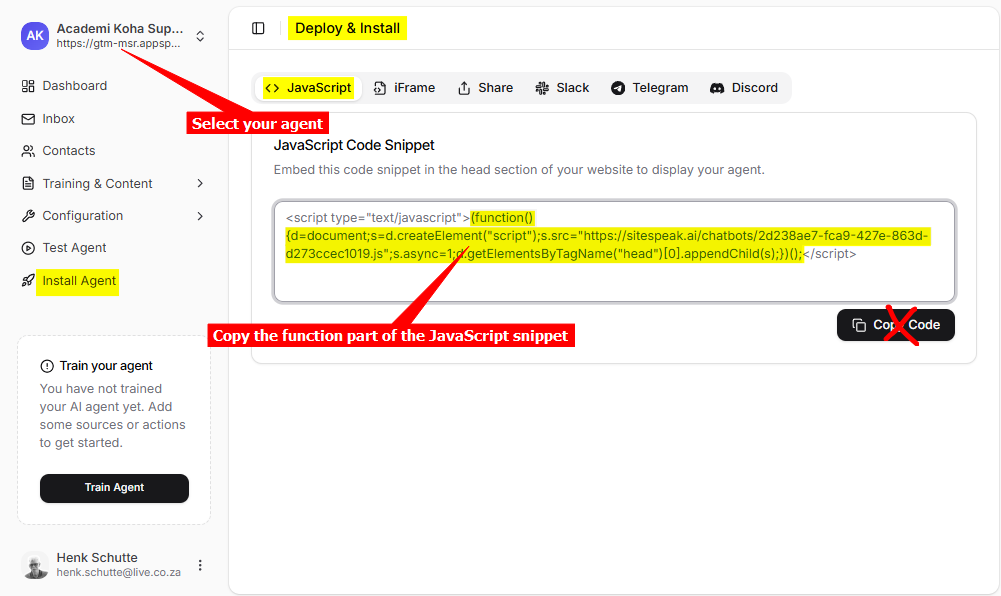 You will then end up with the following (The url.js part will be your specific code):
In Koha
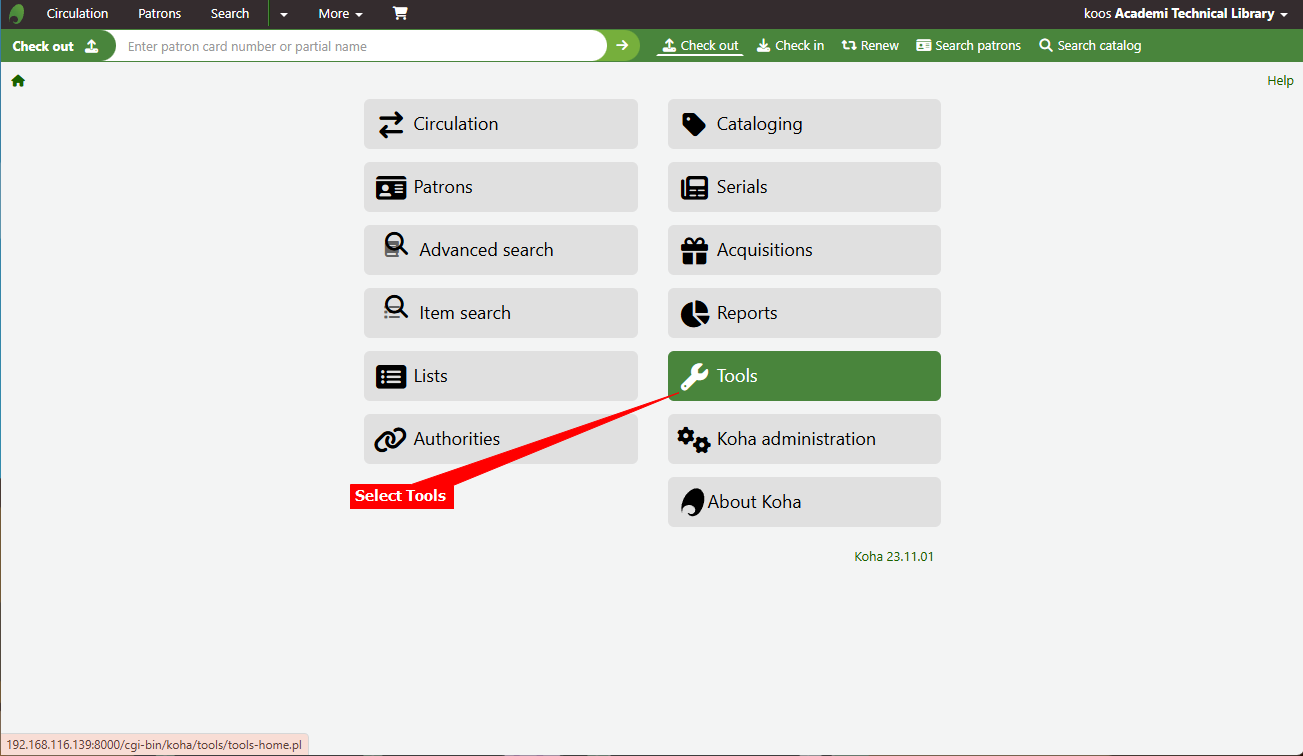
- Log into your Koha account as administrator (or teacher/staff with admin privileges) and select Tools from the menu list
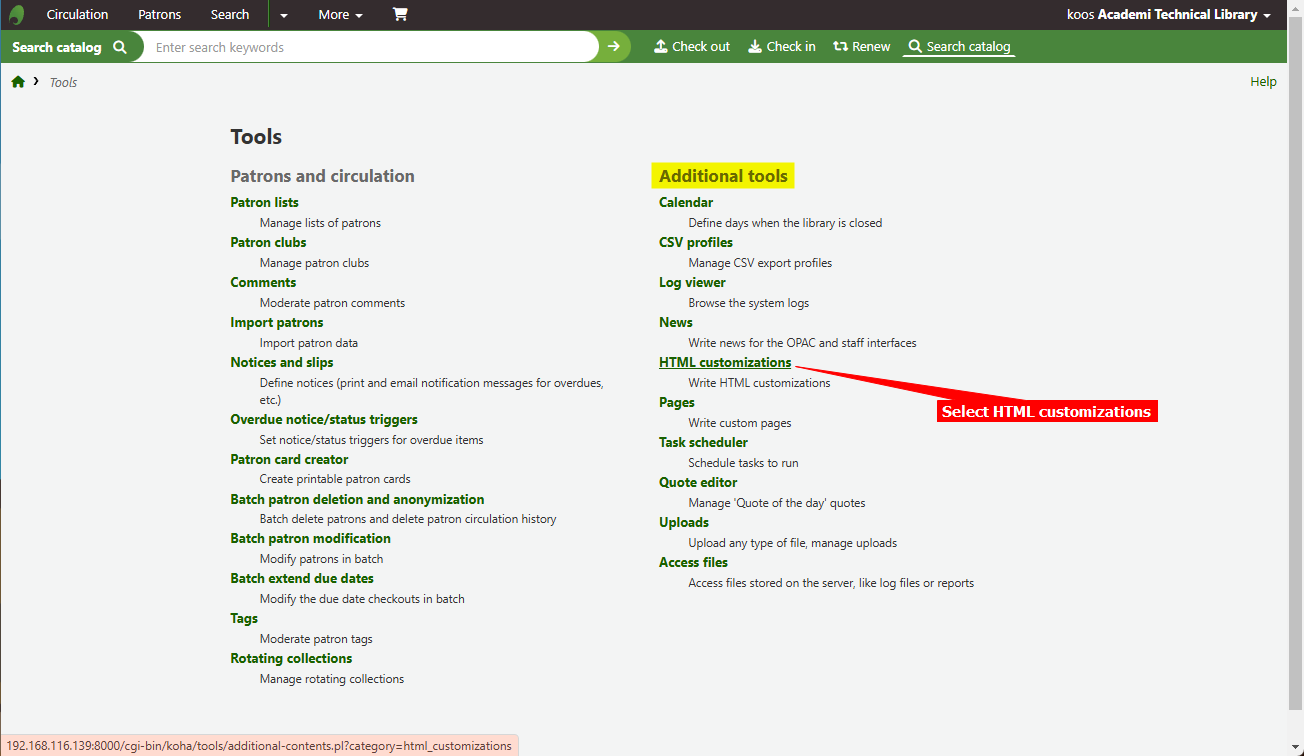
- Select HTML customizations from the list of Tools under Additional tools
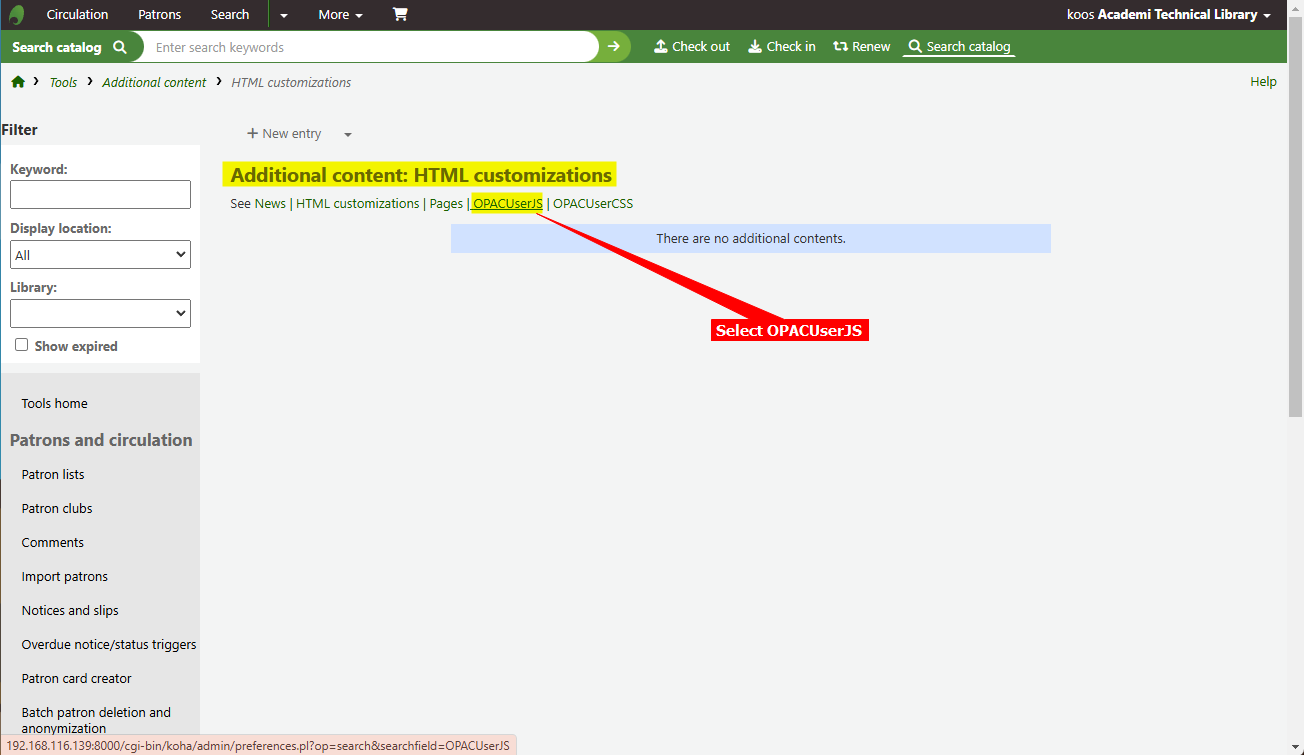
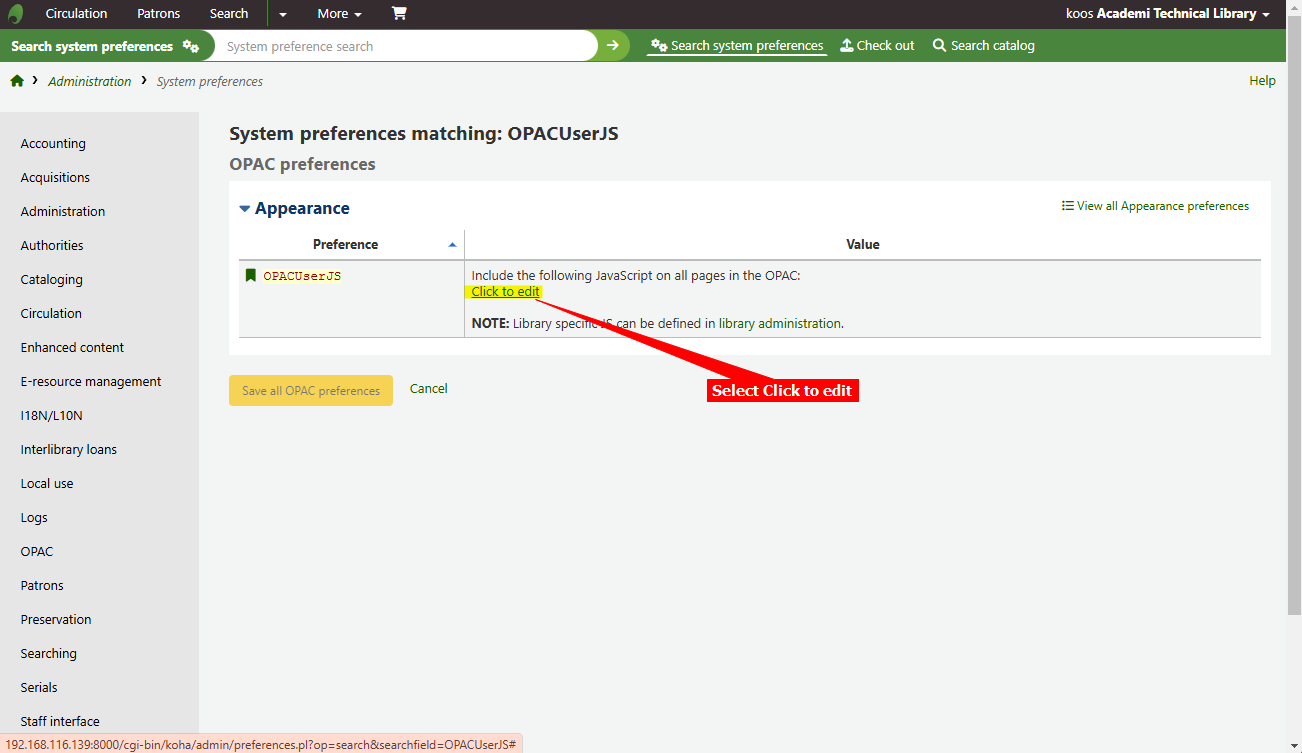
- Select OPACUserJS under Additional content: HTML customizations
- Select Click to edit
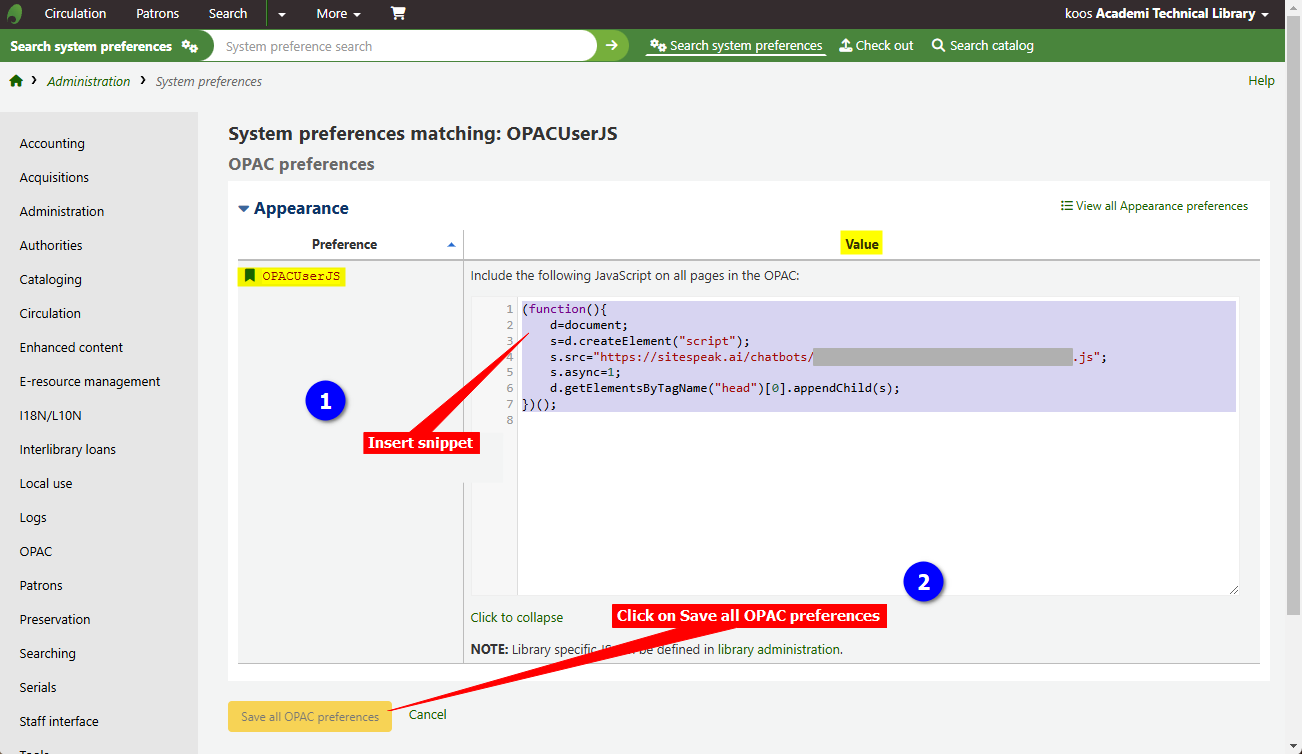
- Insert the copied function part of the JavaScript snippet in the Value text box and click on Save all OPAC preferences
- Your AI support agent button will now be displayed on your Koha library website pages
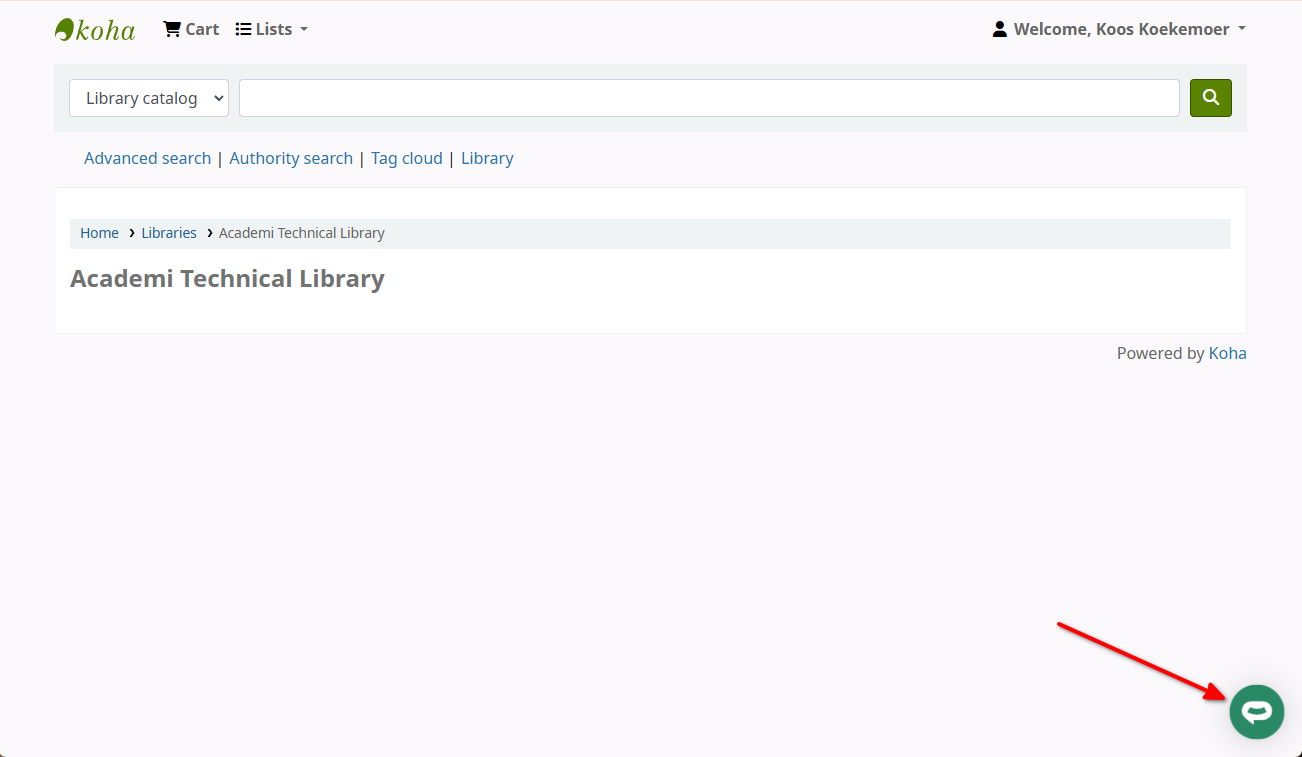
- If you click on the button it will display the AI support agent dialogue
 Your AI support agent has now been added to your Koha website and your visitors/patrons can start interacting with it!
Ready to automate your customer service with AI?
Join over 1000+ businesses, websites and startups automating their customer service and other tasks with a custom trained AI agent.