Add your AI support agent to your Mijnwebwinkel website
In SiteSpeakAI
Select your chatbot from the dropdown menu at the top, click on the Install Agent section in the sidebar, then click on the Copy Code button to copy your code snippet.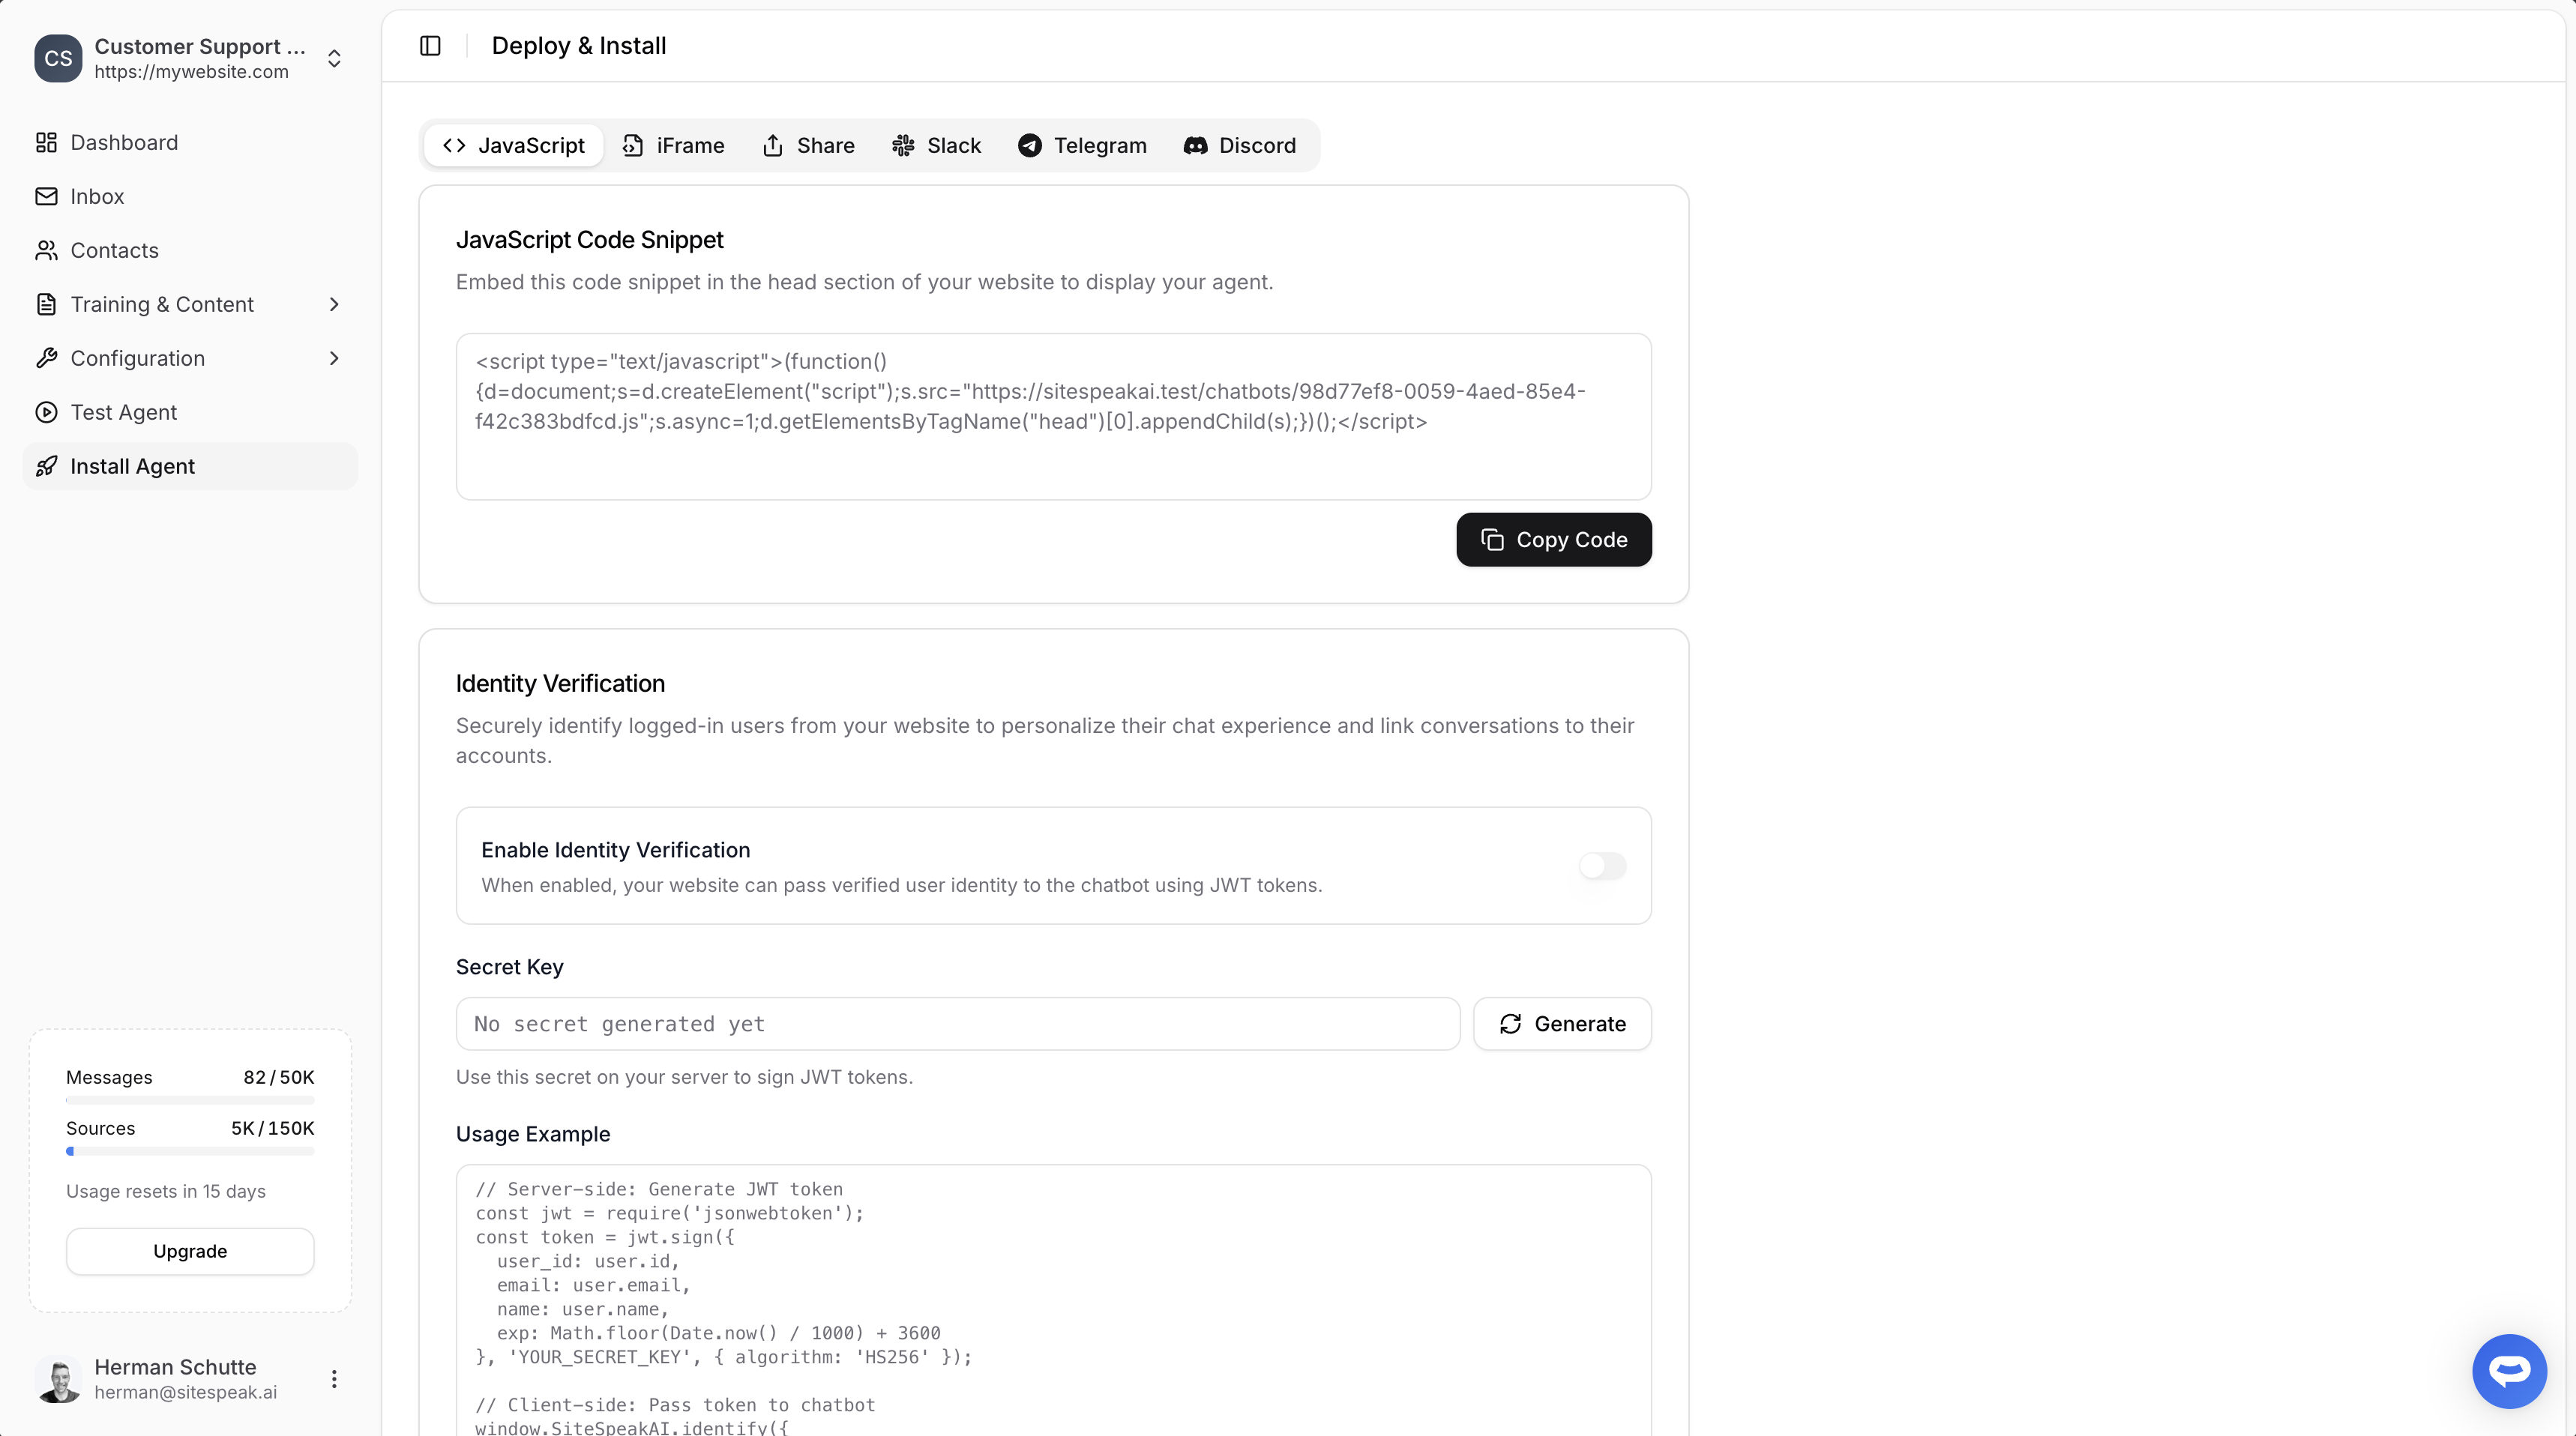
In Mijnwebwinkel
To add Custom HTML to your webstore (e.g., your AI support agent JS snippet as copied above), it is necessary that you have connected Google Tag Manager (GTM) - this is available from a Mijnwebwinkel PRO subscription. If you have not yet done so, read via the link below how to create a Google Tag Manager account and how you can link it in the management environment of your webstore. Do this before continuing with SiteSpeakAI. Information about Google Tag Manager and creating an account A. How do I integrate Google Tag Manager? With Google Tag Manager you place HTML tags on your website, e.g., to integrate a live chat. Google already has a number of frequently used tags ready for you, so you can place them in your shop in no time. For displaying your SiteSpeakAI custom ChatGPT trained AI support agent on your store pages you will have to create a custom tag. How to link GTM to your store is explained below. We will then show you how to create the tag you need (it will need some technical knowledge from your side, but if you follow what we show you, it shouldn’t be too difficult!). Please note! Tags that you apply could influence the way your web store works. It is therefore important that you regularly check the functioning of your shop and order process. Furthermore, please note that the SiteSpeakAI support team does not offer support in creating tags. Now it’s time to get started with Google Tag Manager. B. Create a Google Tag Manager account-
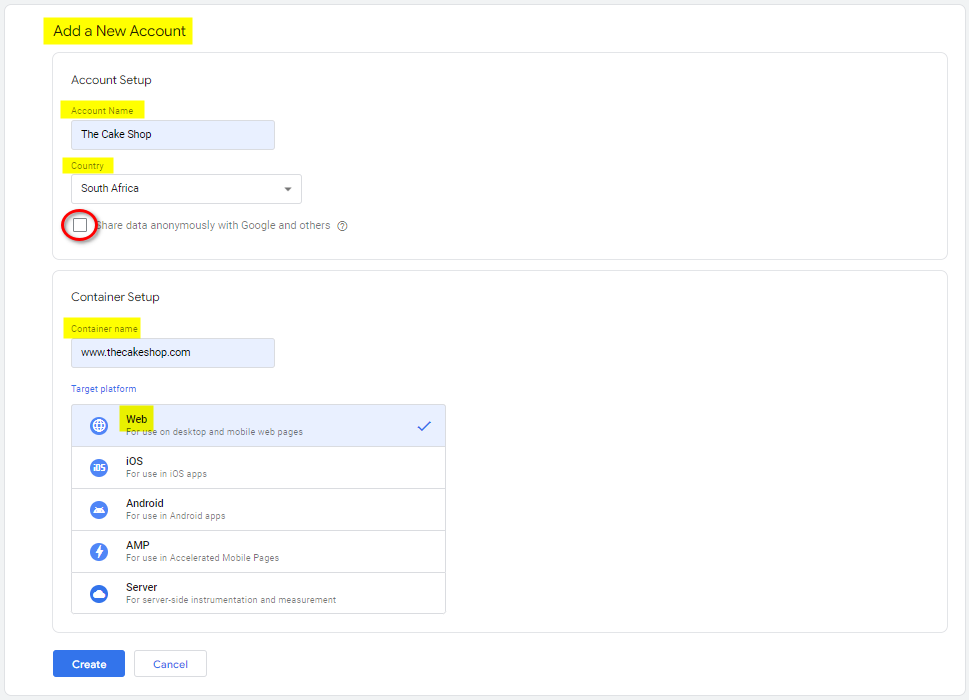
Go to Google Tag Manager and sign in with your Google account. Start with creating an account and a container. This container is what you will later link to your shop and contains your tag. Fill in the following information:
- Under Account Setup, fill in your Account Name. This is mandatory, you can use the name of your company or shop.
- Select your Country if necessary.
- You can select sharing your data with Google and others (see info regarding this in popup).
- Under Container Setup, enter the shop domain name at Container name.
- As the Target platform, select the Web option.
- Click on Create.
- The Google Tag Manager Terms of Service Agreement will now be displayed. If you do agree to the terms stated therein, tick the checkbox at the bottom of the Service Agreement page and click on Yes at the top of the page.
- A piece of code will now appear on the screen. You don’t have to place this in your webstore, just leave that to us! That will be fully automated once you have completed this instruction.
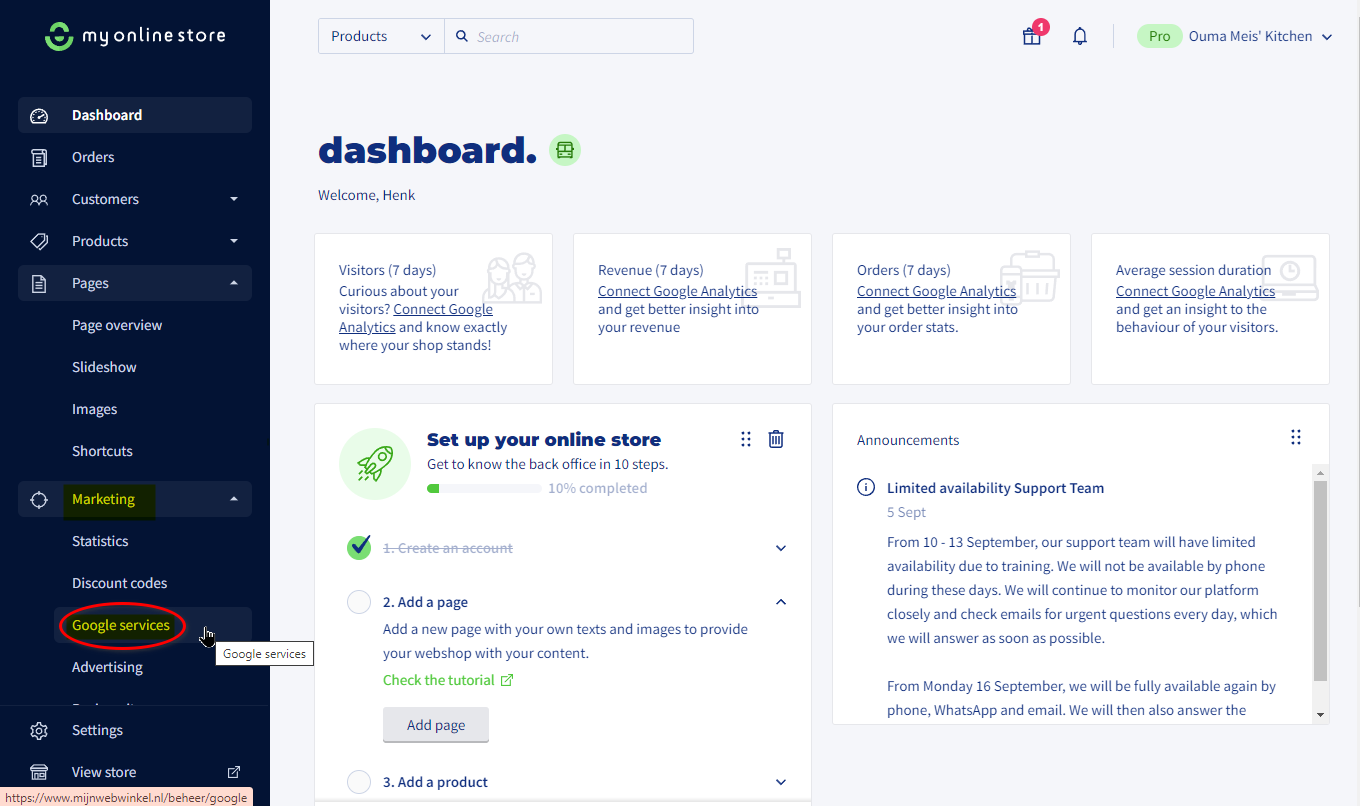
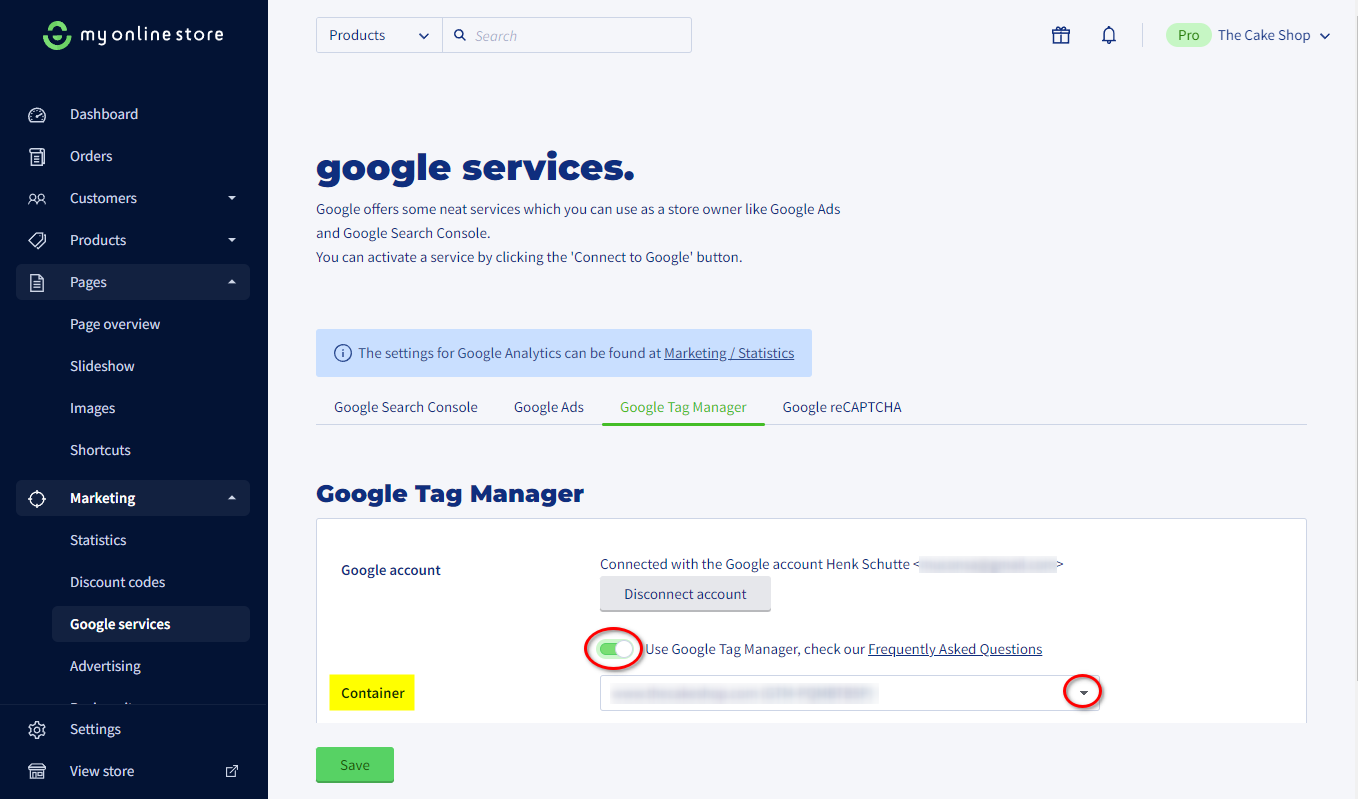
- On your Mijnwebwinkel Dashboard, select Marketing on the left menu bar and click on Google services.
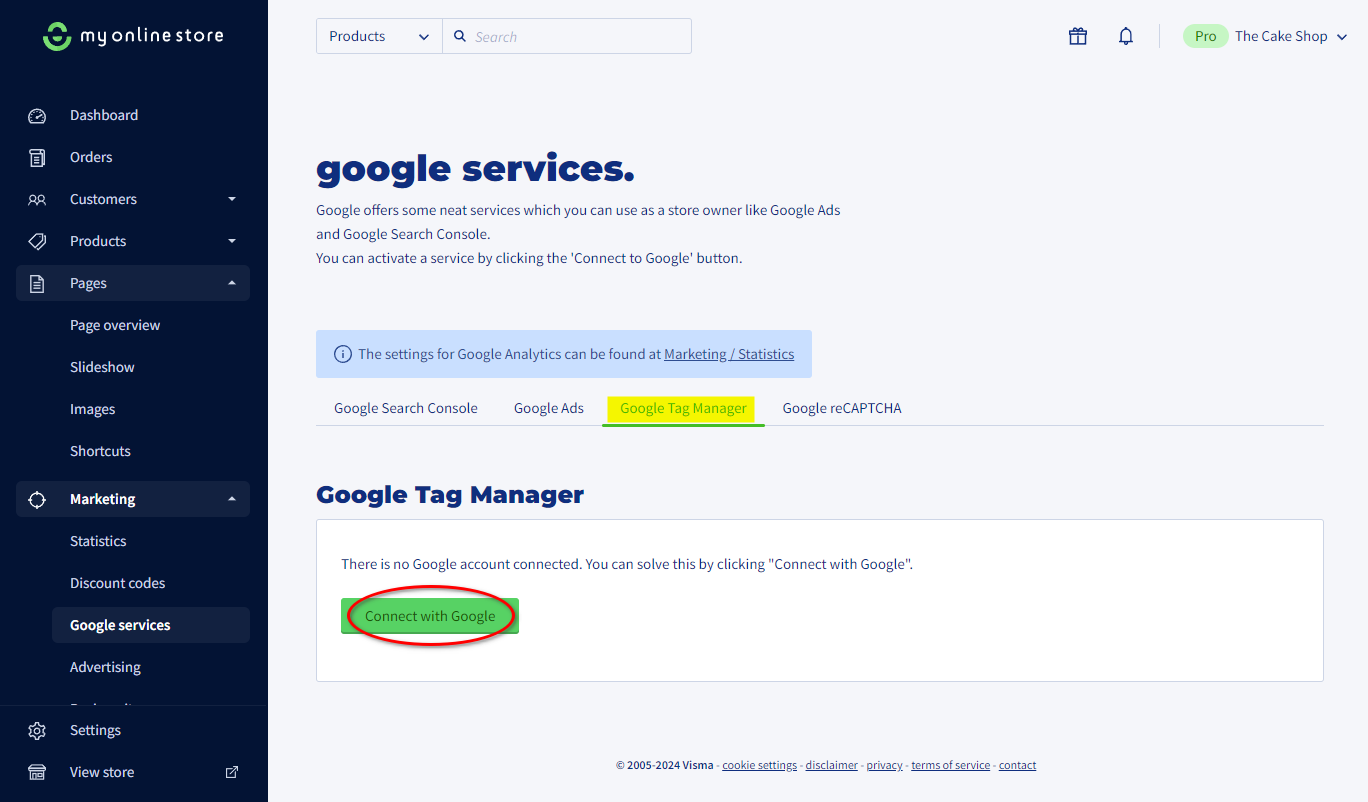
- On the Google services page, open the Google Tag Manager tab and click on the Connect with Google button to connect to your Google Account.
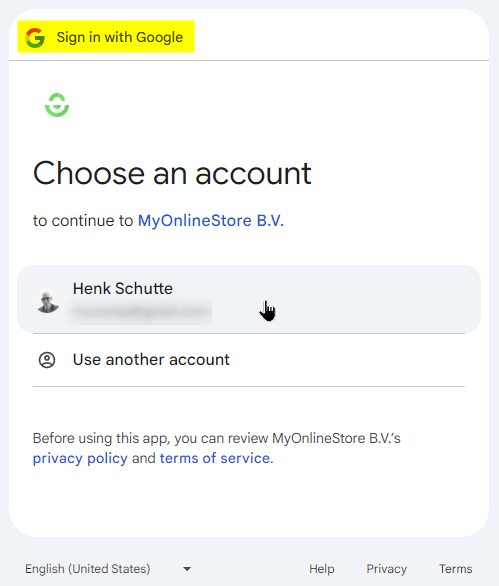
- Google will display a Sign in with Google dialog box. Select the account you want to use to link to Google Tag Manager.
- Next, turn on the Make use of the Google Tag Manager option and select your container. Is your container already selected? Then all you have to do is click on Save.
 D. Adding your tag
That wasn’t too bad, was it? Time to start filling your container! Besides the ready-made tags that Google already has in there, you can also create your own HTML tags. This option is used for example to add a live chat on every page of your store, or for showing Google Maps on your contact page. For SiteSpeakAI it will be used to display your AI support agent on your Mijnwebwinkel store pages.
D. Adding your tag
That wasn’t too bad, was it? Time to start filling your container! Besides the ready-made tags that Google already has in there, you can also create your own HTML tags. This option is used for example to add a live chat on every page of your store, or for showing Google Maps on your contact page. For SiteSpeakAI it will be used to display your AI support agent on your Mijnwebwinkel store pages.
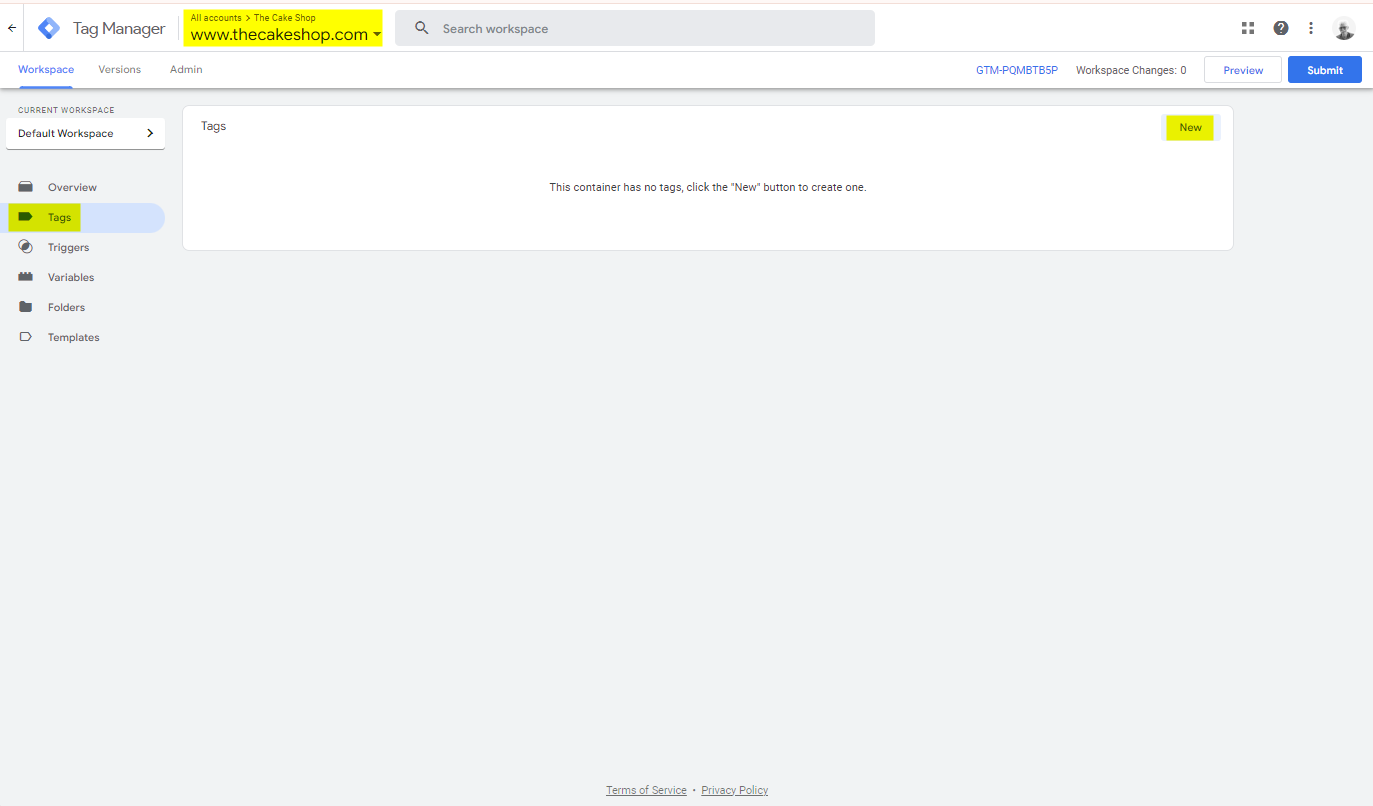
- Make sure you’re logged into Google Tag Manager account and select the container you’ve linked to your store. Select Tags in the menu on the left sidebar and click on New to create a new tag.
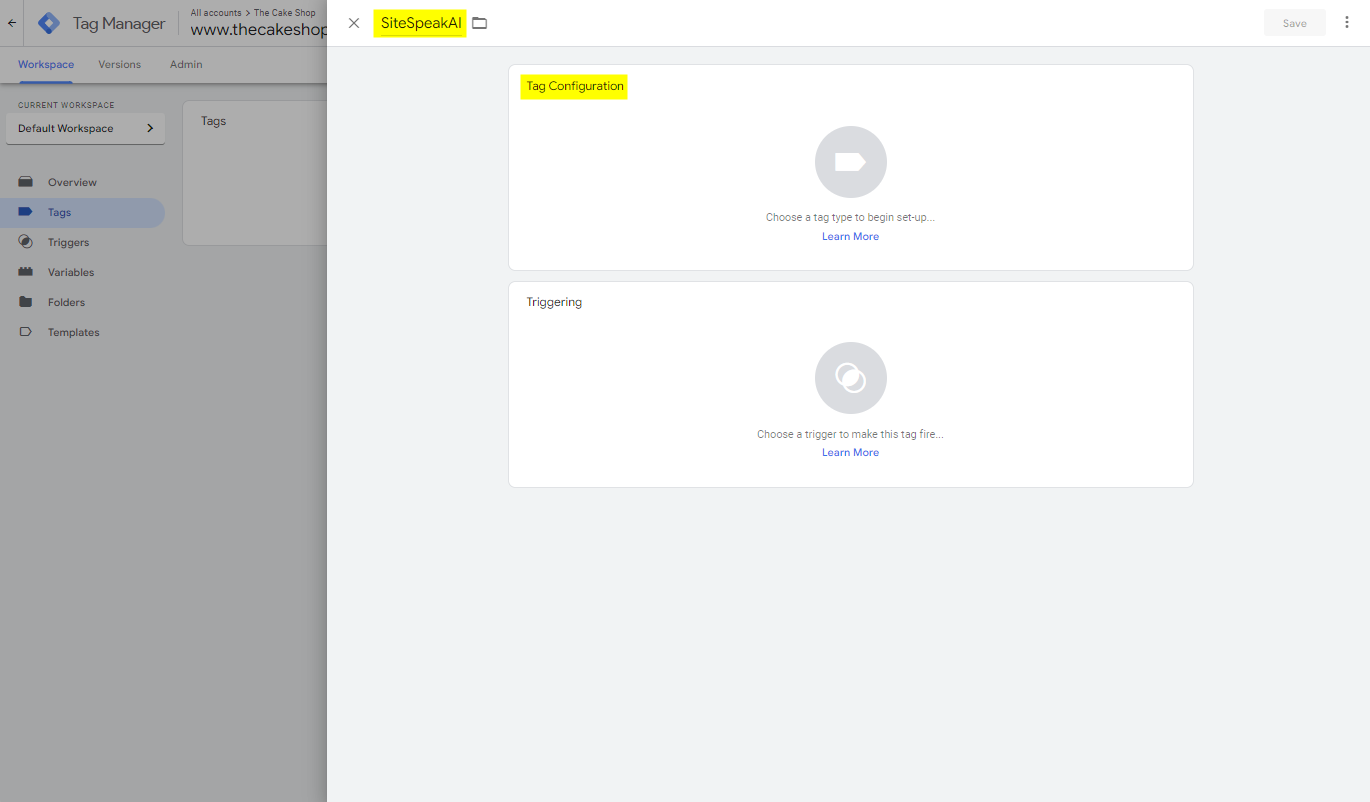
- Give your tag a name and then click on the Tag Configuration block.
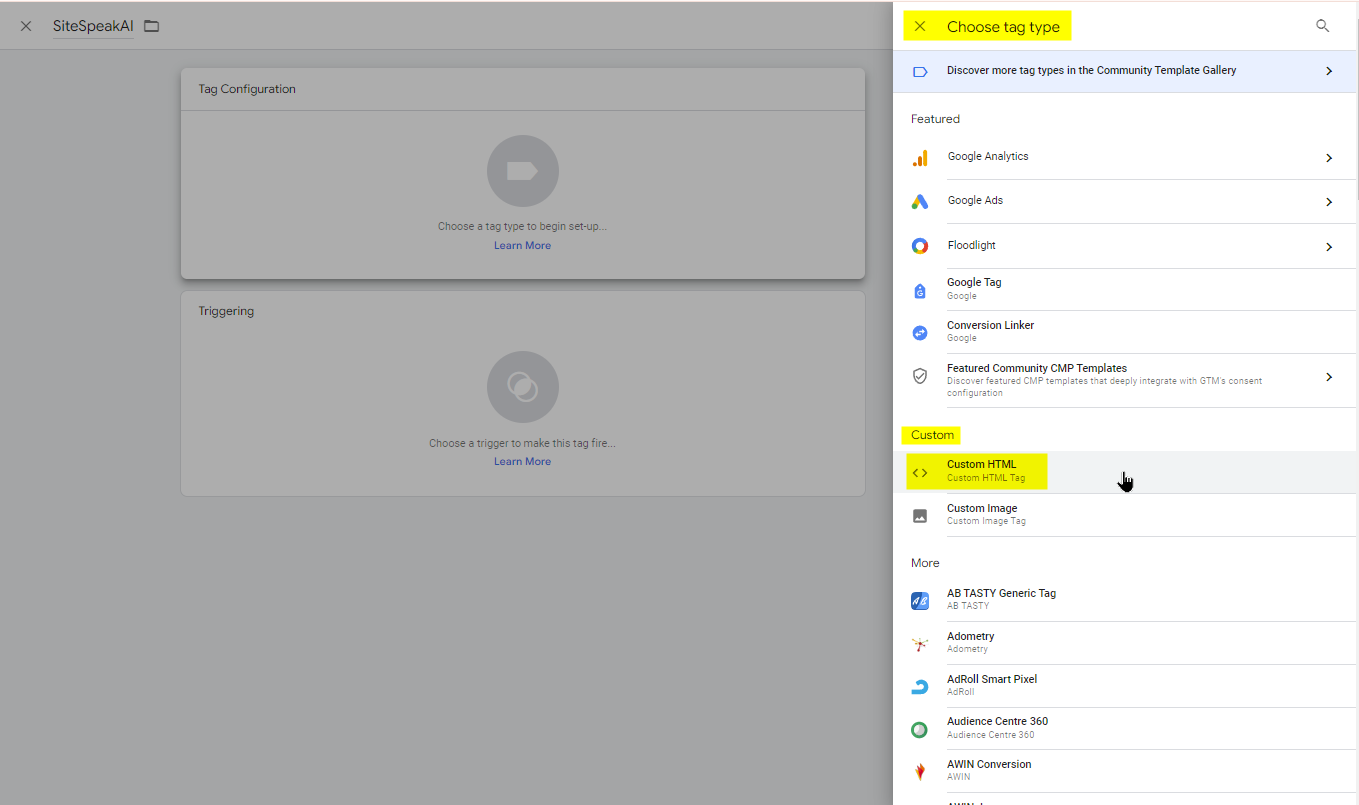
- On the Choose tag type list, choose Custom HTML.
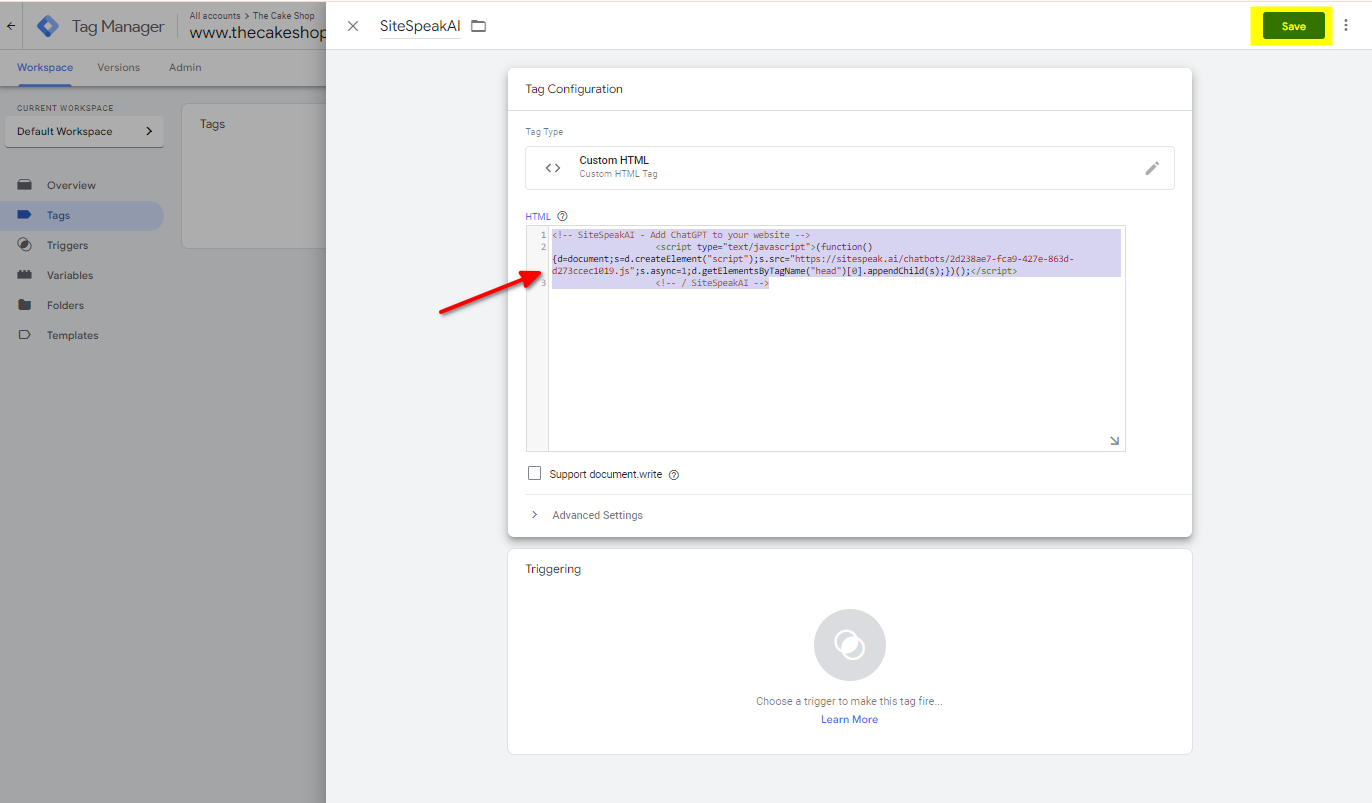
- Paste the JS code you copied at the beginning of this tutorial into the HTML field and click on Save.
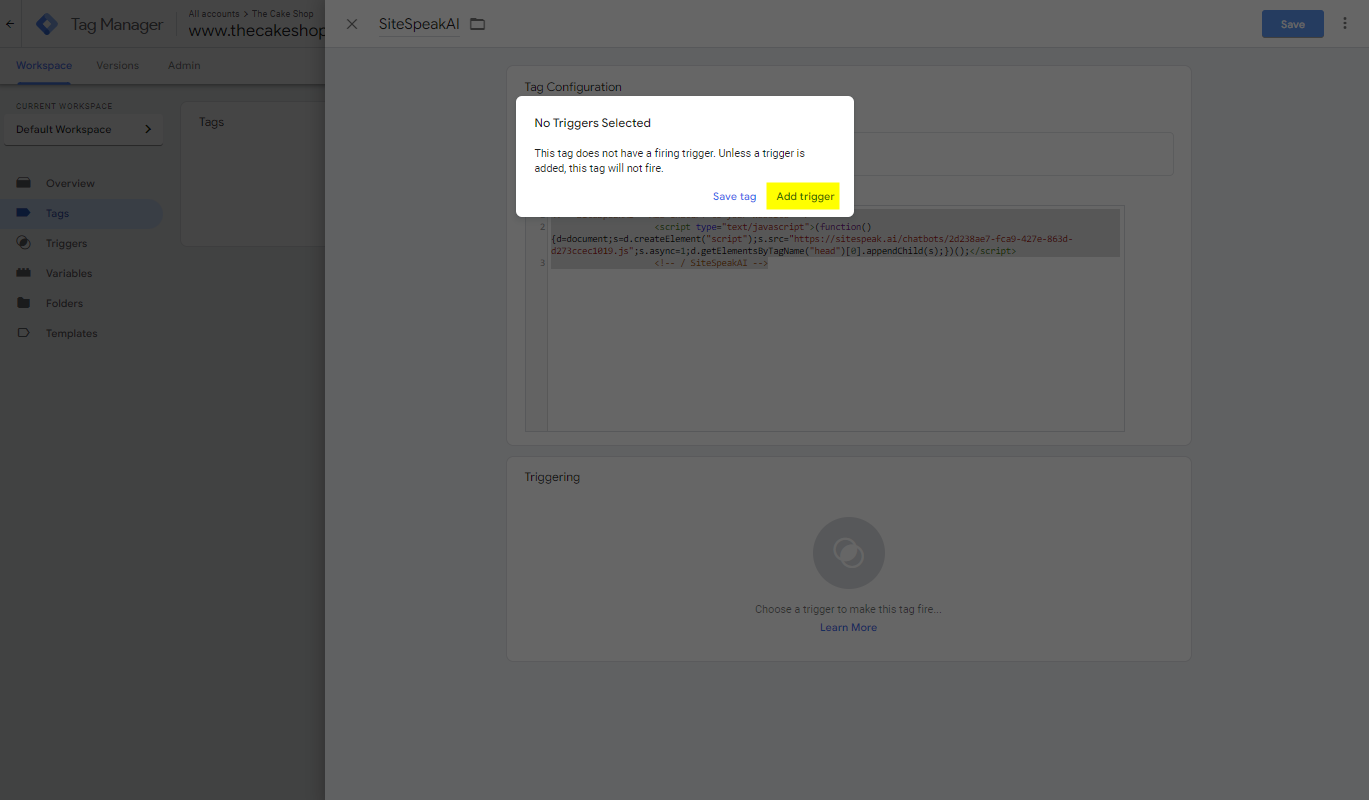
- A pop-up will appear stating that you have not selected a trigger yet. Click on Add Trigger.
- Then select the All Pages option.
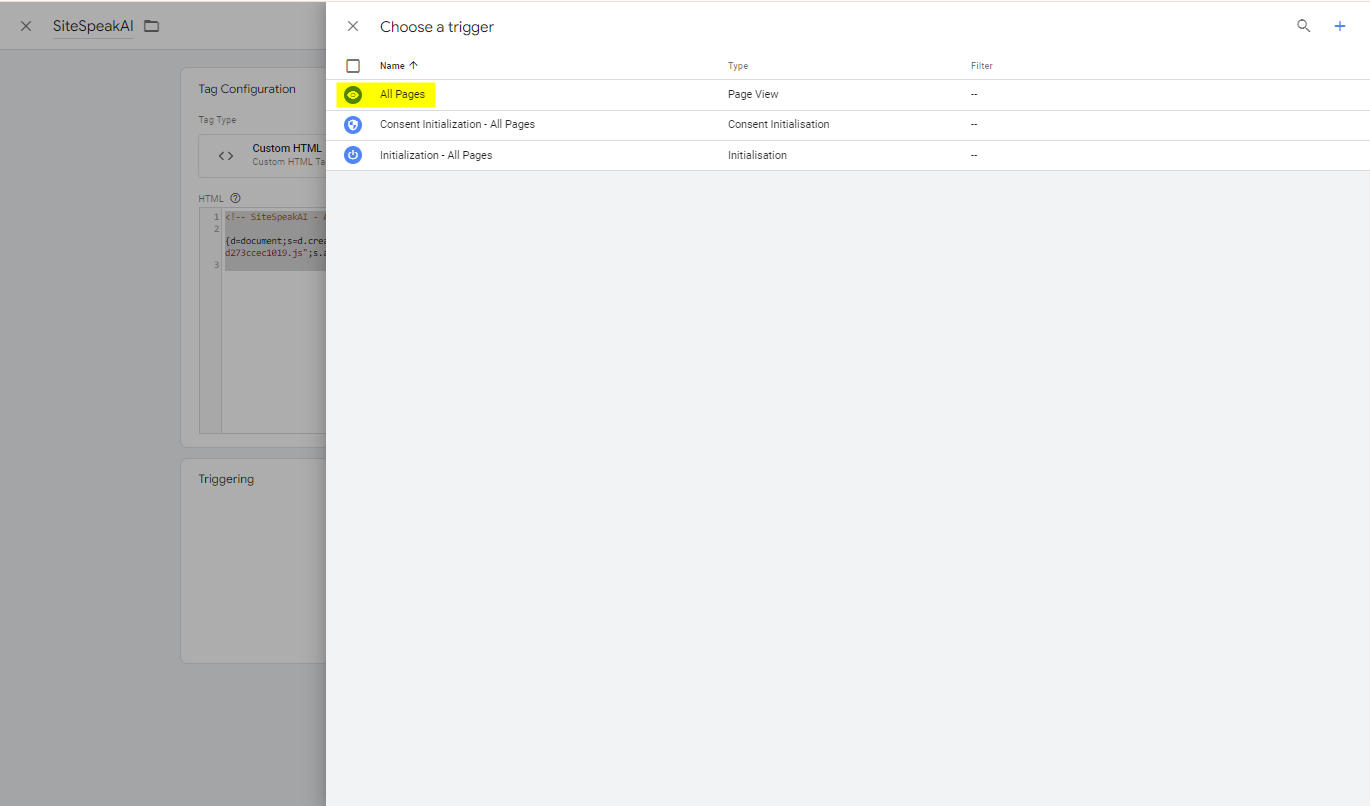
- This will then display All Pages (Page View) under Firing Triggers.

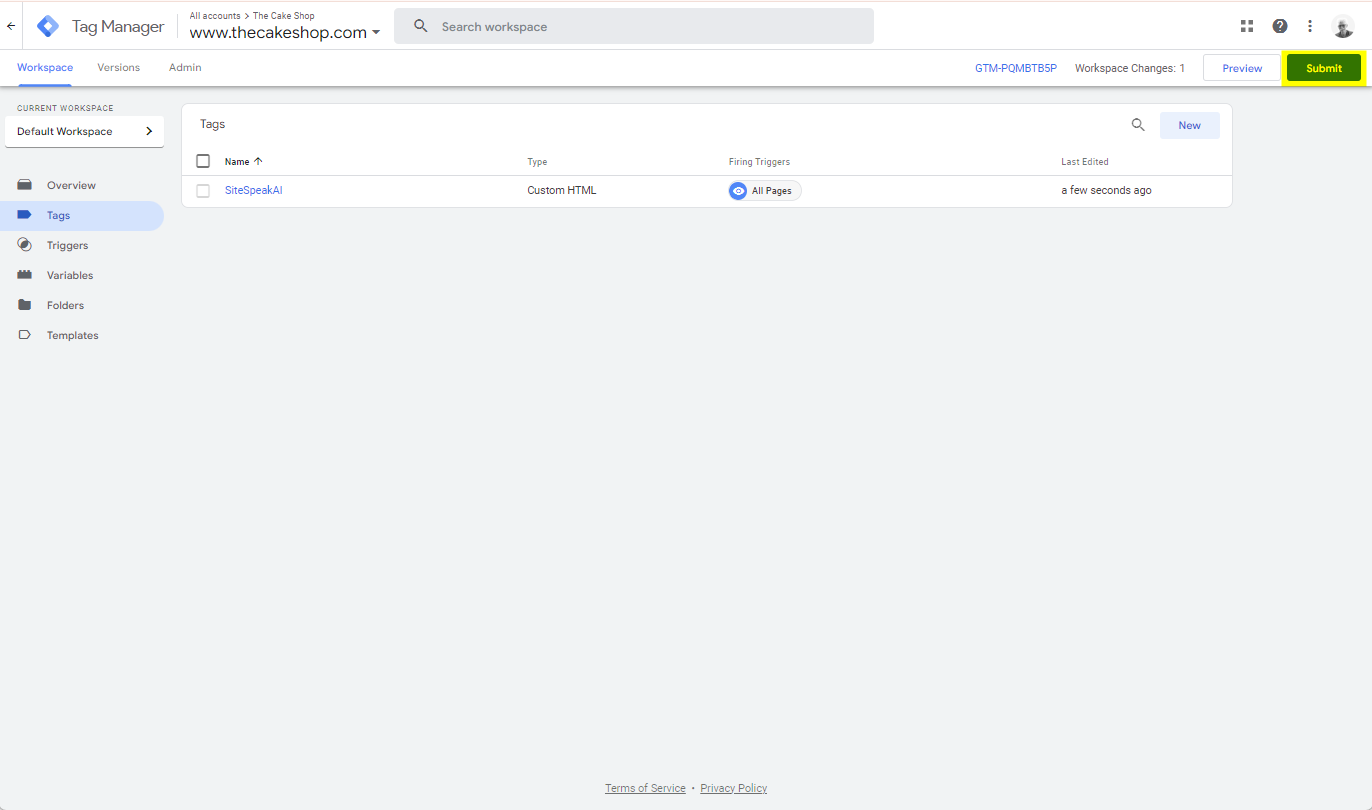
- Click Save again at the top right of your screen to save your tag. Once your tag has been saved, click Submit in the top right corner of your screen.
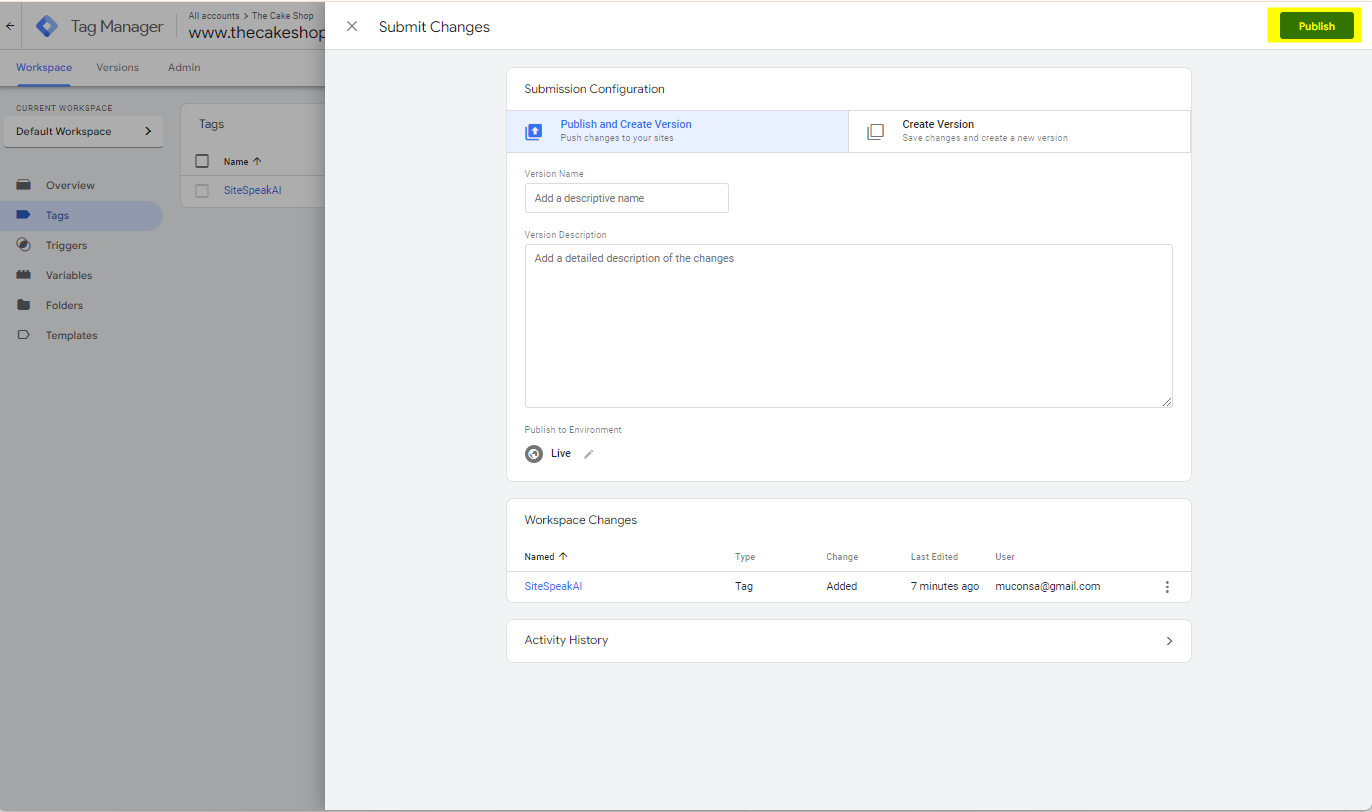
- Then click on Publish.
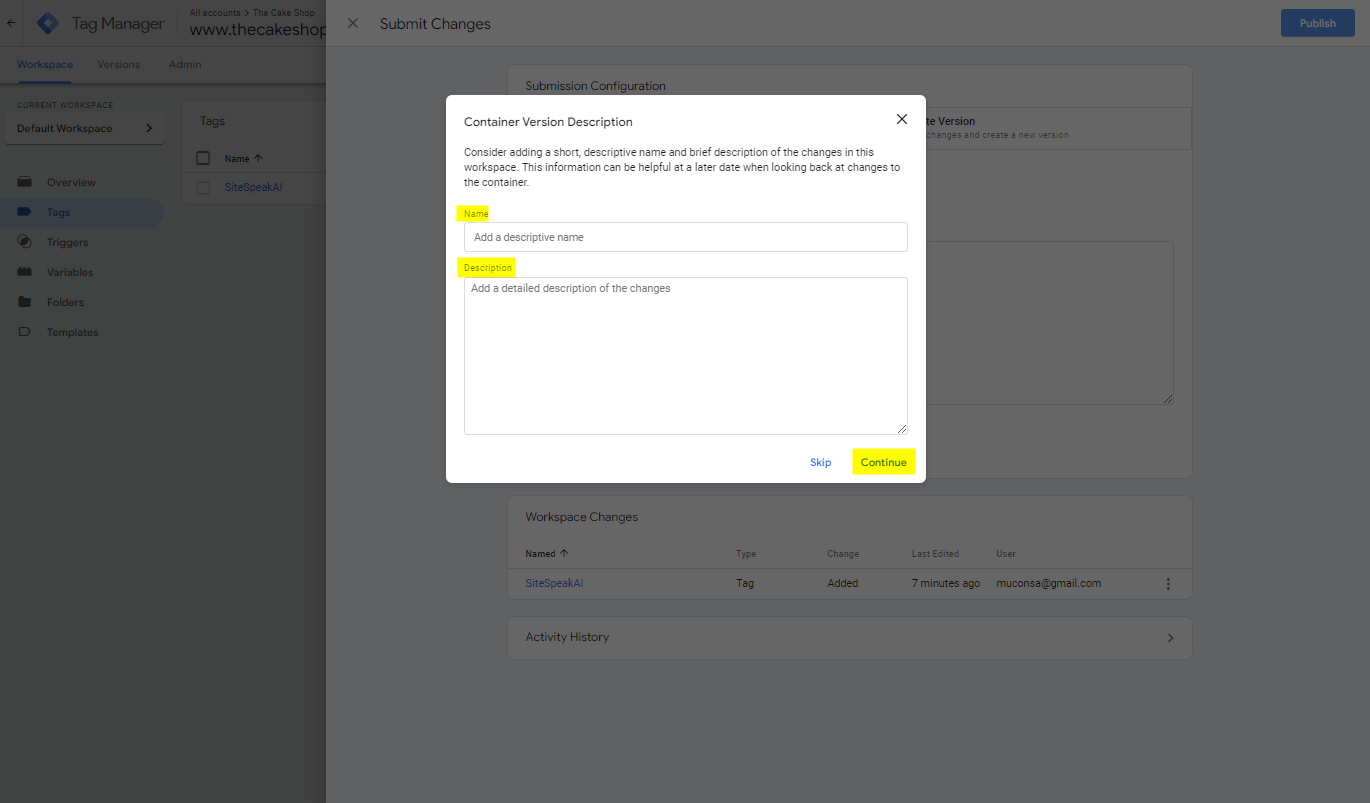
- Give your tag a name and description (if you want) and click Continue.
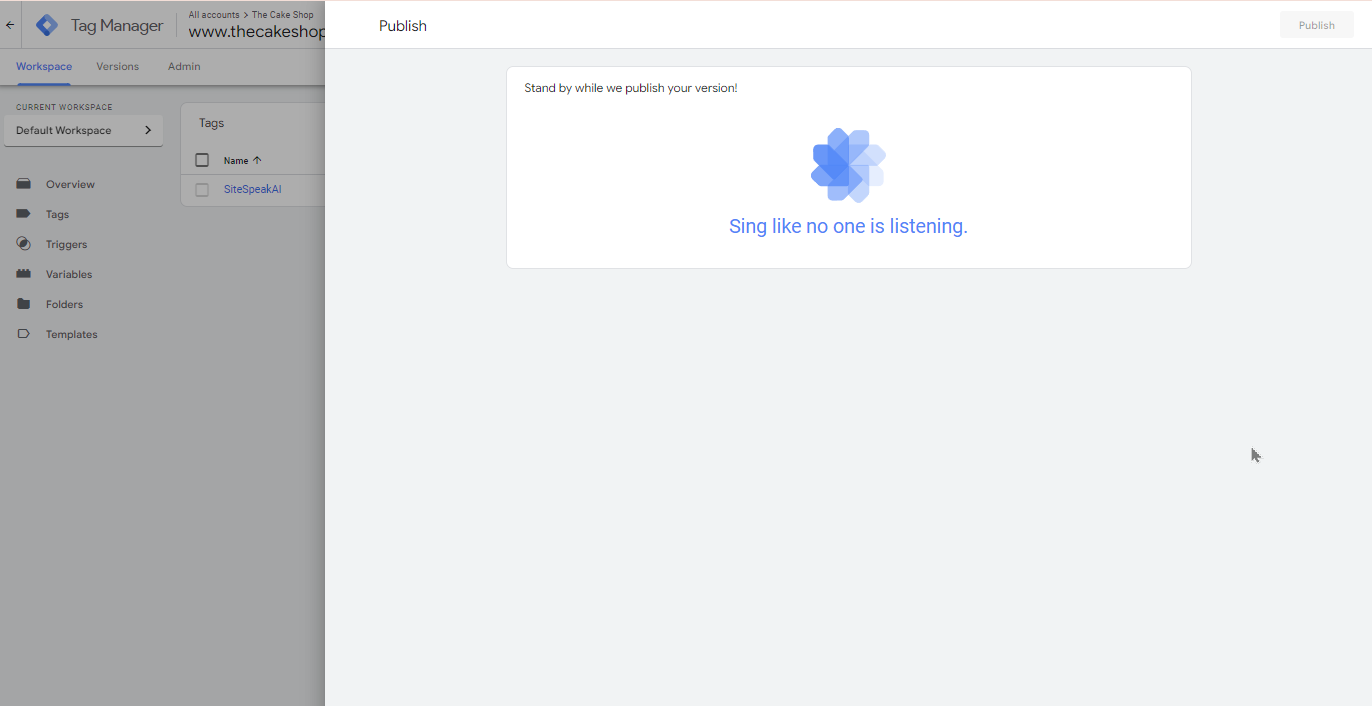
- You will now see the following screen:
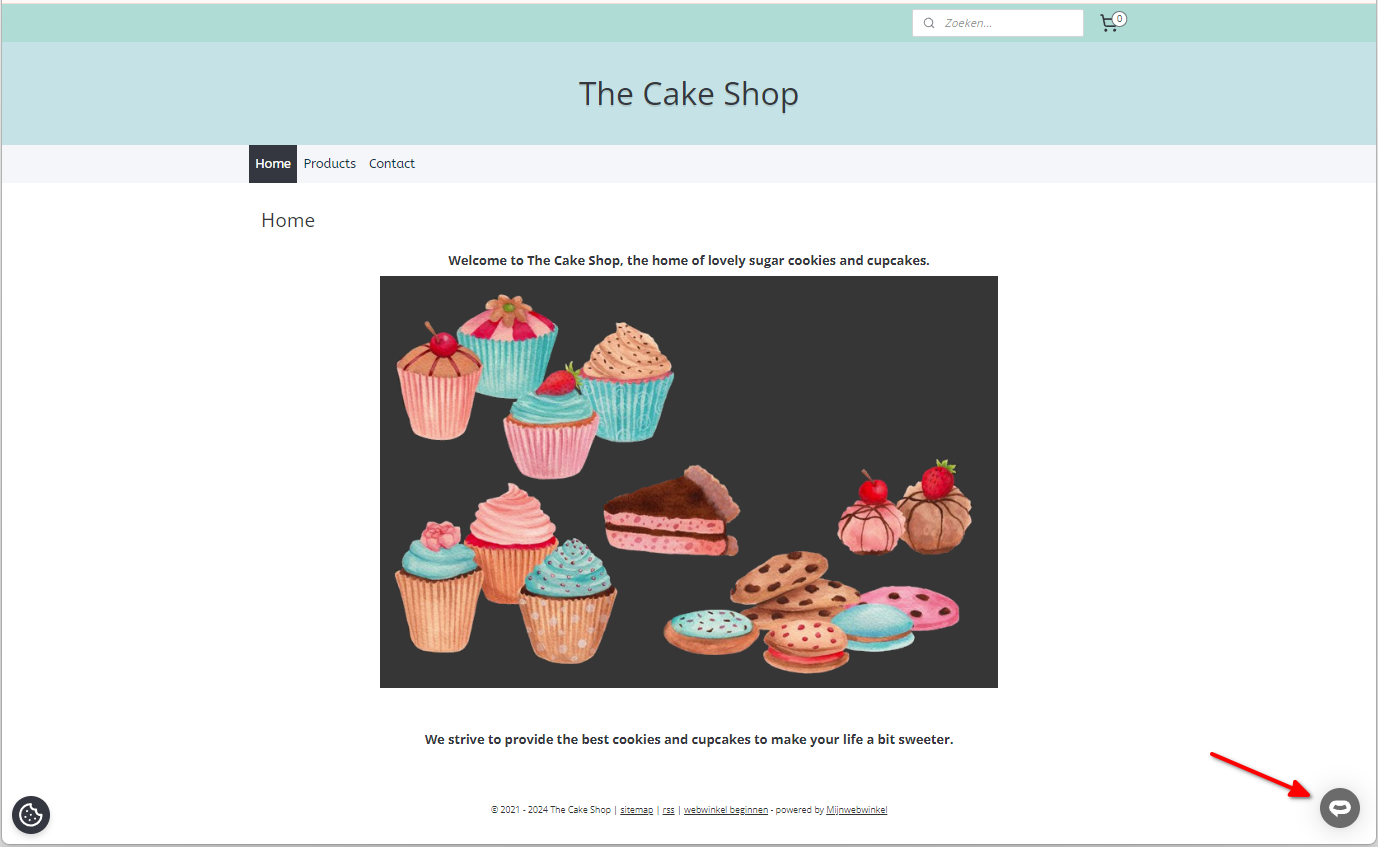
- Your AI support agent button will now be displayed on your Mijnwebwinkel webstore pages
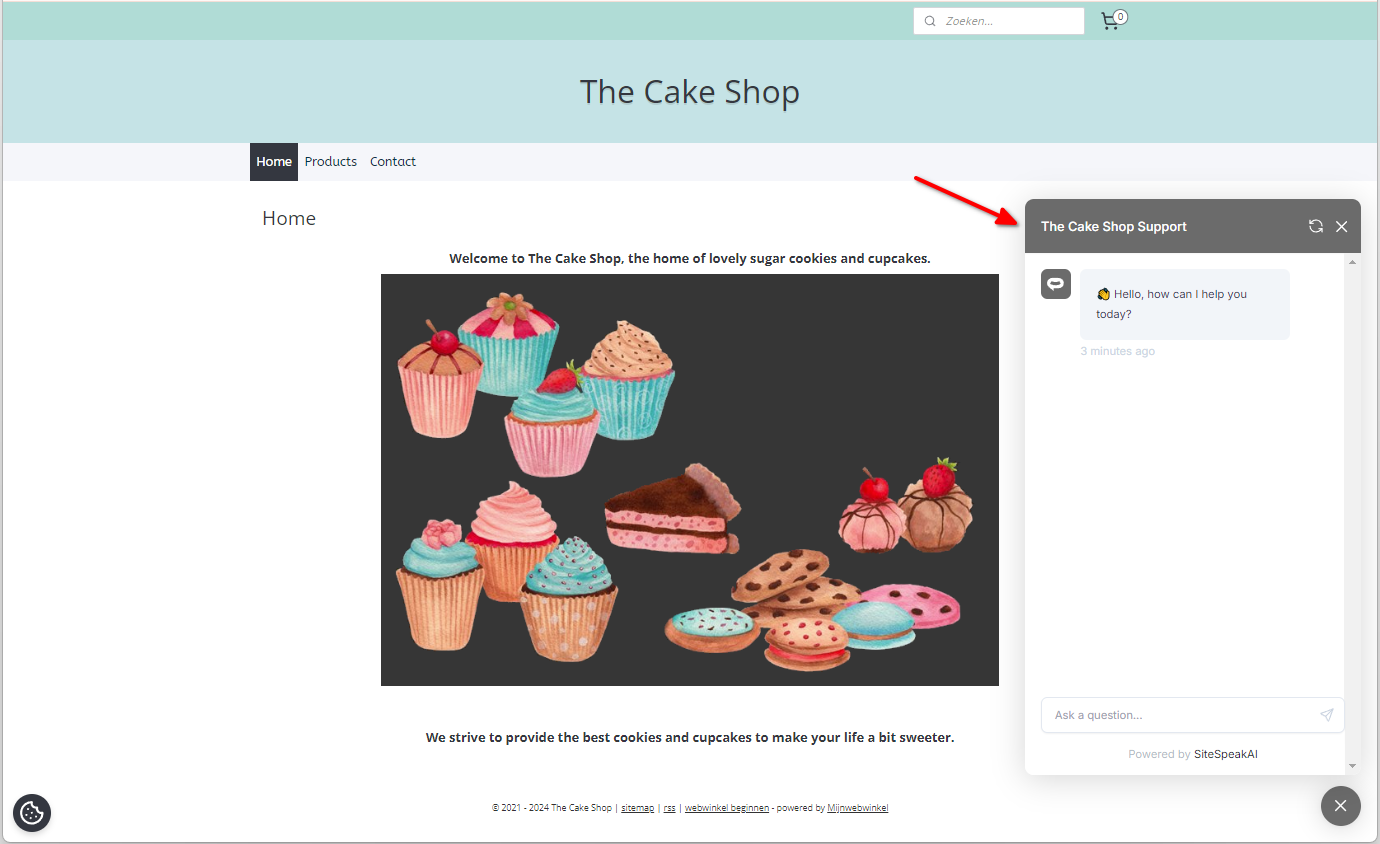
- If you click on the button it will display the AI support agent dialogue
 Your AI support agent has now been added to your Mijnwebwinkel webstore and your visitors/customers can start interacting with it!
Ready to automate your customer service with AI?
Join over 1000+ businesses, websites and startups automating their customer service and other tasks with a custom trained AI agent.