Add your AI support agent To your SharePoint Modern Online website
SharePoint Modern Online sites are web-based, responsive collaboration tools within Microsoft 365, designed for rapid creation of engaging intranets and content management. They offer a modern UI, mobile responsiveness, and easy customization using modern web parts, empowering users to build sites in seconds. SharePoint doesn’t allow adding custom HTML as other website builders do. You can use Microsoft Copilot Studio to create a webpart but we found a Power Popups app that will do the job for us. This popup can be triggered by clicking on a button, a link or an image. Power Popups offer a 7 day free full function option which allows you to test the functionality. Due to the fact that we have no access to the header and footer code of the website, the popup can not be added to display site wide, you must add the popup to each page of your website. In this tutorial we will look at an image as a trigger. The button is similar but can only contain text on it so you can put any relevant text on it. The image will be displayed with a minimum size of 100x100px. You can play around with the size. The popup trigger will be added to a section. Sections can have different layouts, i.e. 1, 2 or 3 columns but we suggest a 3 column layout so you can basically add the popup trigger left, center or right.In SiteSpeakAI
Select your AI support agent from the dropdown menu at the top, click on the Install Agent section in the sidebar and select the iFrame option. Then select and copy the iframe source URL. This will be used as the URL for the iFrame being displayed in the popup.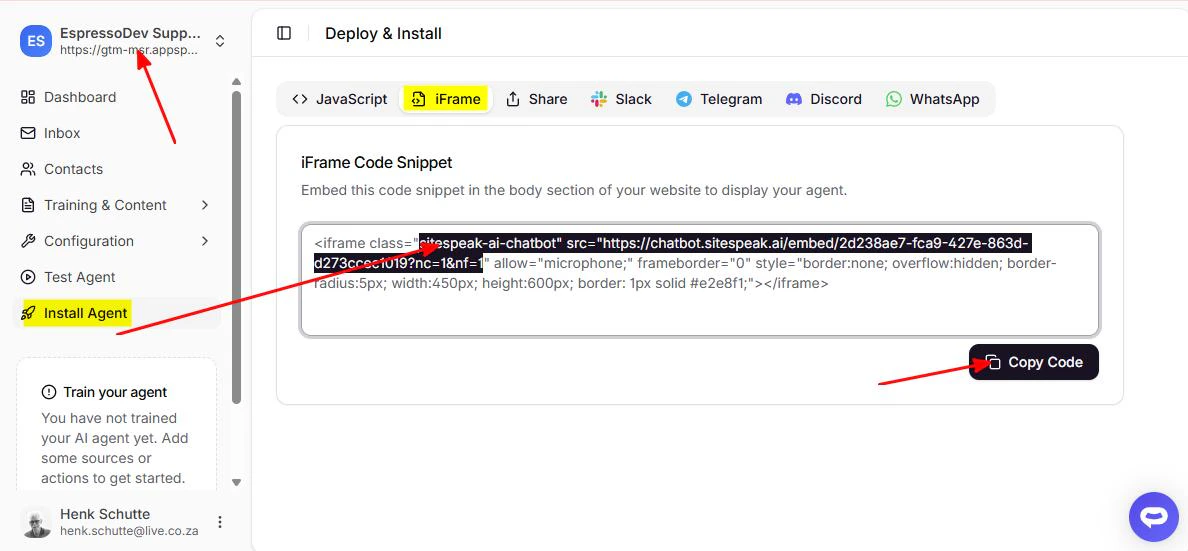
In SharePoint Modern Online
- Obtain your Power Popups webpart.
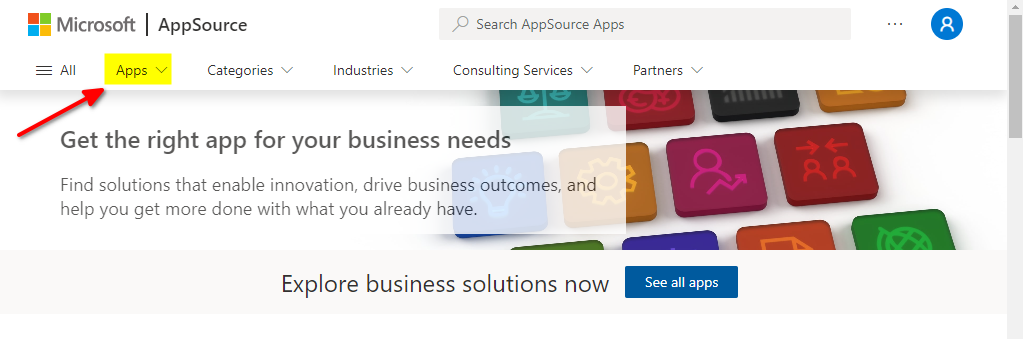
- Goto https://appsource.microsoft.com/en-US/home.
- Click on the Apps dropdown and select SharePoint apps.
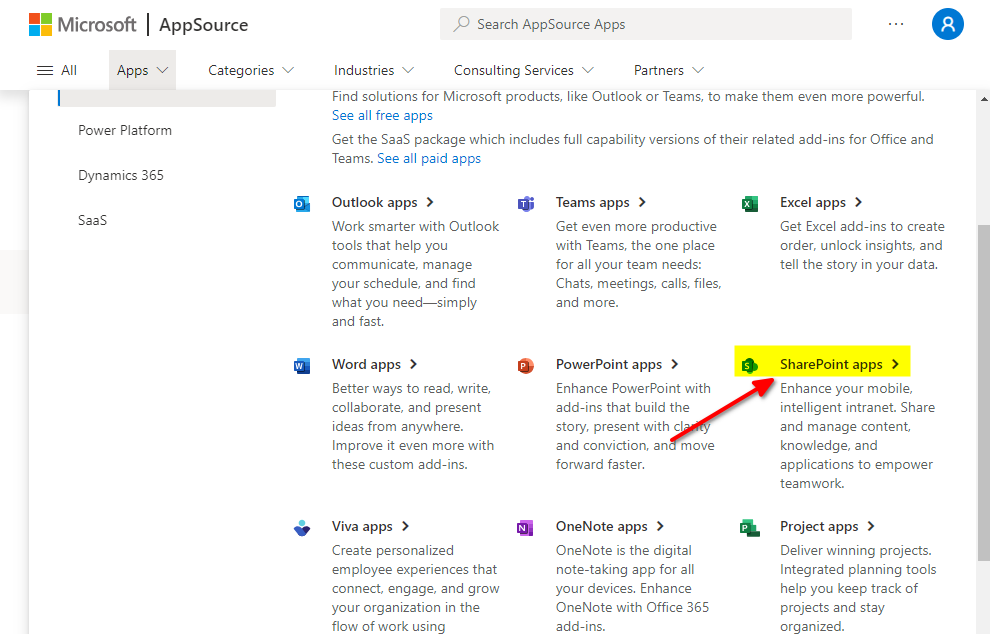
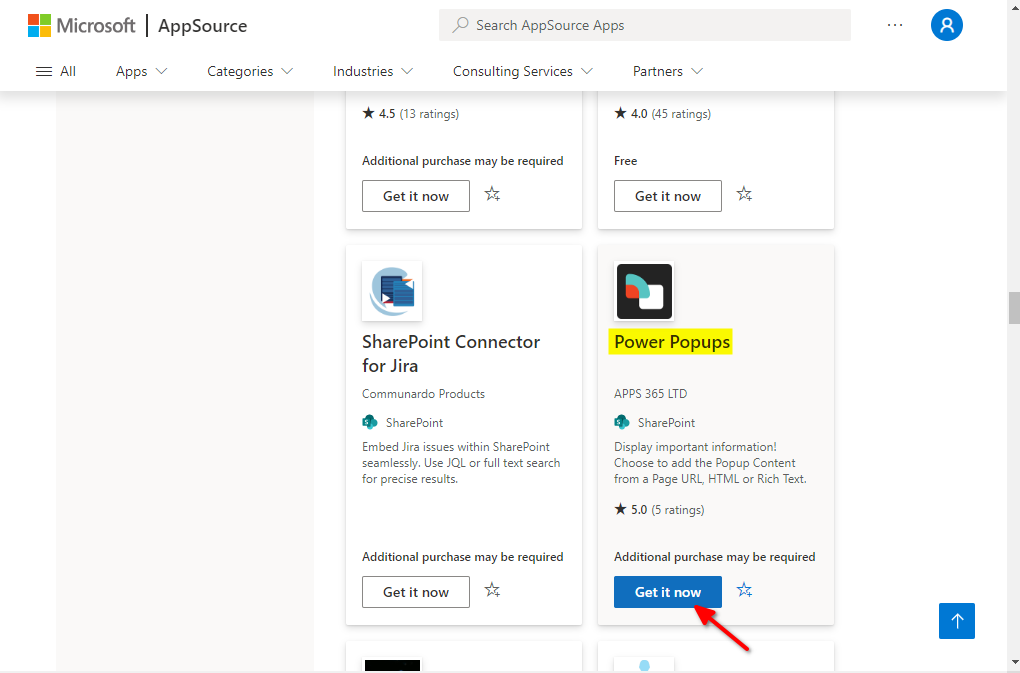
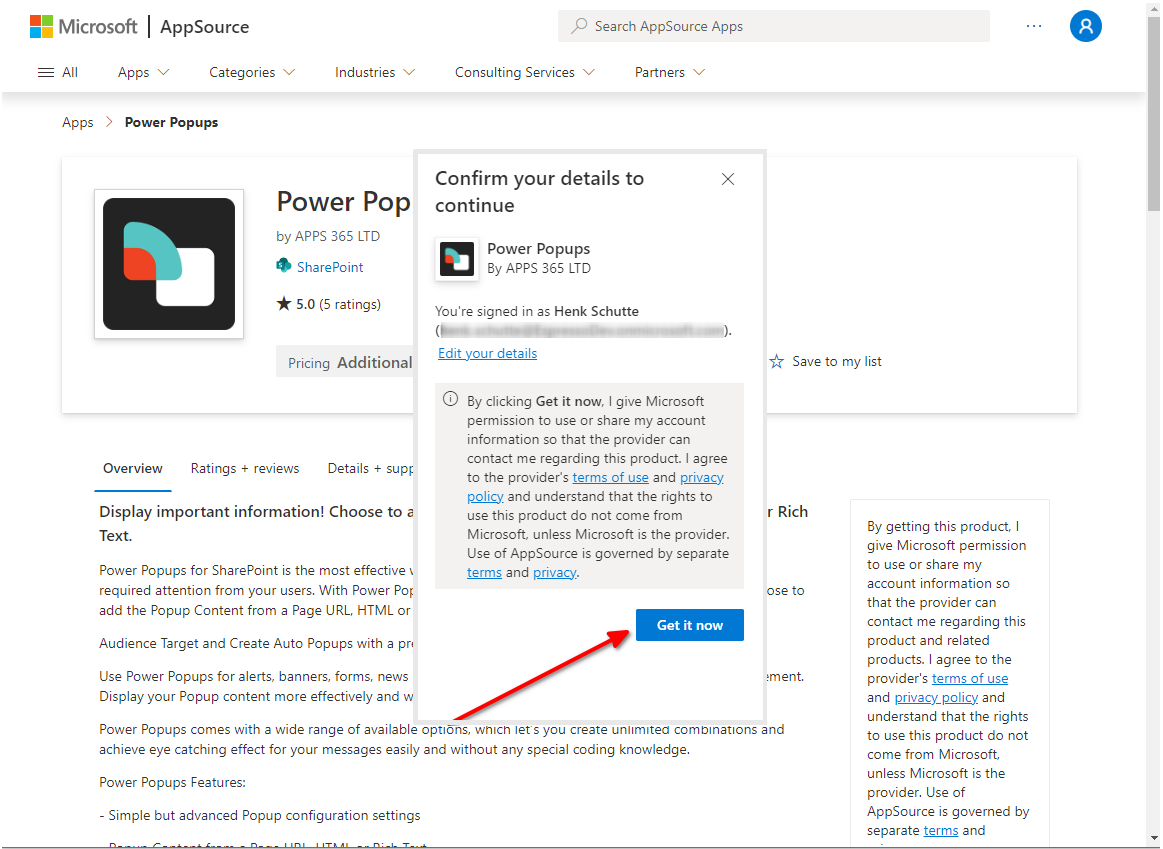
- Scroll down until you get the Power Popups app and click on Get it now.
- Confirm your details and click on Get it now to start installation.
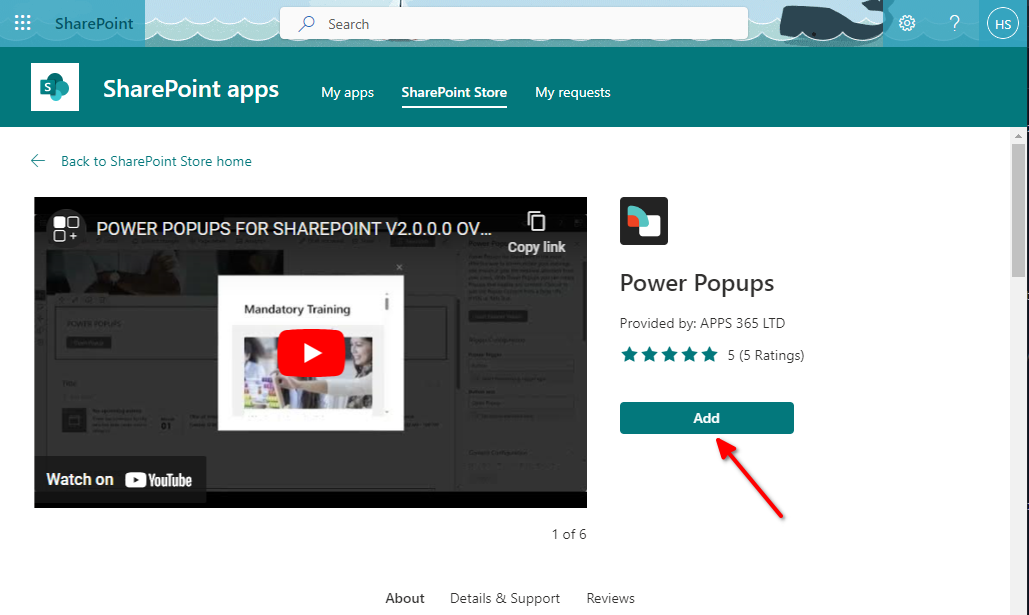
- The SharePoint Store will now be displayed. It also displays a video link where the popup is explained. Click on Add.
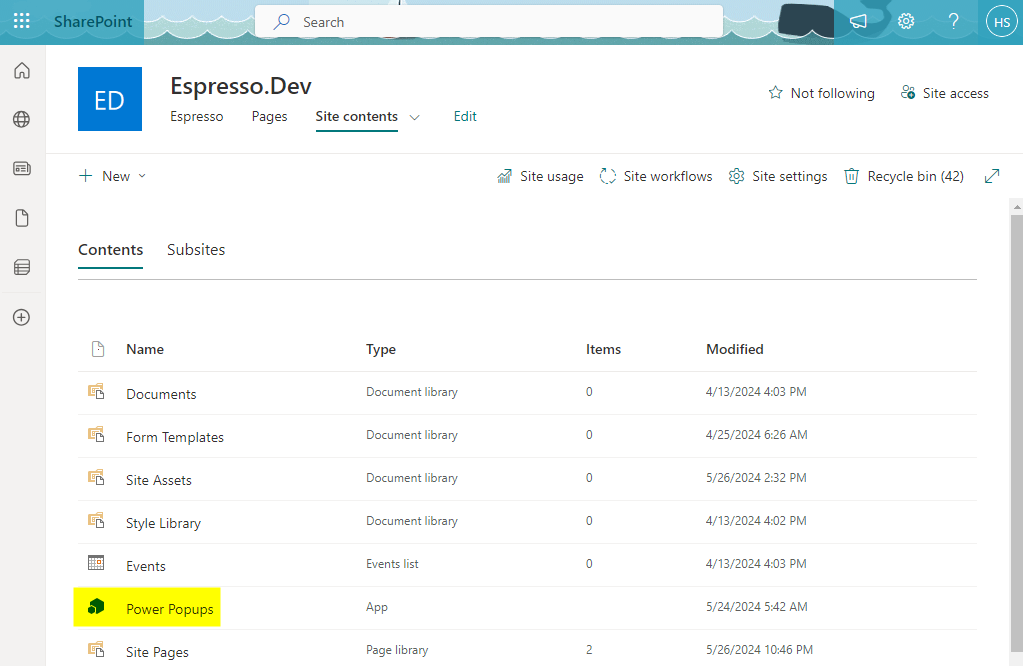
- The app (webpart) will then be added to the Apps site in SharePoint and will be visible under Site contents. It will be available as a webpart for your SharePoint website.
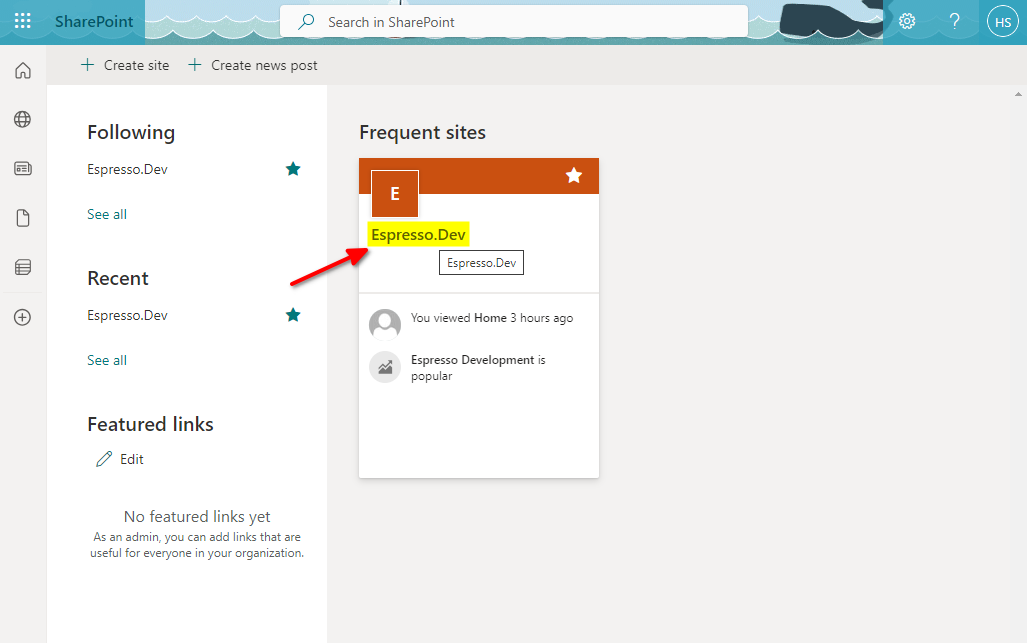
- On your SharePoint start page, select the website you want to work with.
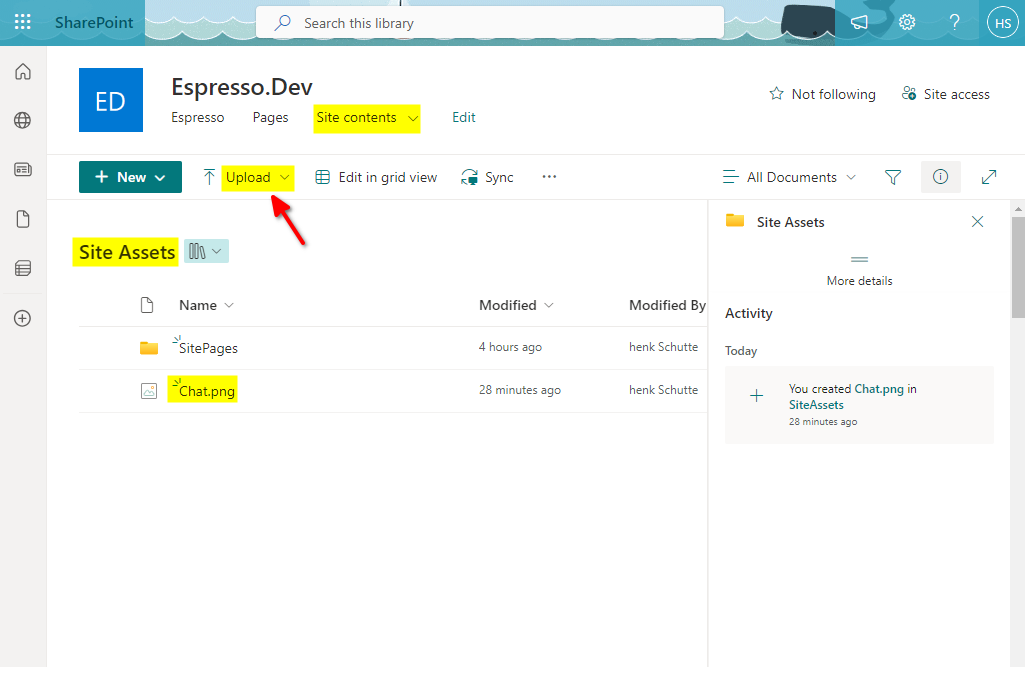
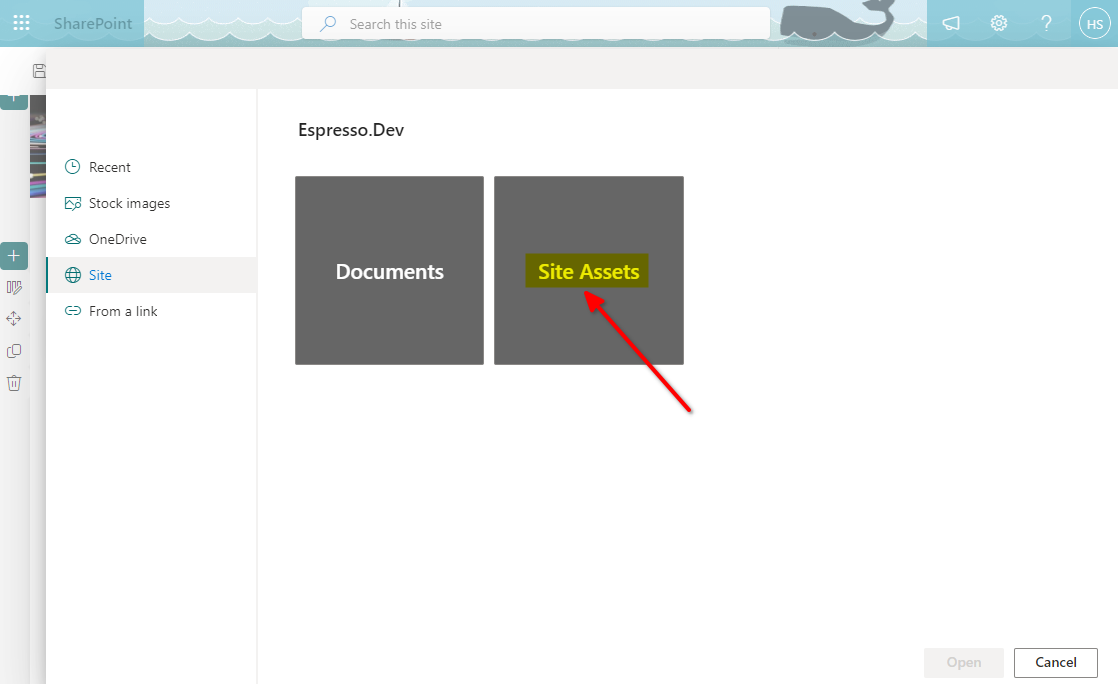
- If you want to add the popup trigger as an image you will have to add the image to the site library. You can add it to the site assets. You will find Site Assets under Site contents. Upload you image to Site Assets via the upload option.
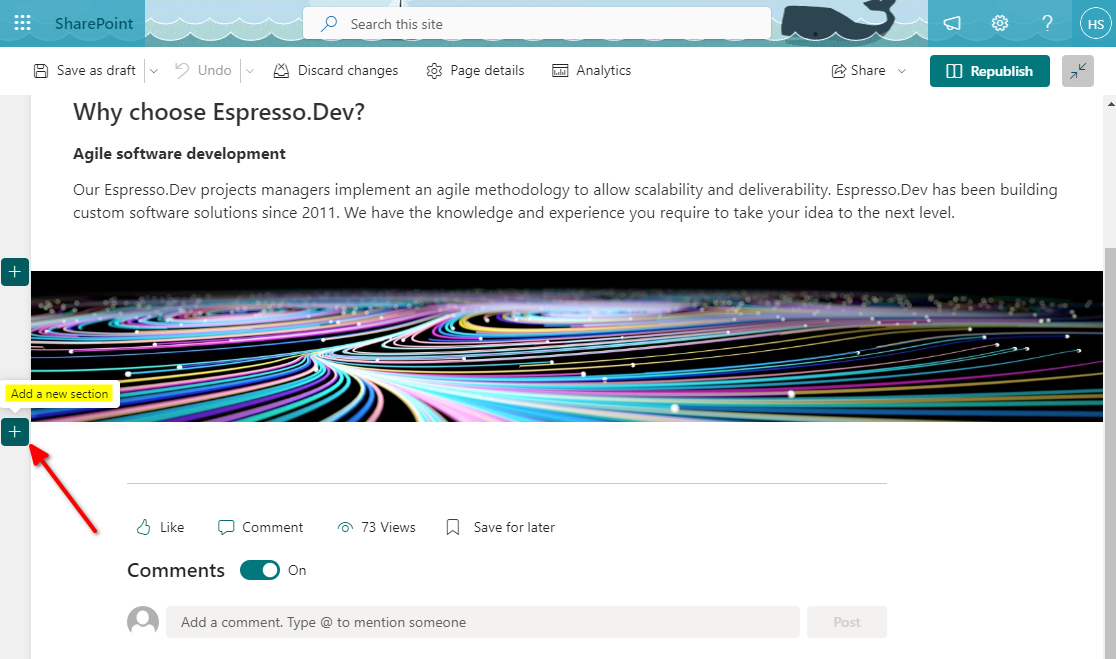
- Return to your website page and prepare the area you want to add the popup trigger to.
- Click on Edit to open the page in edit mode.

- Insert a new section just above the page footer.
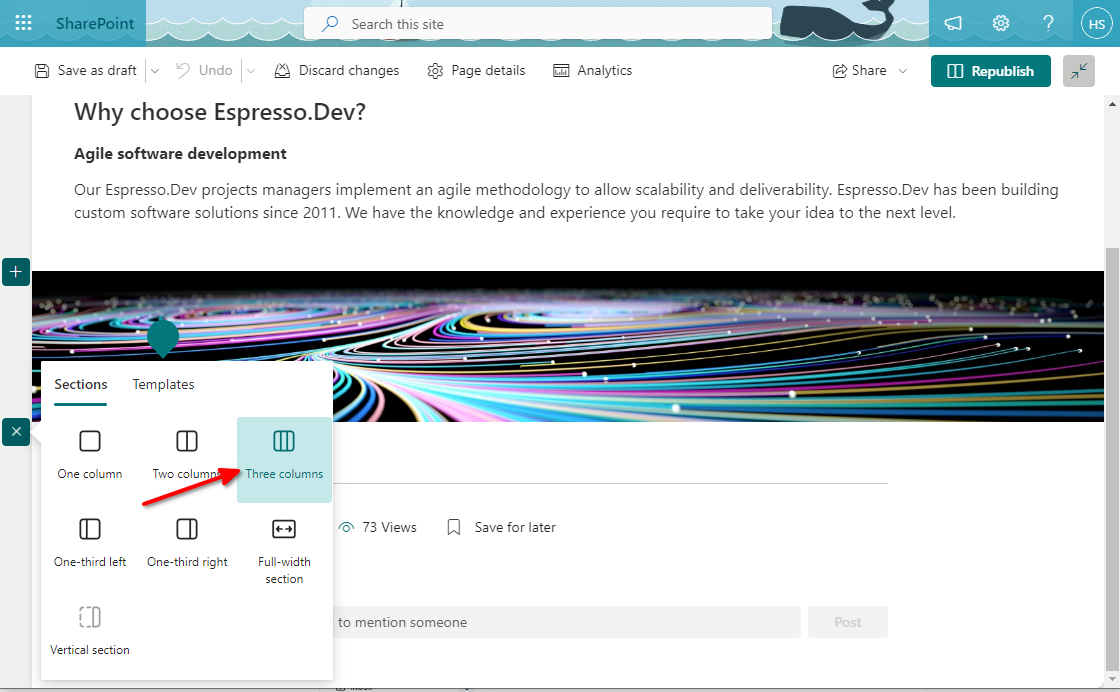
- Select a 3 column section. This will allow you to place the popup trigger left, center or right on the page.
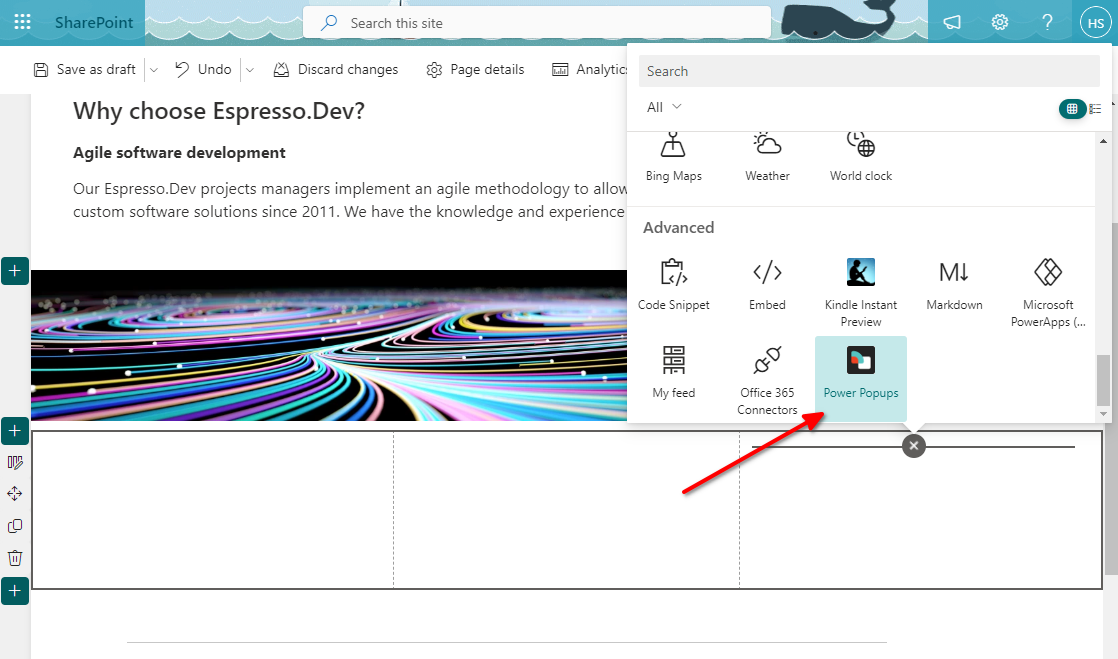
- Insert a webpart in the right most column.
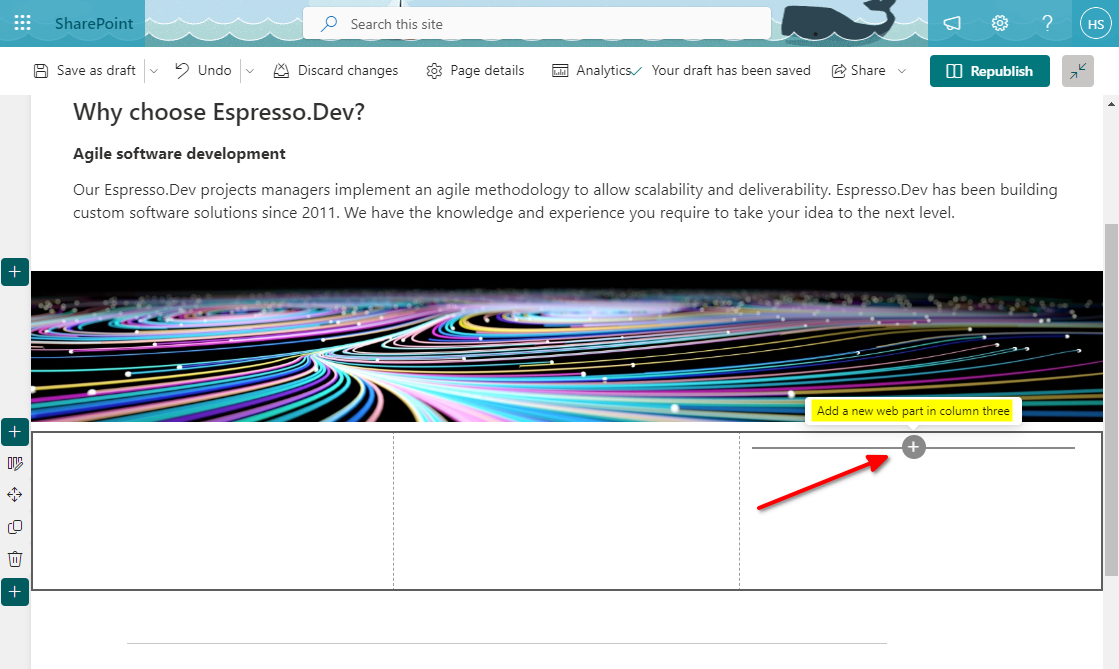
- Scroll down and select the Power Popups webpart.
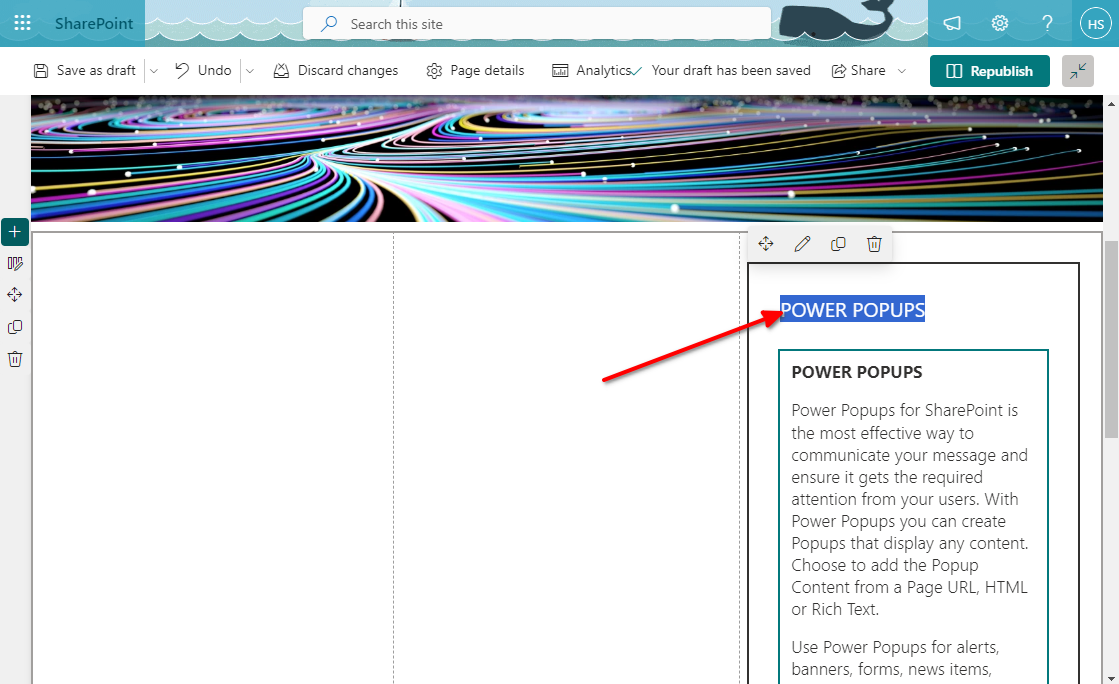
- Highlight and delete the webpart title. This will remove the additional title while displaying the popup trigger.
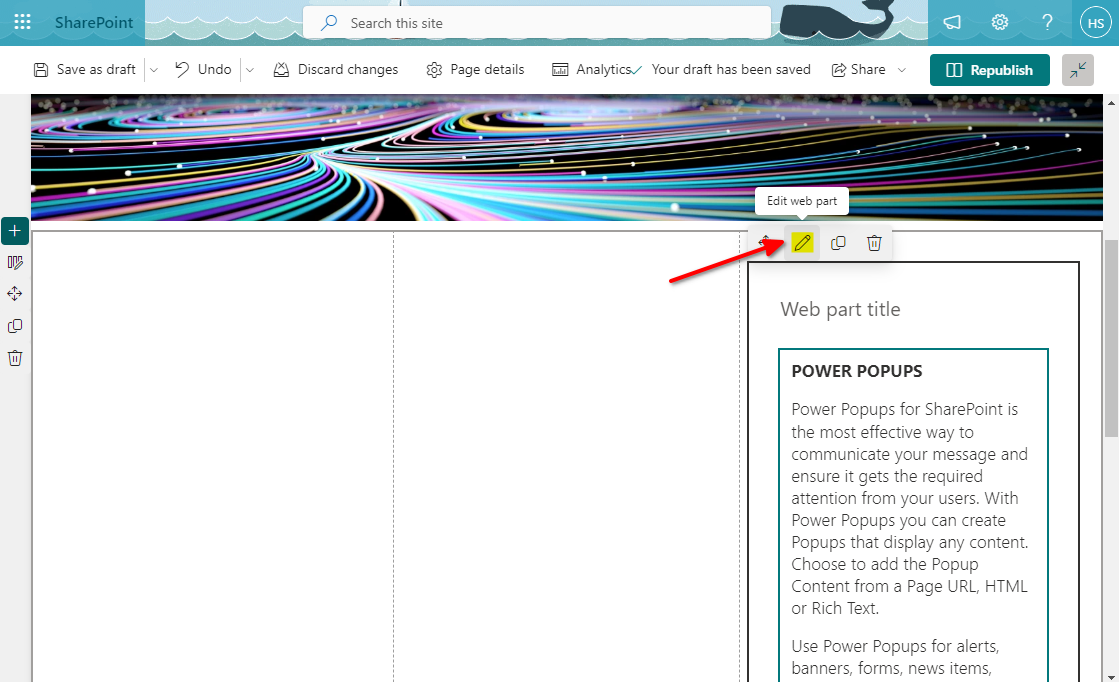
- Click on Edit web part.
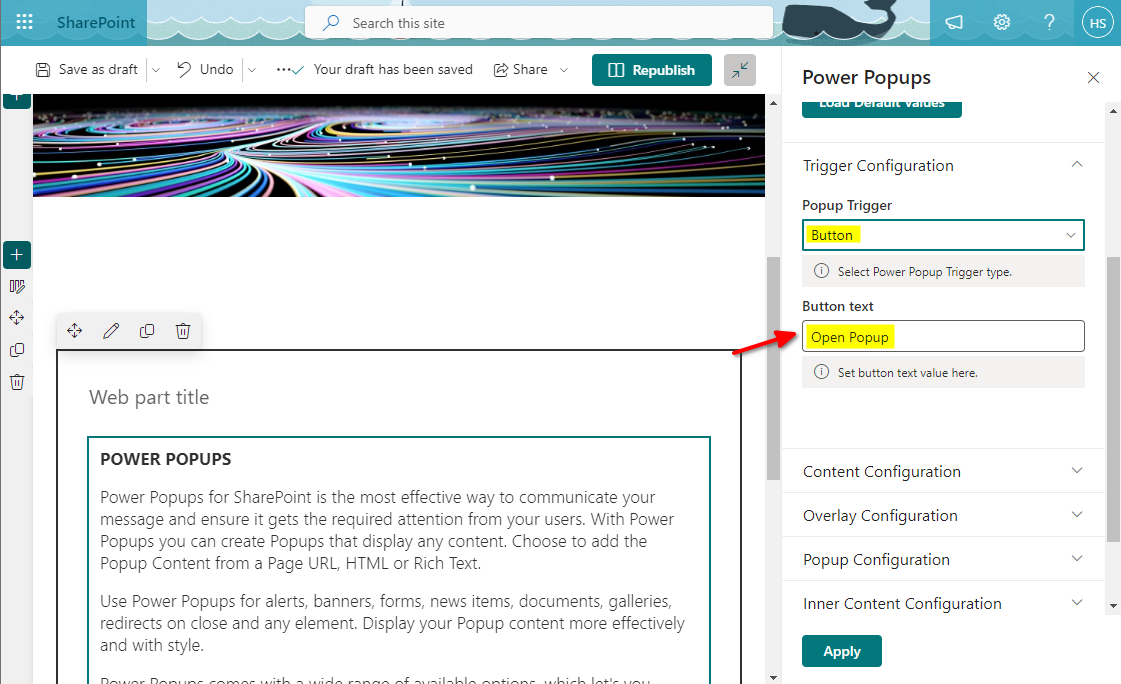
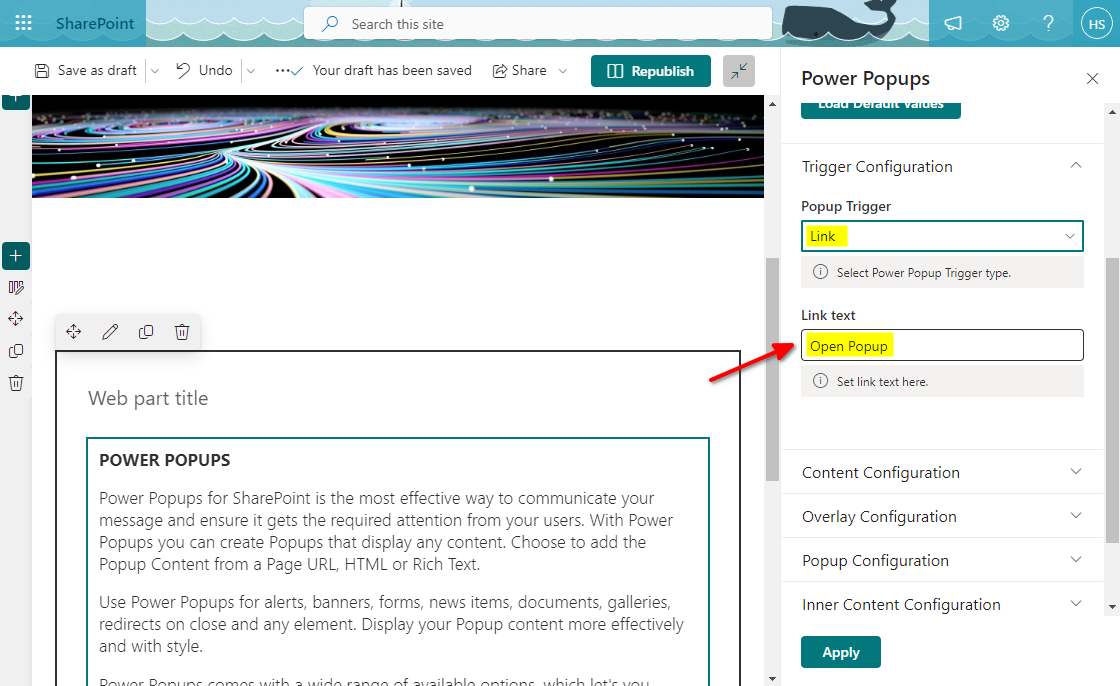
- We will now configure the popup web part. The following parts must be configured:
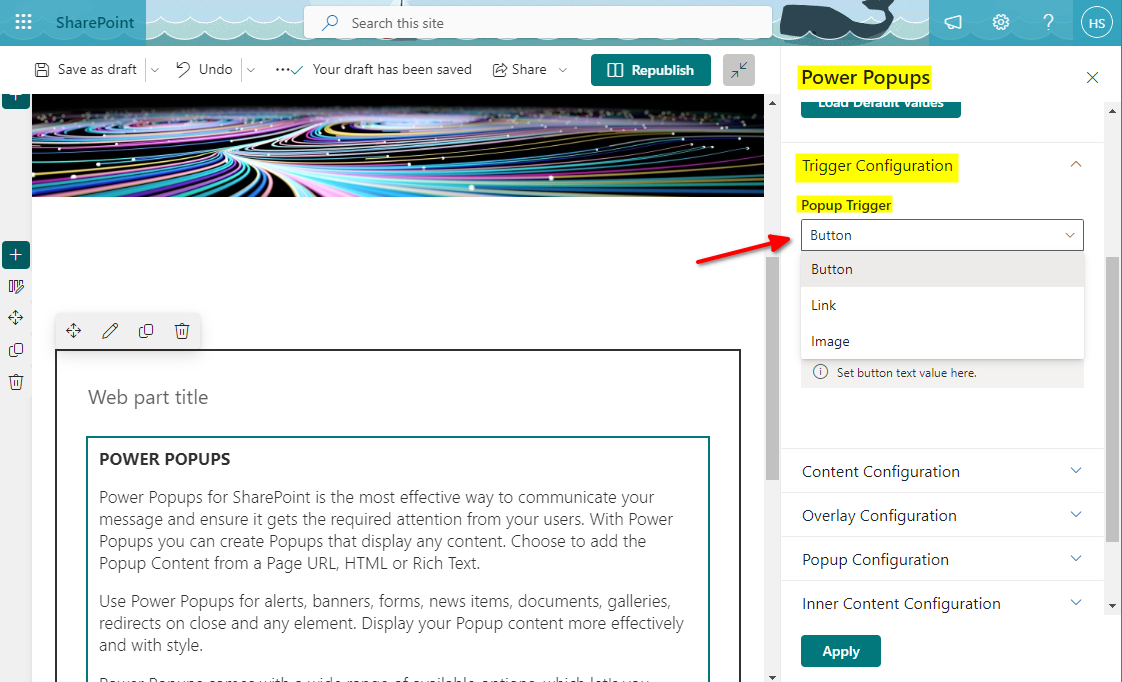
- Button setup.
- Link setup.
- Image Setup. For the image trigger we have to select the image as well.
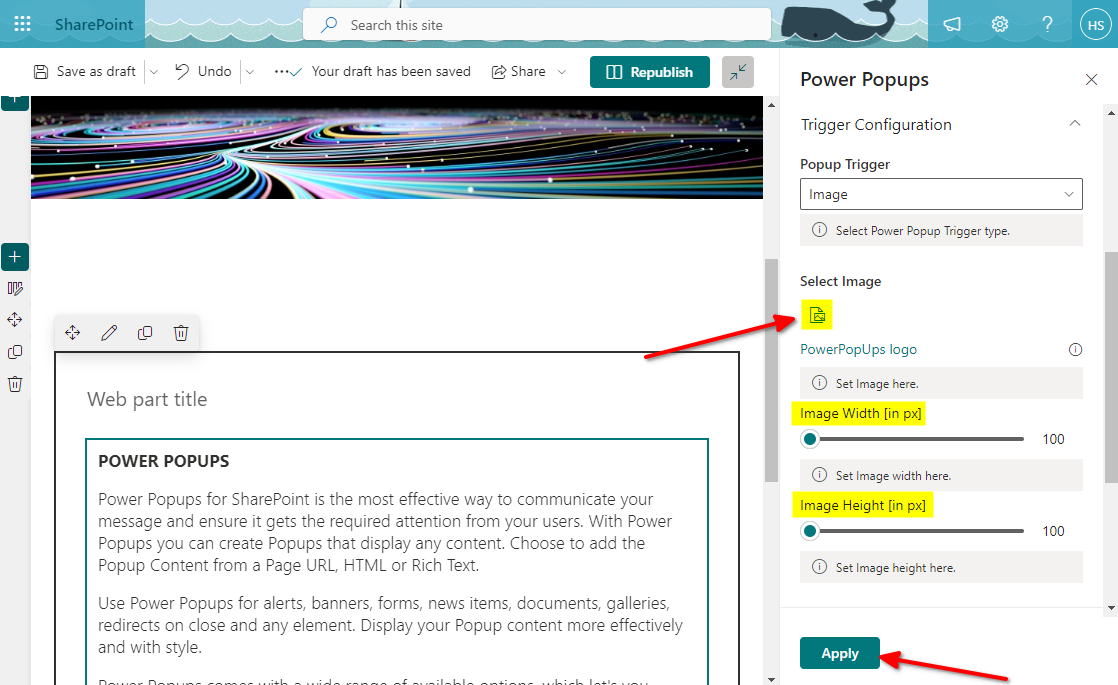
- Image selection (this is the image we added to the Site contents).
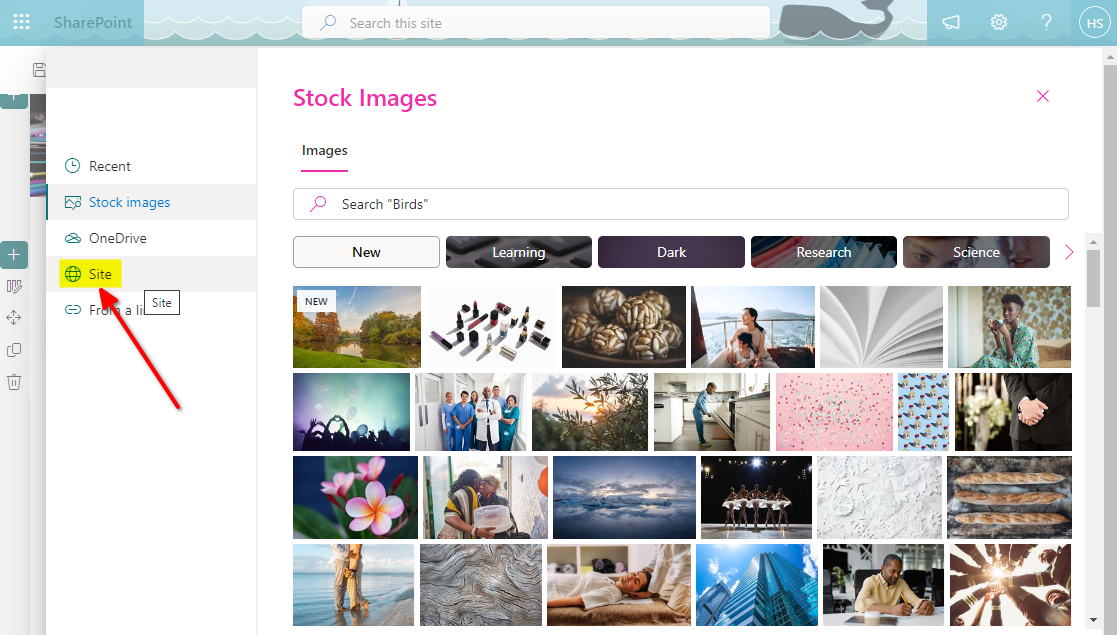 . Select Site Assets.
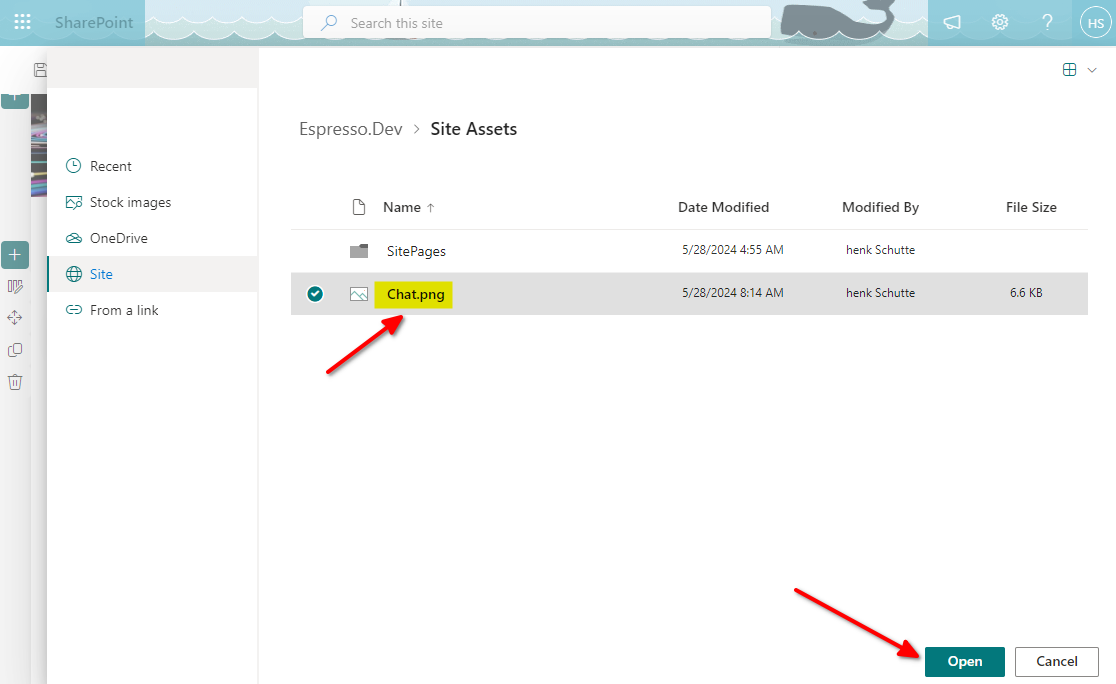
 . Select the image and click on Open.
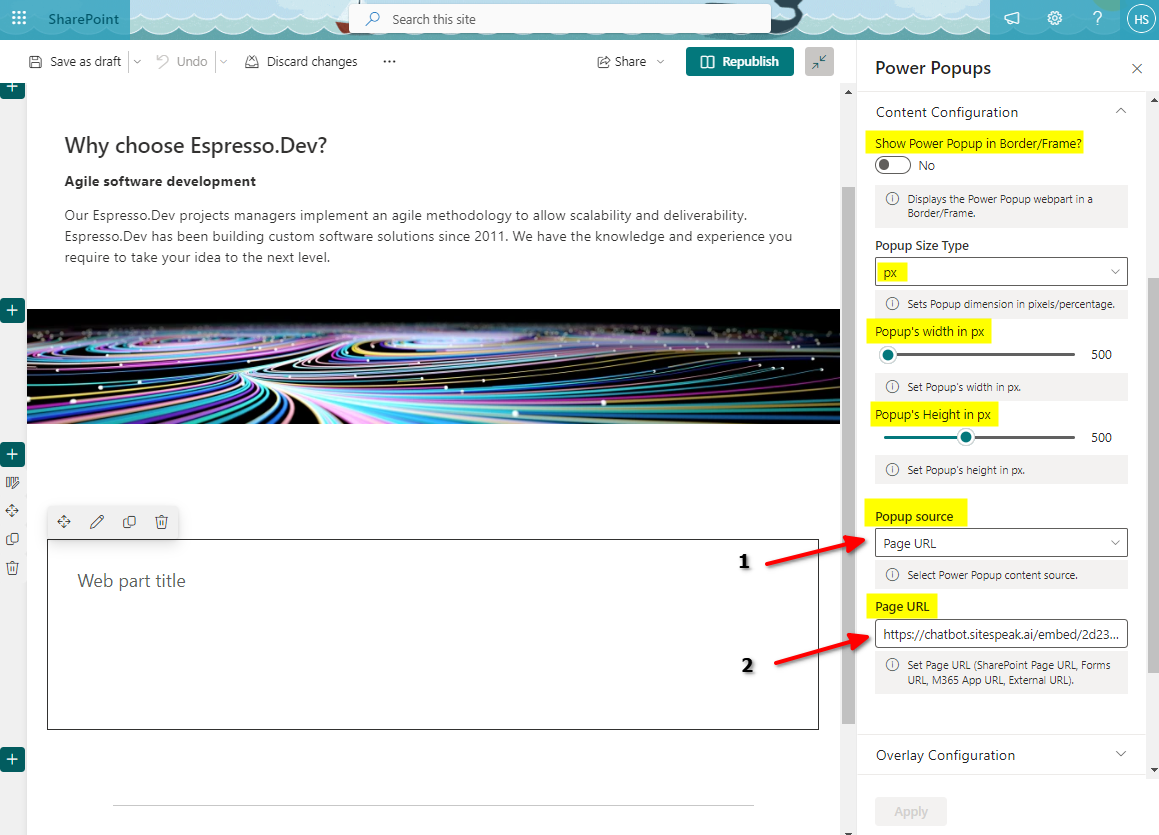
 b. Content Configuration. This configures how the popup trigger displays as well as the source of the popup. The popup source must be set to Page URL and for the Page URL you must enter the iFrame URL you copied from the AI support agent setup at the start of this tutorial.
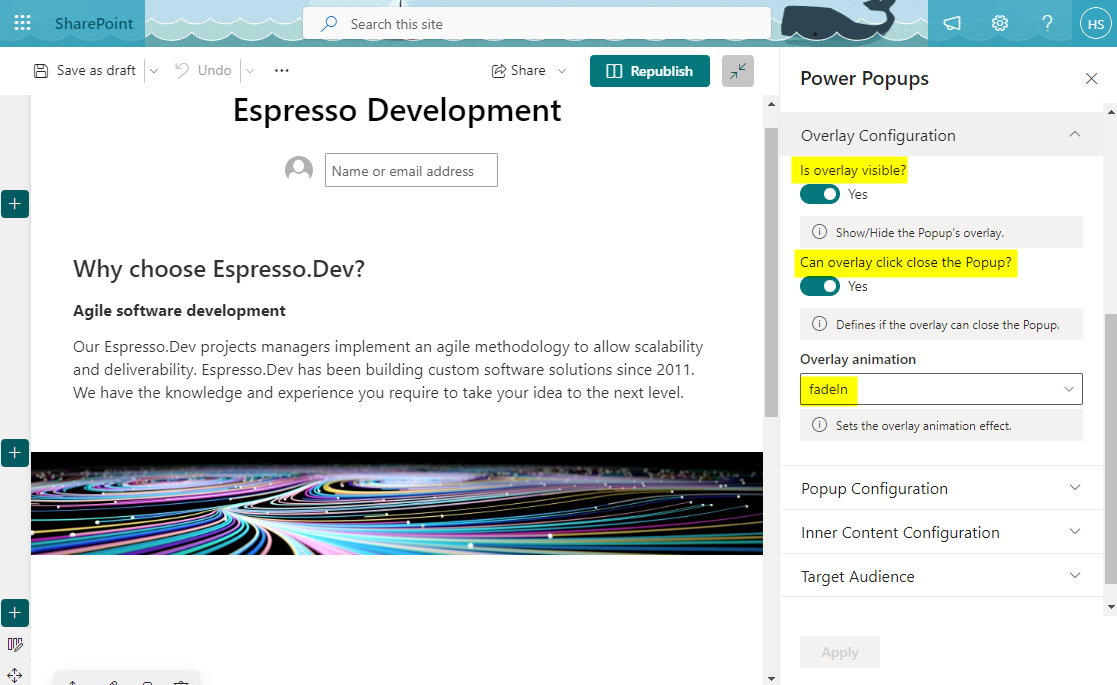
 c. Overlay Configuration.
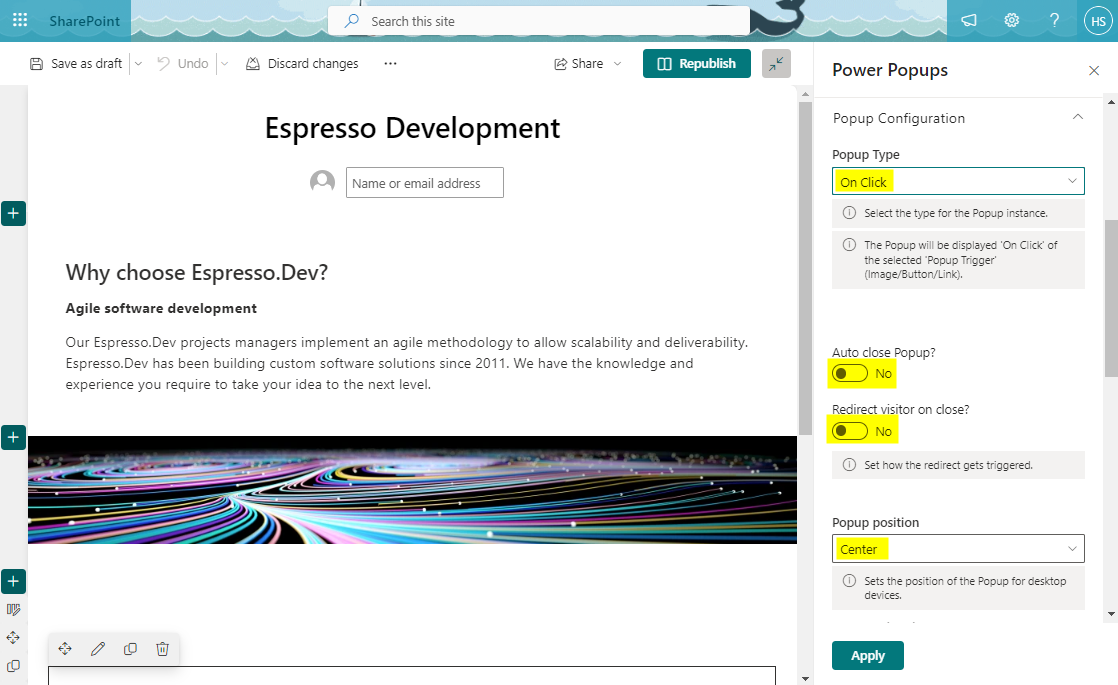
 d. Popup Configuration.
- Position can be left right or center, left, right, top left, top center, top right, bottom left, bottom center or bottom right).
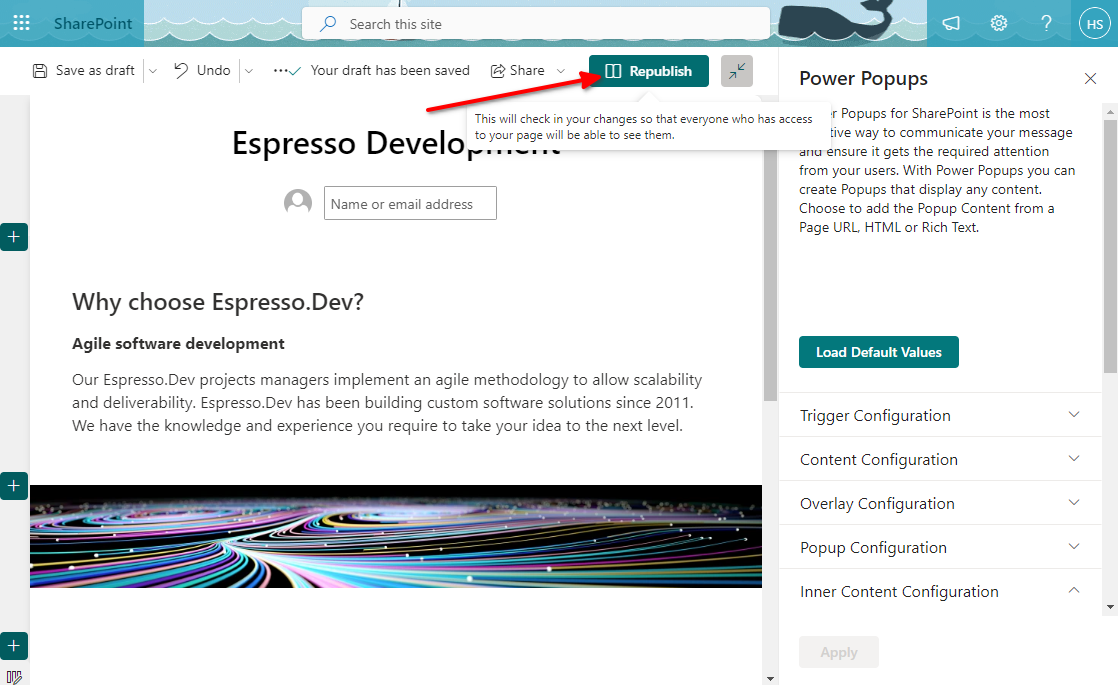
- Click on Apply.
- Click on Publish (or RePublish if you have Published the page before).
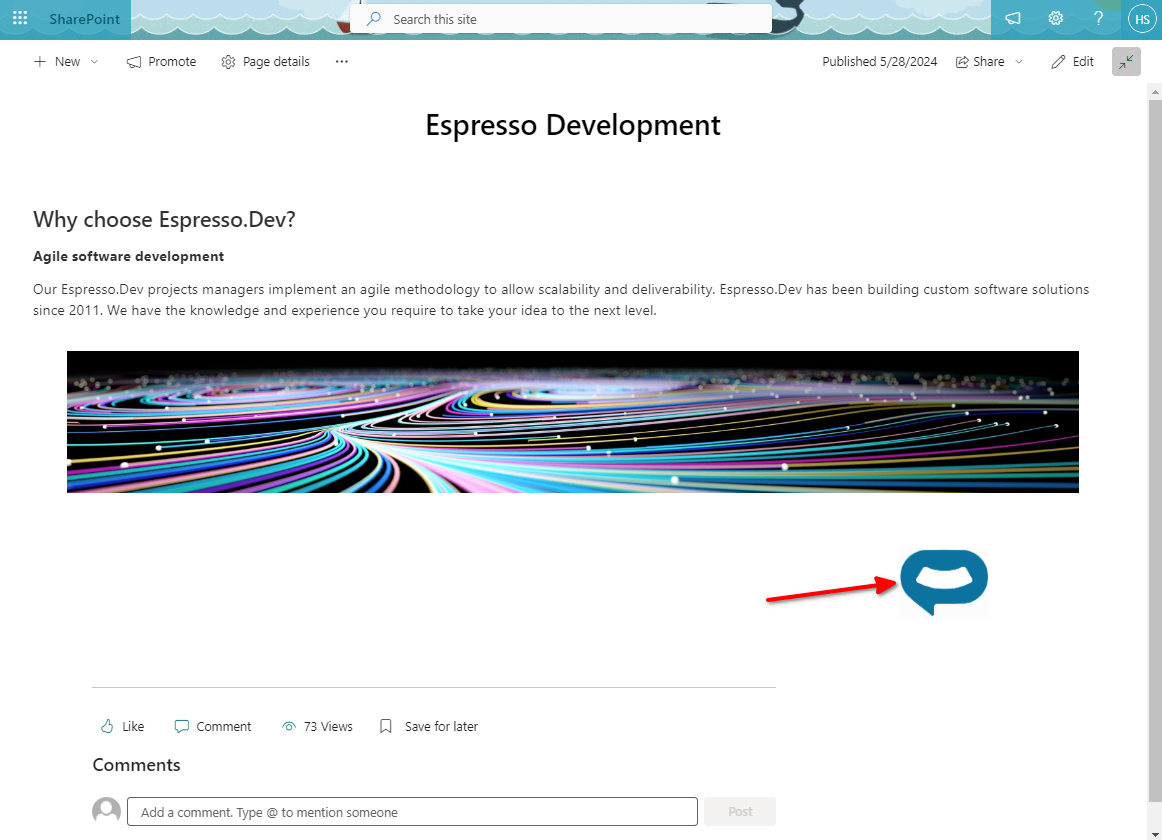
- Your AI support agent button will now display on the page.
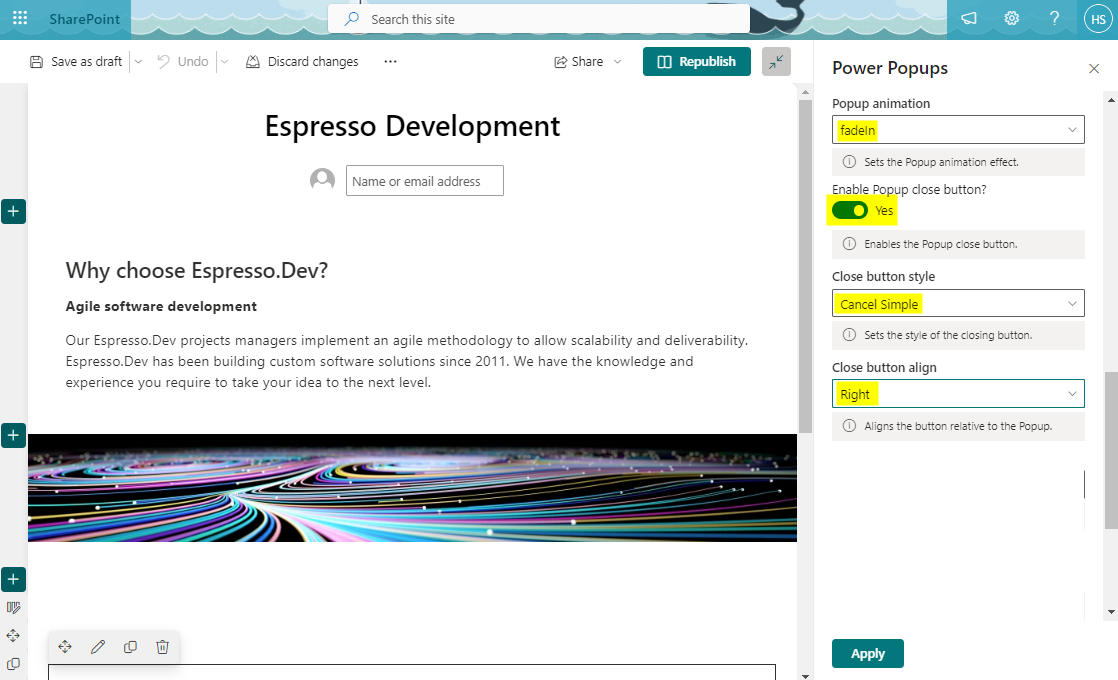
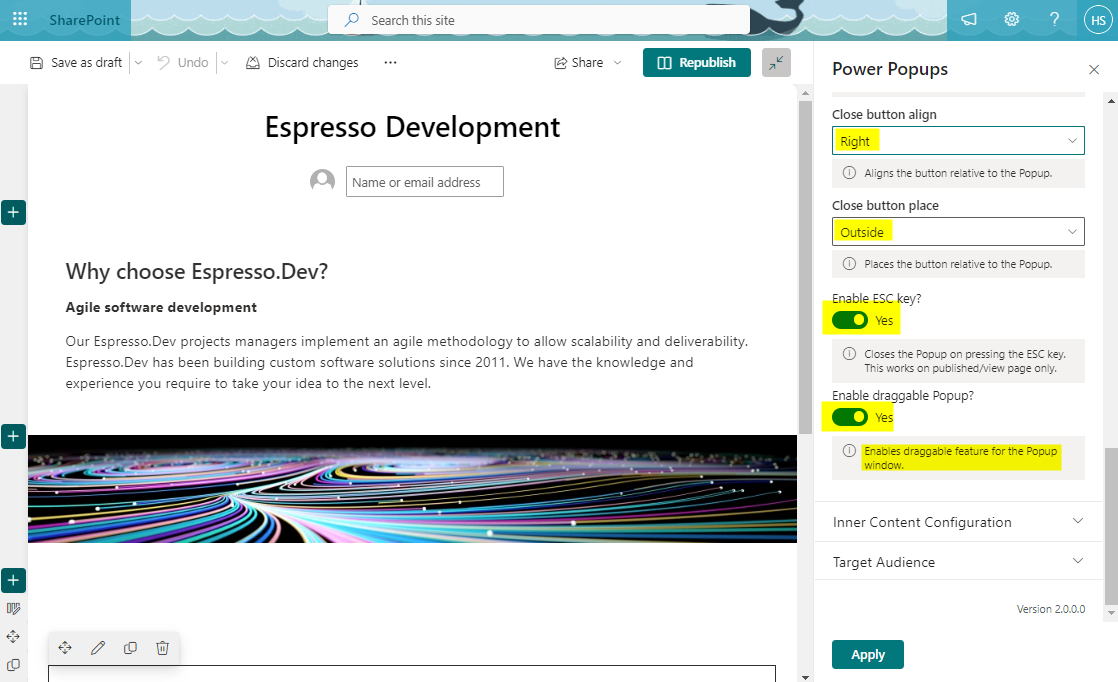
- If you click on the button it will display your AI support agent dialogue. To close click on the X. You can also close it by pressing ESC if you have set it up in the configuration.
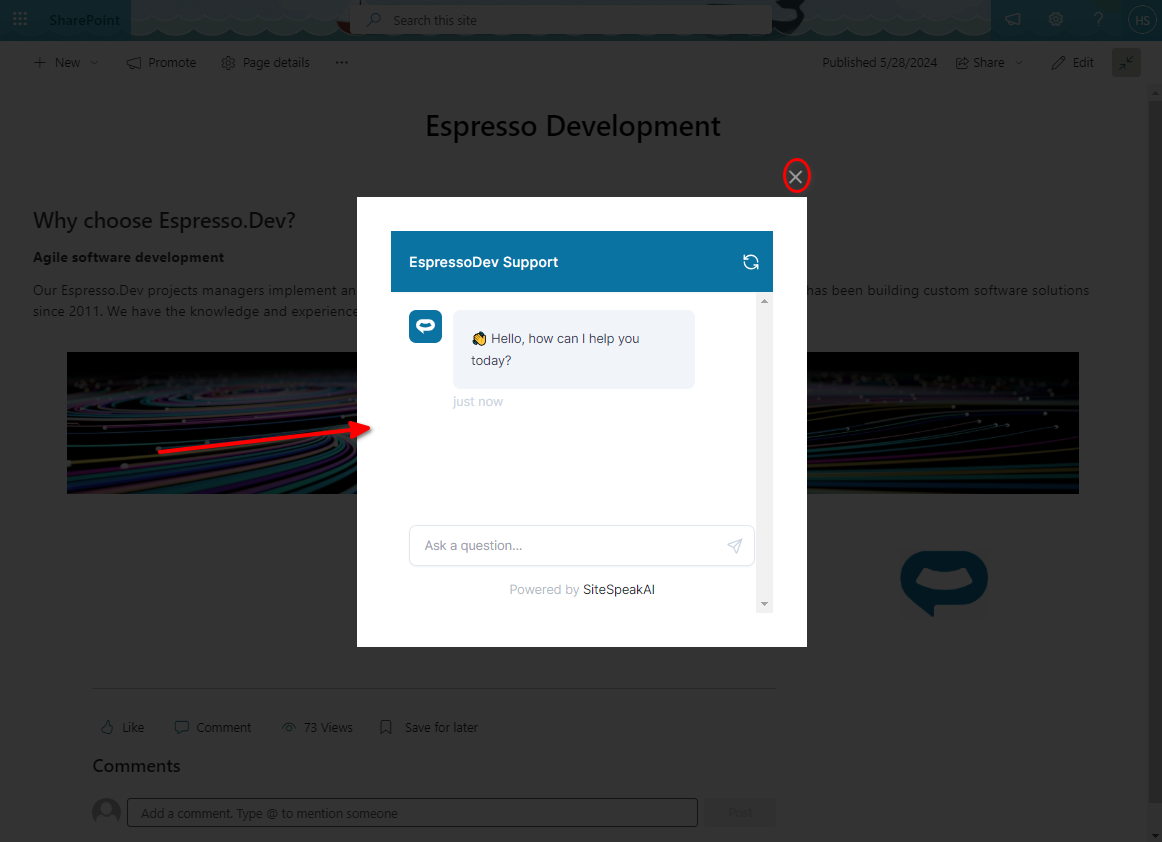
- That’s it, your AI support agent is now added to your SharePoint website and your customers can start interacting with it!
Ready to automate your customer service with AI?
Join over 1000+ businesses, websites and startups automating their customer service and other tasks with a custom trained AI agent.