

Video transcript
Video transcript
Your customers use Telegram every day. They send the same questions again and again.A SiteSpeak AI agent can answer these questions in Telegram, at any time. It works in a private chat and in a group. This video shows how to make the agent, create a Telegram bot, and connect them.Step 1. Make the agent. Log in to SiteSpeak. Type a name for your agent. Type the URL of your website. SiteSpeak finds your pages and selects the main pages for you. Click Save and Continue. SiteSpeak trains the agent on these pages. This takes a few minutes.Step 2. Create a Telegram bot. In Telegram, open a chat with BotFather. BotFather is the Telegram bot that makes other bots. Send the command: new bot. Type a name for your bot. Your customers see this name. Type a username for your bot. The username must end in bot. For example: northwind support bot. BotFather sends you an access token. Copy the token, and keep it secret.Step 3. Connect the bot to your agent. In SiteSpeak, open Install Agent, and select Telegram. Paste the token in Telegram Bot Access Token. Click Connect.Step 4. Test the bot. In Telegram, open a chat with your bot. Send the command: start. The bot replies with your Welcome Message. Ask a question that your customers ask. The agent answers from your content, in the Telegram chat.Step 5. Add the bot to a group. In BotFather, send the command: my bots. Then select your bot. Select Bot Settings, then Group Privacy, and turn it off. Add the bot to your group. In the group, type the username of the bot, and then your question. The agent answers. The agent also answers when you reply to one of its messages. It does not answer the other messages in the group.Step 6. Read the conversations. In SiteSpeak, open the Inbox. You can read each Telegram conversation there.Step 7. Make the answers better. Open the Dashboard, and look at Top Unanswered Questions. For each question, add the missing information. Or add an Updated Answer.Telegram is available on all plans, also on the free plan. You can start with a free plan at sitespeak.ai.
/newbot command and following the steps until you’re given a new token.
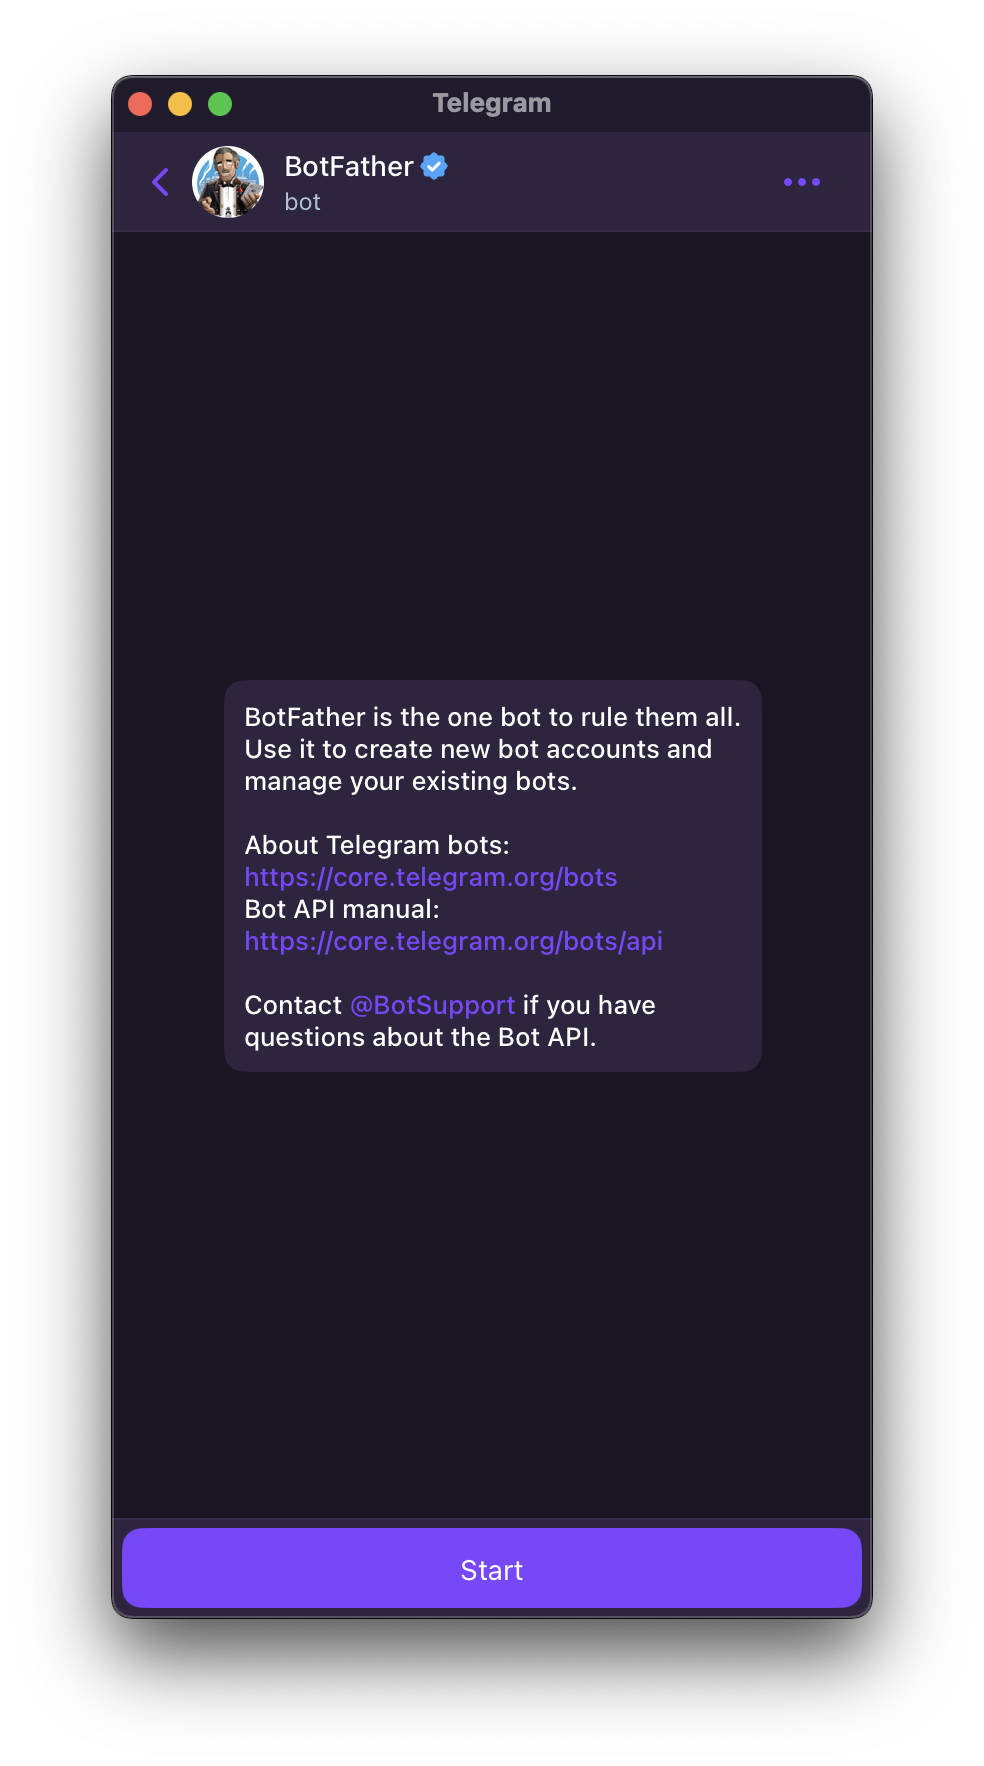 After clicking Start you’ll get a message that details all the commands available to create and manage your bot. The only one we’re interested in is the
 /newbot command for now.
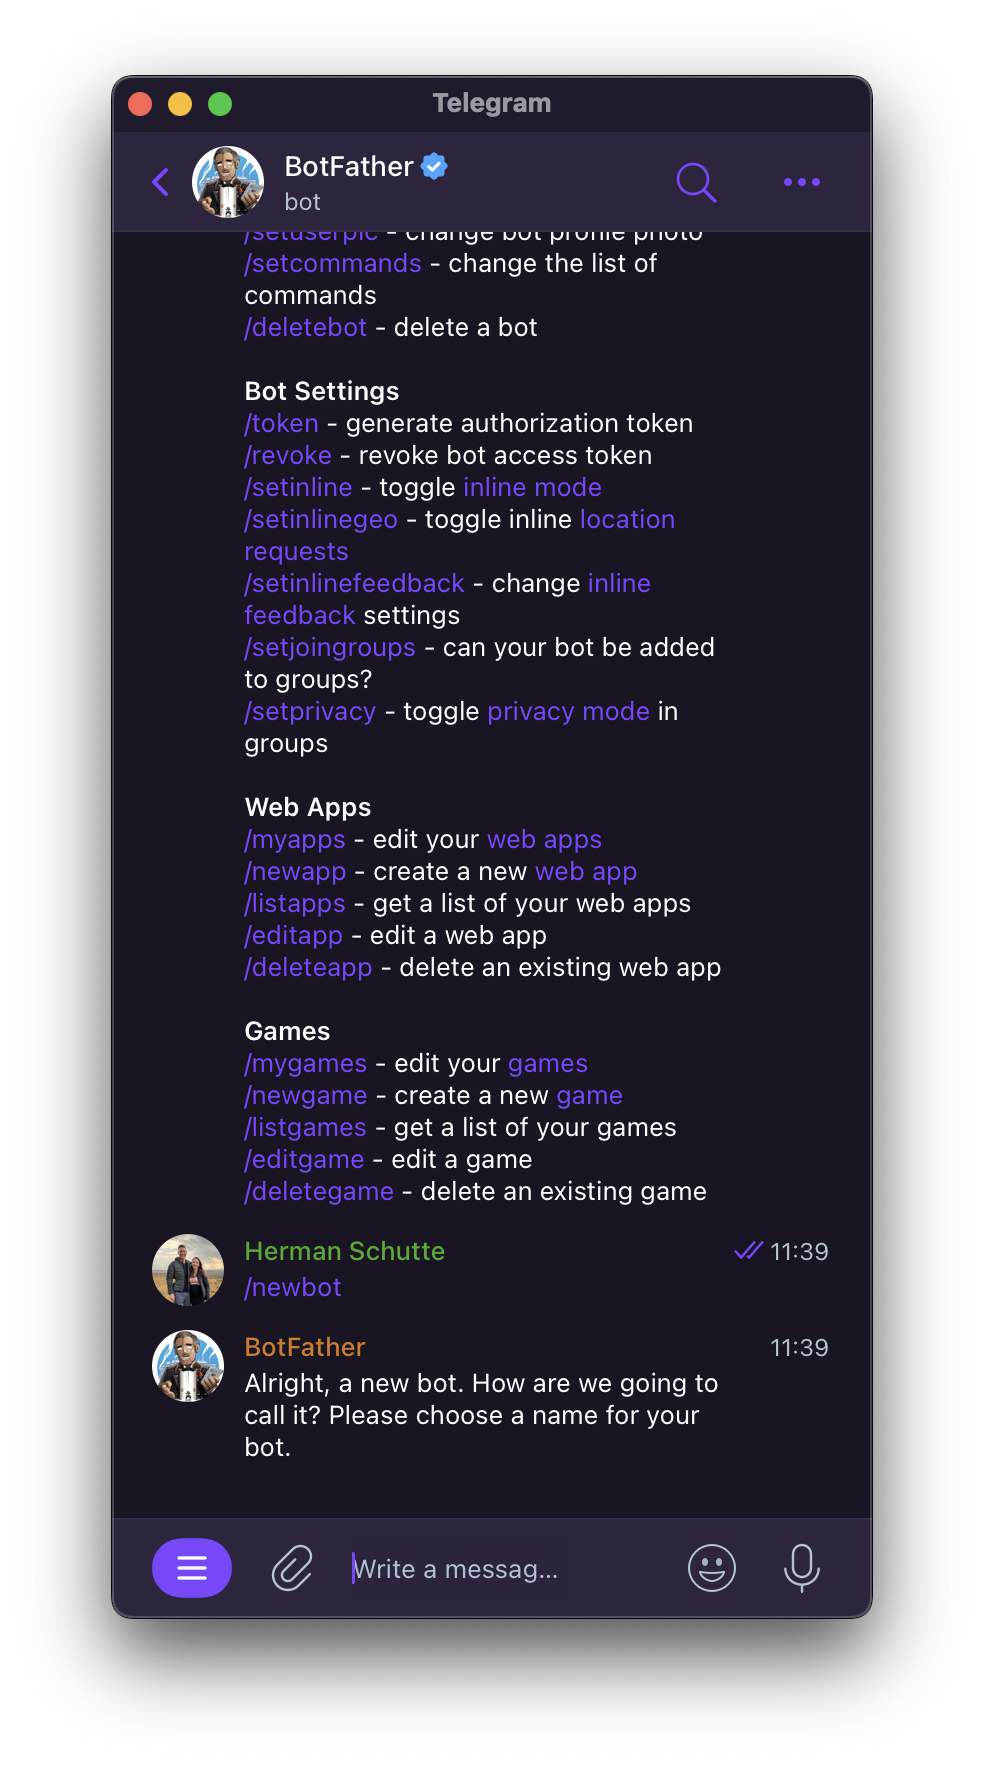 Enter a name for your bot, as well as a username. Make sure you use something that represents your business or AI support agent since this is what your visitors will see.
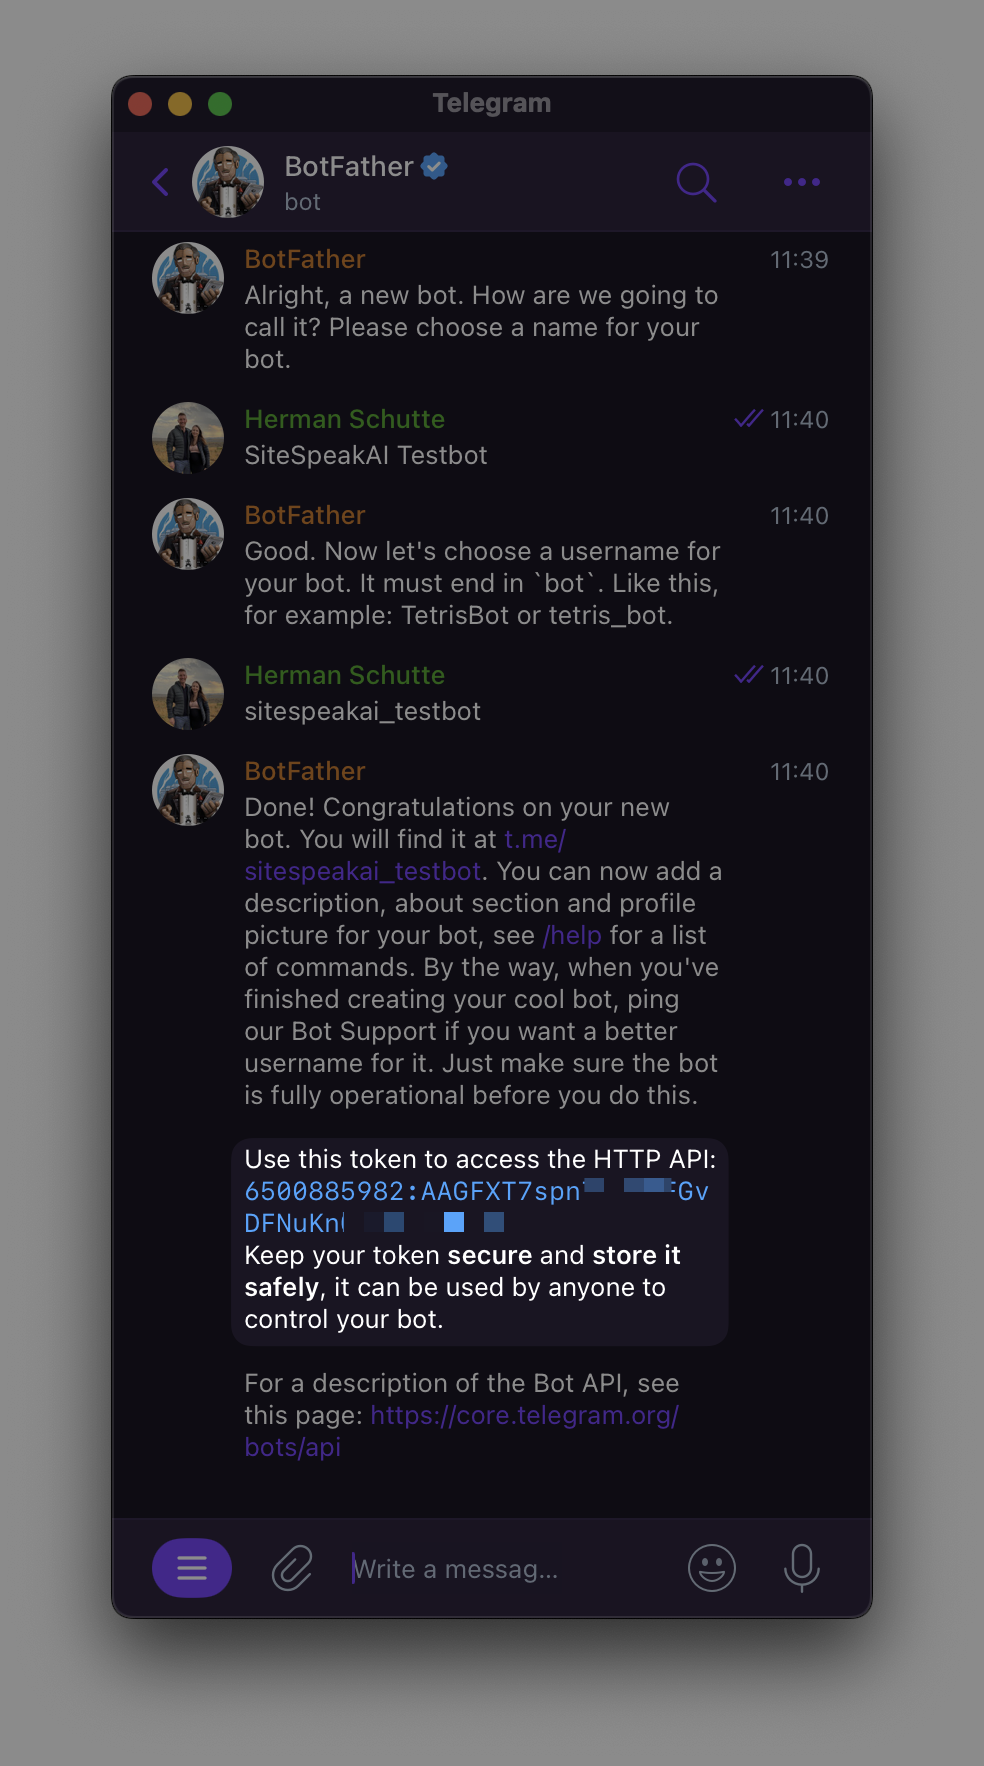 Once you’re bot is created, you’ll need to copy the bot token. The bot token will be in the format of:
 123456:ABCD....
You’ll also need the Telegram link to your bot which will be in the format of: t.me/your_bot_username. You’ll use this to start chatting to your bot in Telegram.
Now head over to SiteSpeakAI to connect your customer support AI support agent to your Telegram bot.
After selecting your AI support agent in SiteSpeakAI, go to Install Agent -> Telegram and enter the bot token you got from @BotFather.
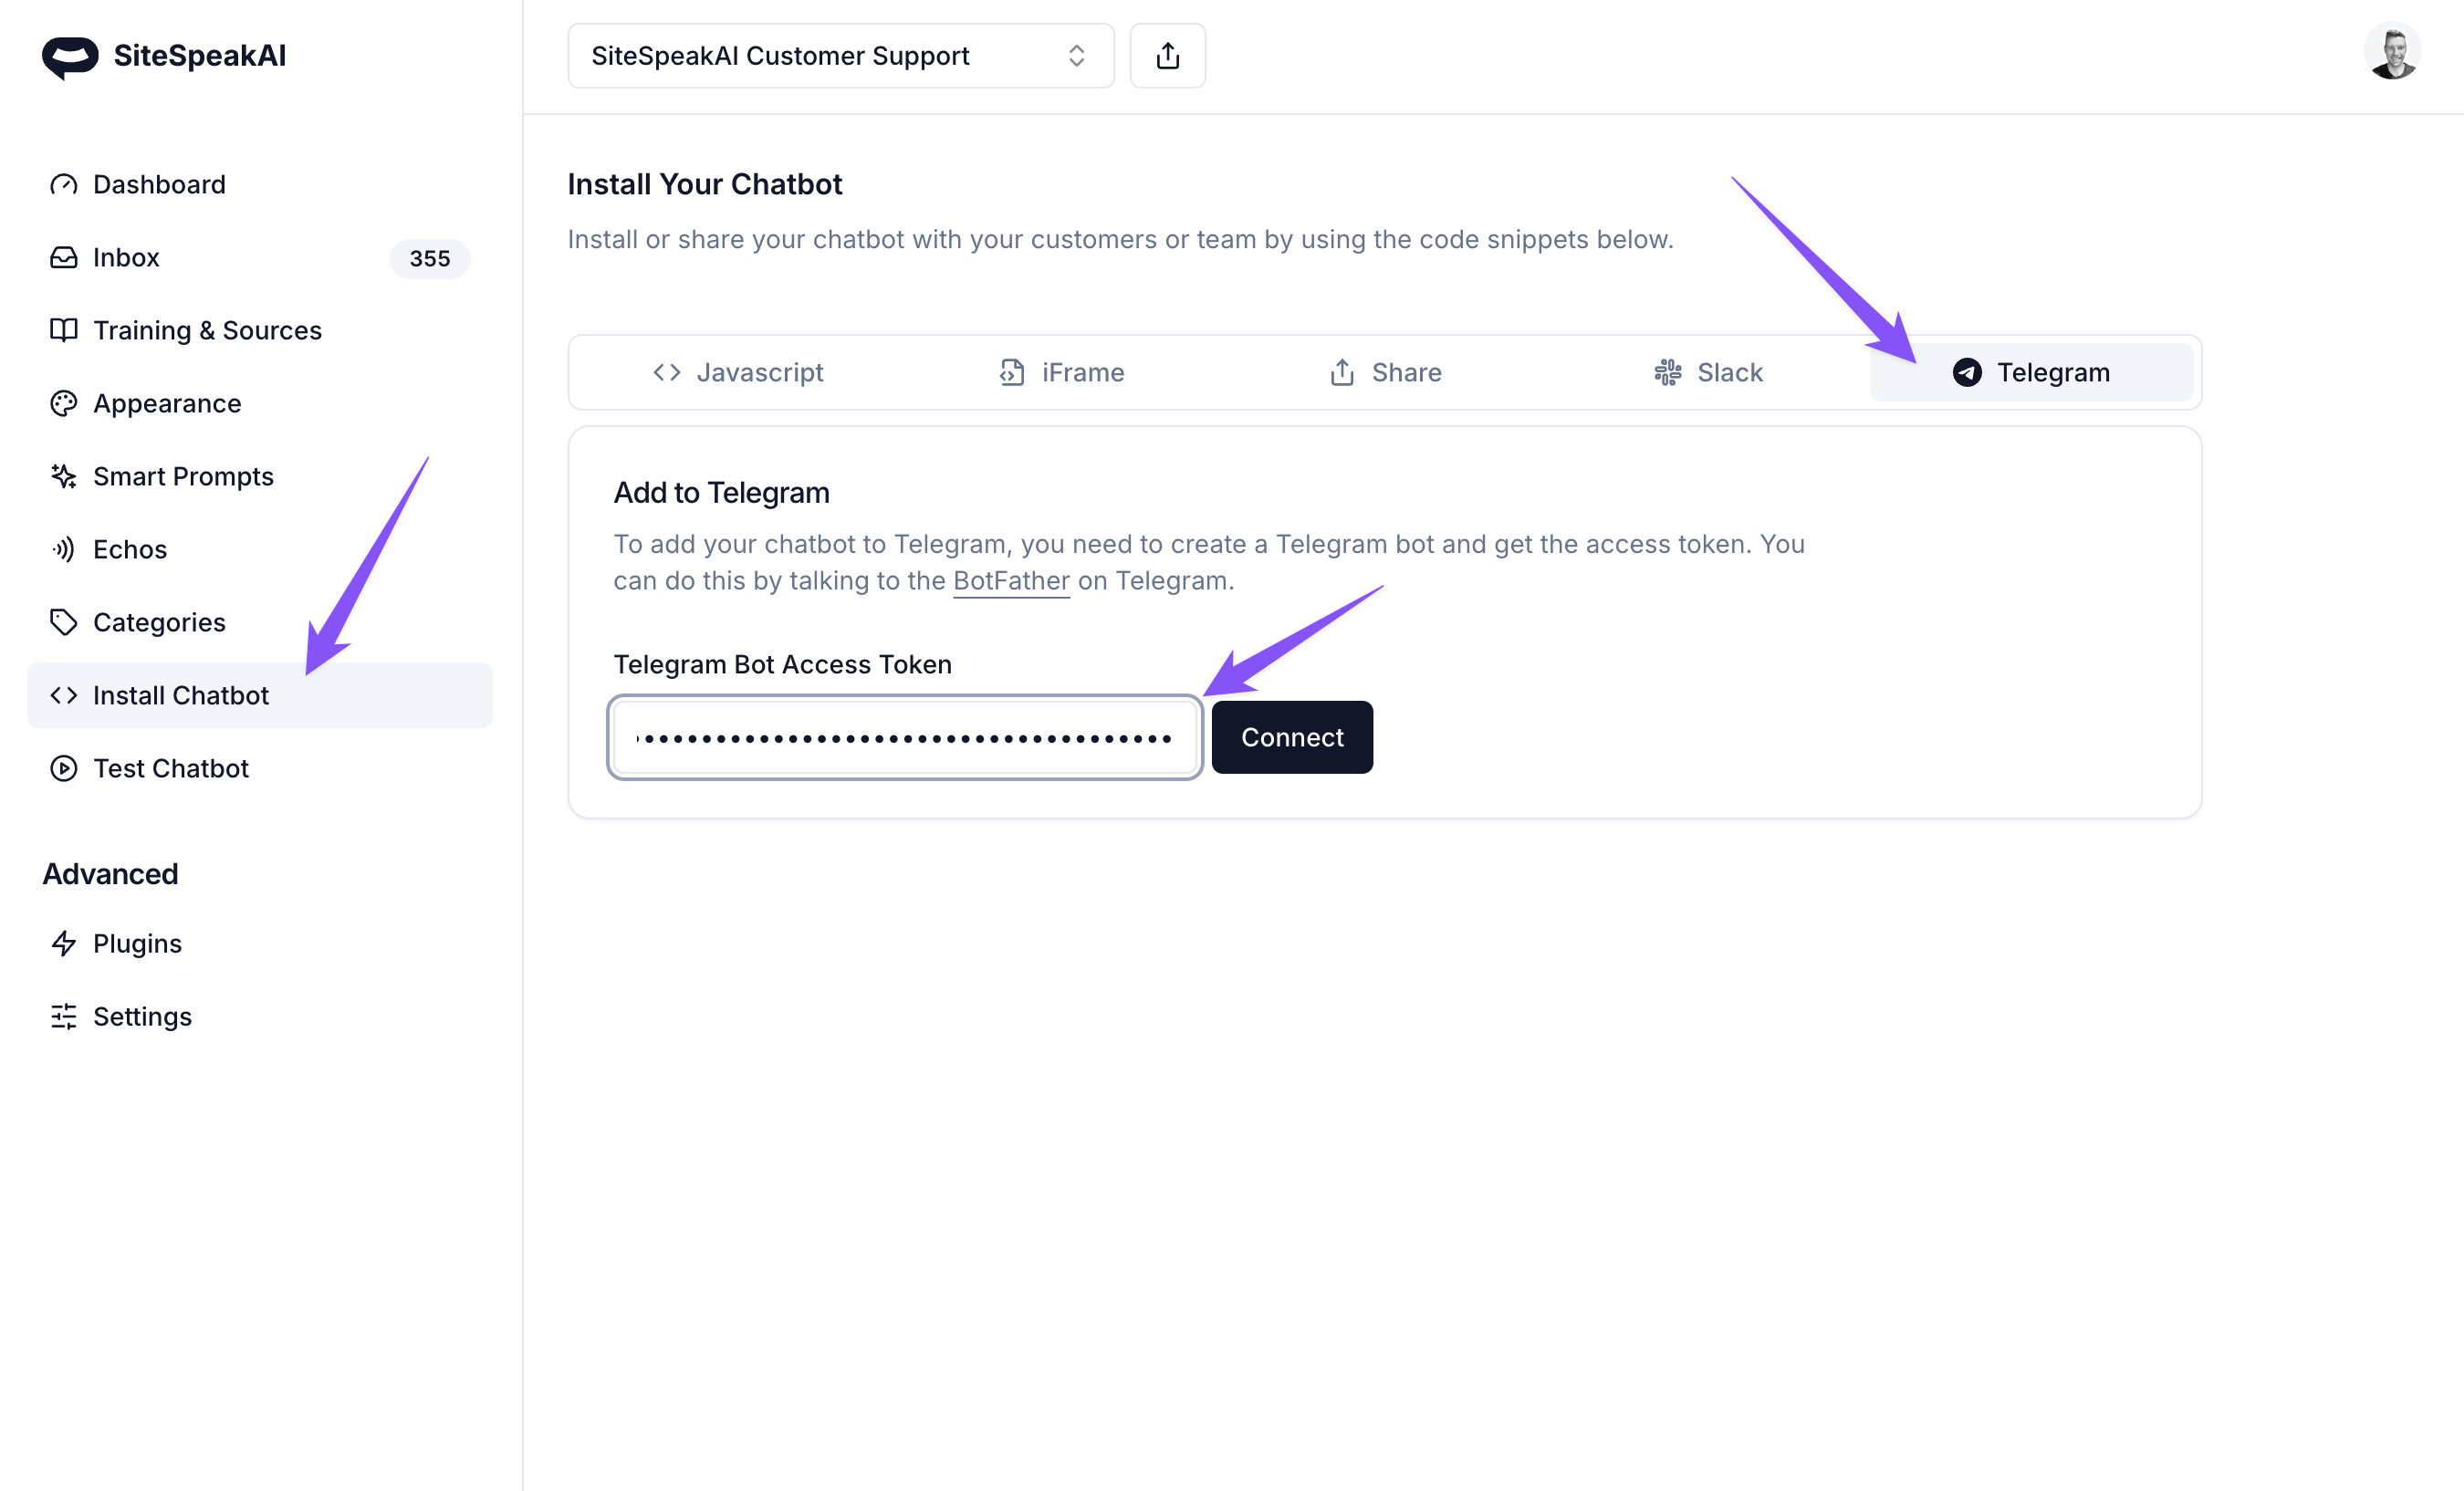 Click Connect to connect your AI support agent and configure the basic settings for your Telegram bot.
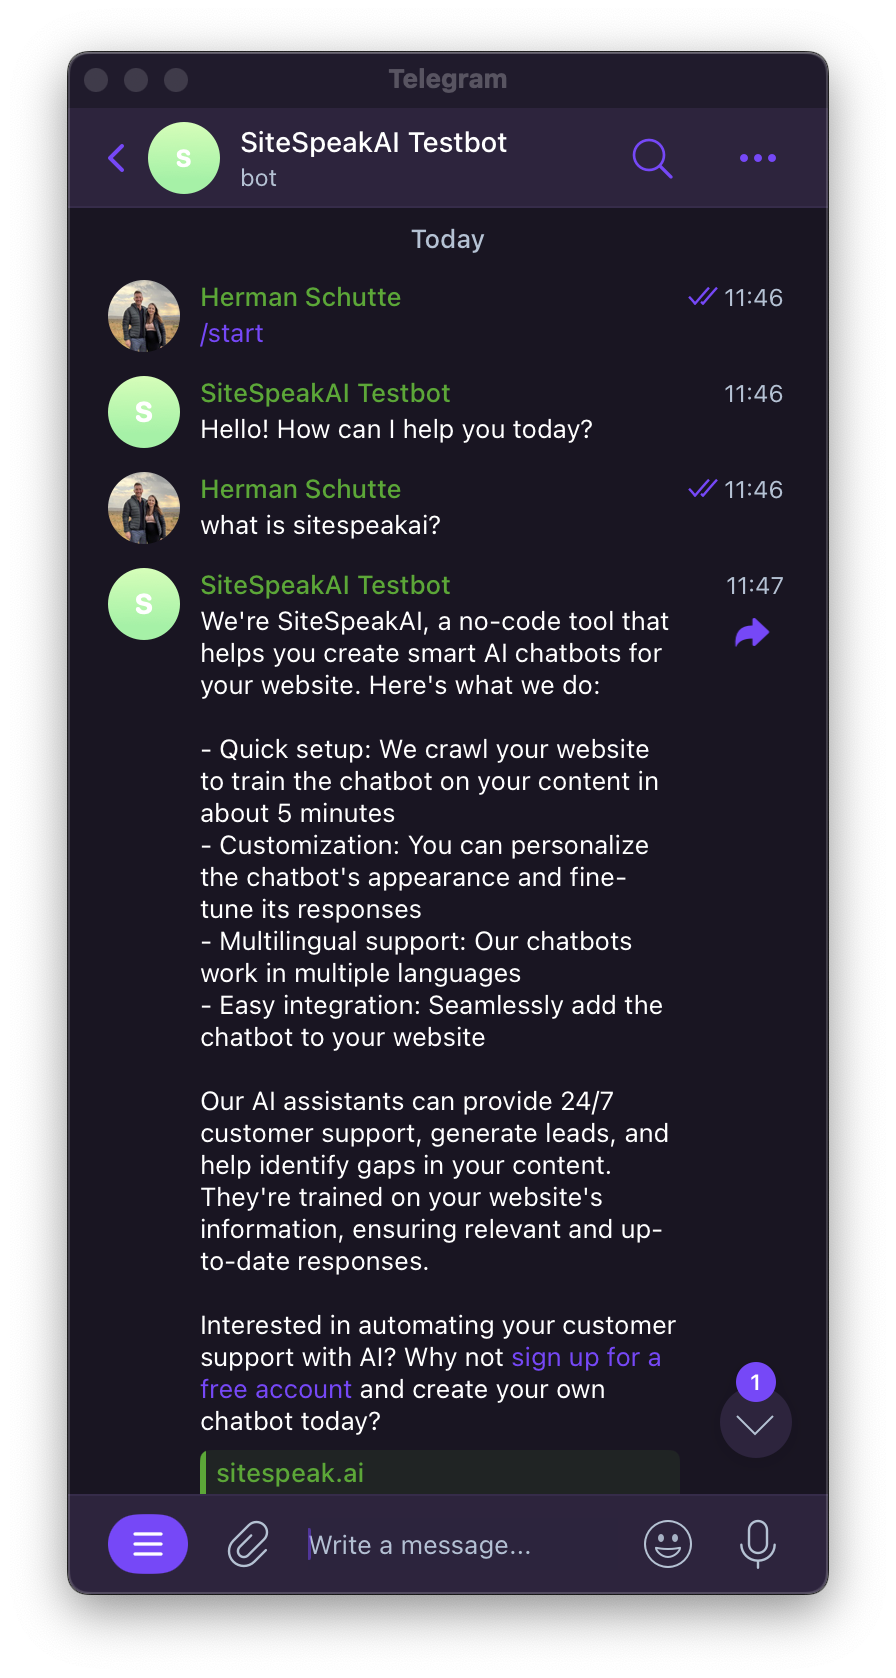
You can now head back to Telegram and use the link for your AI support agent to start chatting with your bot.
Click Connect to connect your AI support agent and configure the basic settings for your Telegram bot.
You can now head back to Telegram and use the link for your AI support agent to start chatting with your bot.
 To add your AI support agent to a group, you’ll need to update the bot’s privacy setting in Telegram. This is easy using @BotFather.
Issue the
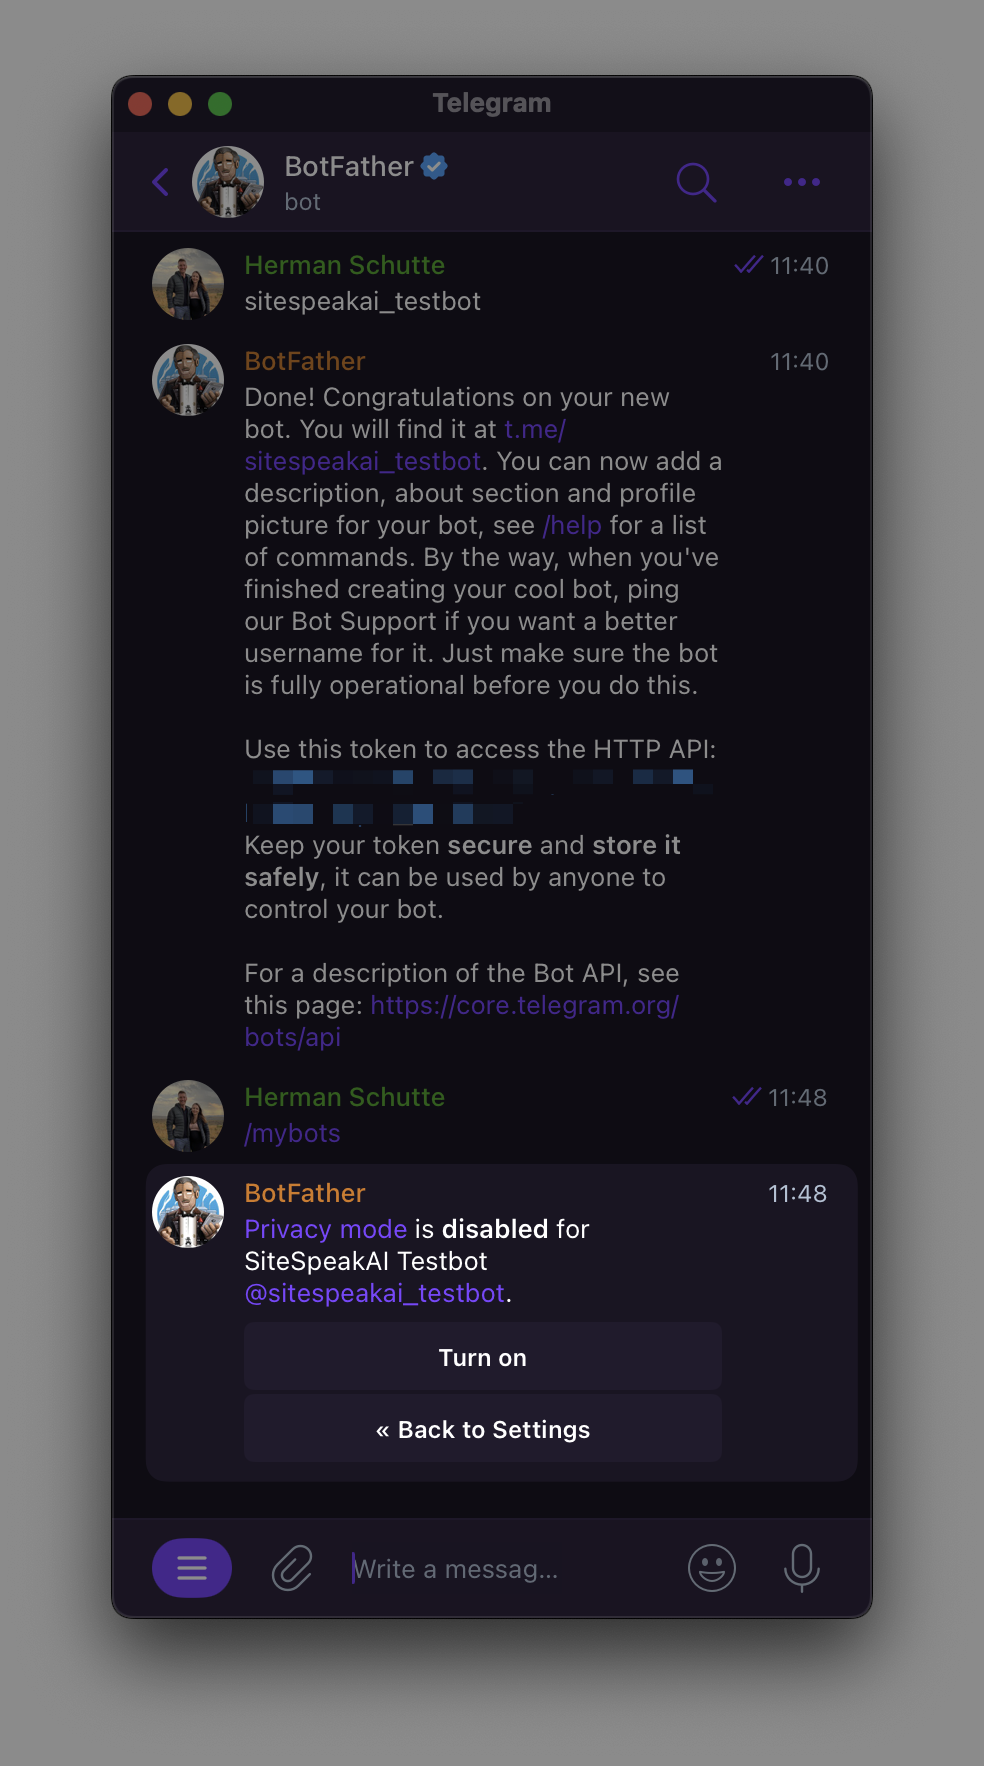
To add your AI support agent to a group, you’ll need to update the bot’s privacy setting in Telegram. This is easy using @BotFather.
Issue the /mybots command, then select the bot you want to add to your group chat. Then select Bot Settings -> Group Privacy and Turn off privacy.
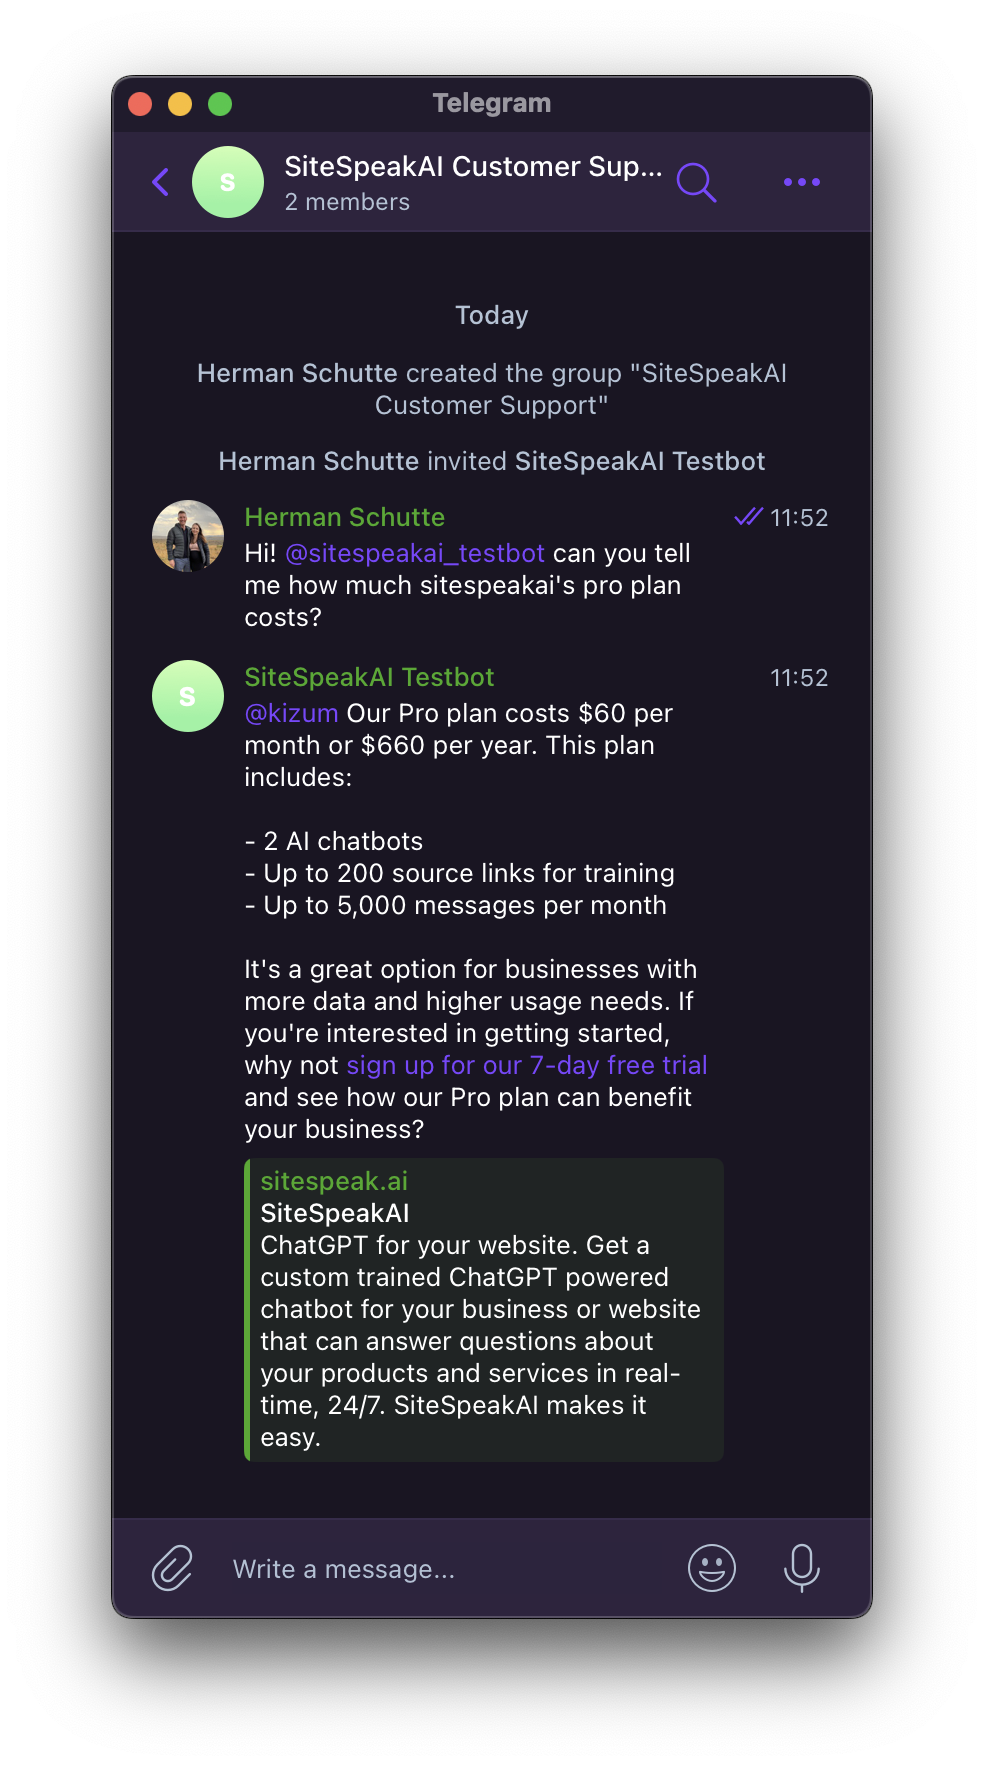
 You can now add your bot to any group that you are an admin of, and start chatting to your AI support agent by mentioning it in conversations.
 And that’s it! Super easy to add your own custom trained AI support agent to Telegram to assist your customers or employees.
Ready to automate your customer service with AI?
Join over 1000+ businesses, websites and startups automating their customer service and other tasks with a custom trained AI agent.