How to add a ChatGPT chatbot to WebSim.ai
You want to embed your custom trained chatbot in your WebSim.ai website page. Here's how to add ChatGPT to WebSim.ai with SiteSpeakAI.
Add your chatbot to your WebSim.ai website
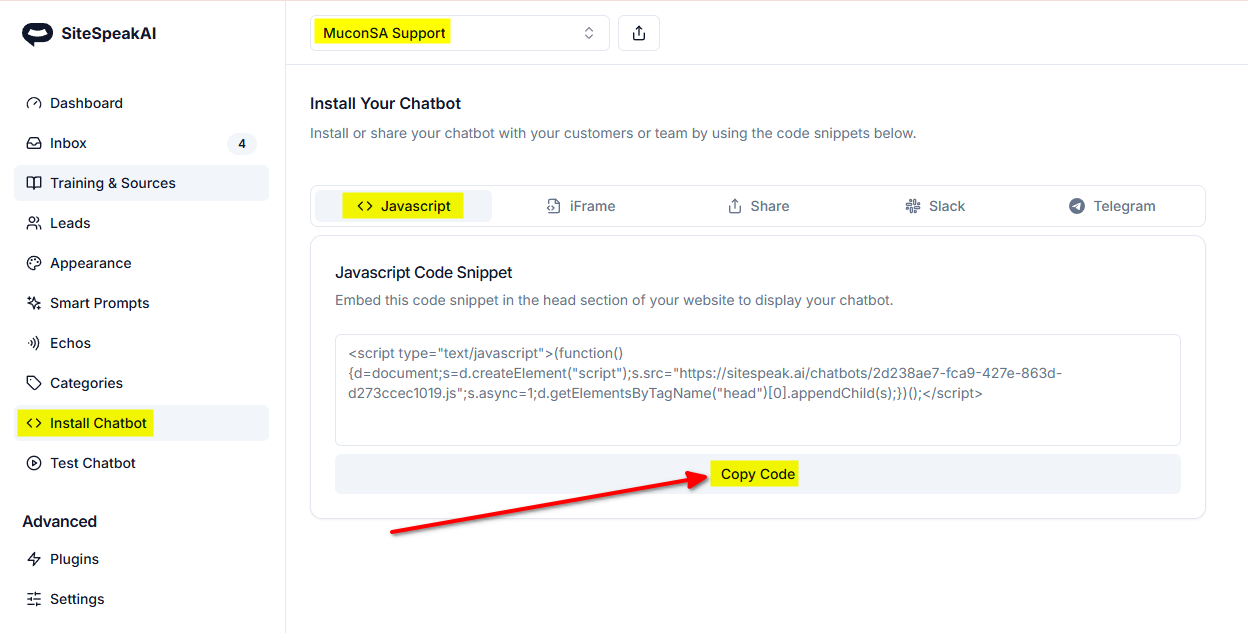
In SiteSpeakAI
Select your chatbot from the dropdown menu at the top, click on the Install Chatbot section in the sidebar and then click on the Copy Code button to copy your code snippet.
In WebSim.ai
Note: We will gpt-4o for this tutorial.
-
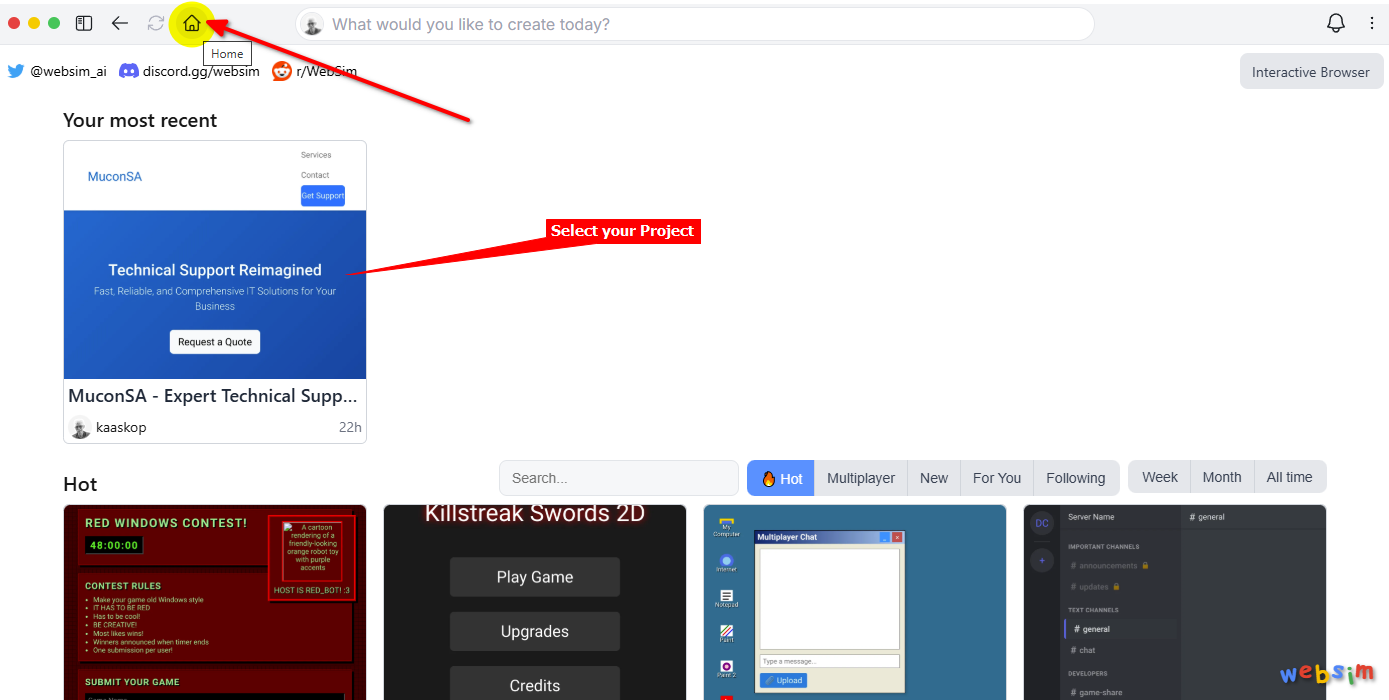
Log into your websim.ai account, select Home and select your project on the dashboard
-
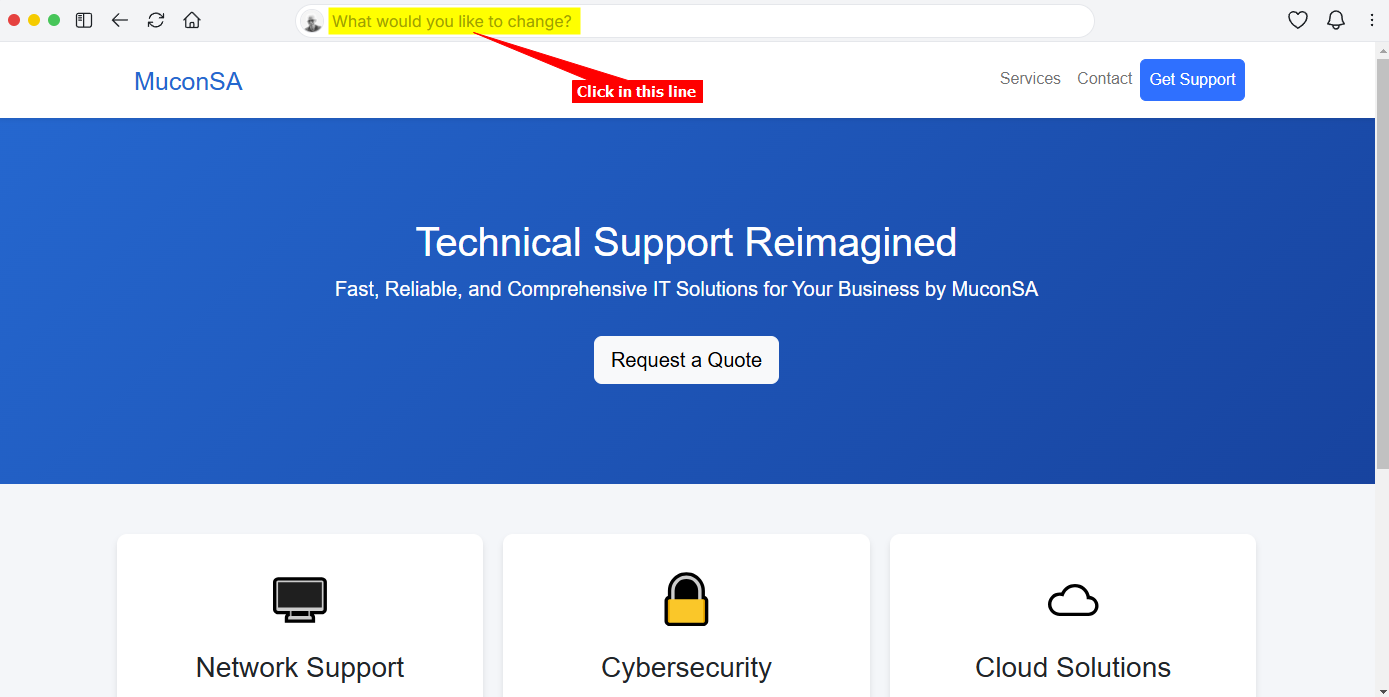
Click in the command line containing "What would you like to change?"
-
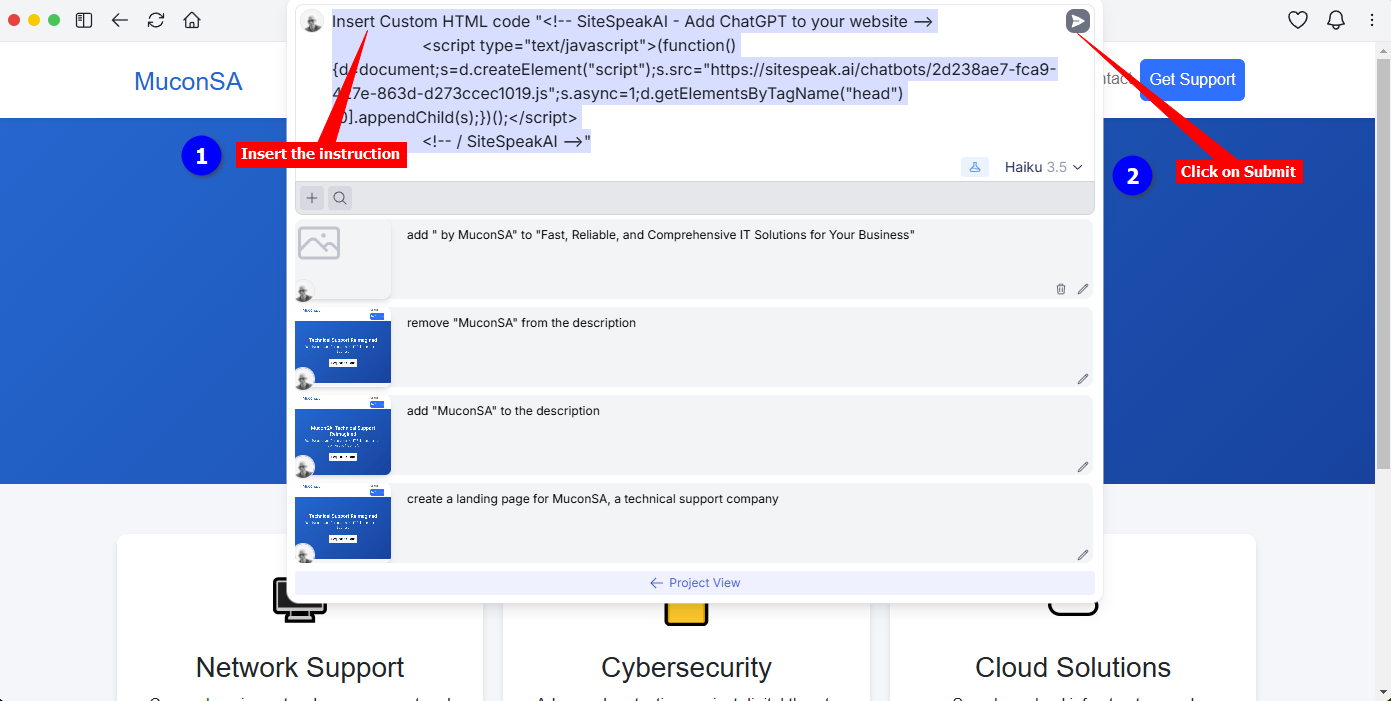
Enter the following instruction in the command line:
Insert Custom HTML code "--- insert the js code copied at the beginnng of the tutorial ---" and click on the Submit button
-
Your chatbot button will now be displayed on your WebSim.ai website page

-
If you click on the button it will display the chatbot dialogue
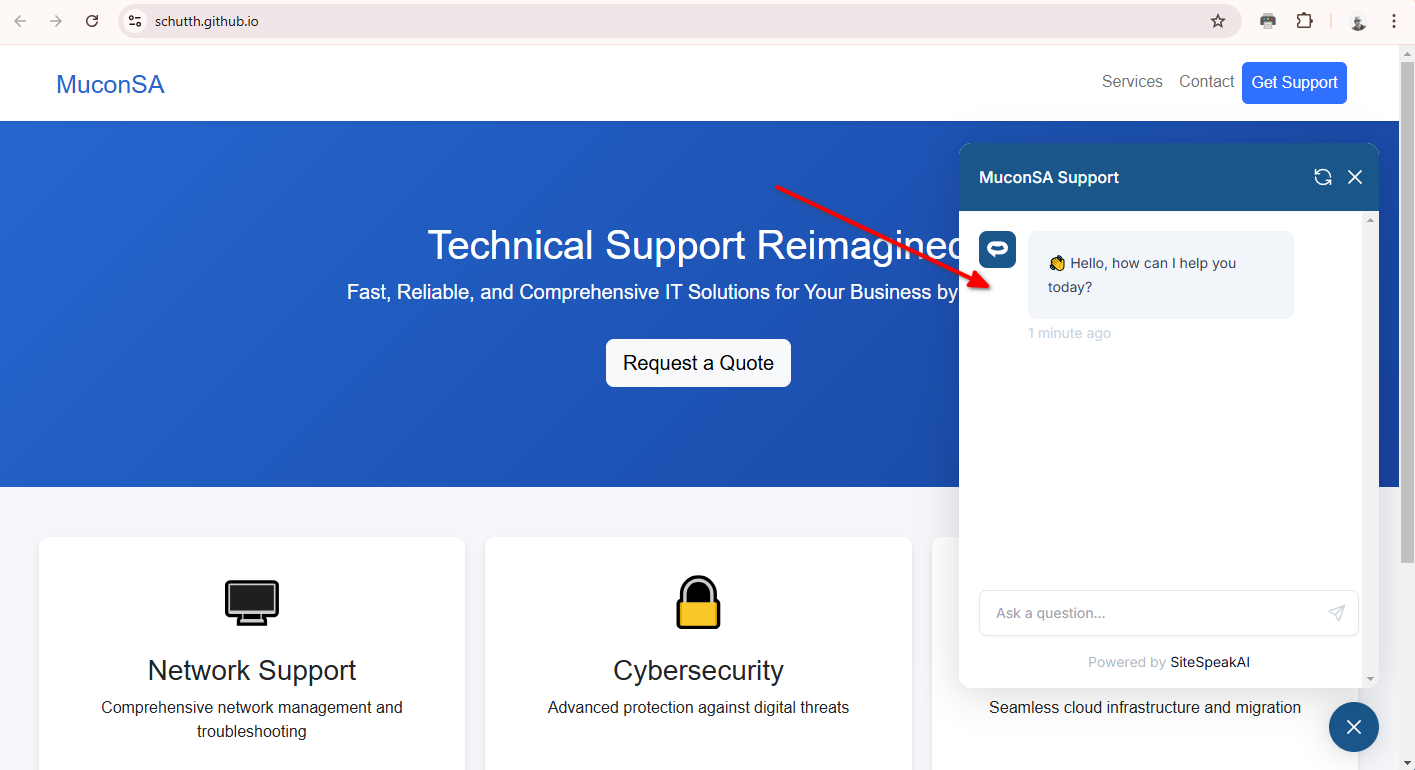
Your chatbot is now added to your WebSim.ai website and your visitors/customers can start interacting with it!
Not finding what you need? Reach out to our support team for help.
Contact Support