- AI-Powered Design: Offers AI assistance for creating layouts and content.
- eCommerce Capabilities: Includes robust tools for selling products online.
- Advanced Customization: Provides granular control over design elements.
- Landing Page Builder: Specialized tools for creating high-converting landing pages.
- No Coding Required: Designed for users with no technical skills.
Add your AI support agent to your WebSite X5 Pro website
In SiteSpeakAI
Select your chatbot from the dropdown menu at the top, click on the Install Agent section in the sidebar, then click on the Copy Code button to copy your code snippet.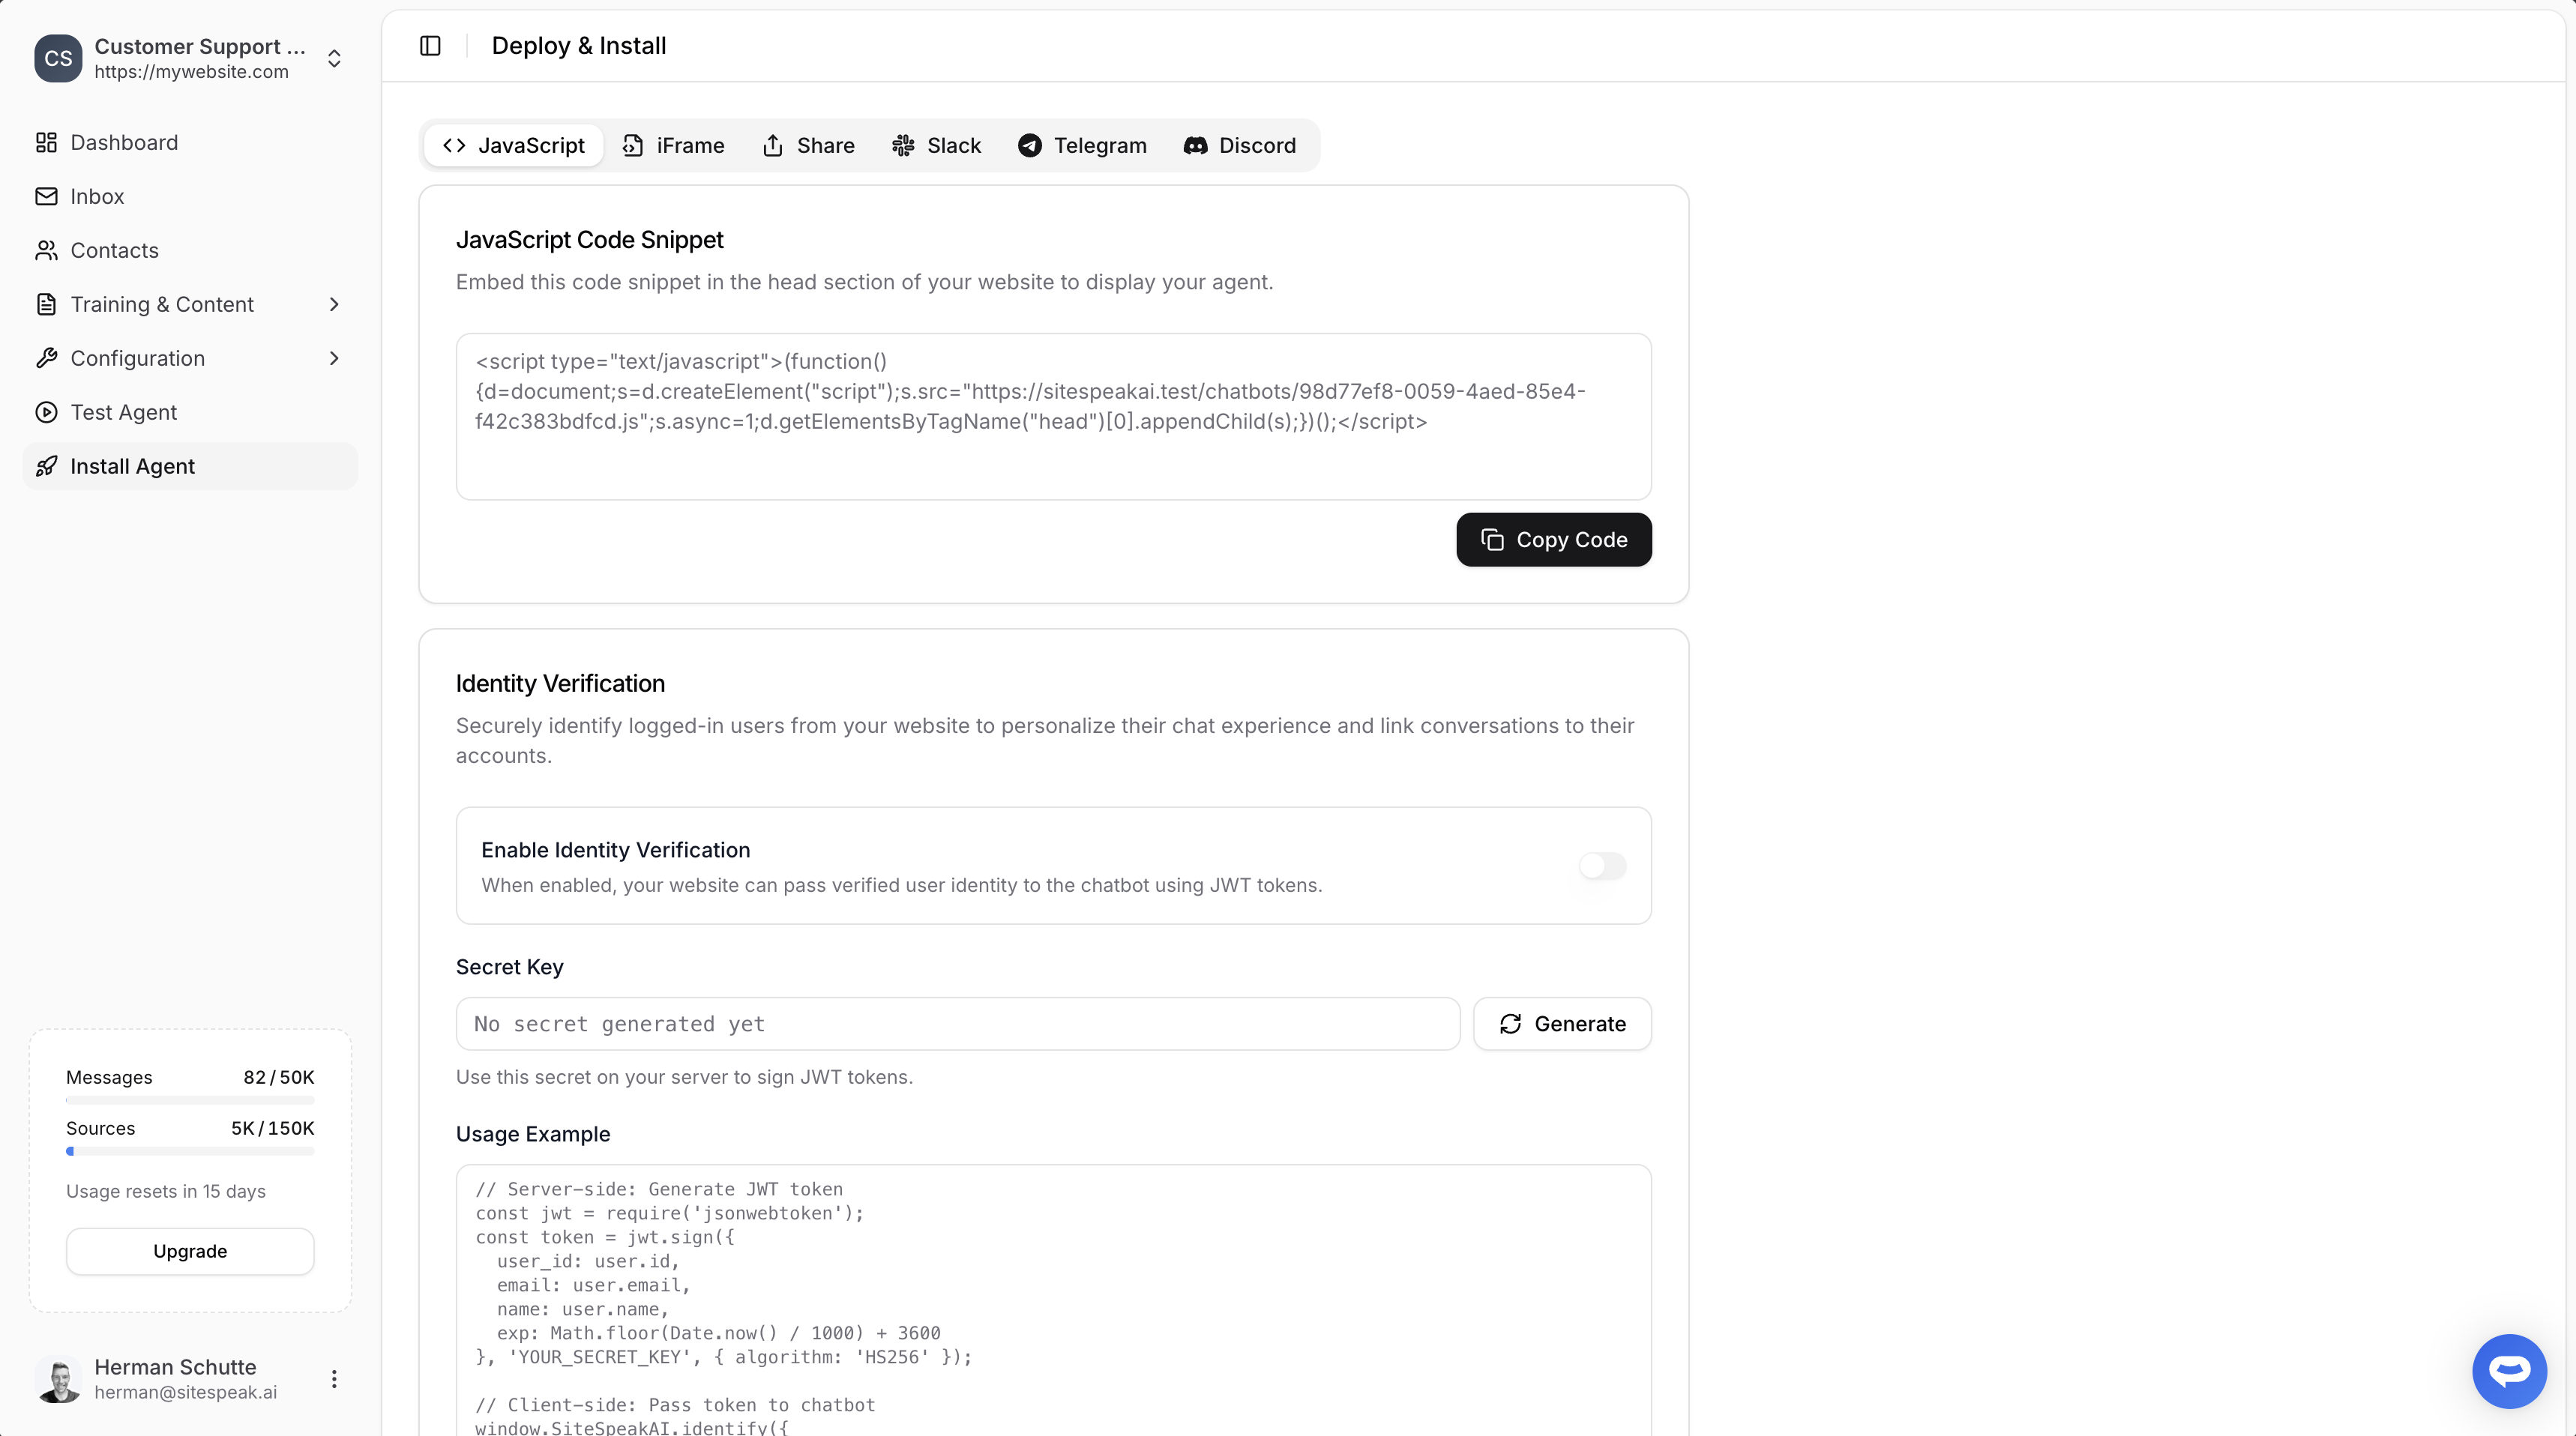
In WebSite X5 Pro
Update: You can now easily install SiteSpeak in WebSite X5 using a dedicated marketplace plugin.-
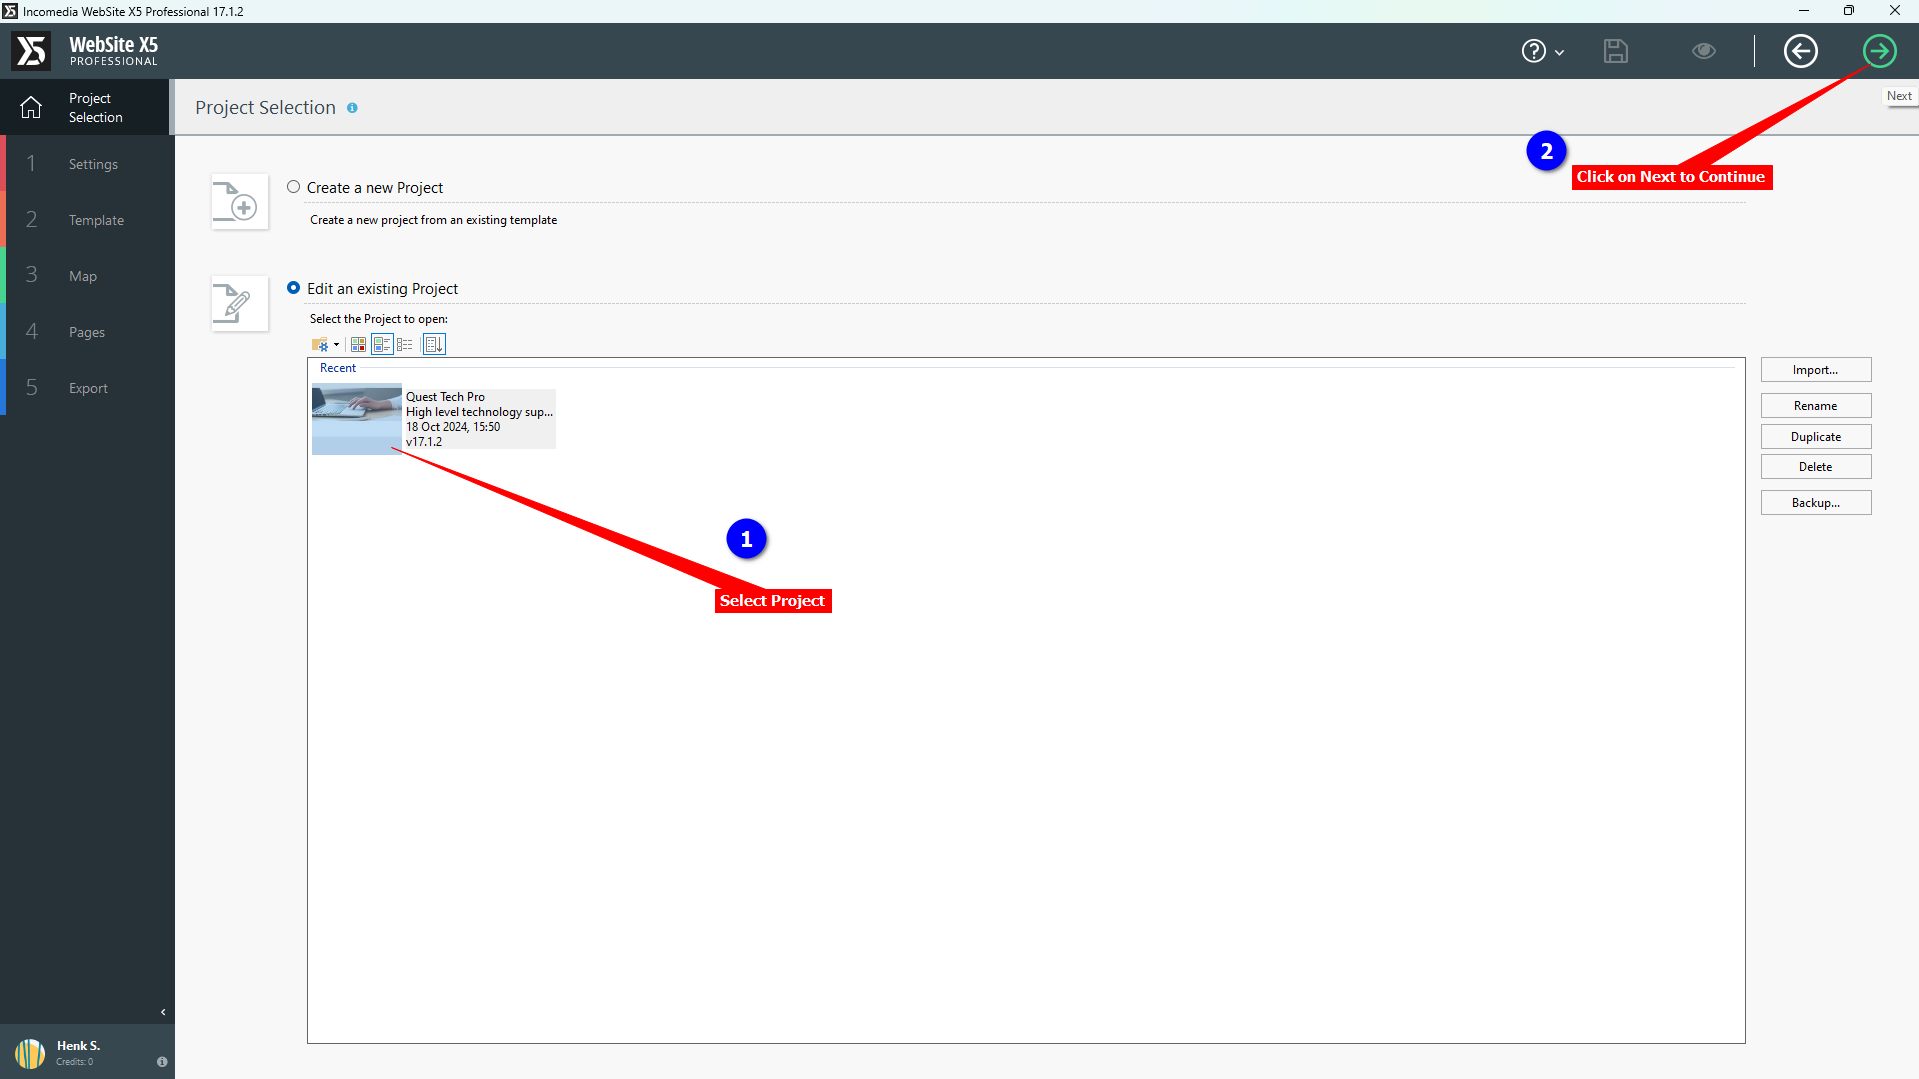
Log into your WebSite X5 Pro application and select the project you want to add your support agent to. Click on Next to continue
-
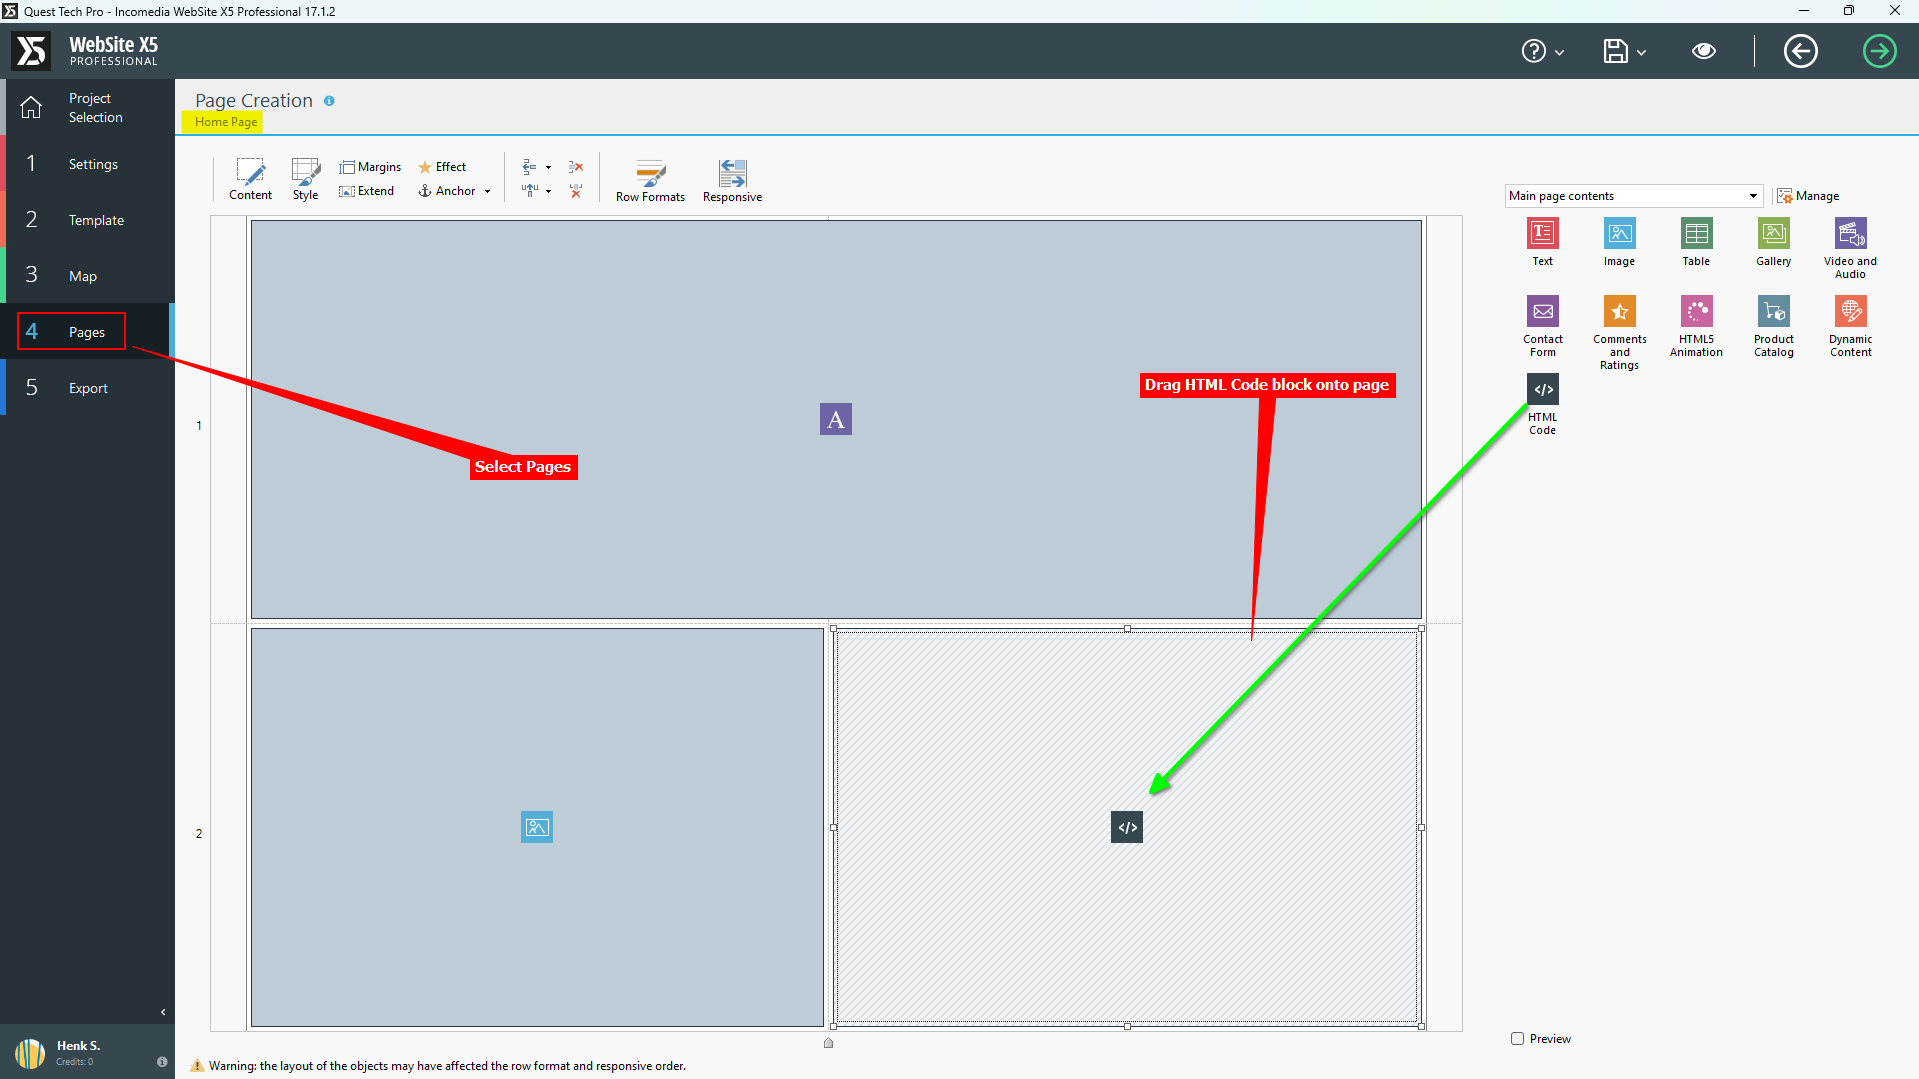
Select Pages on the left sidebar. Please note that if your website contains multiple pages you will have to add the support agent snippet to all pages. Adding an HTML Code Object in Website X5 Pro is per page and not website wide. Drag the HTML Code Object onto the page
-
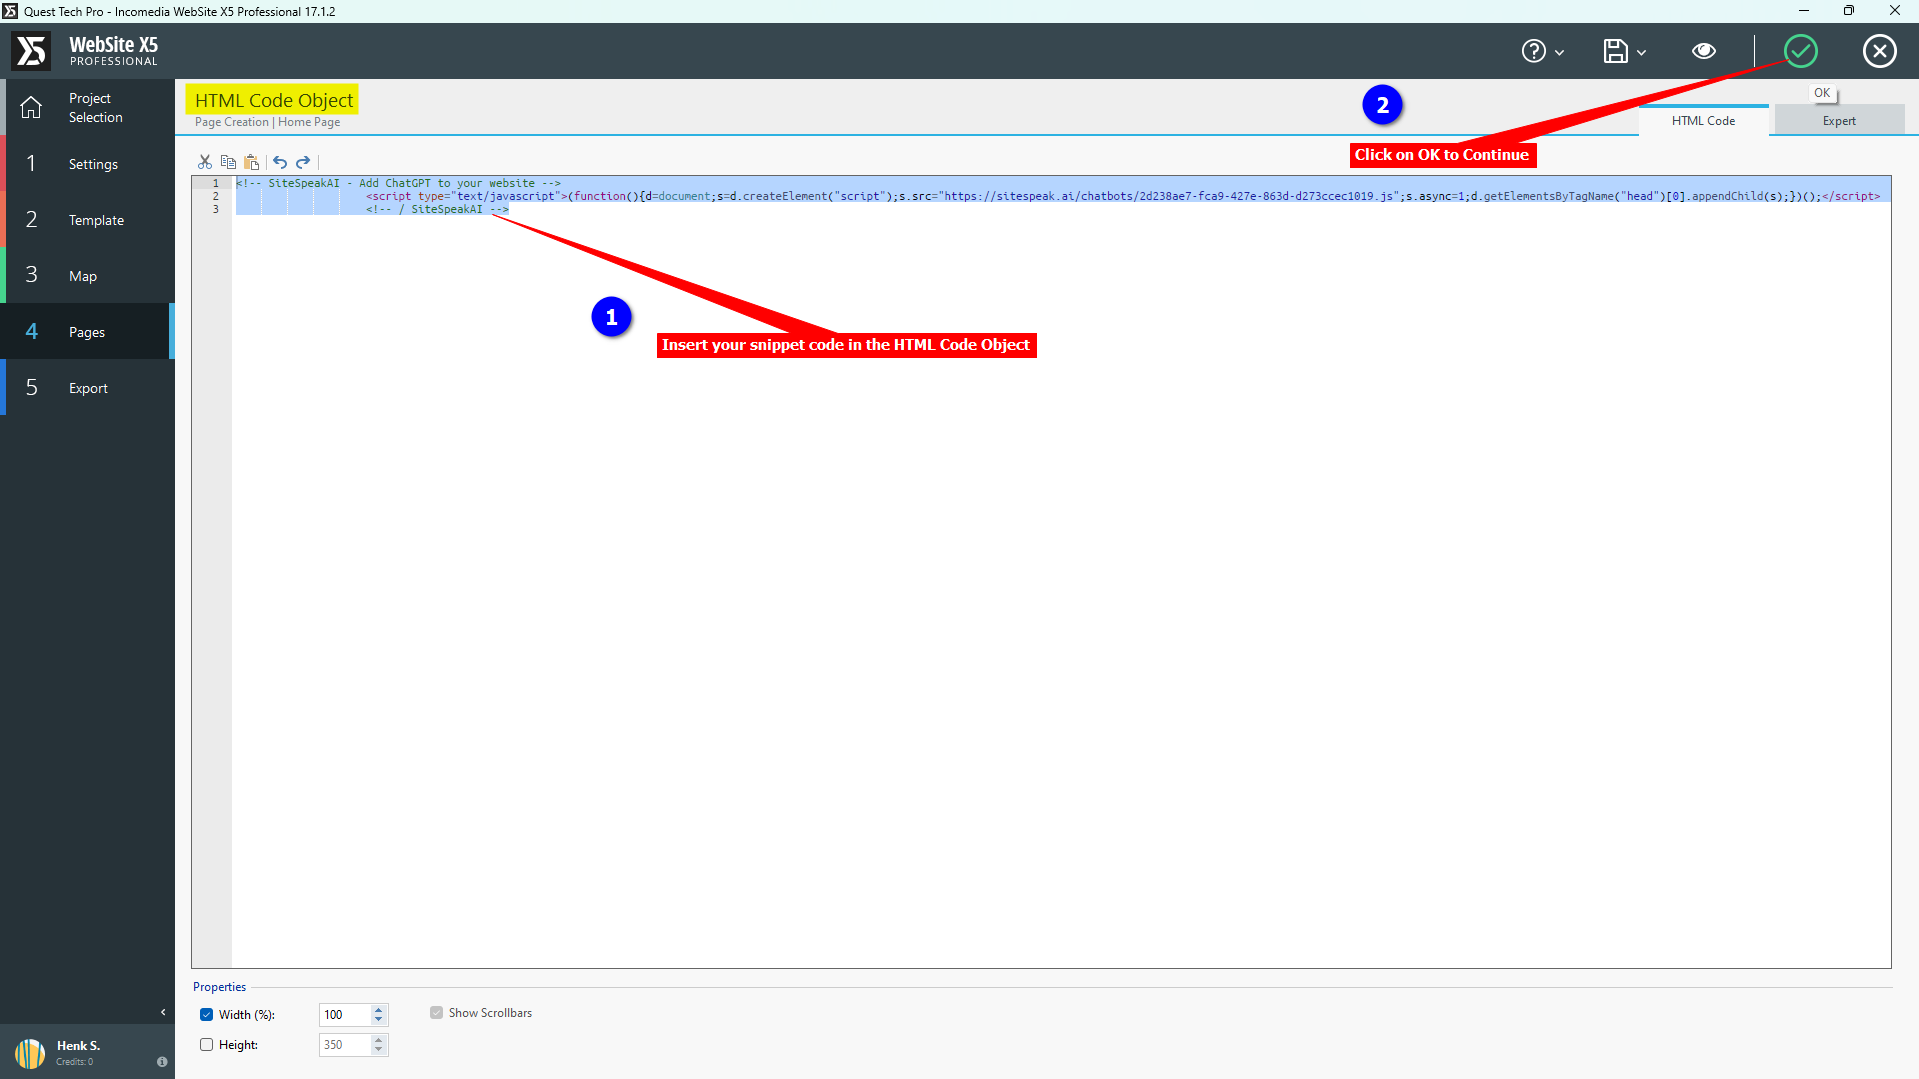
Insert your snippet into the HTML Code Object and click on OK to continue
-
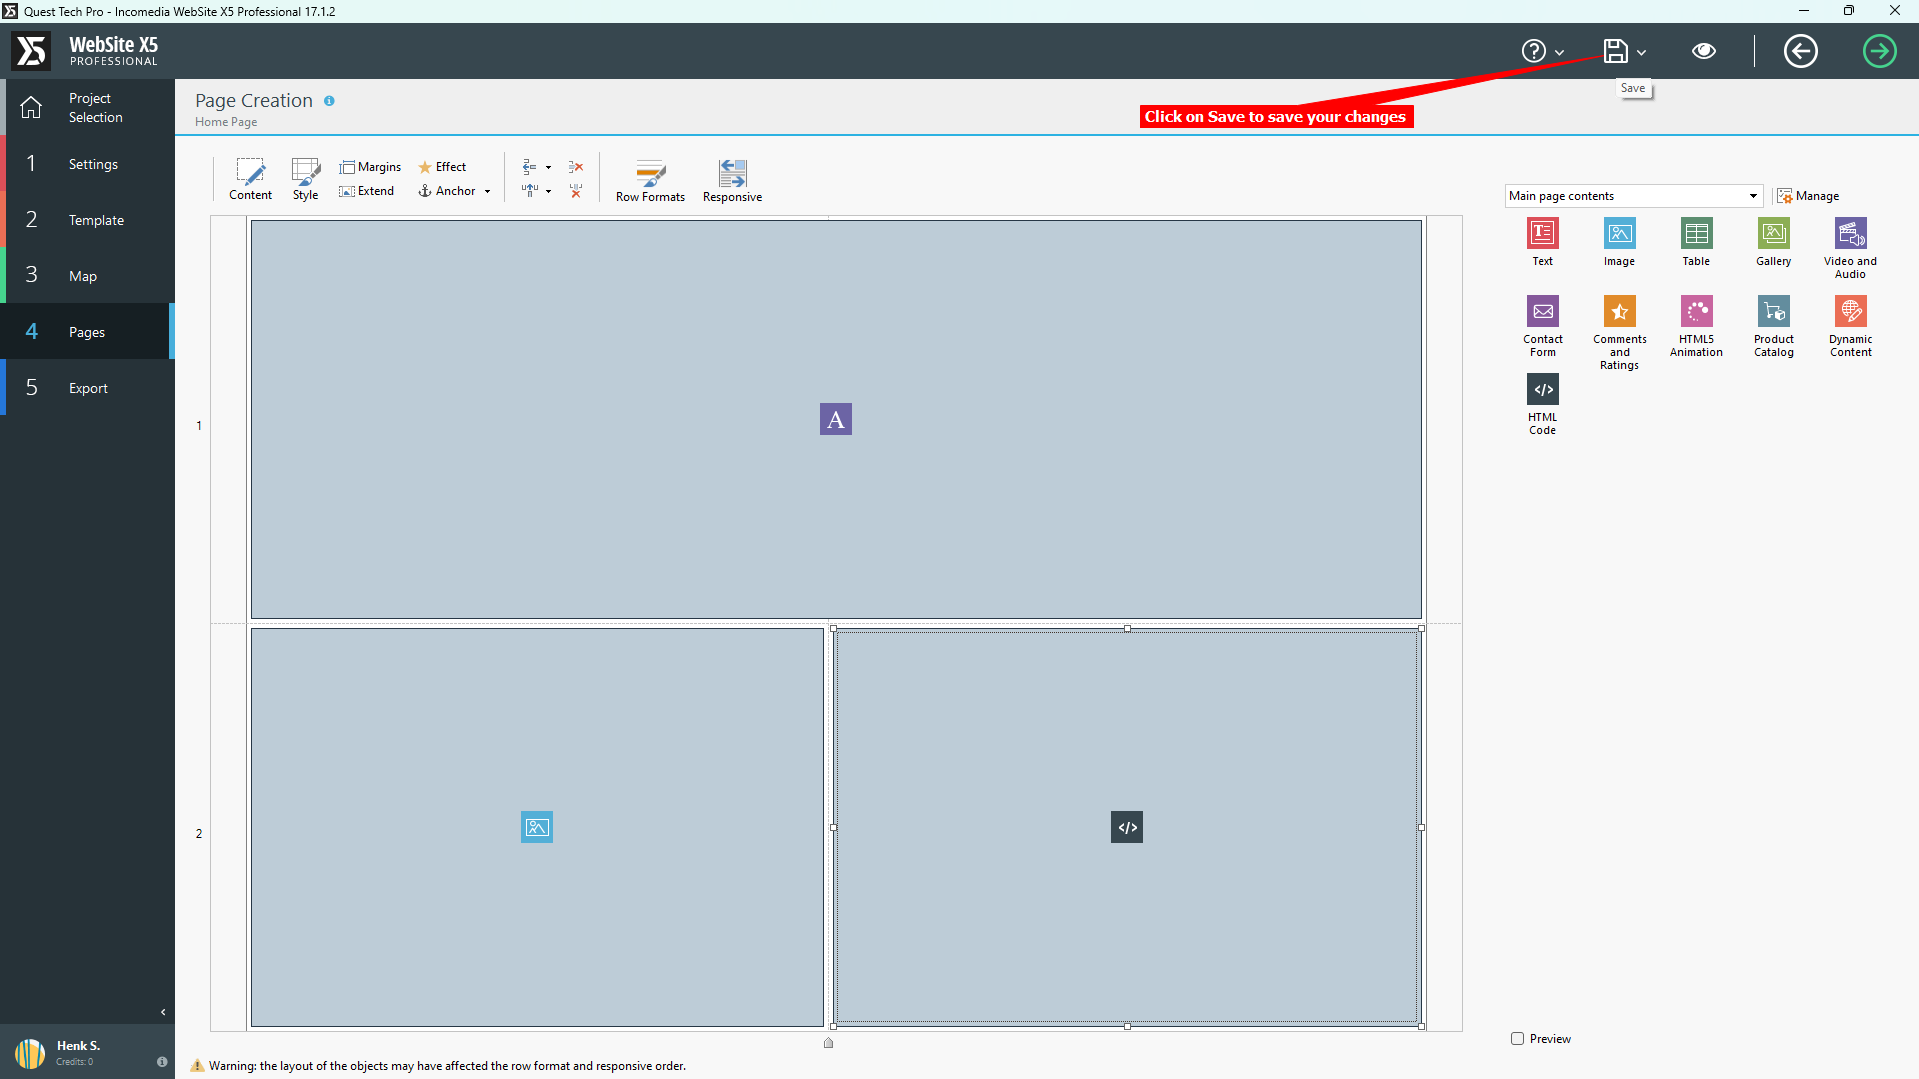
Click on Save to save the changes to your project
-
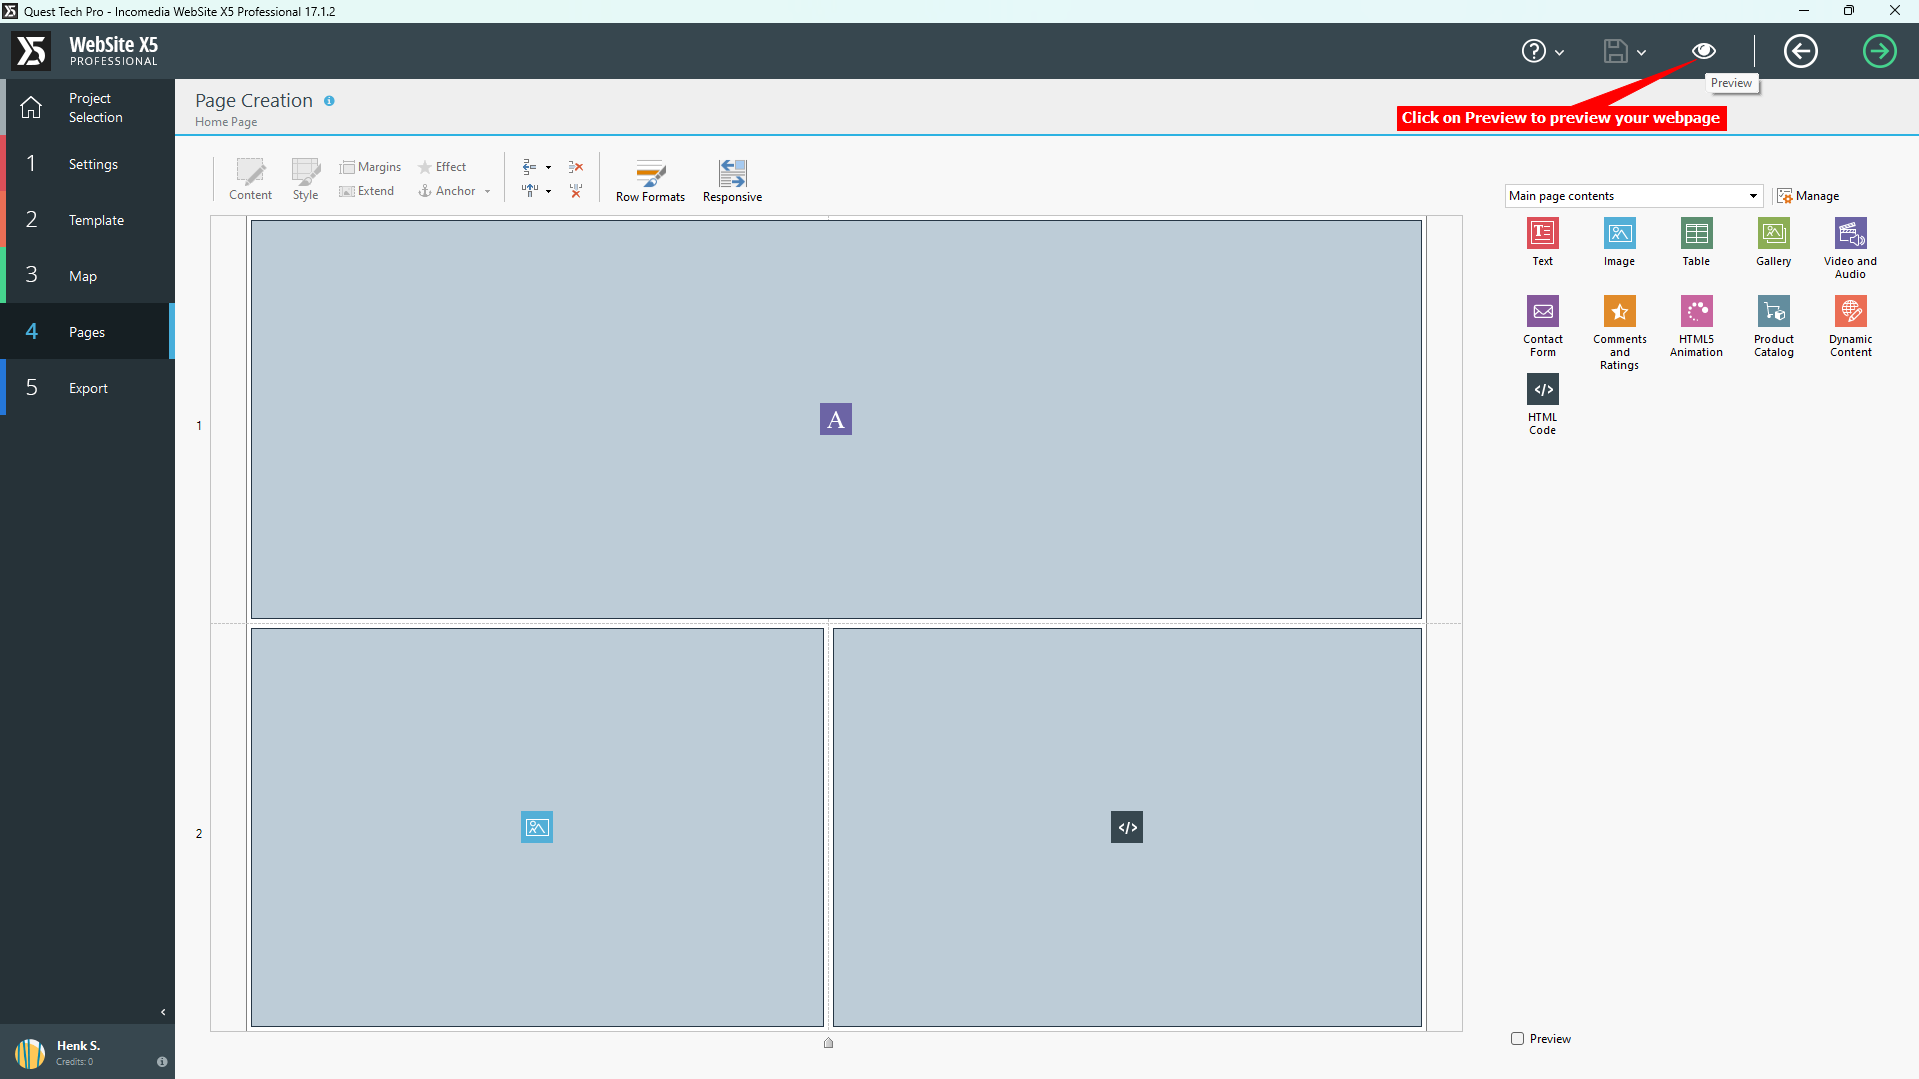
Click on Preview to preview your webpage
-
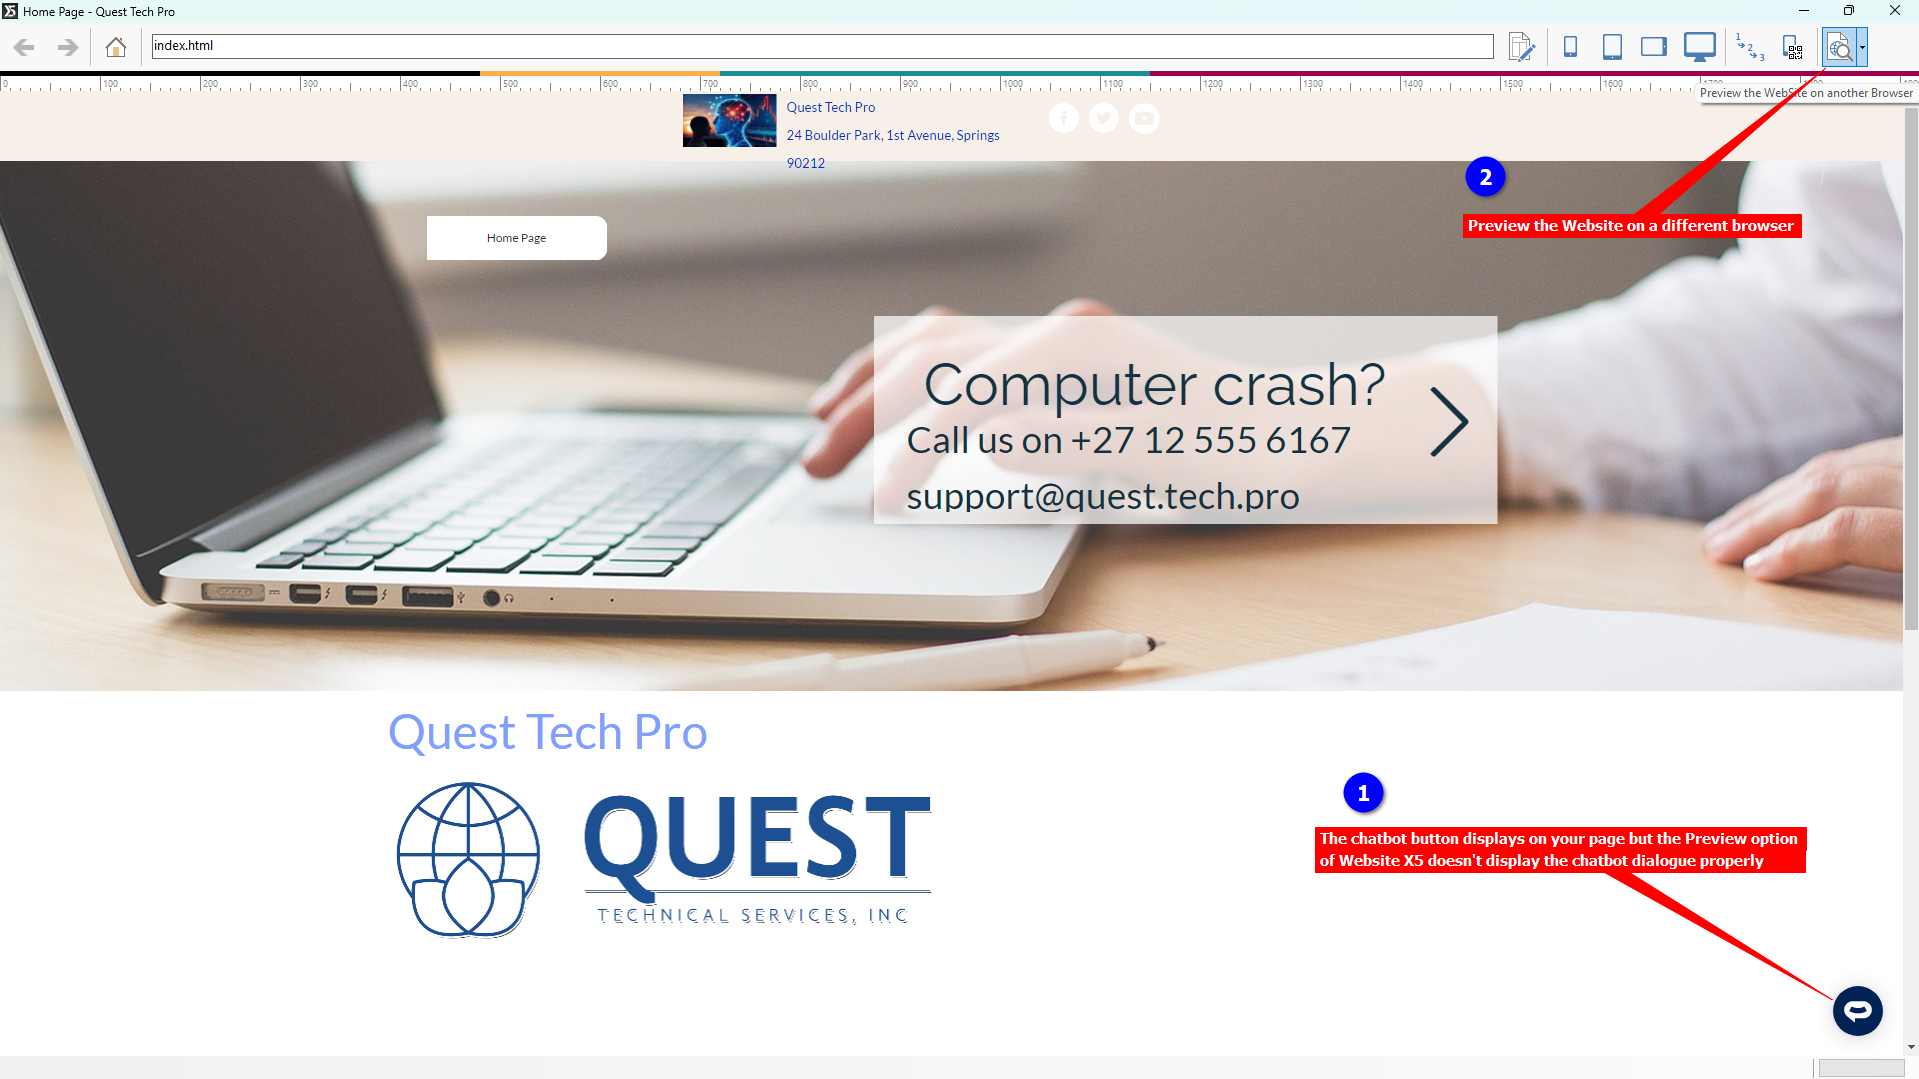
The AI support agent button displays correctly on the Preview page but clicking on it won’t display the support agent dialogue. To see the dialogue box, select the Preview the Website on another browser option and select your browser of choice
-
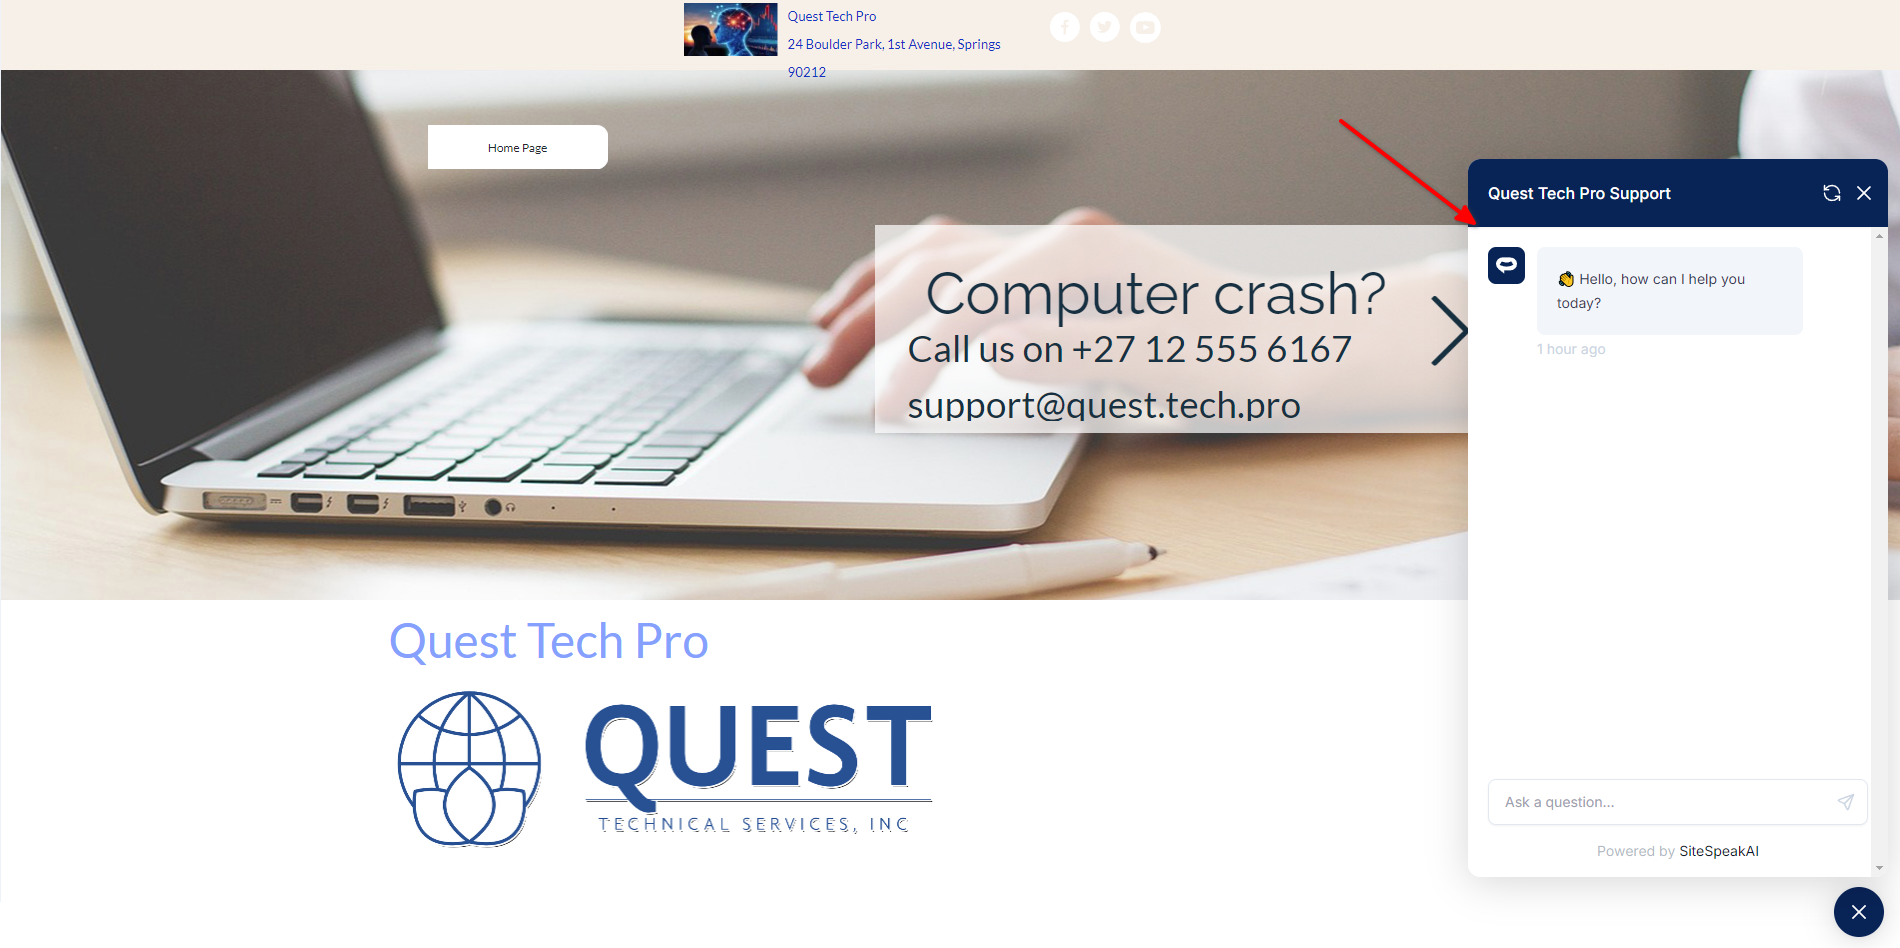
If you click on the button it will display the AI support agent dialogue
Ready to automate your customer service with AI?
Join over 1000+ businesses, websites and startups automating their customer service and other tasks with a custom trained AI agent.