Add your chatbot to your Wix website
In SiteSpeakAI
Select your chatbot from the dropdown menu at the top, click on the Install Agent section in the sidebar, then click on the Copy Code button to copy your code snippet.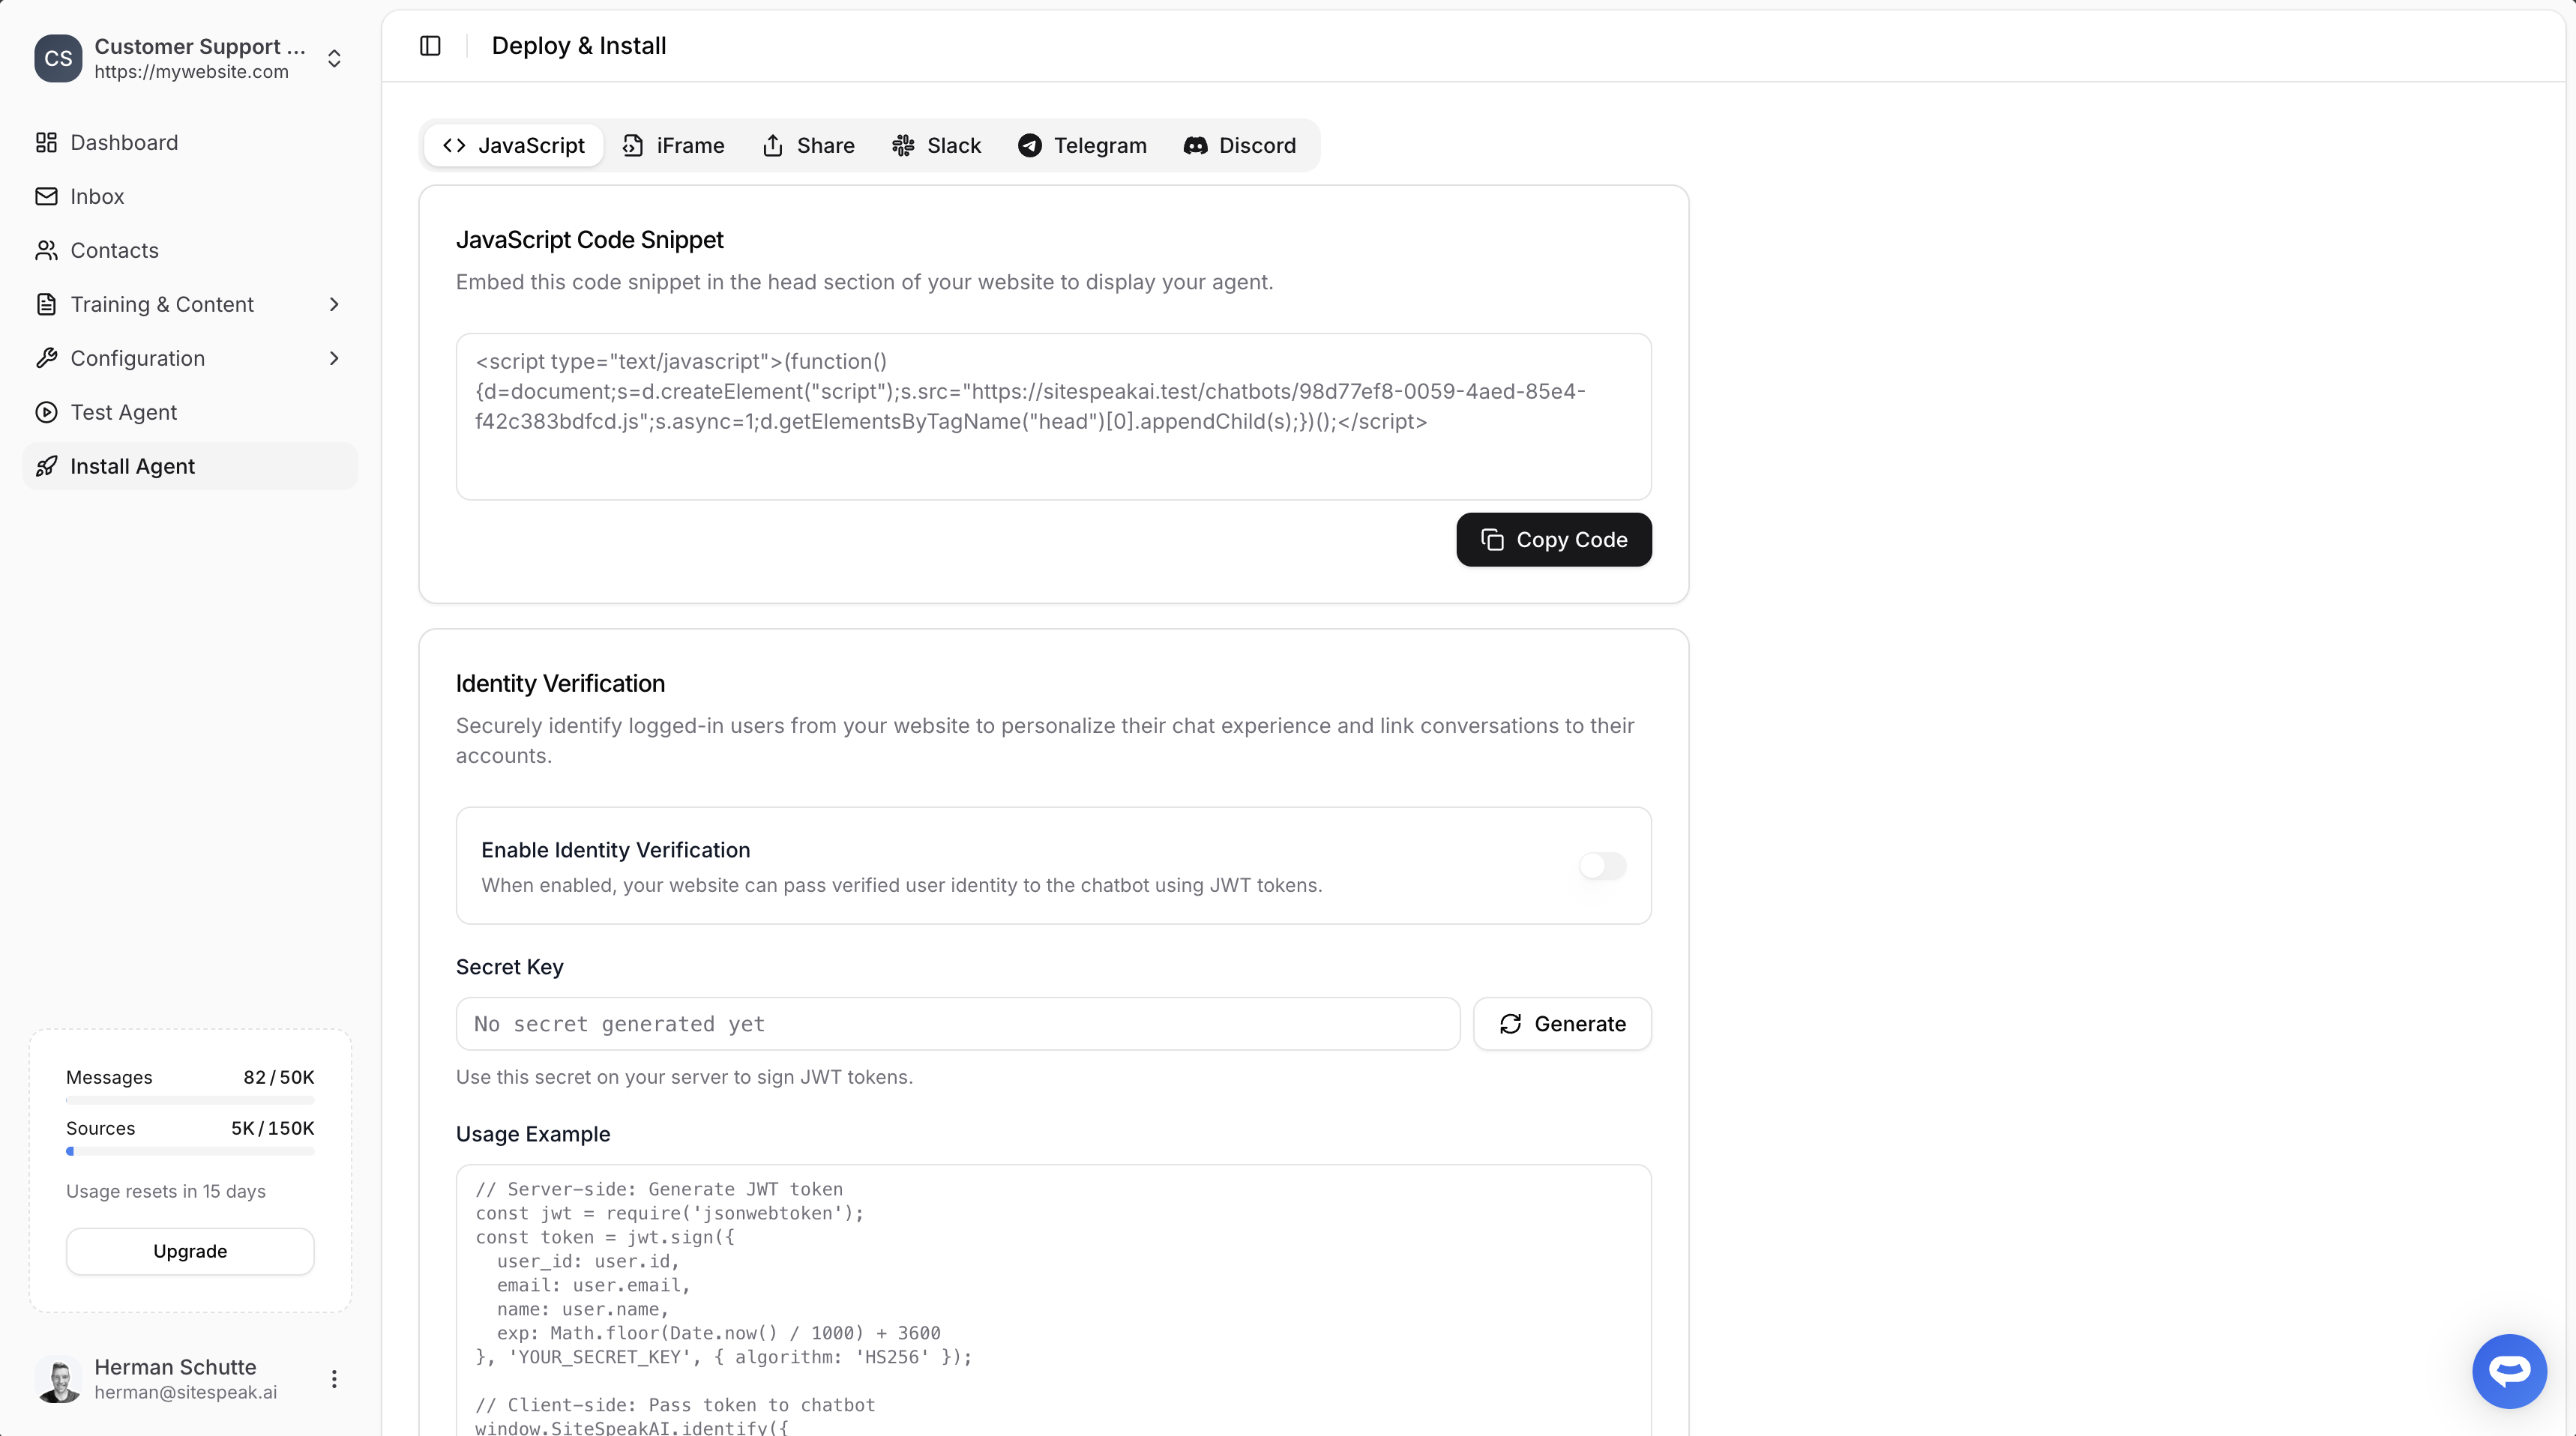
In Wix
- In the Wix Editor, click Add Elements (the plus icon)
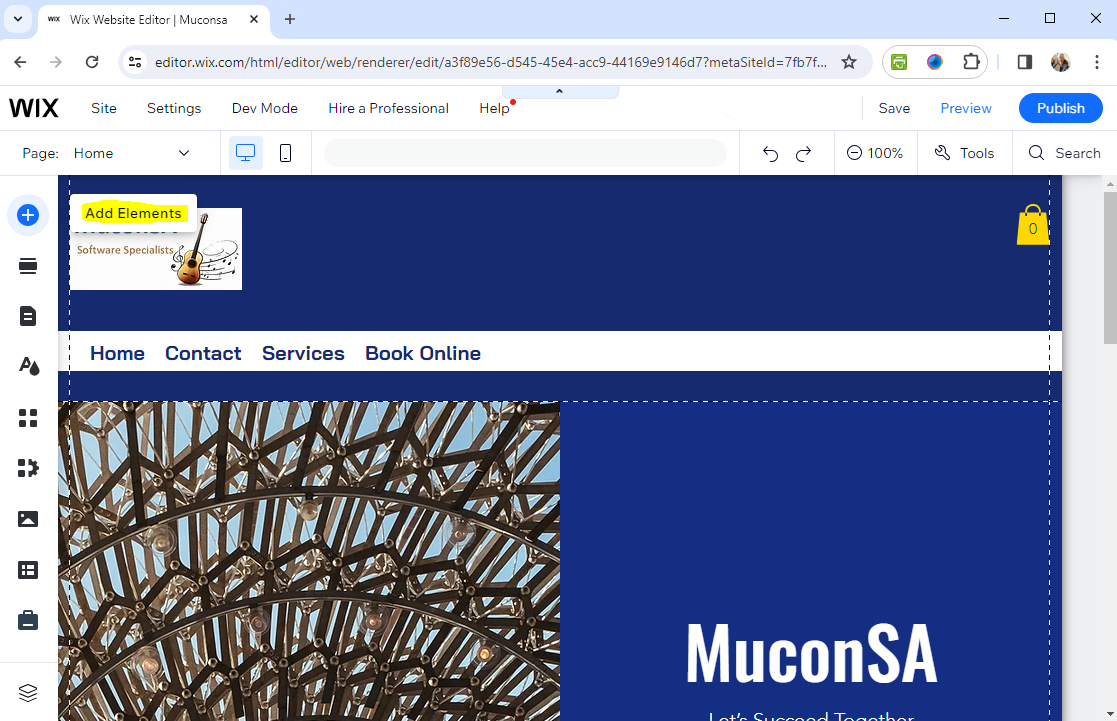
- Select Embed Code, then choose Custom Code under Marketing Integration Tools
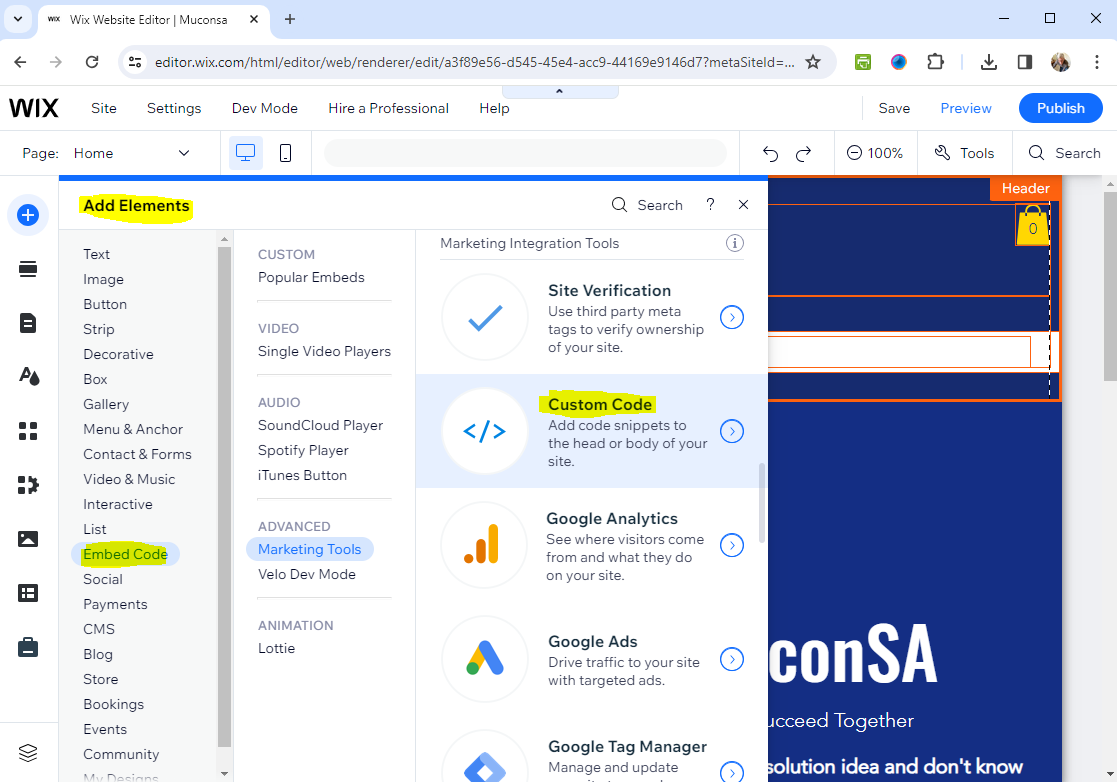
- Click Add Code in the Head section of the Custom Code dialog
-
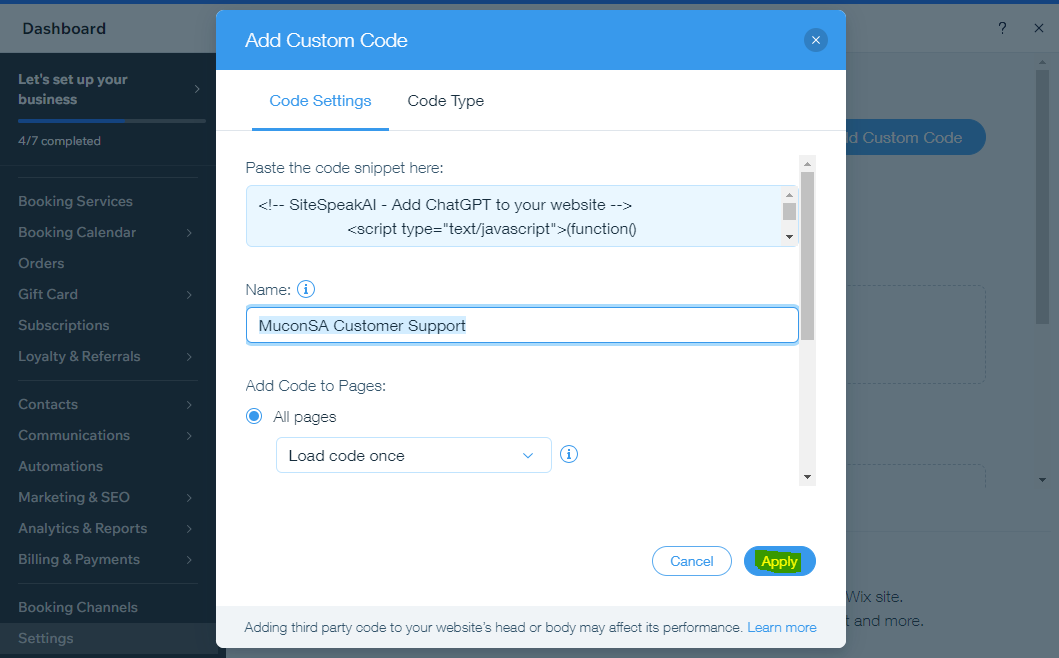
Paste your chatbot code snippet into the Add Custom Code modal
- Give it a name like “SiteSpeakAI Chatbot” to identify it easily
- Choose whether to display on All pages or a specific page
- Click Apply to save your changes
- Click Publish to make your changes live

The chatbot will only appear on your published site, not in the Wix Editor preview. You must publish your changes to see the chatbot.
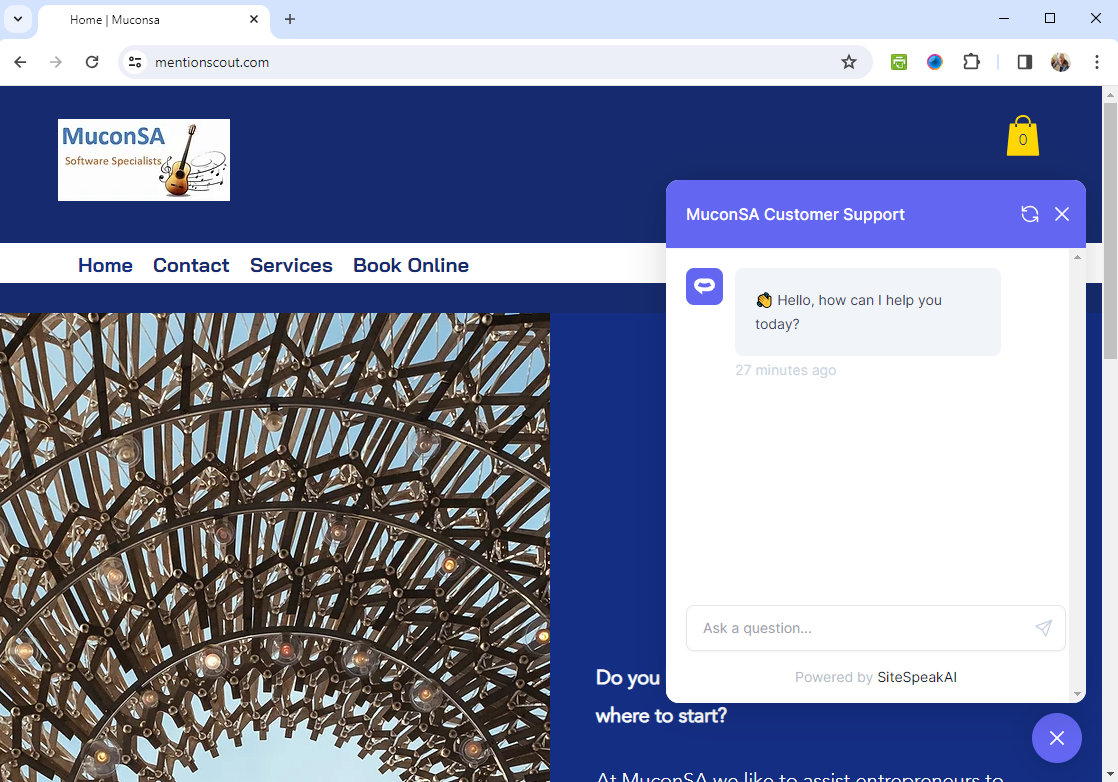
- Your chatbot button will now appear on your live website

- Visitors can click the button to open the chat and start asking questions
Alternative: Using an HTML embed
If you prefer to embed the chatbot in a specific location on your page rather than as a floating widget:- In the Wix Editor, click Add Elements > Embed Code > Embed HTML
- Drag the HTML widget to where you want the chatbot to appear
- Click Enter Code and paste the iFrame embed code from SiteSpeakAI
- Resize the embed box as needed
- Publish your site
Mobile responsiveness
The SiteSpeakAI chatbot widget is fully responsive and works on all devices. On mobile, the chat button automatically adjusts its position to avoid interfering with navigation elements. You can customize the mobile position offset in your SiteSpeakAI dashboard if needed.Troubleshooting
Chatbot not appearing after publishing? Clear your browser cache and reload the page. Wix may cache your site for performance. Custom Code option not available? Make sure you have a Wix Premium plan. Custom code features are not available on free Wix sites. Chatbot appears in wrong position? Adjust the position and offset settings in your SiteSpeakAI appearance settings. You can position the widget in any corner and set custom margins. Preview not showing the chatbot? This is expected behavior. Wix’s preview mode doesn’t load custom code. You must publish your site to see the chatbot.Ready to automate your customer service with AI?
Join over 1000+ businesses, websites and startups automating their customer service and other tasks with a custom trained AI agent.