How to add a ChatGPT chatbot to pixpa
You want to embed your custom trained chatbot in your pixpa website page. Here's how to add ChatGPT to pixpa with SiteSpeakAI.
Add your chatbot to your pixpa website
In SiteSpeakAI
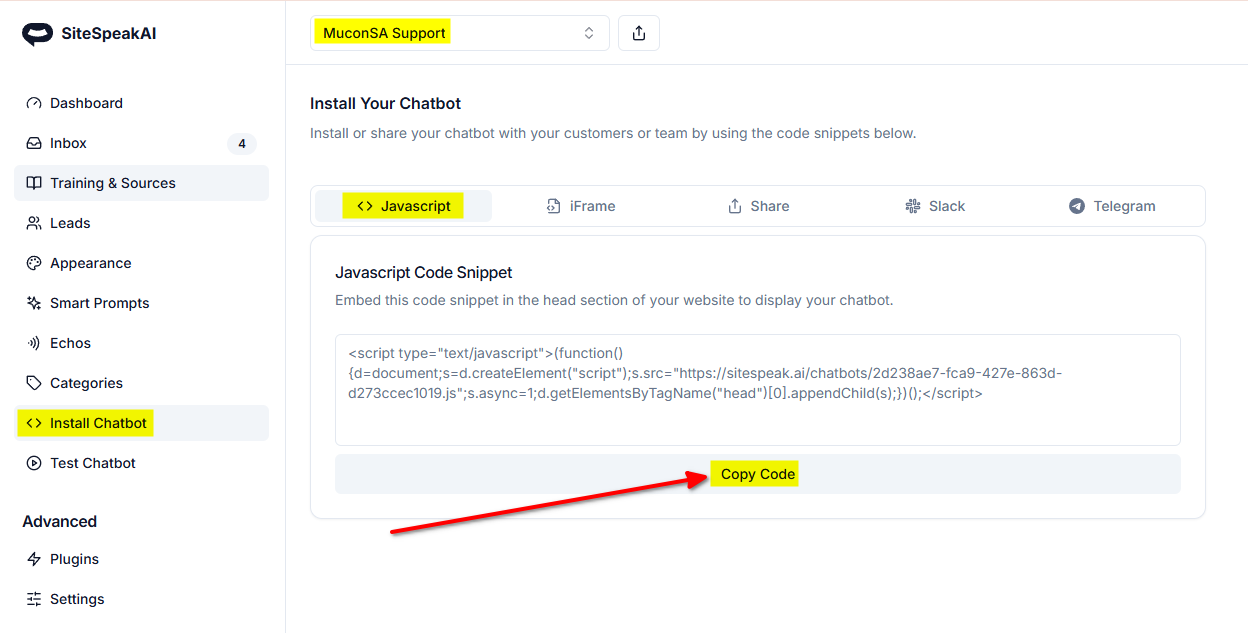
Select your chatbot from the dropdown menu at the top, click on the Install Chatbot section in the sidebar and then click on the Copy Code button to copy your code snippet.
In pixpa
-
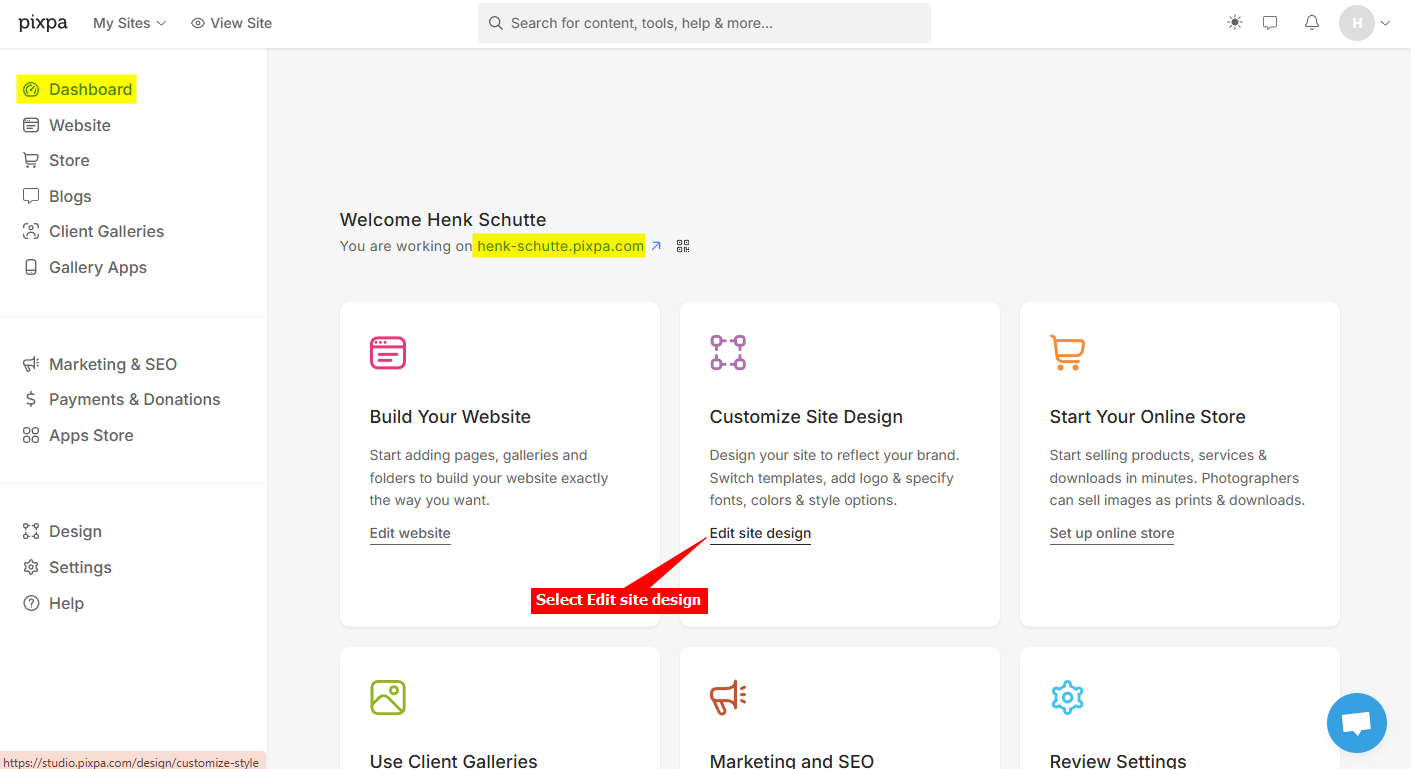
Log into your pixpa account and on the dashboard select Edit site design for the site you want to add your chatbot to
-
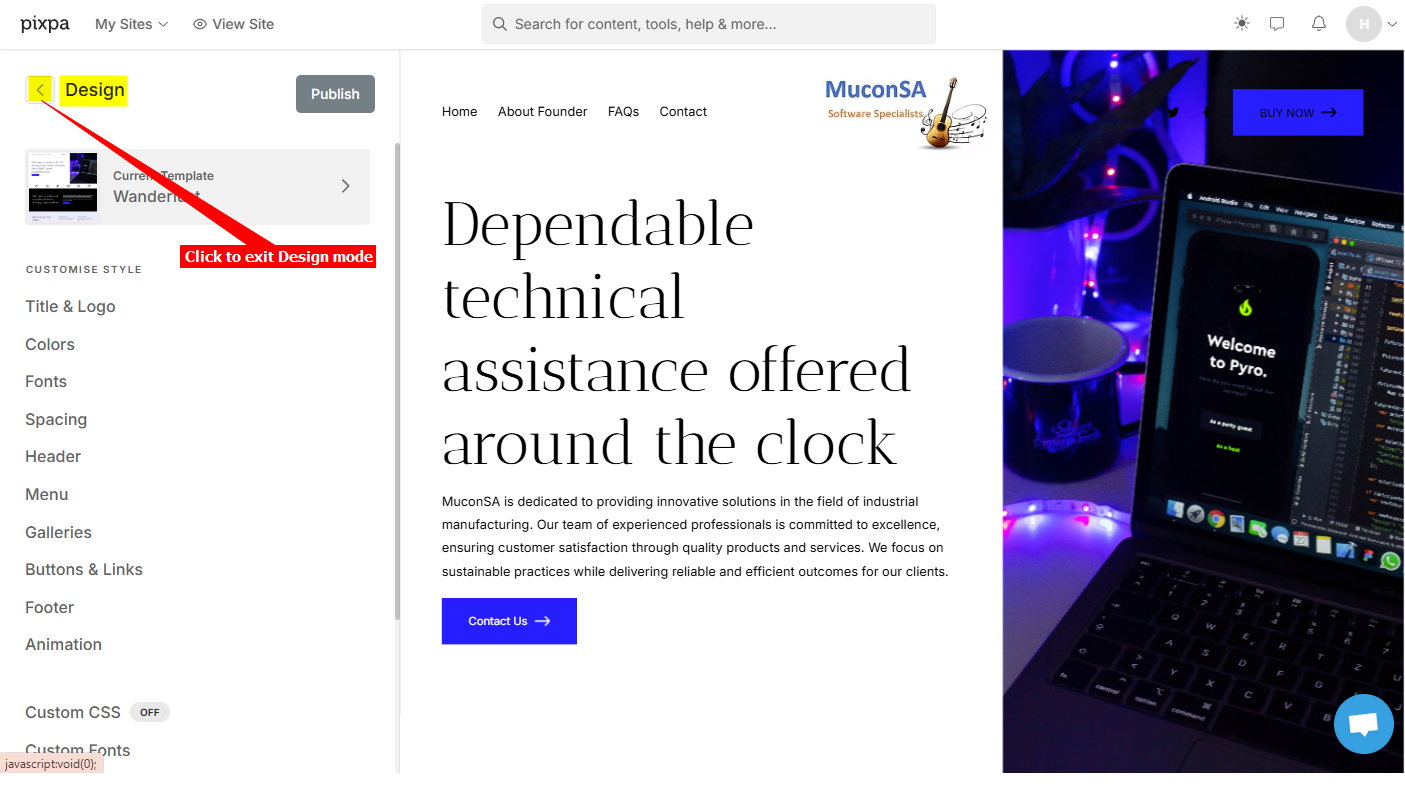
Click on the exit button to exit Design mode
-
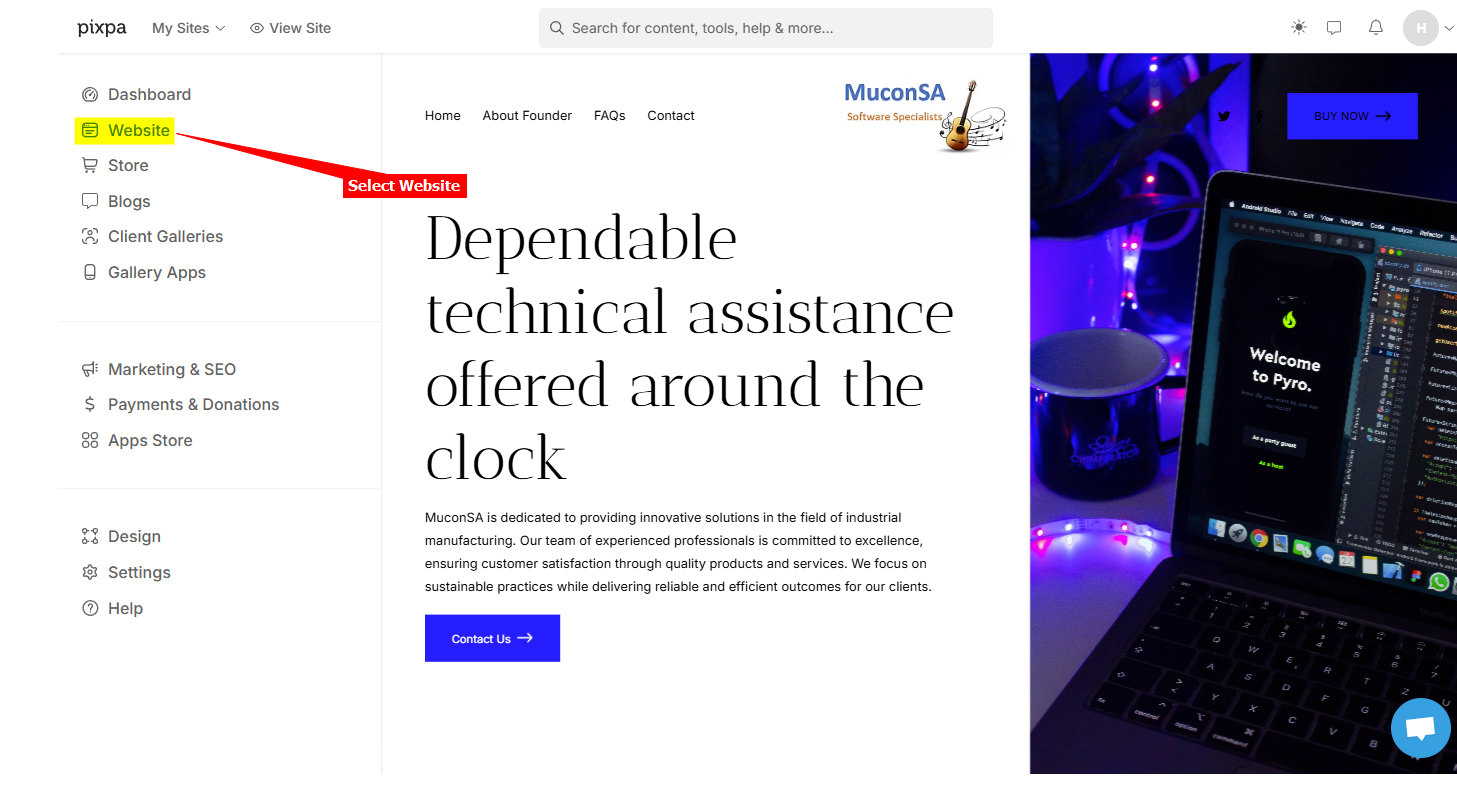
Select the Website option on the left sidebar list
-
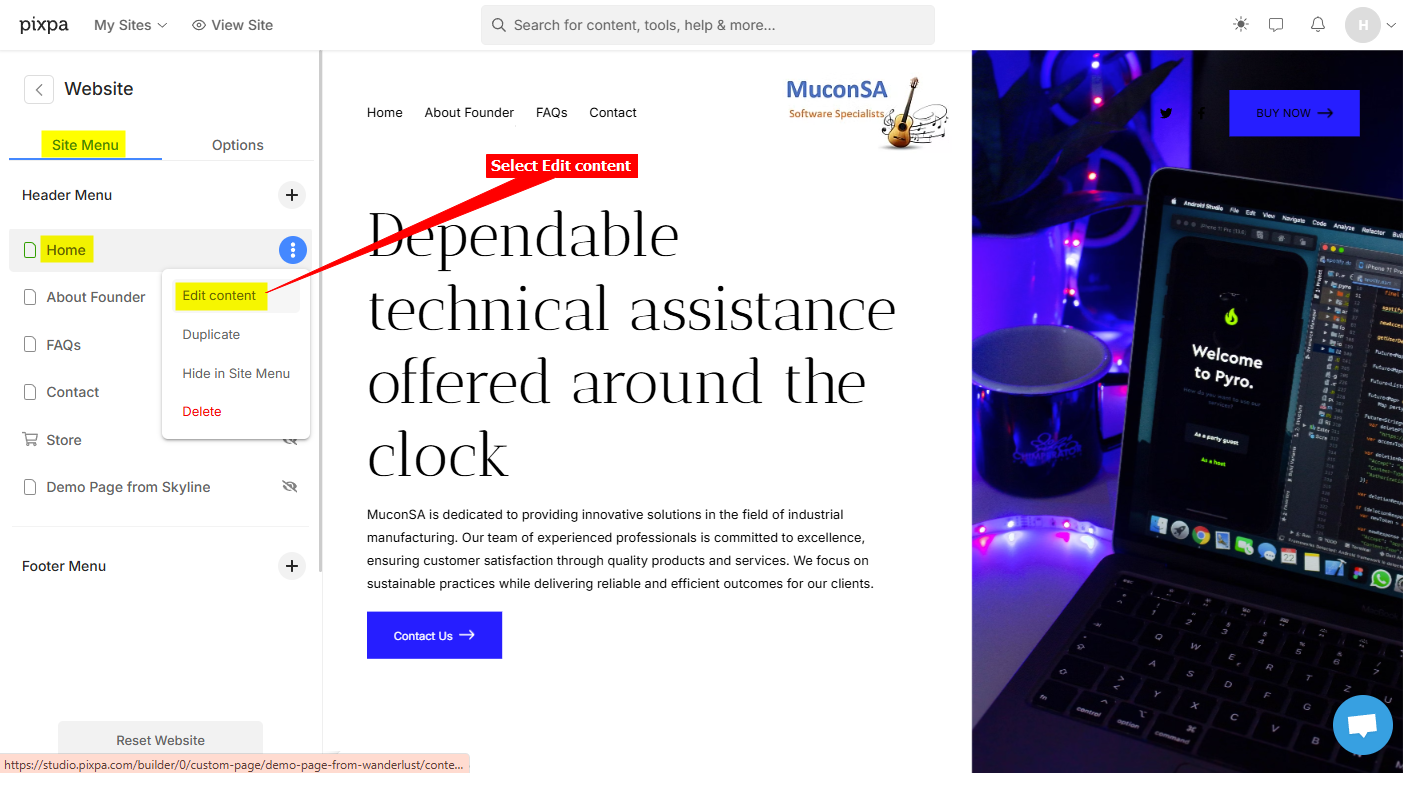
On the Website edit page, select Edit content to allow editing the content of the website page
-
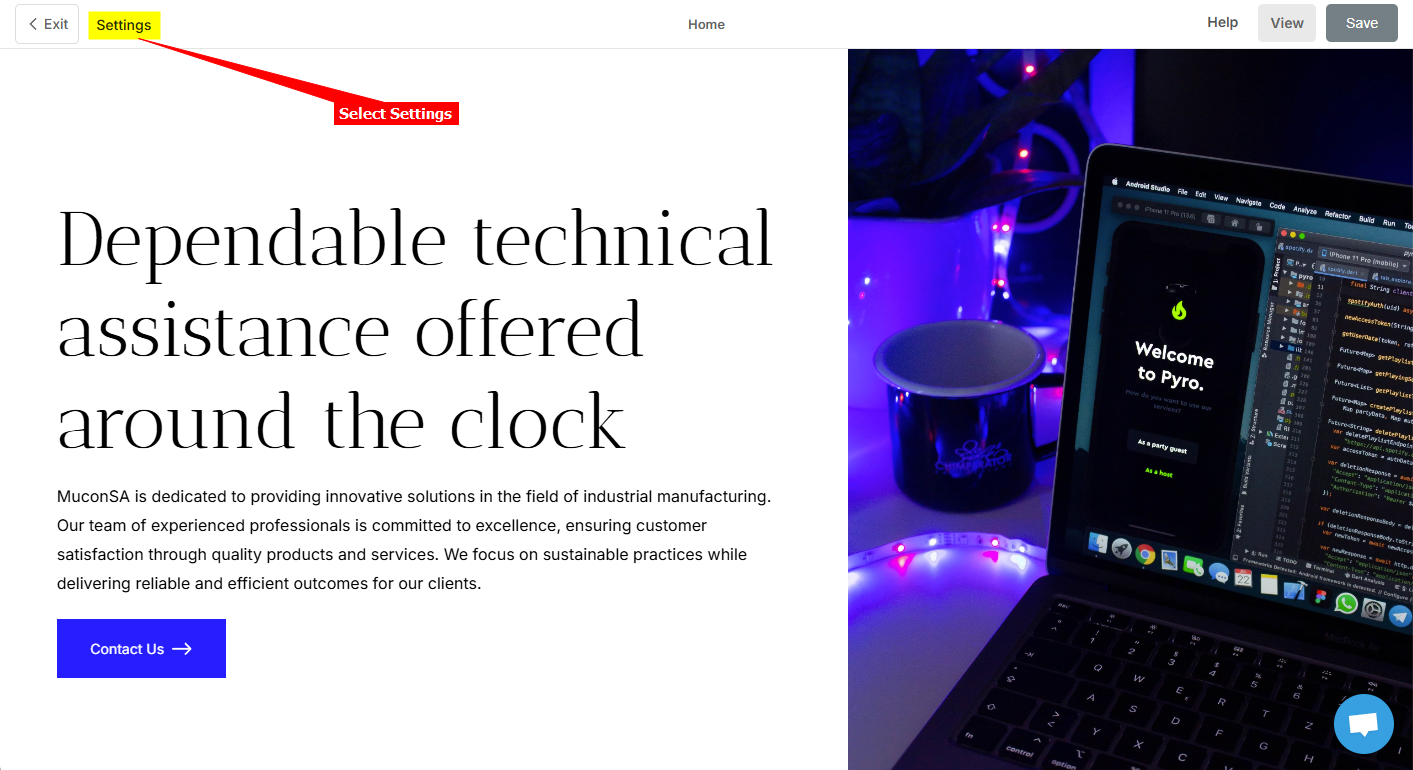
On the Edit content page, select Settings
-
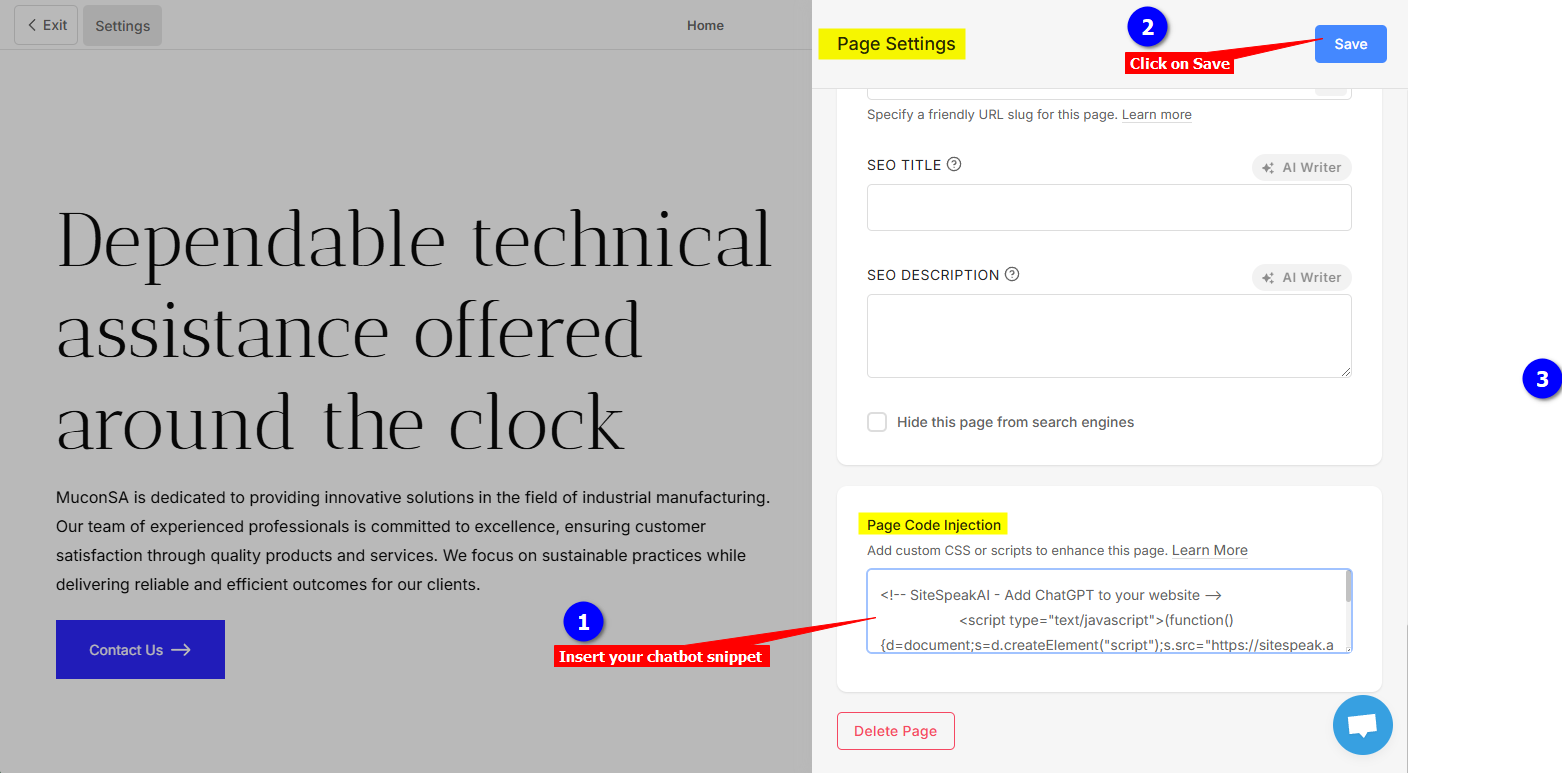
Scroll down on the Page Settings dialogue to the Page Code Injection option, insert your chatbot snippet in the Page Code Injection input text box and click on Save
-
Your chatbot button will now be displayed on your pixpa website

-
If you click on the button it will display your chatbot dialogue

Your chatbot has now been added to your pixpa website and your customers/visitors can start interacting with it!
Not finding what you need? Reach out to our support team for help.
Contact Support