Add your AI support agent to your b2evolution website
In SiteSpeakAI
Select your chatbot from the dropdown menu at the top, click on the Install Agent section in the sidebar, then click on the Copy Code button to copy your code snippet.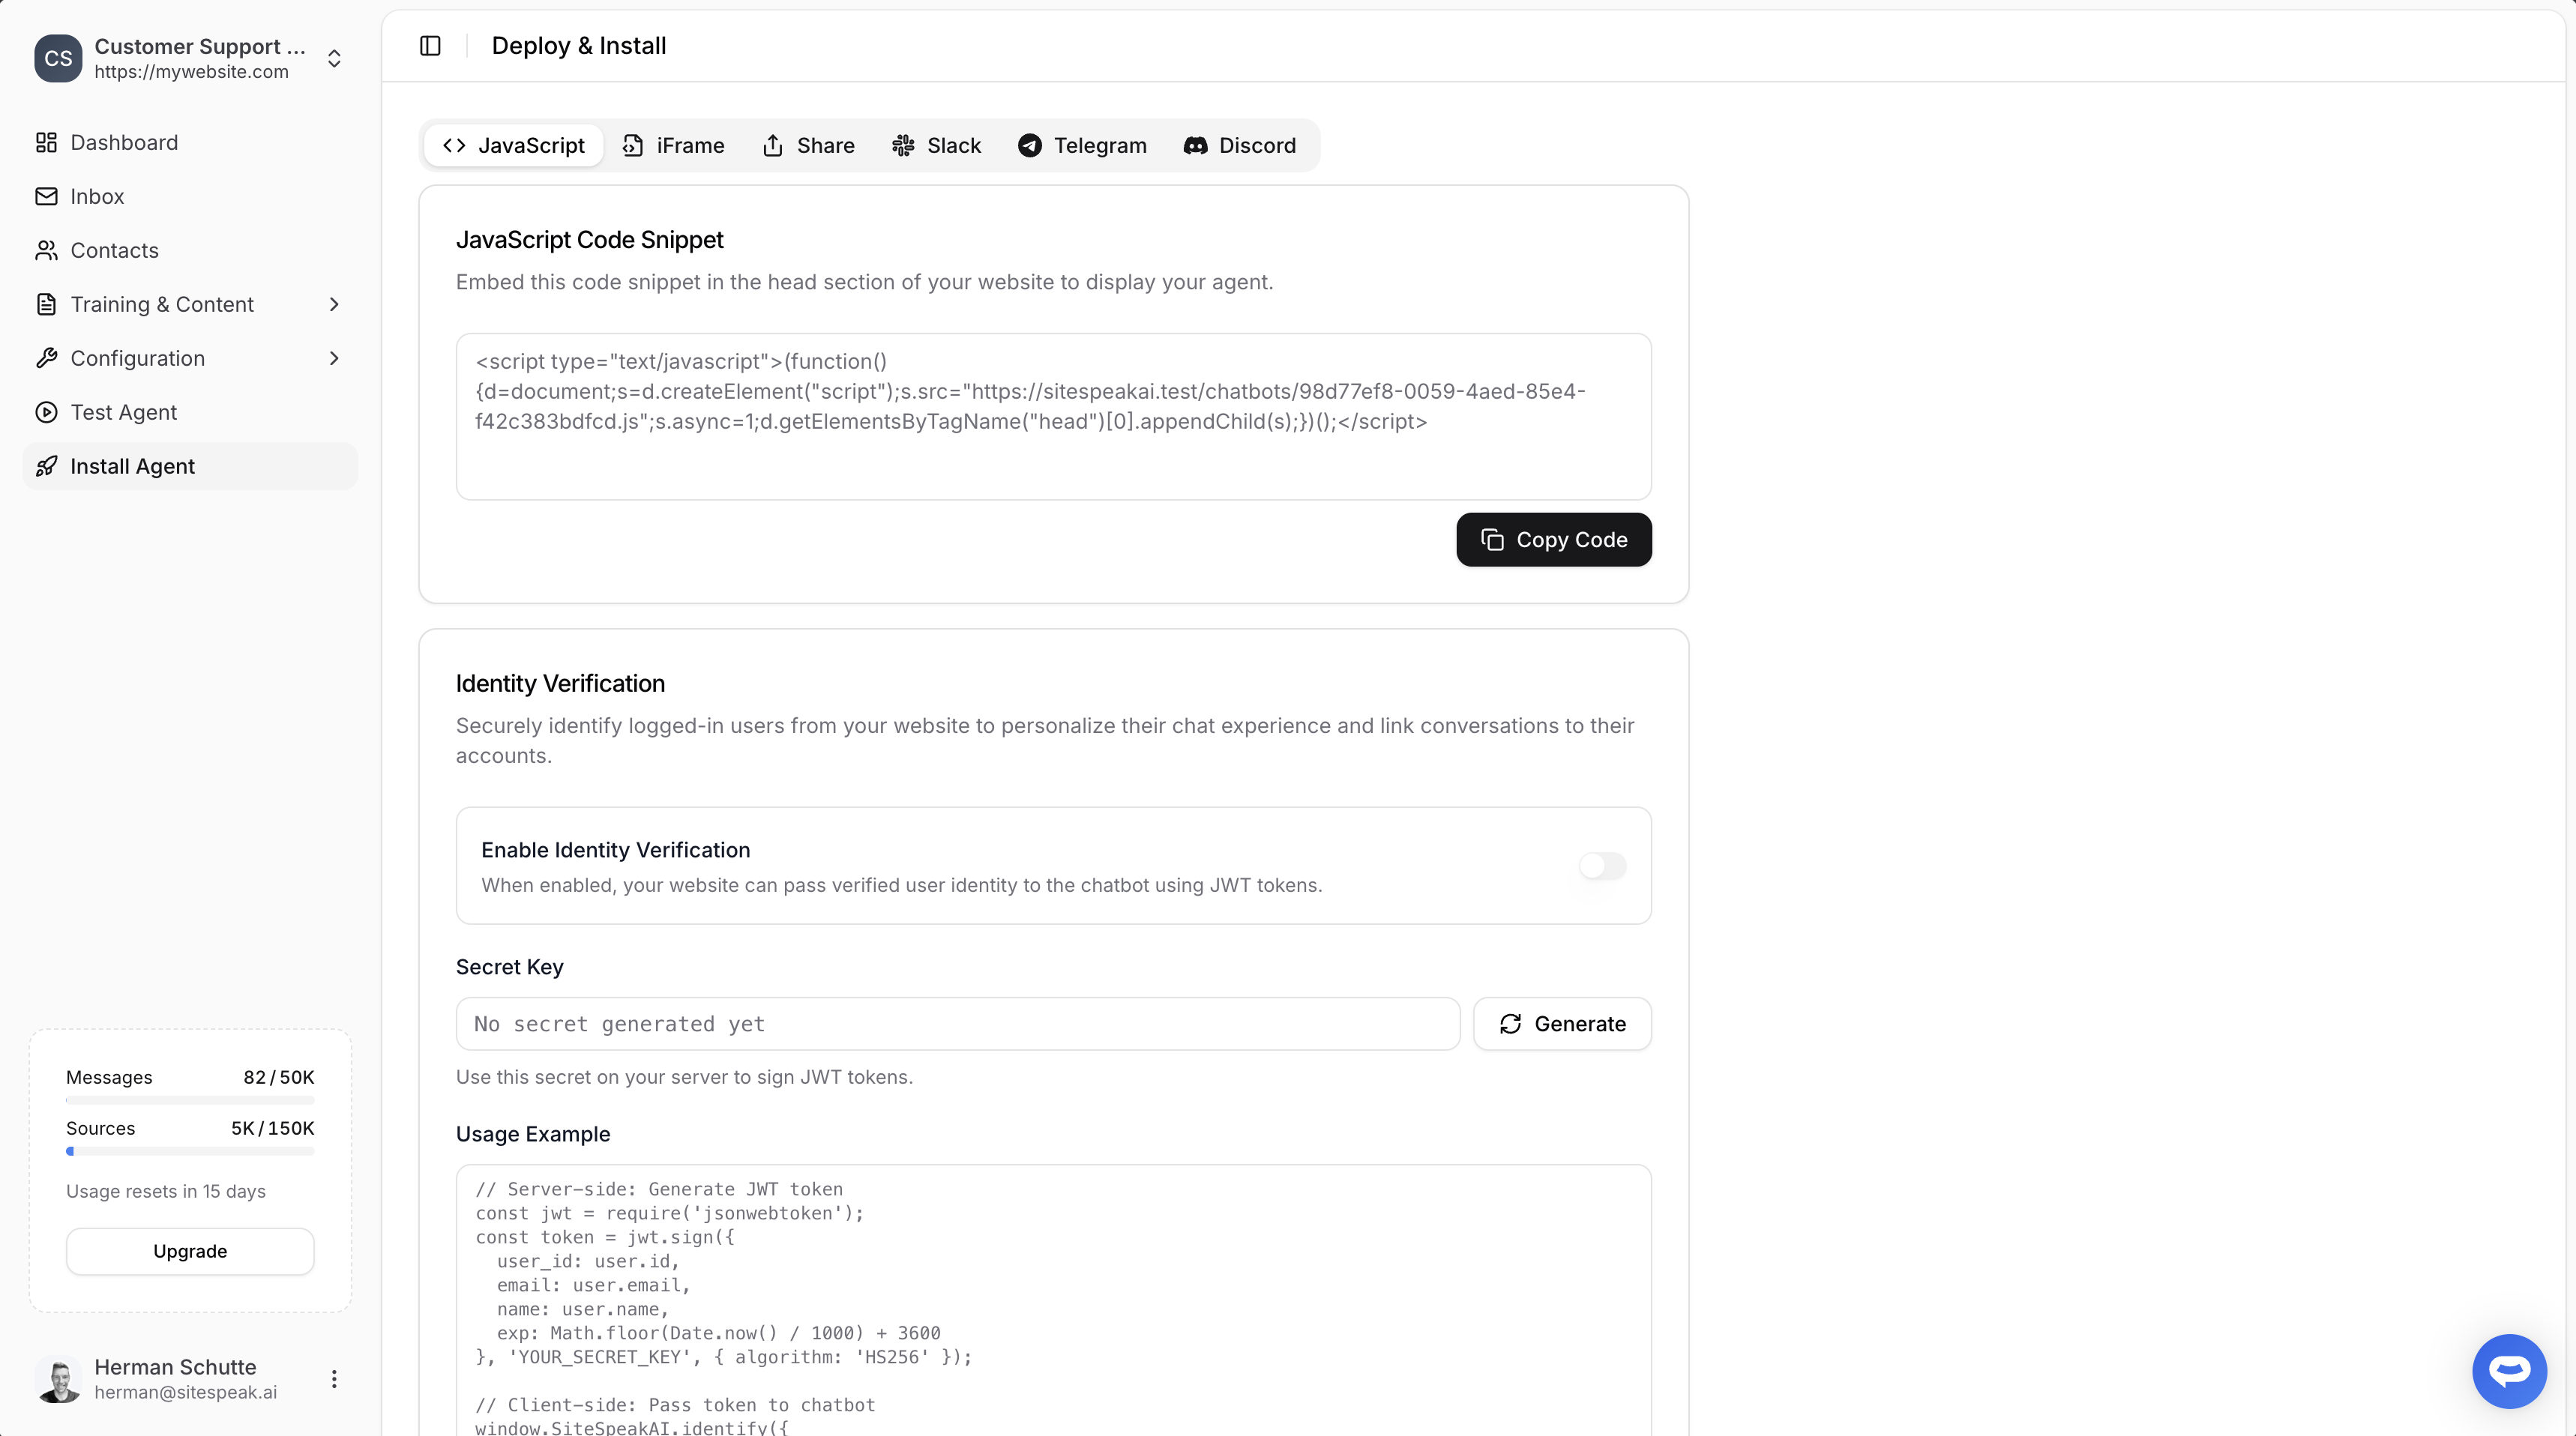
In b2evolution
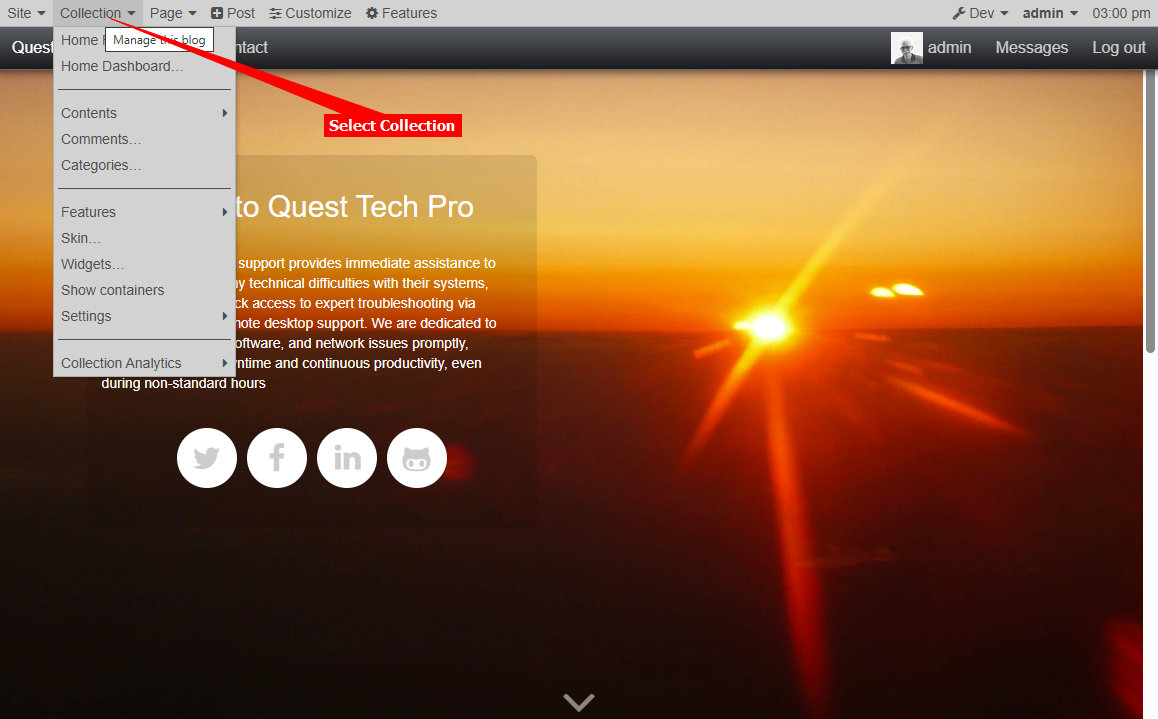
- Log in to your b2evolution acount and on your dashboard select Collection to manage your blog/website
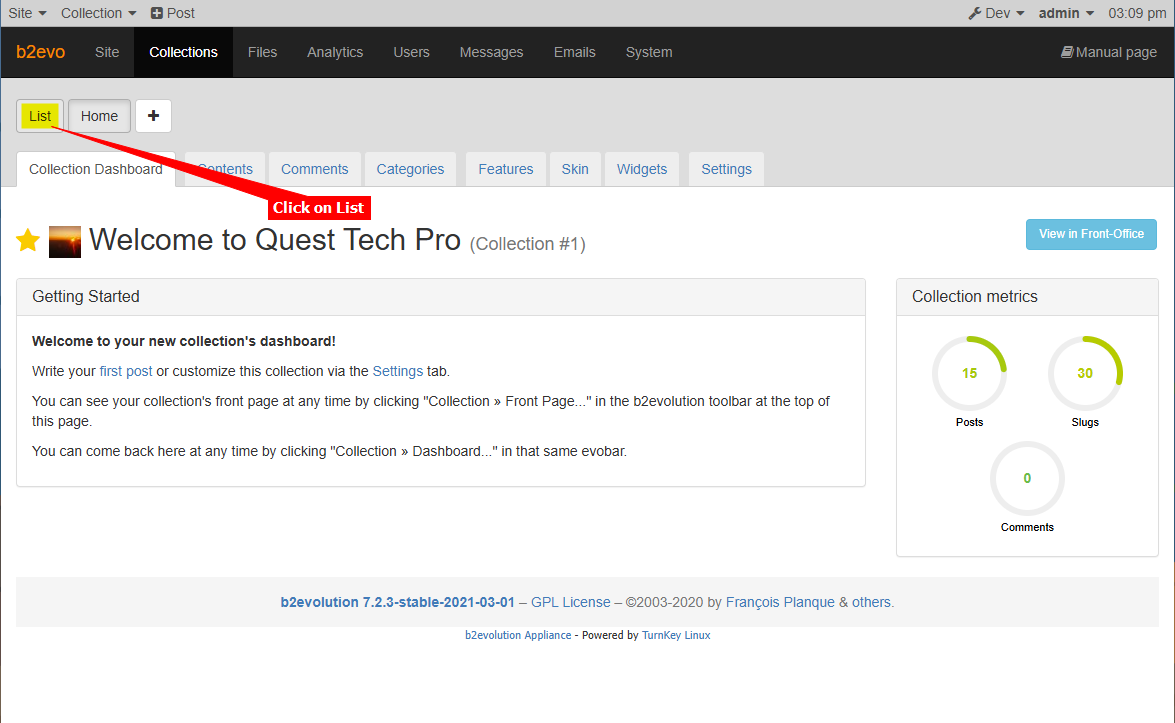
- Click on List to display a list of your Collections
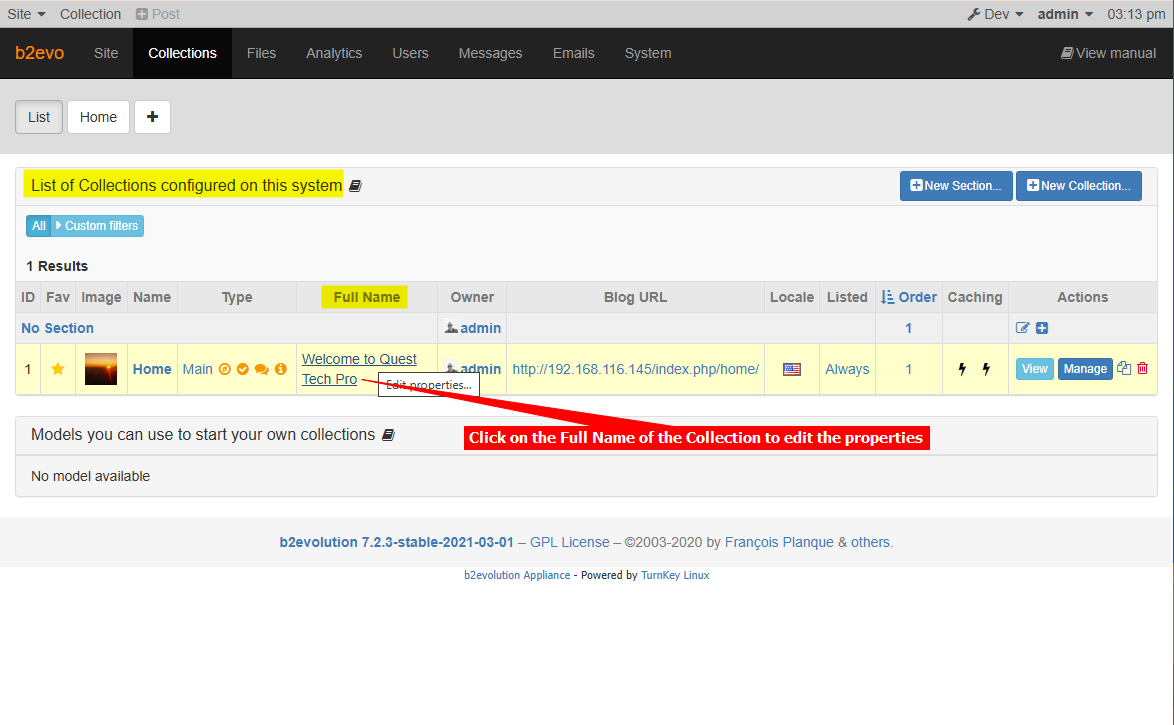
- Click on the Full Name of the Collection to edit the properties
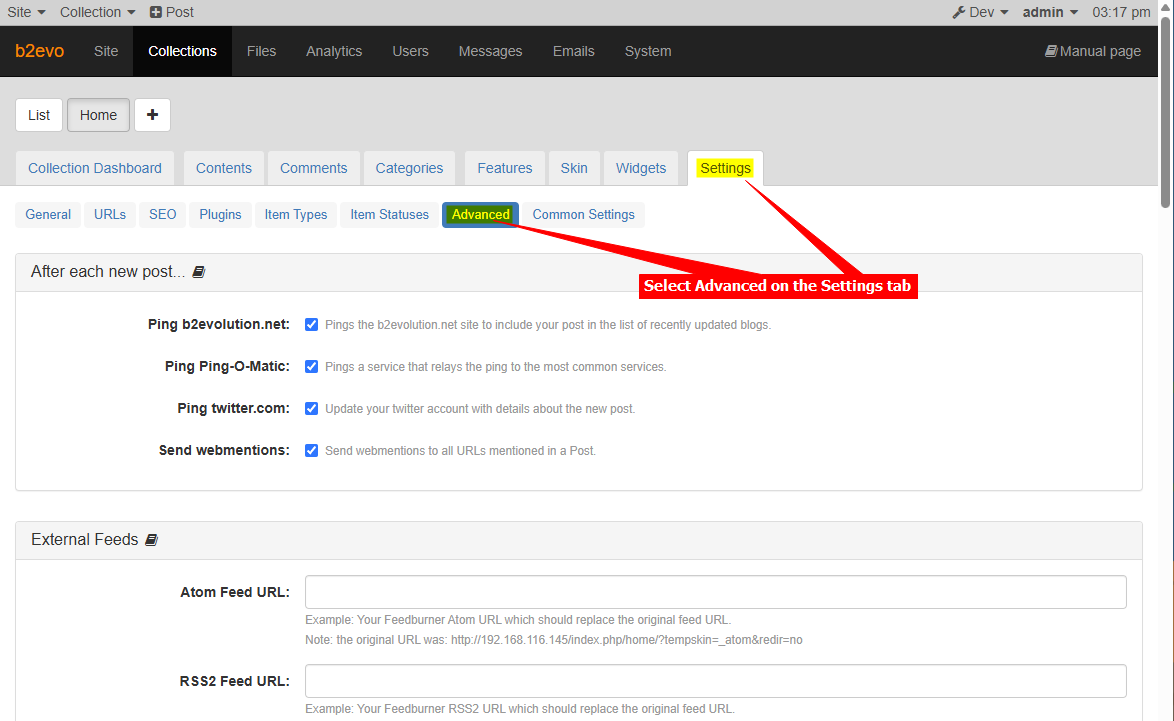
- Select Advanced on the Settings tab
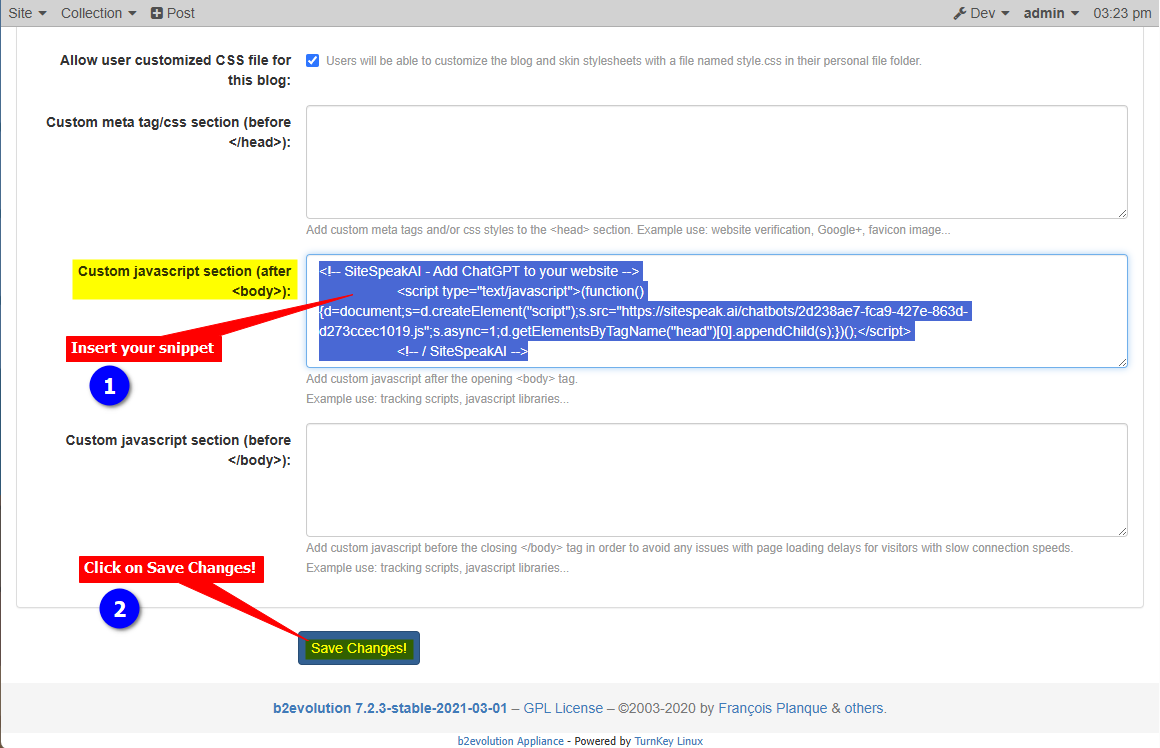
- Scroll down on the Advanced list and insert your snippet in the Custom javascript section (after <body>) text box. Click on Save Changes! when done
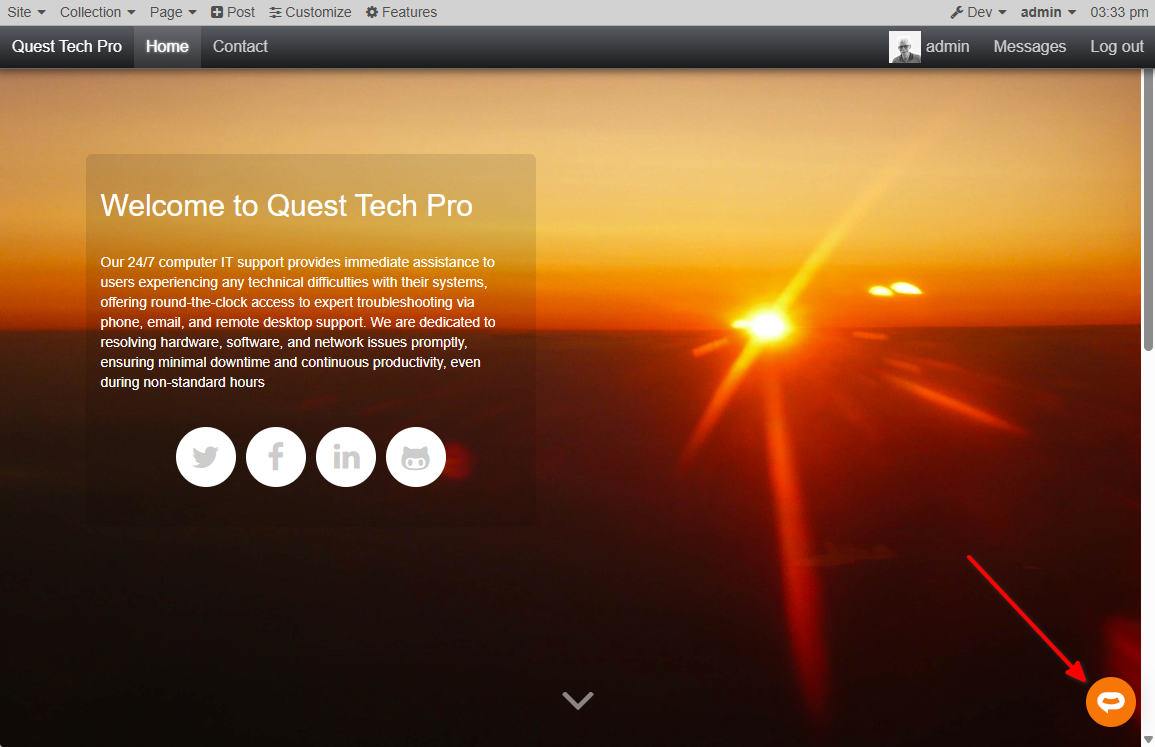
- Your AI support agent button will now be displayed on your b2evolution website page
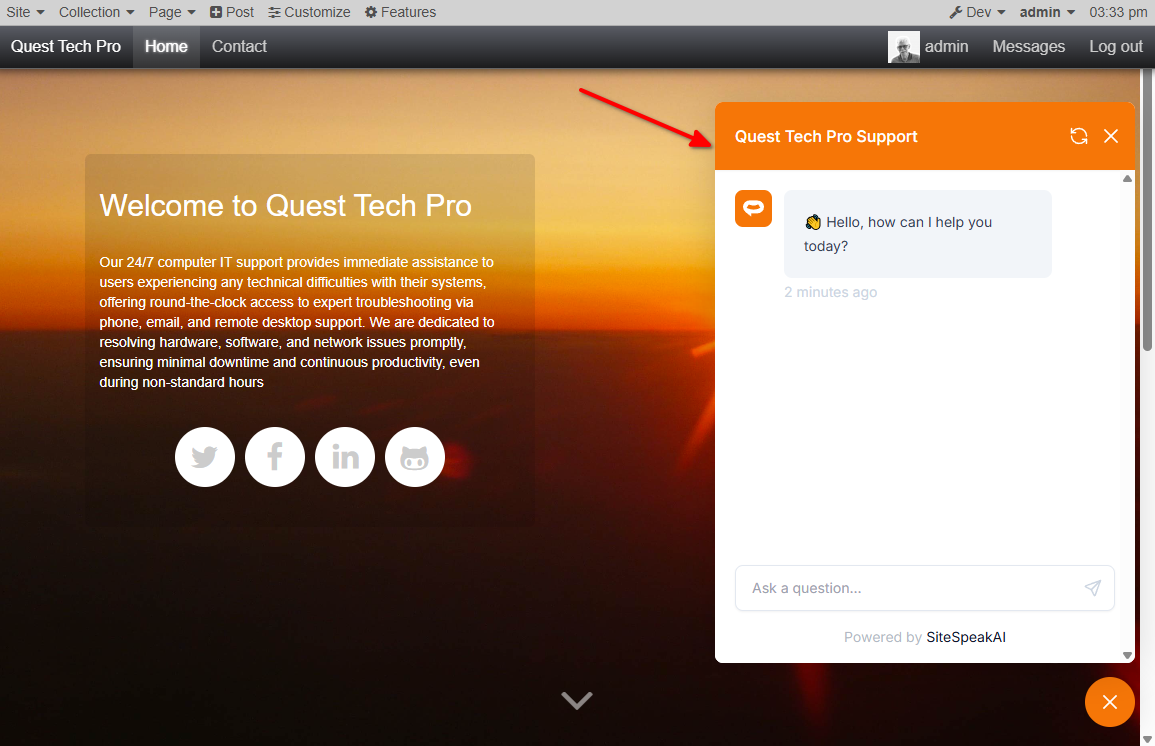
- If you click on the button it will display the AI support agent dialogue
 Your AI support agent has now been added to your b2evolution website and your visitors/customers can start interacting with it!
Ready to automate your customer service with AI?
Join over 1000+ businesses, websites and startups automating their customer service and other tasks with a custom trained AI agent.