Add your chatbot to your Studio.Design website
Studio.Design is a no-code website builder crafted for designers, creatives, and small businesses who want full visual freedom without touching code. It’s especially popular for building portfolios, landing pages, and branded websites that look polished and perform well. For more info see Studio.Design.In SiteSpeakAI
Select your chatbot from the dropdown menu at the top, click on the Install Chatbot section in the sidebar, select iFrame and then click on the Copy Code button to copy your code snippet.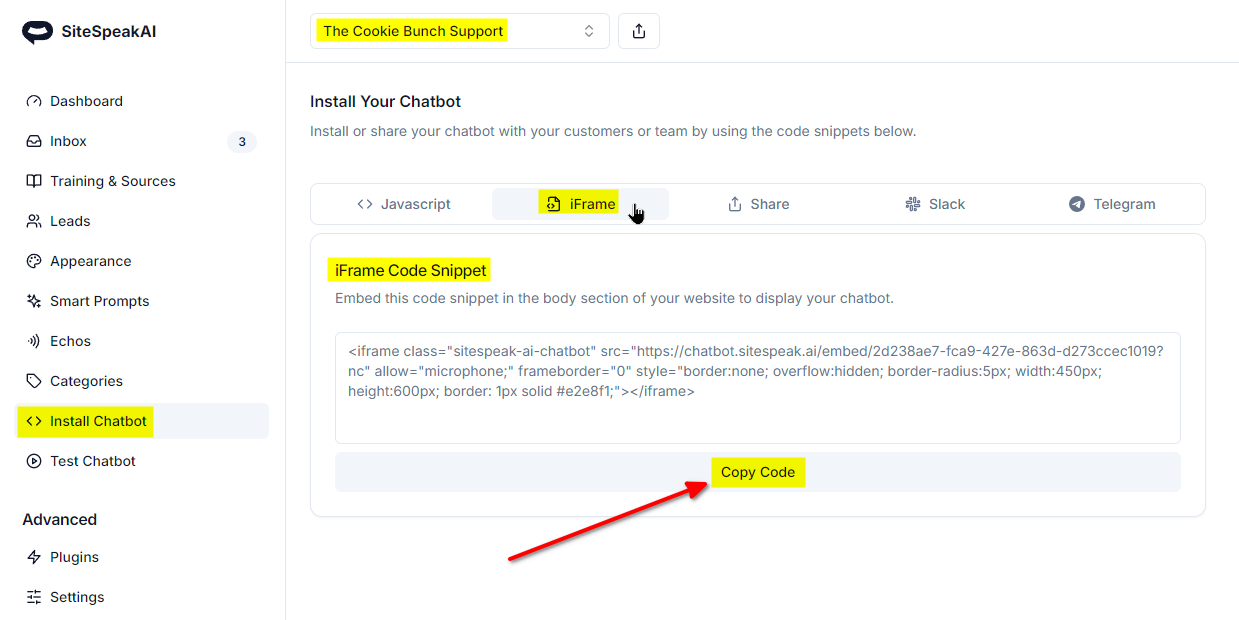
In Studio.Design
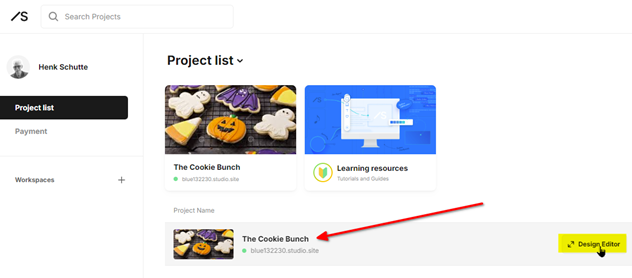
- Log into your Studio.Design account and on your dashboard, hover over the project you want to add your widget to and select Design Editor
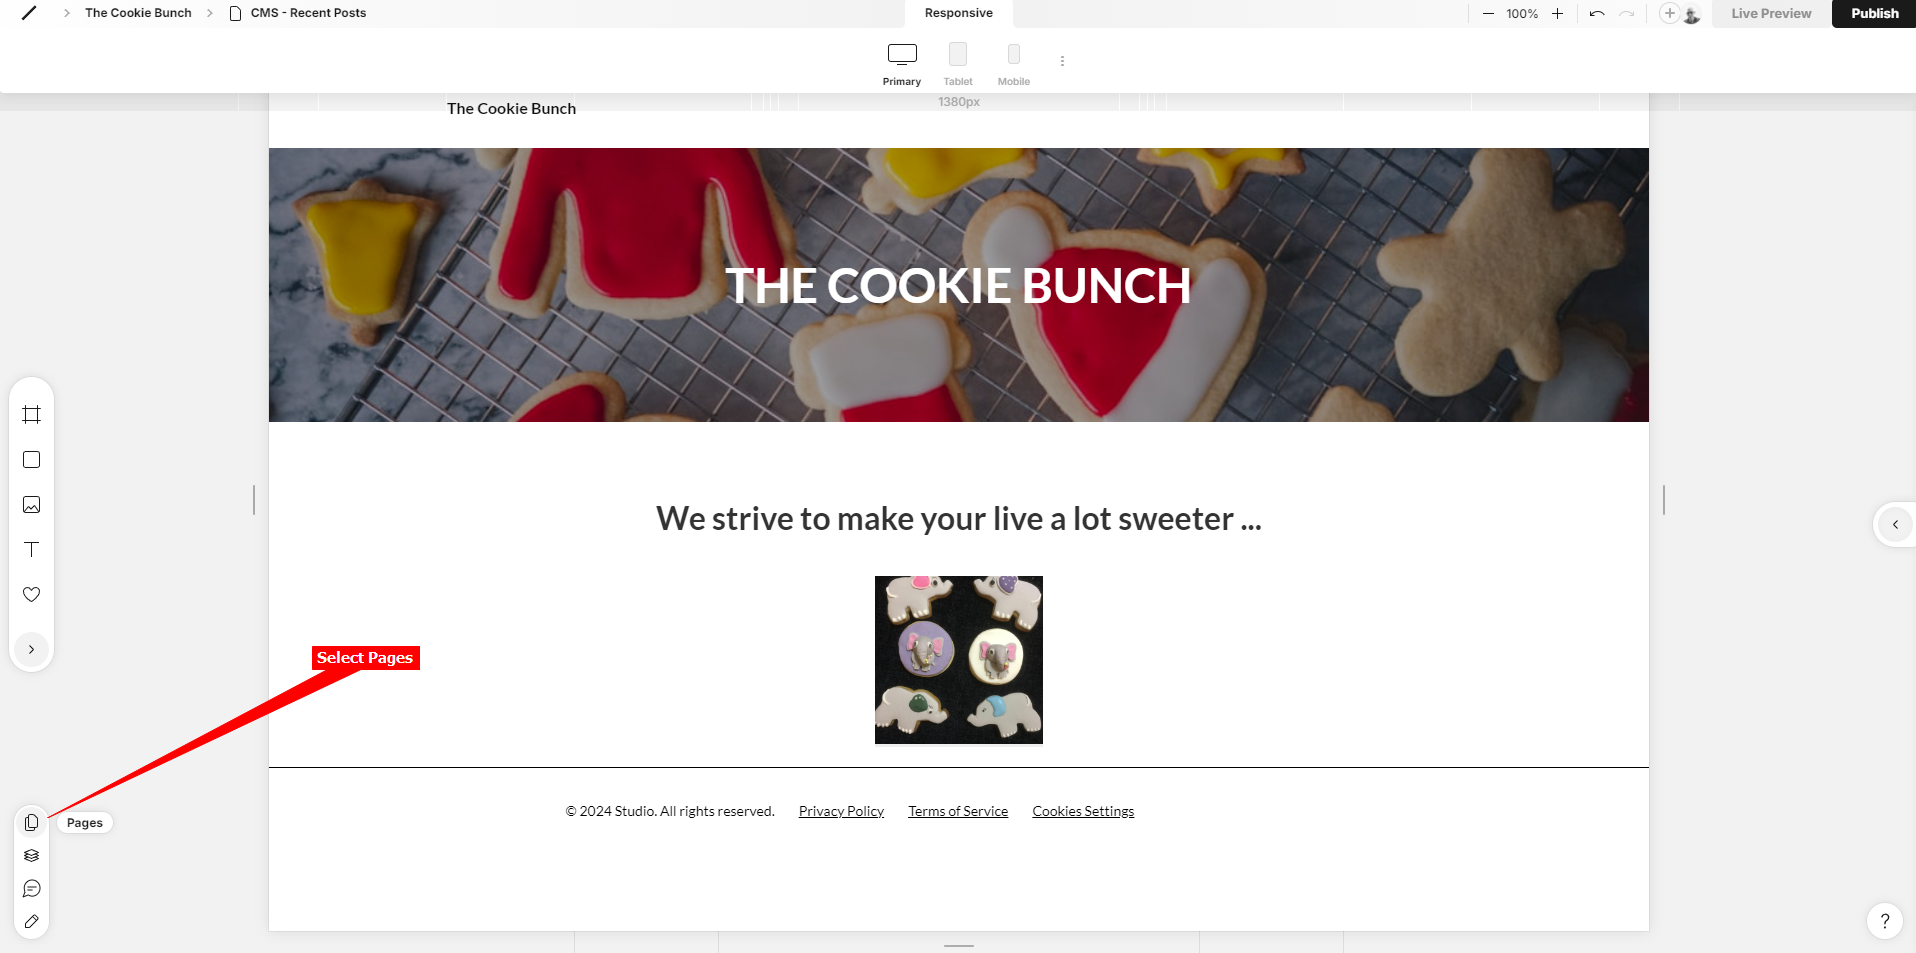
- Your project will now be opened in edit mode with the default page displayed
- Select the Pages option in the left sidebar
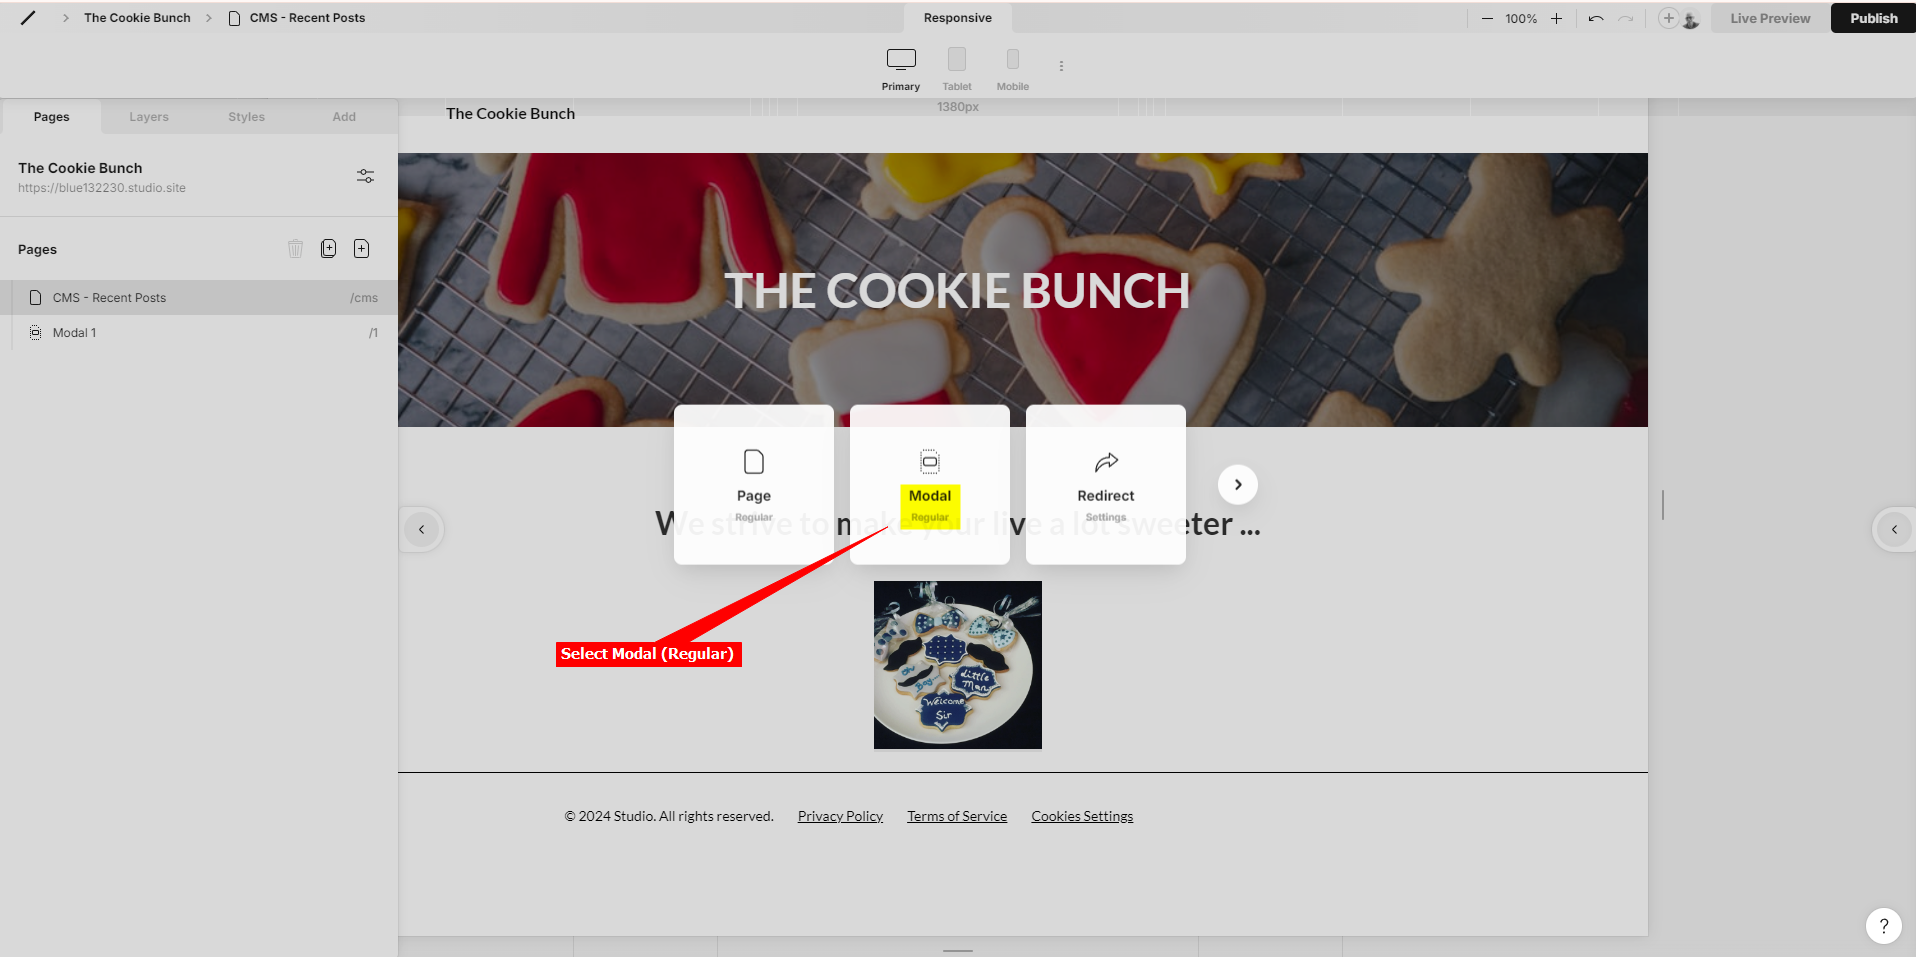
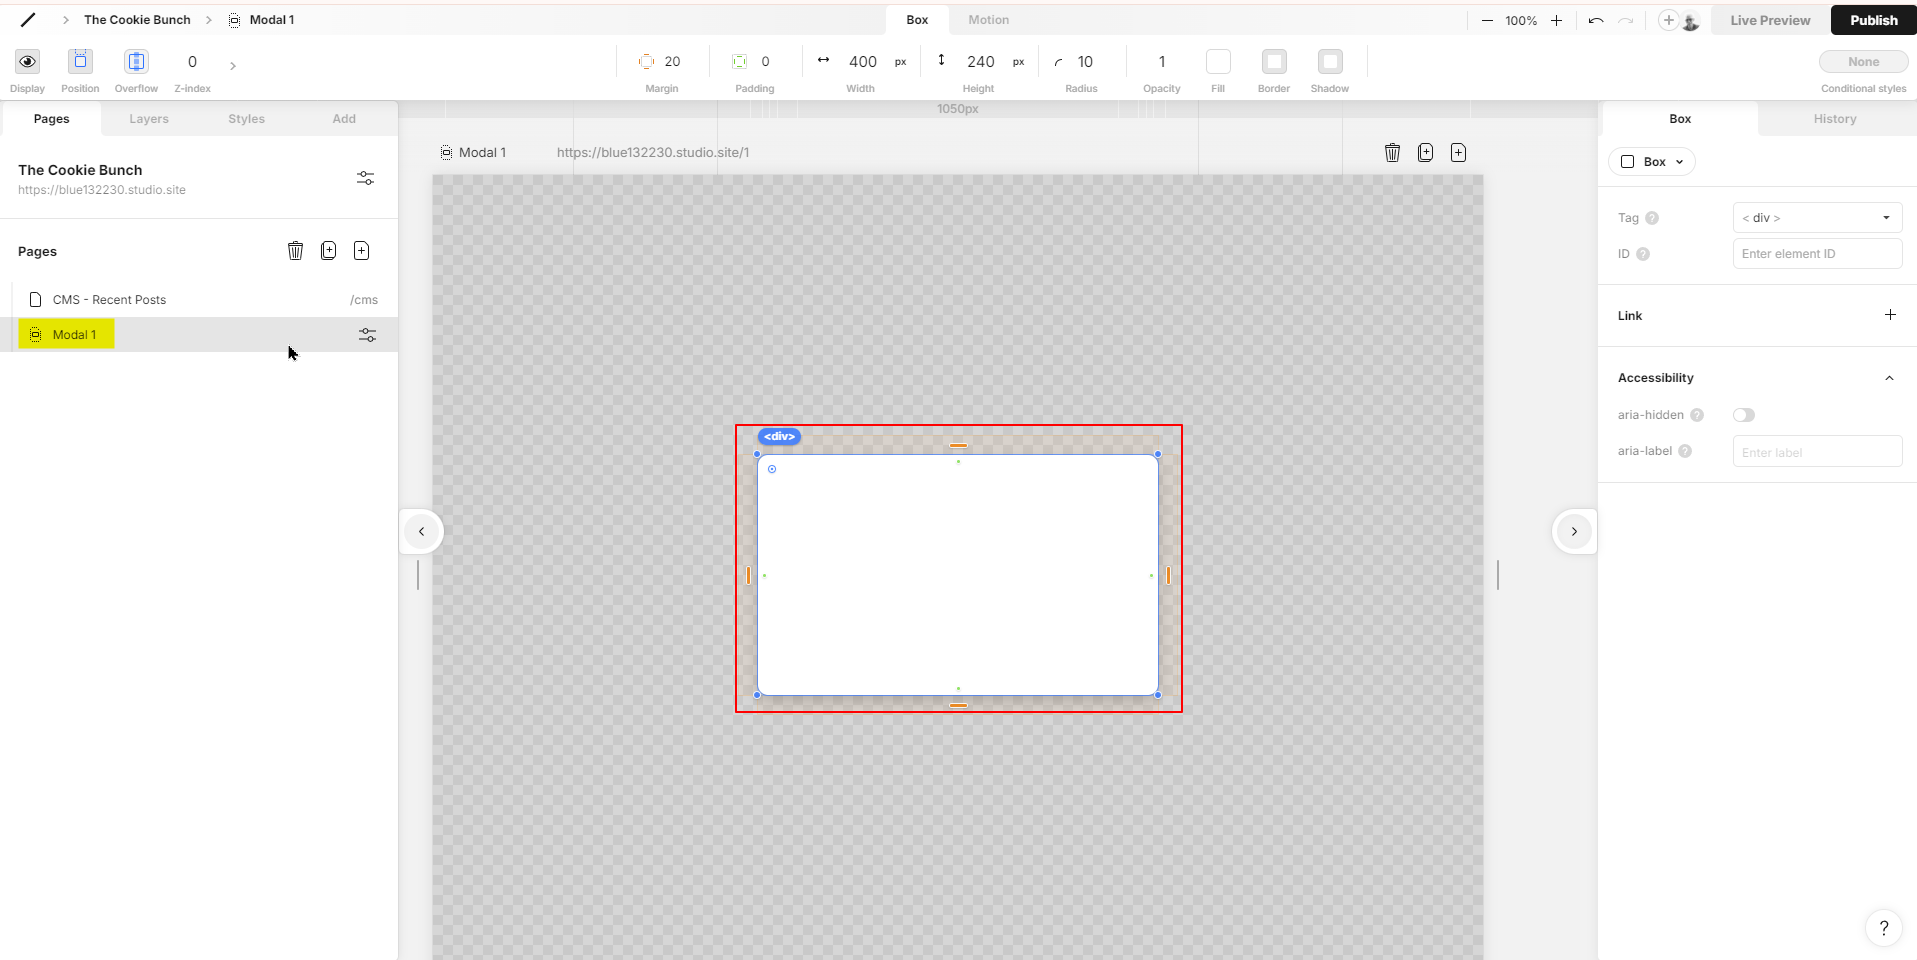
- On the Pages tab, click on Add to add a page. This allows you to add Regular and Dynamic Pages, Regular and Dynamic Modals, Redirect Pages, Search Pages and Password Pages. For our purpose we will choose a Regular Modal page.

- Select Modal (Regular)
- The blank Modal page will now be listed under Pages
- Select Add and drag the Embed Blank </> box into the Modal page
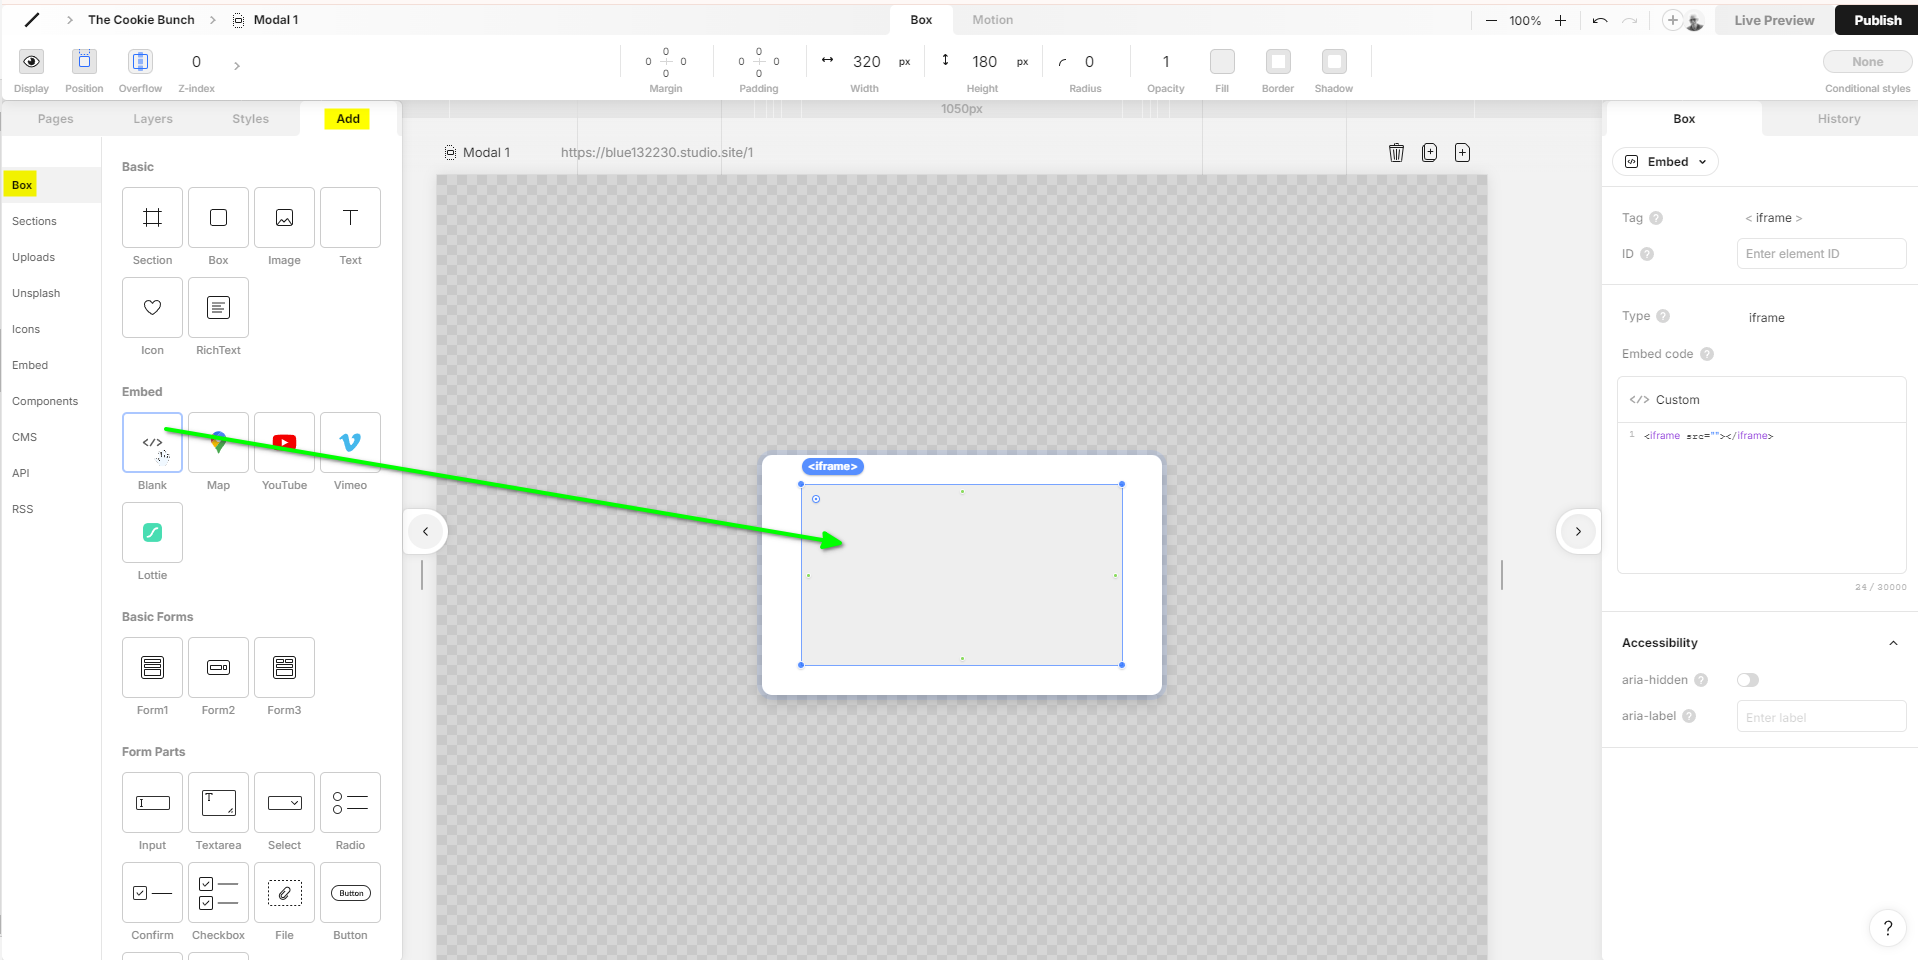
- Insert your iframe code that you copied at the start into the </> Custom box. You will see the chatbot being displayed in the Embed Box on the Modal page - we will resize this in the next steps
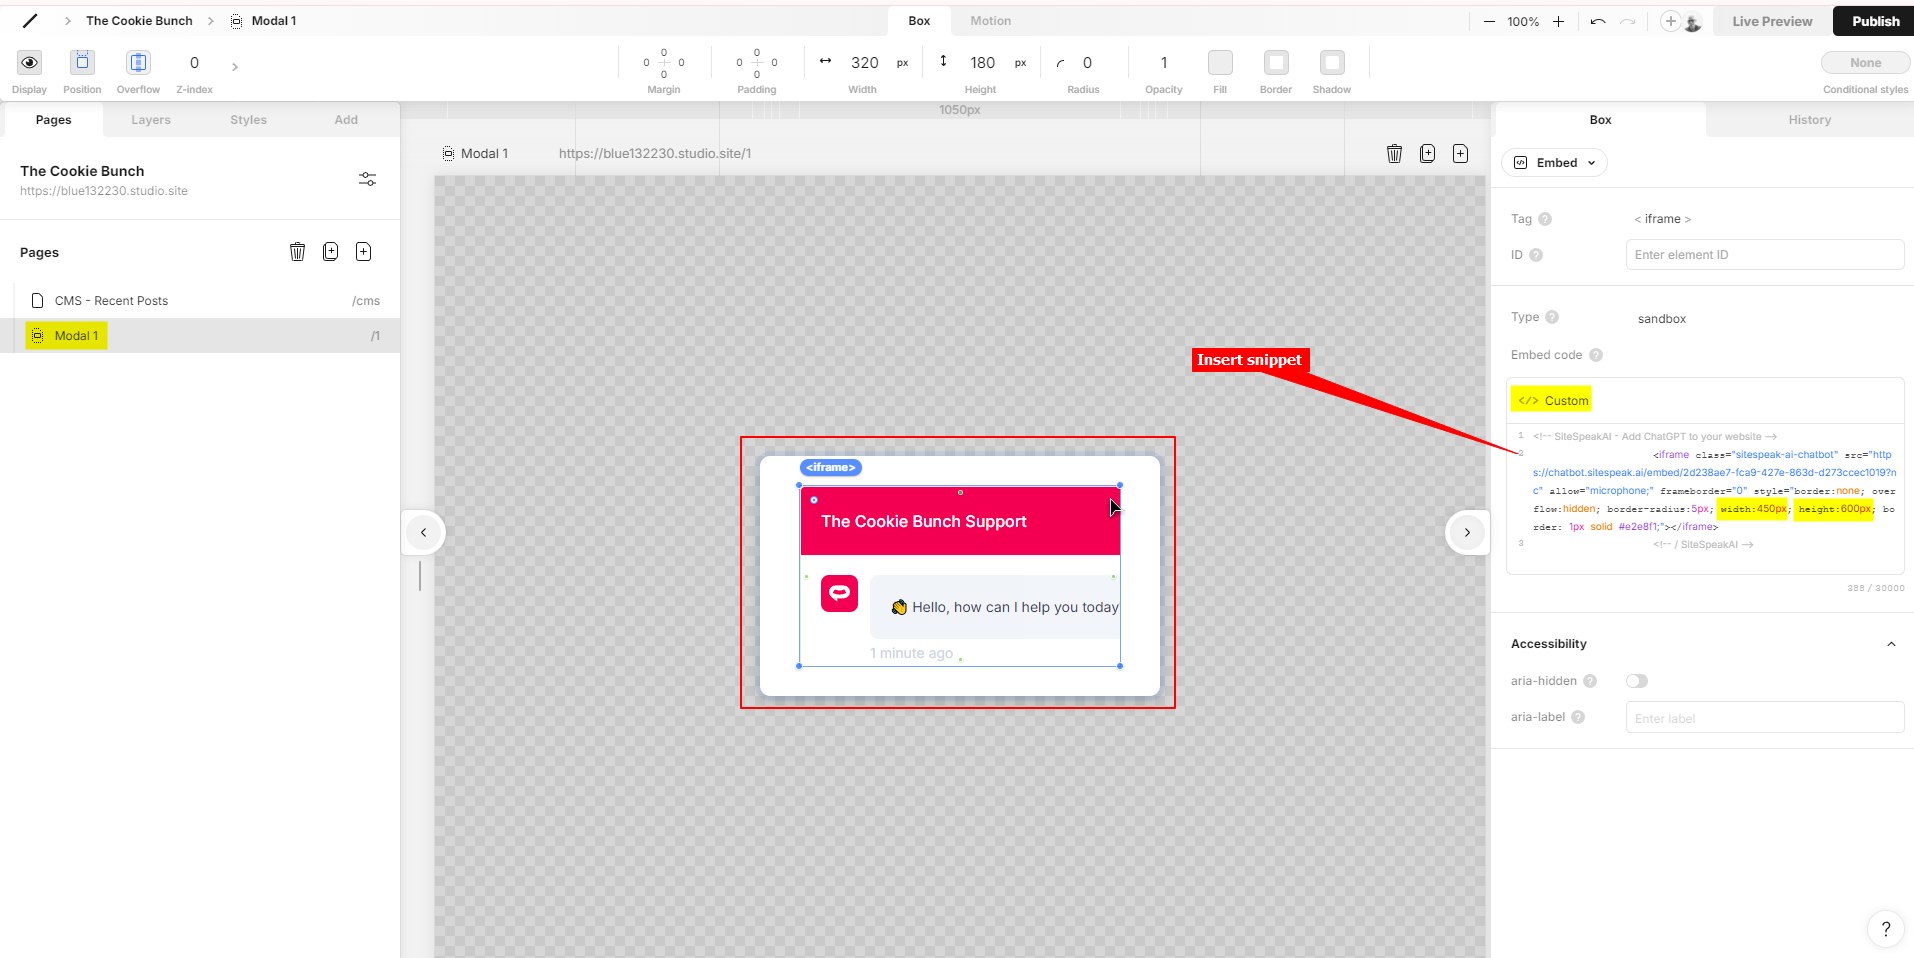
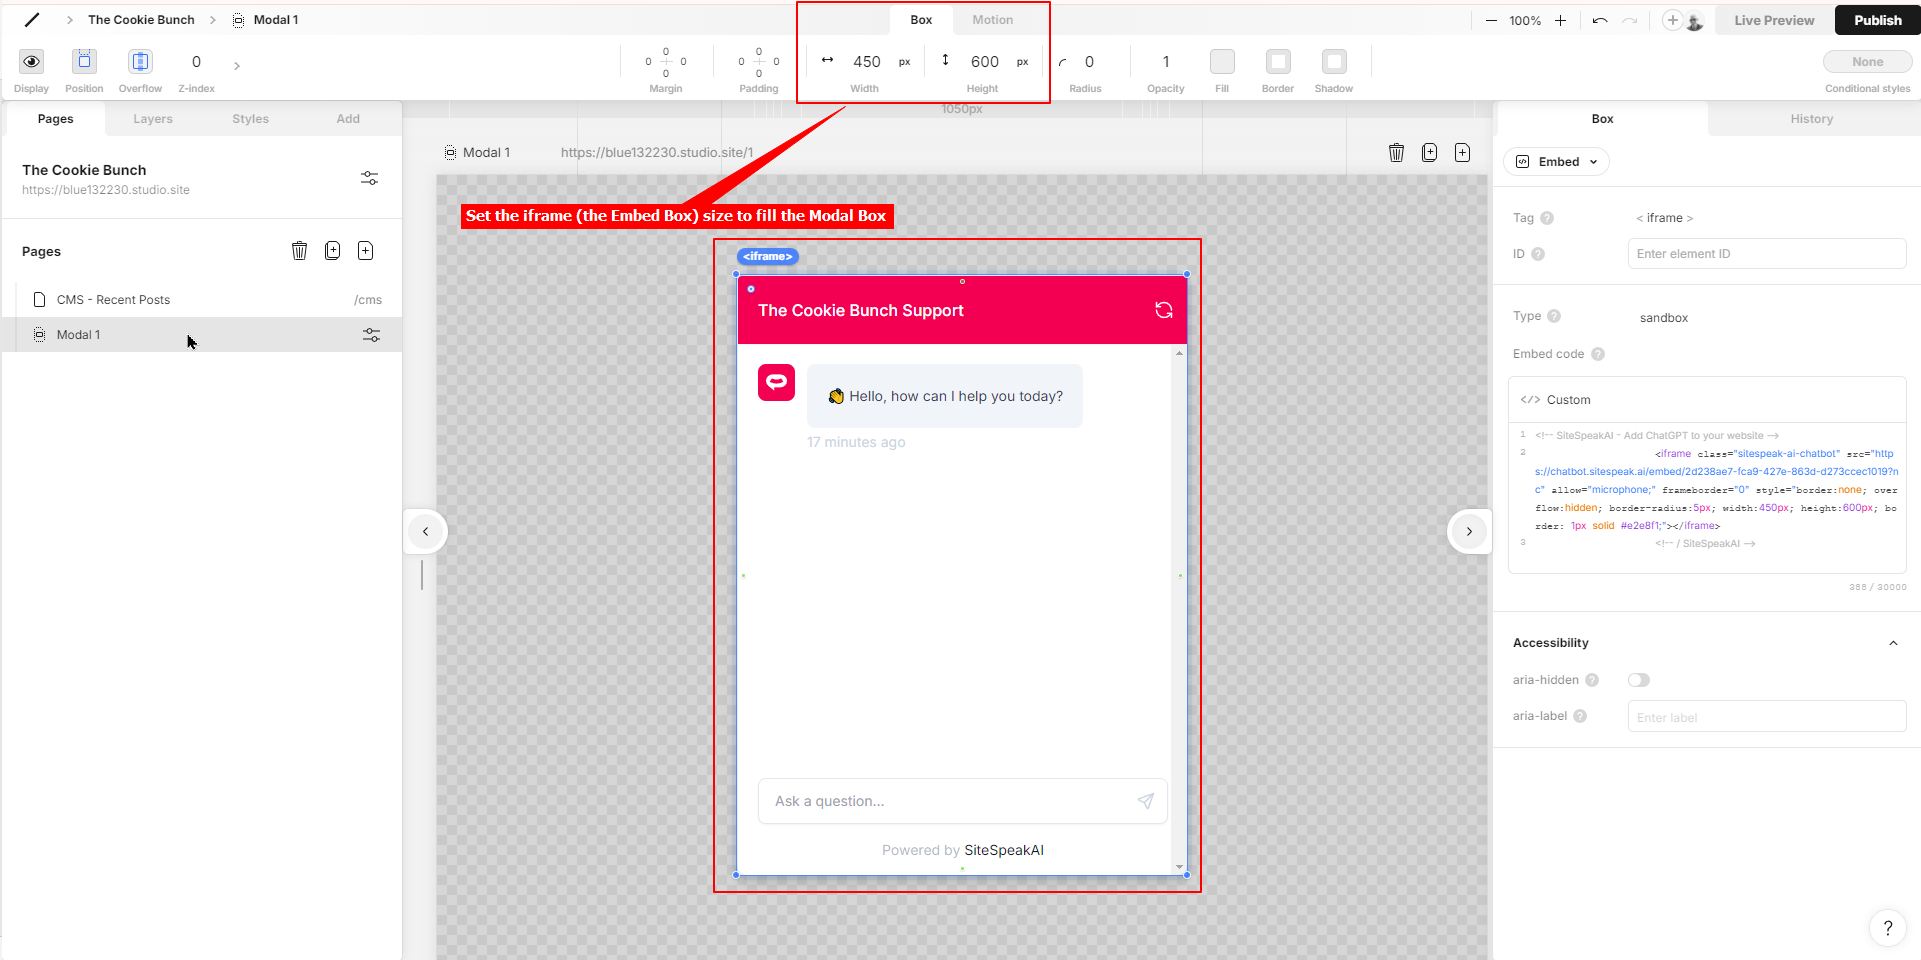
- The actual iframe size is width=450px and height = 600px. Set the Modal page size to match the iframe size as set in the iframe code attributes
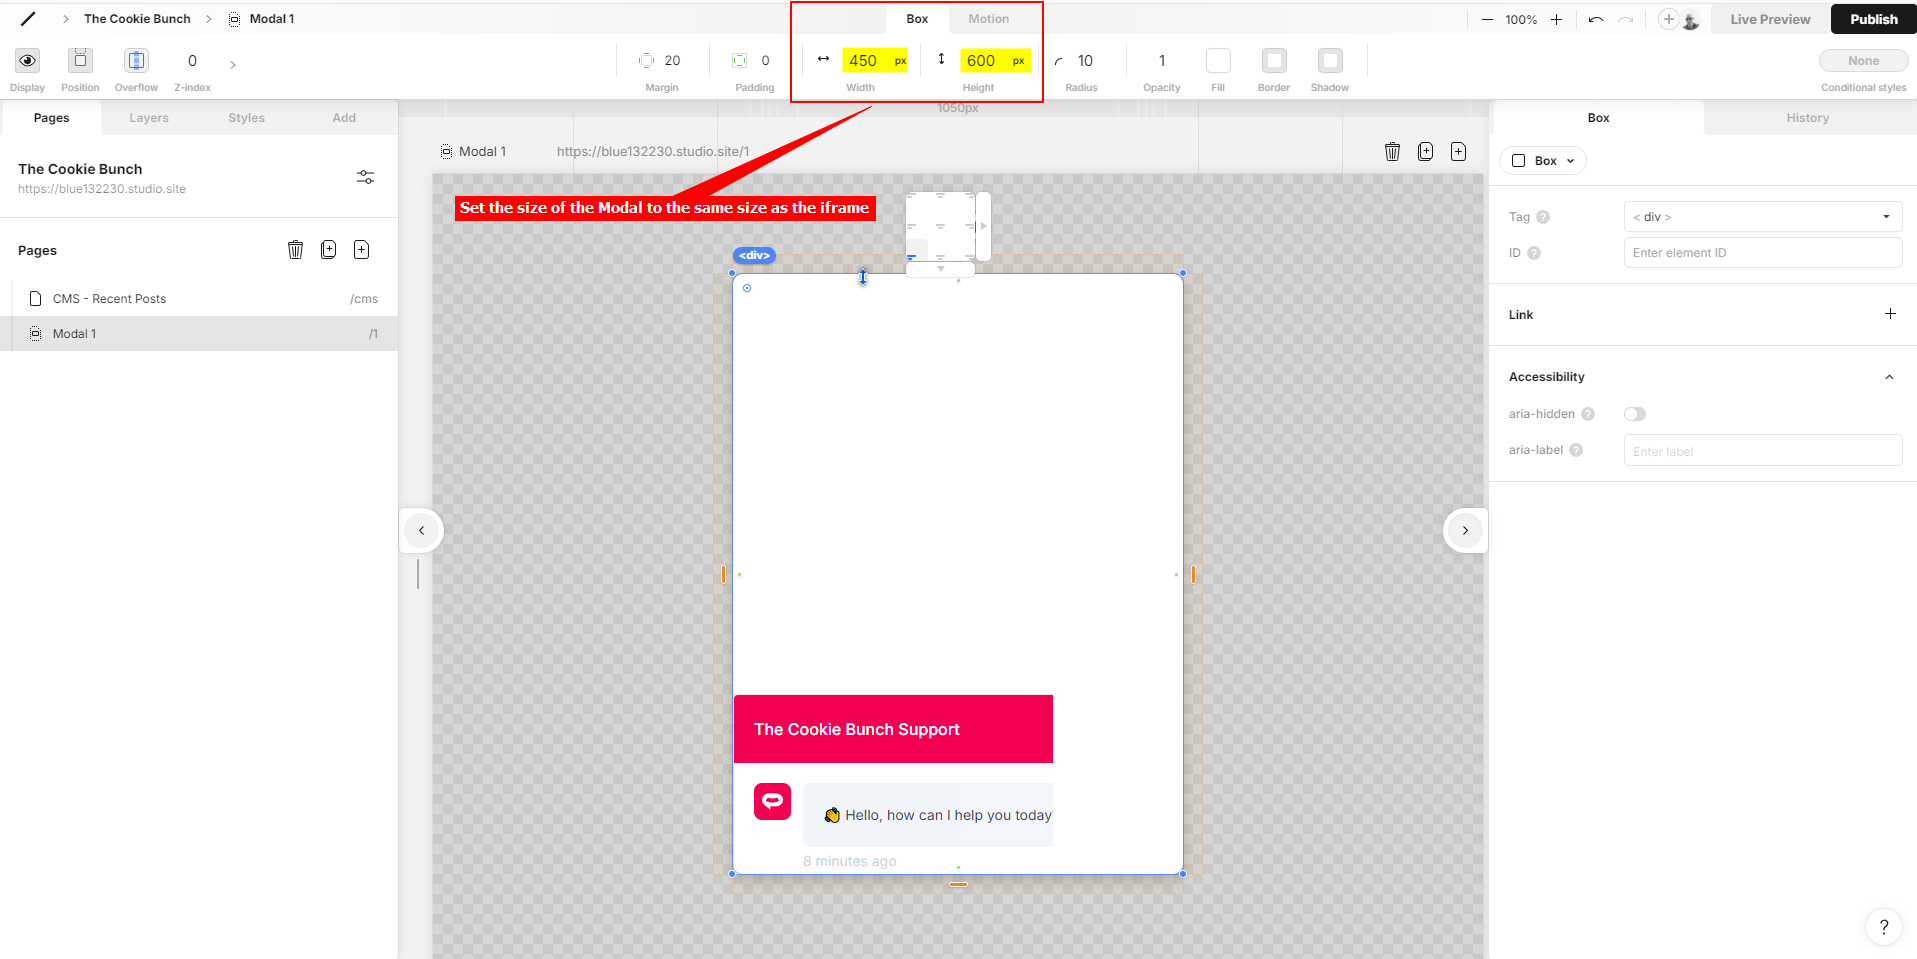
- Select the Embed Box containing the iframe and set the size to fill the Modal page
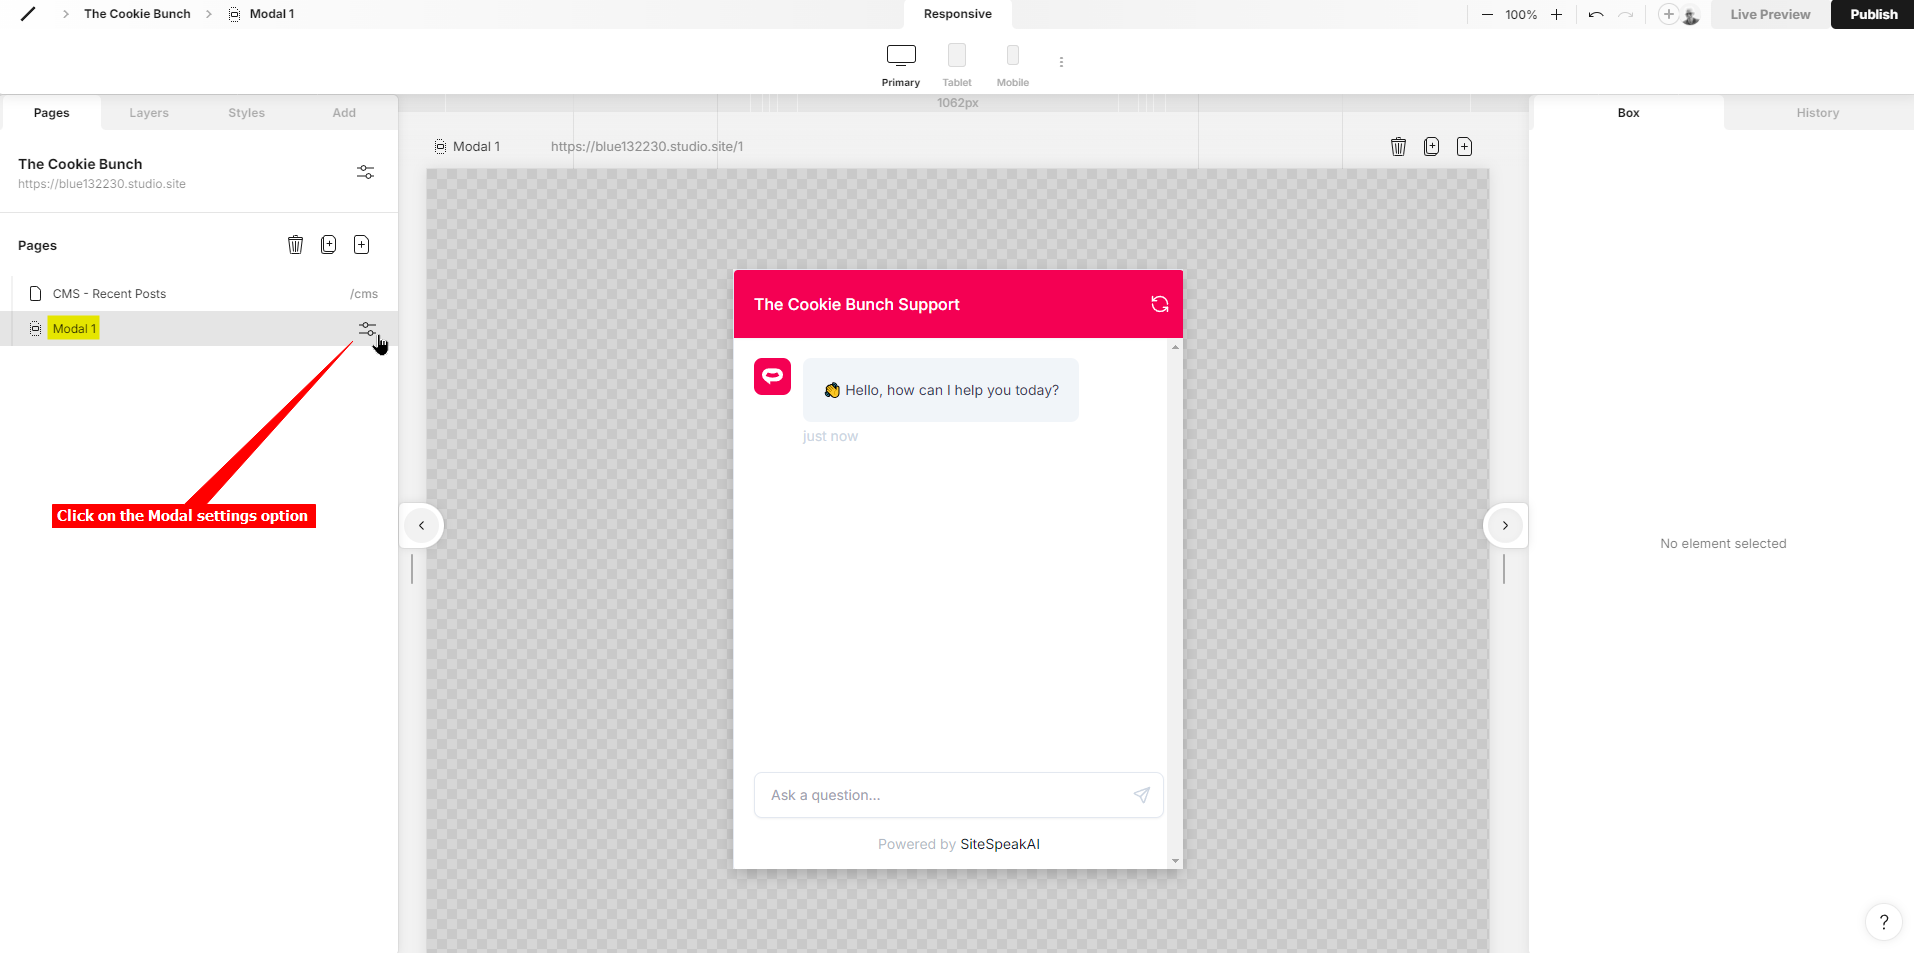
- Select the Modal page settings option
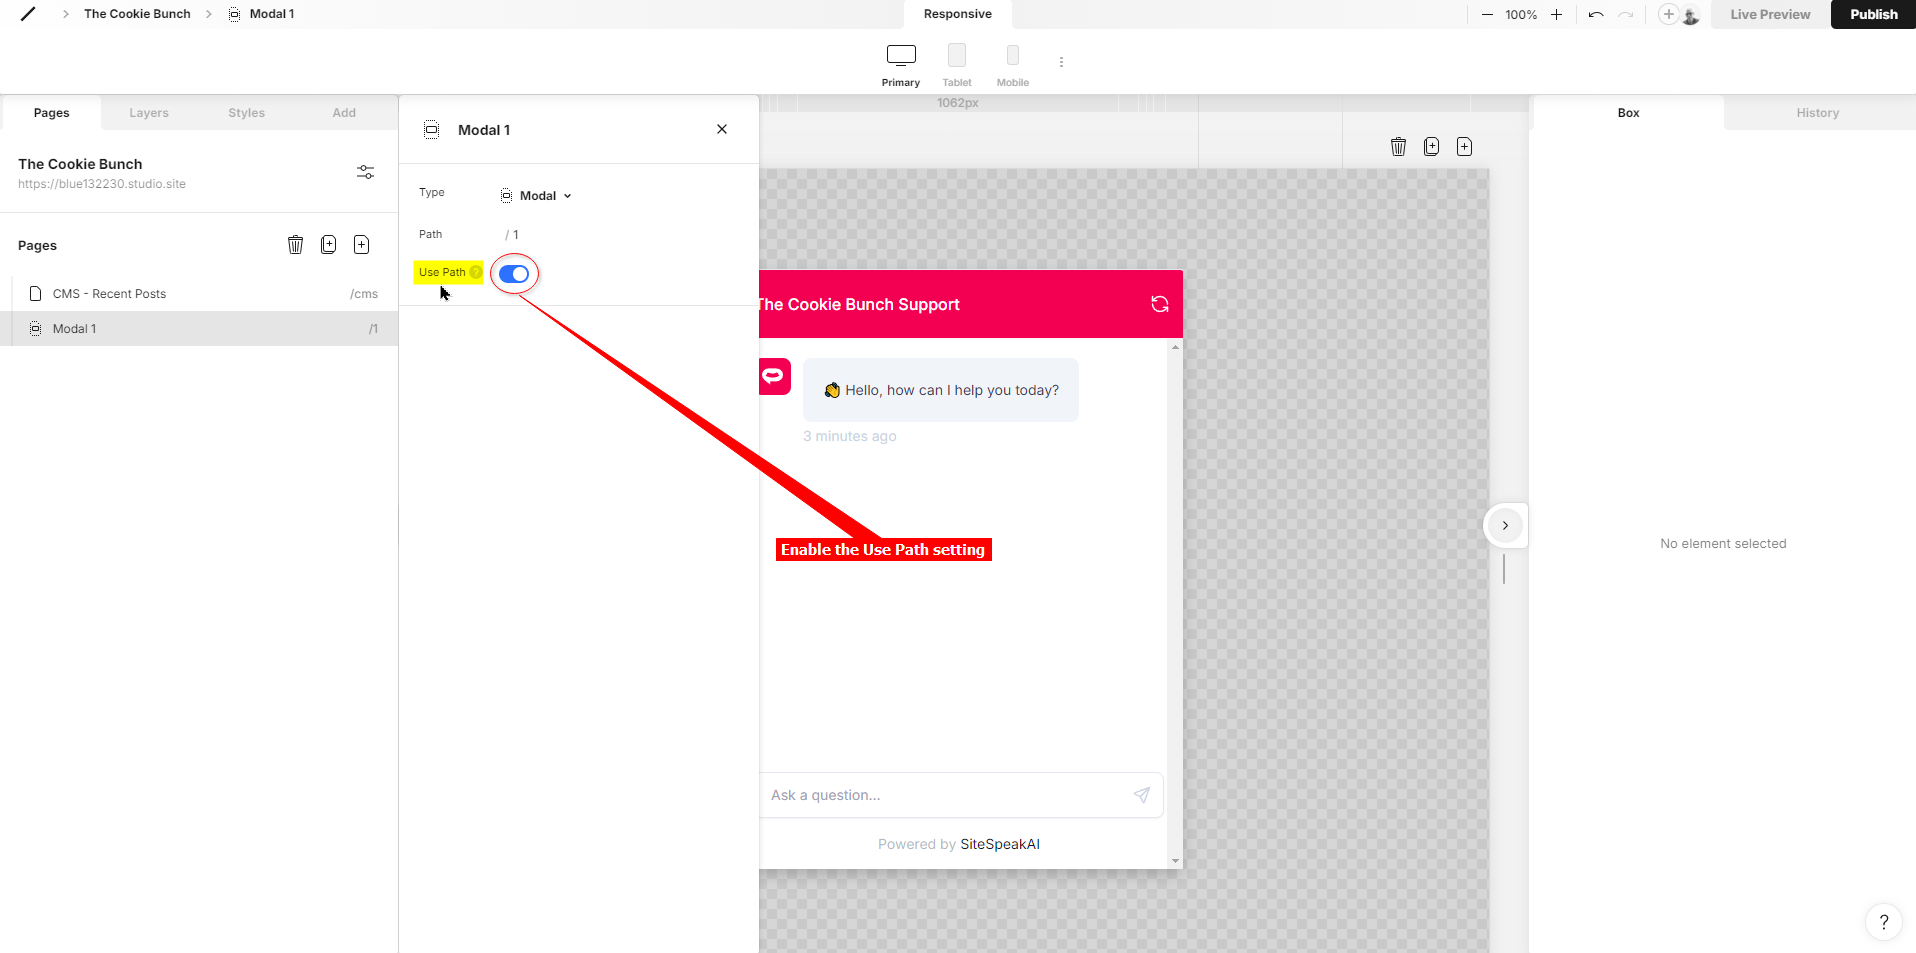
- Enable the Use Path setting
 We are now going to add a Button to your webpage that will display the popup Modal page containing your chatbot dialogue. The best place will be to add the button to the page footer. If you don’t have a page footer you can add it now (this is not in the scope of this tutorial, please check the Studio.Design documents on how to add a footer).
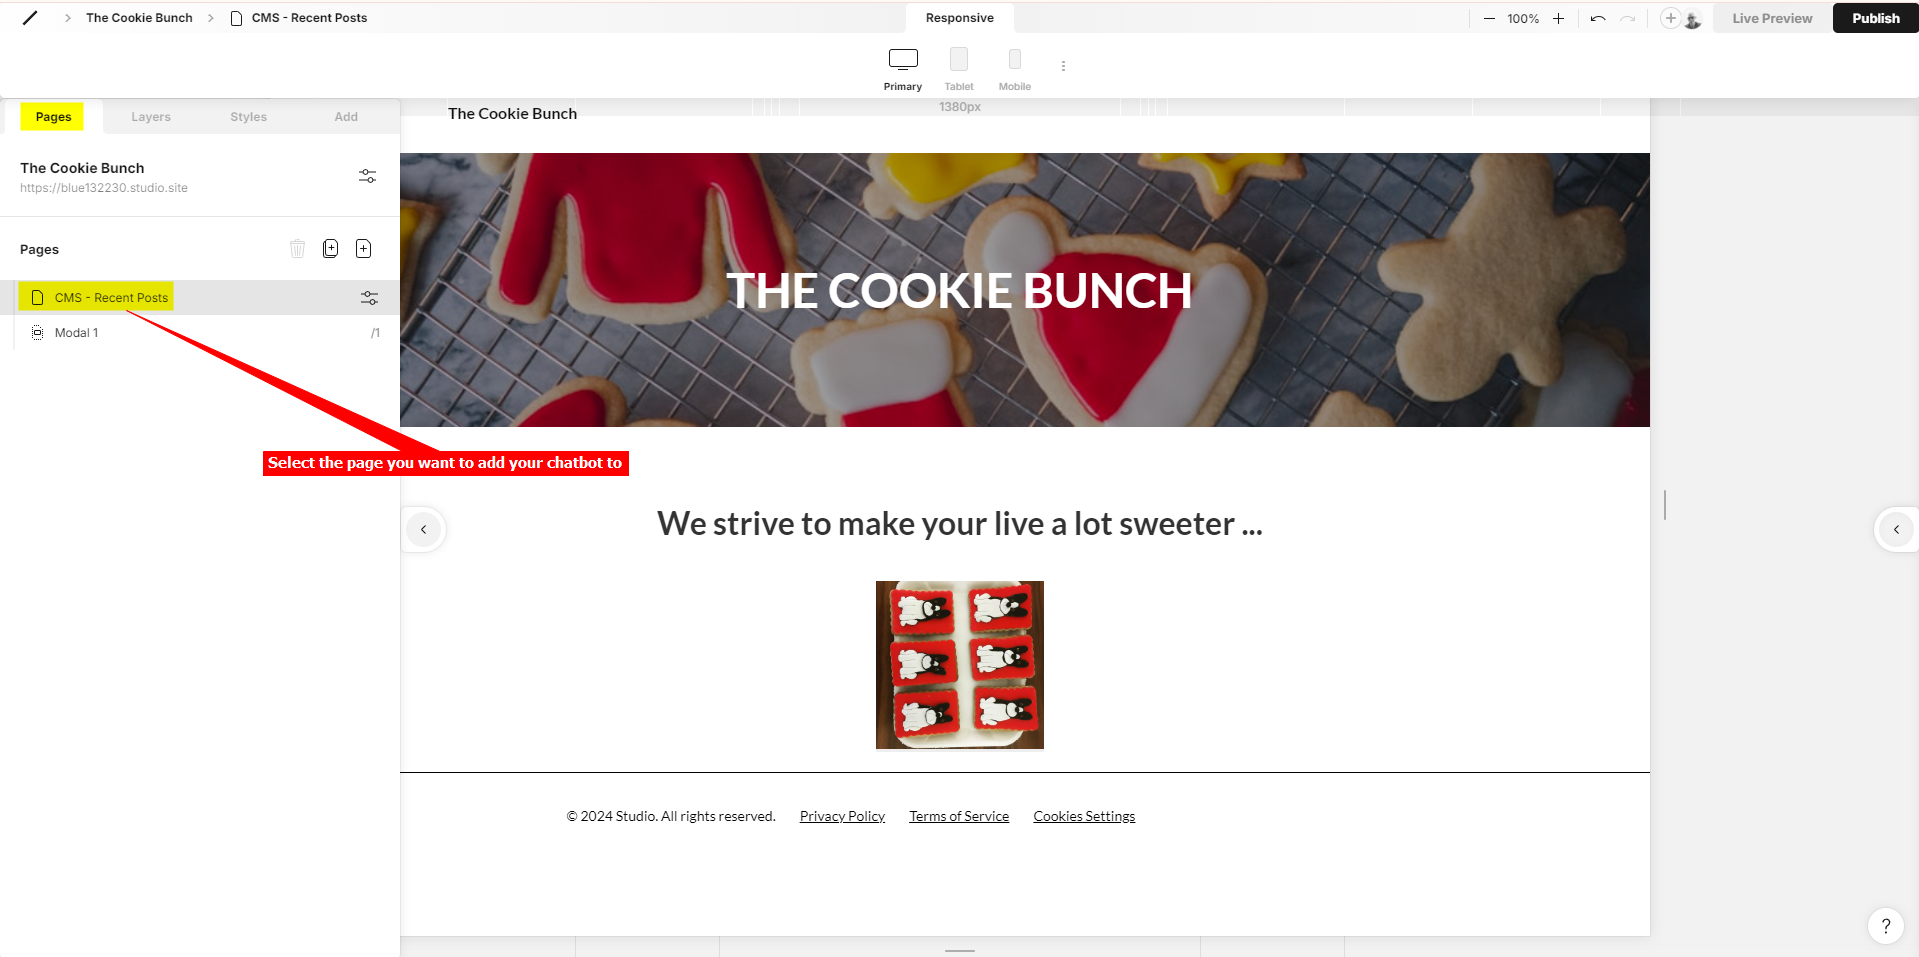
- Select the Page you want to add your chatbot to
- Drag a Box onto your page footer

- Drag a Button into the Box
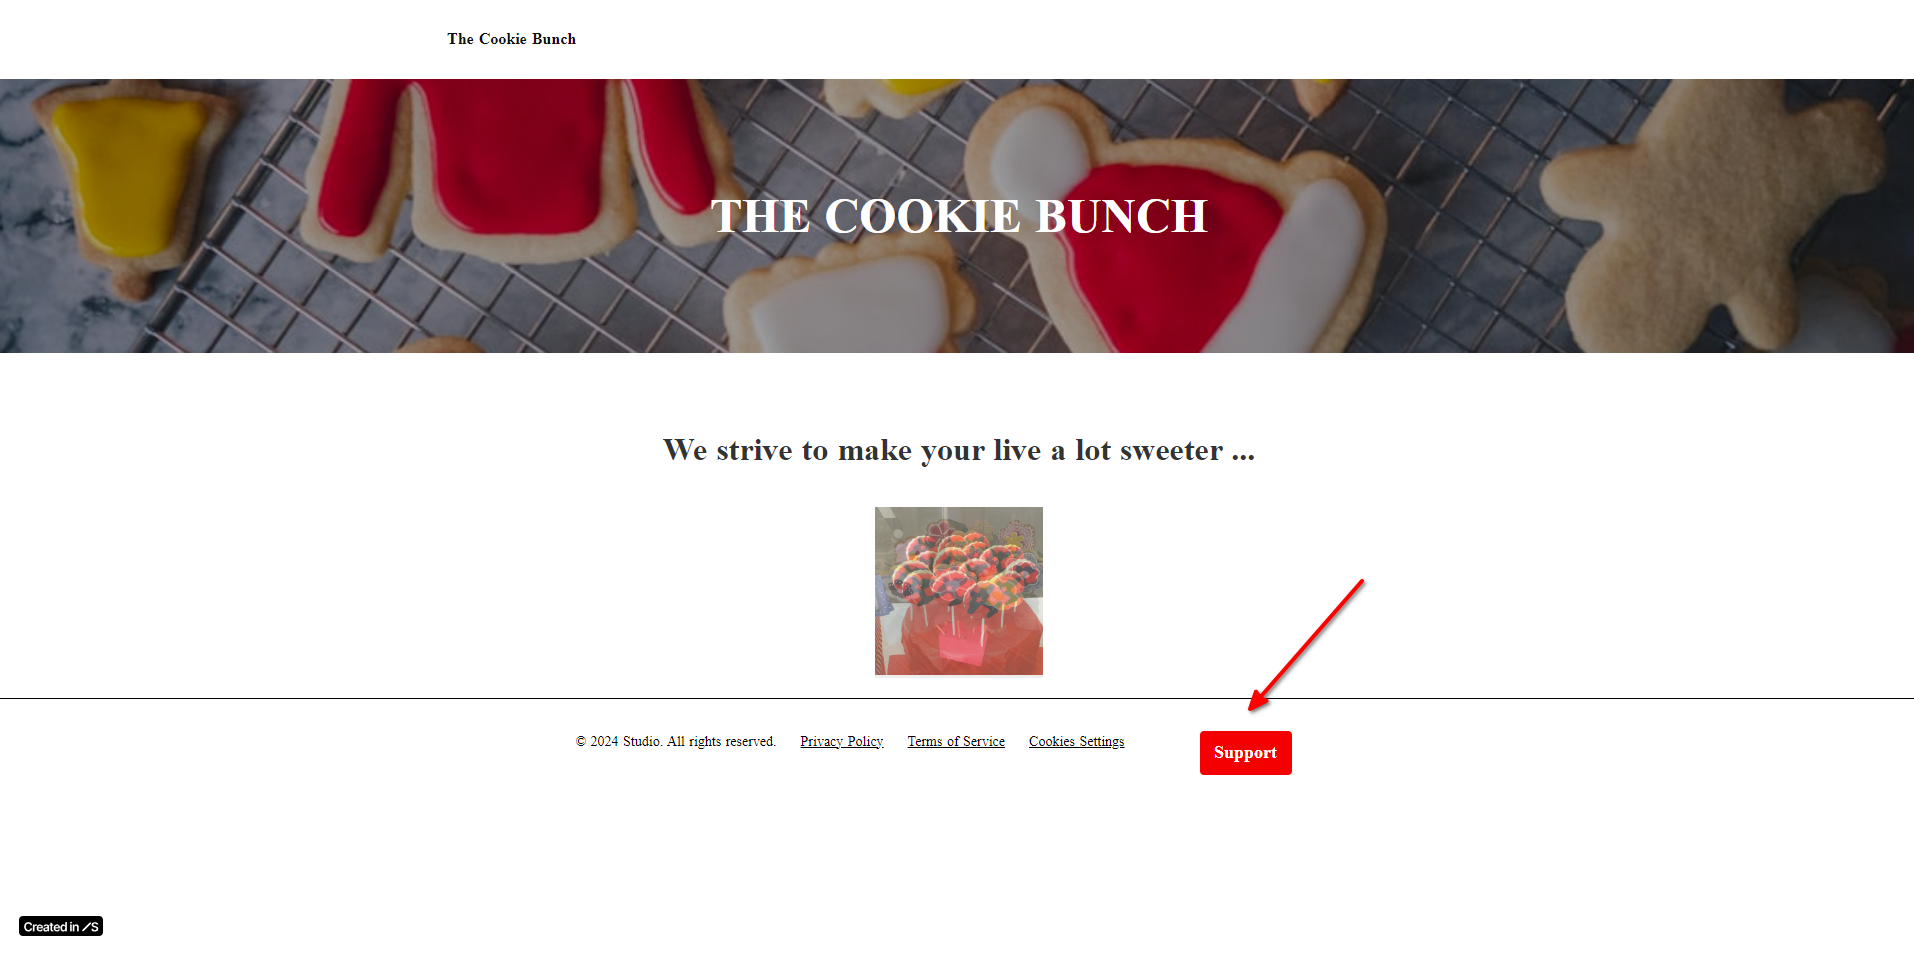
 Please note: The buttons used in Studio.Design can’t display an icon so we will add appropriate text to the button. In our case we added Support.
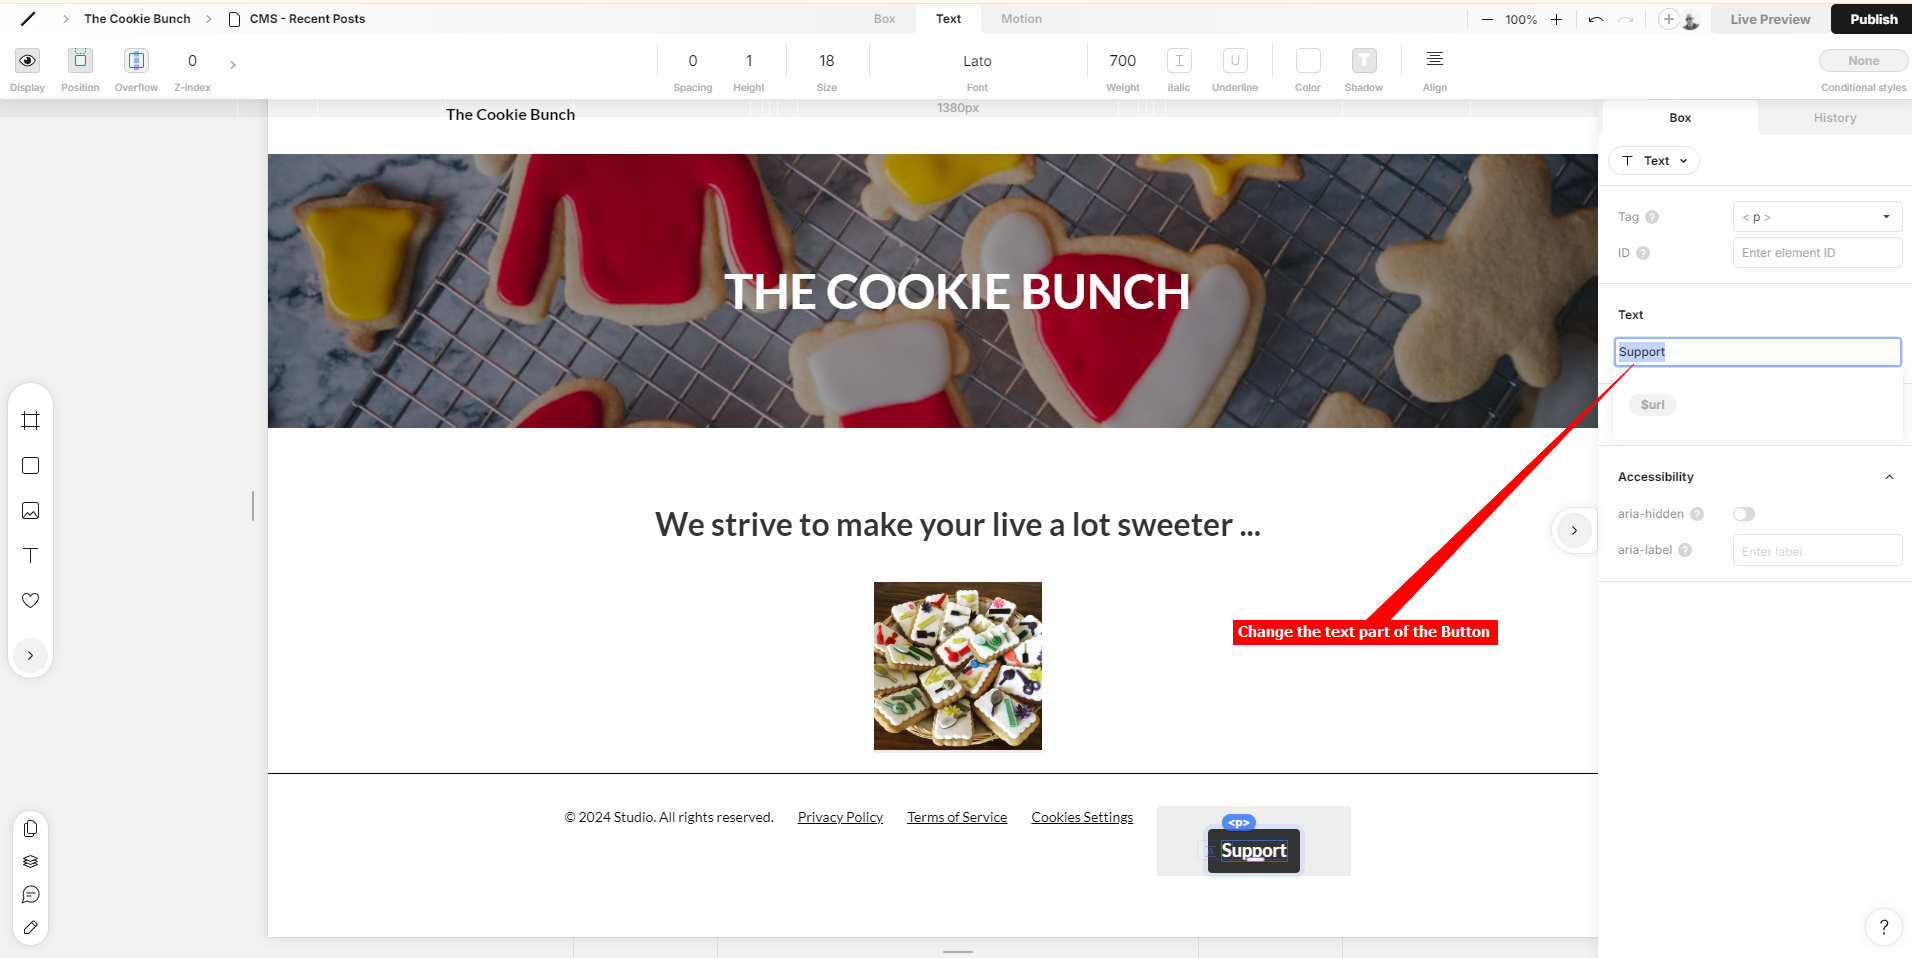
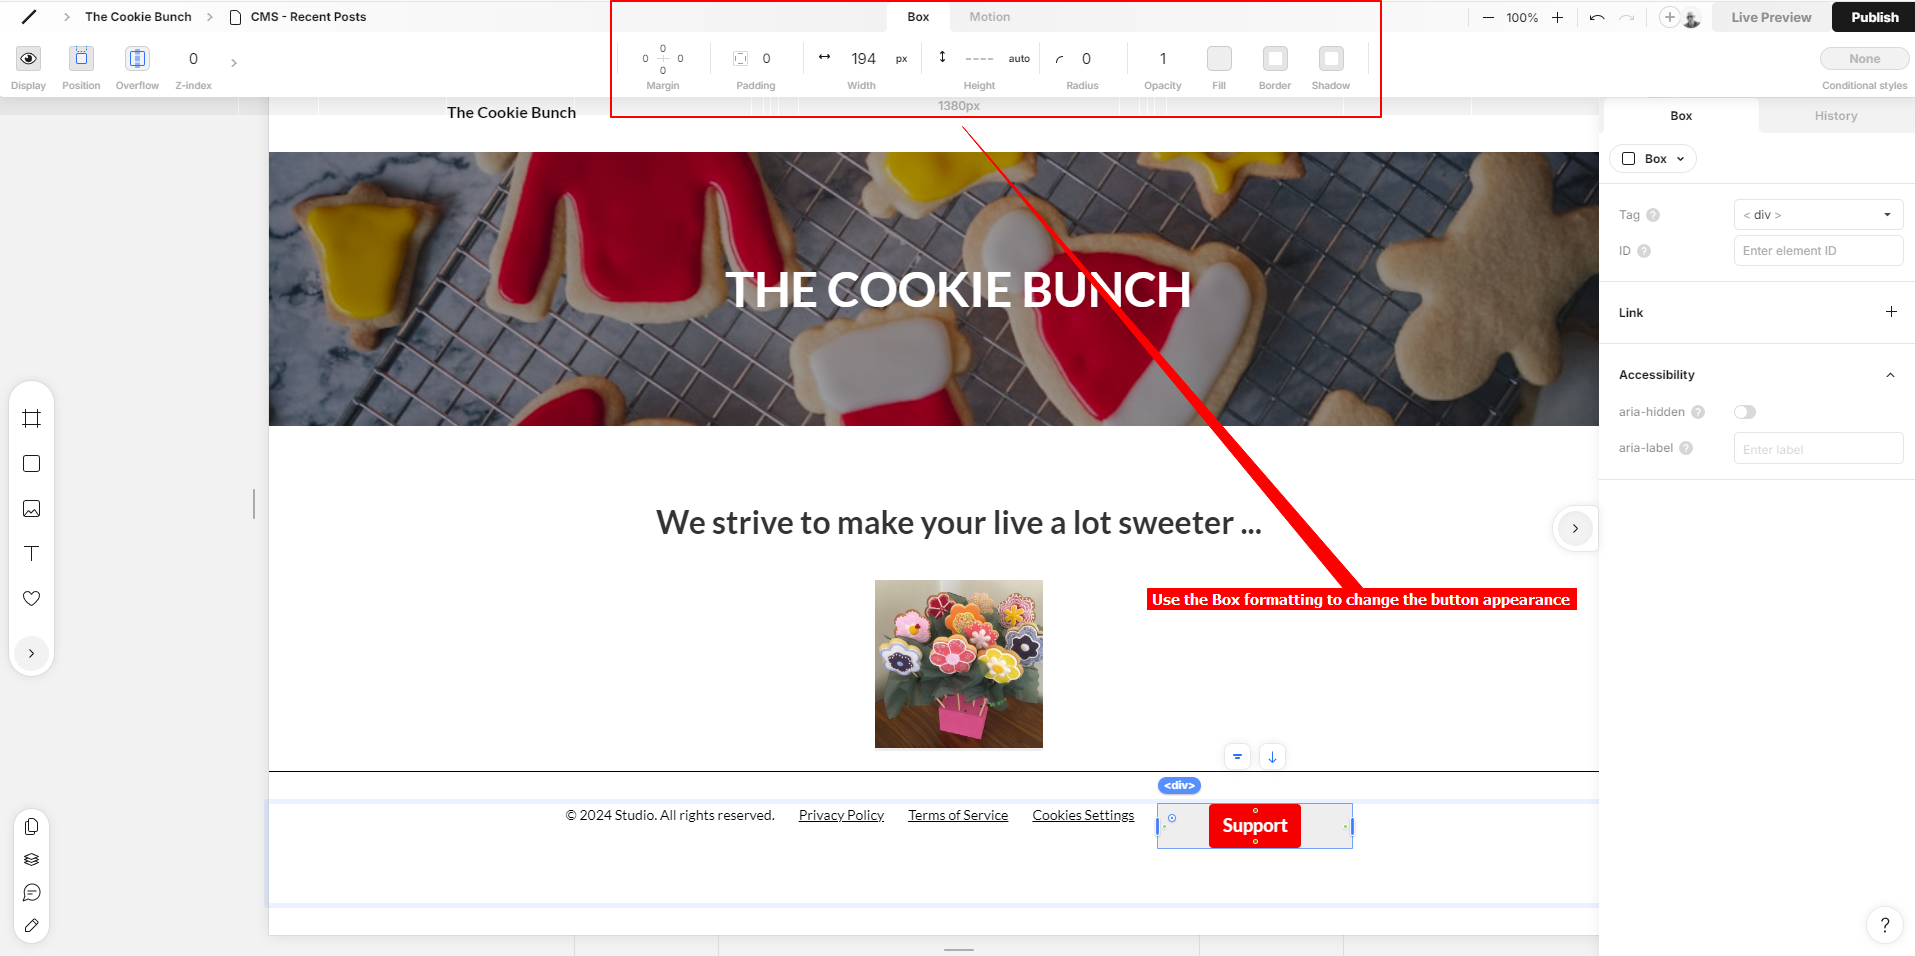
- To change the size, margin, padding, shape and fill colour of the button, select the button box and use the attributes in the top menu to make your changes. In our case we have changed the default black button colour to a colour that matches the webpage
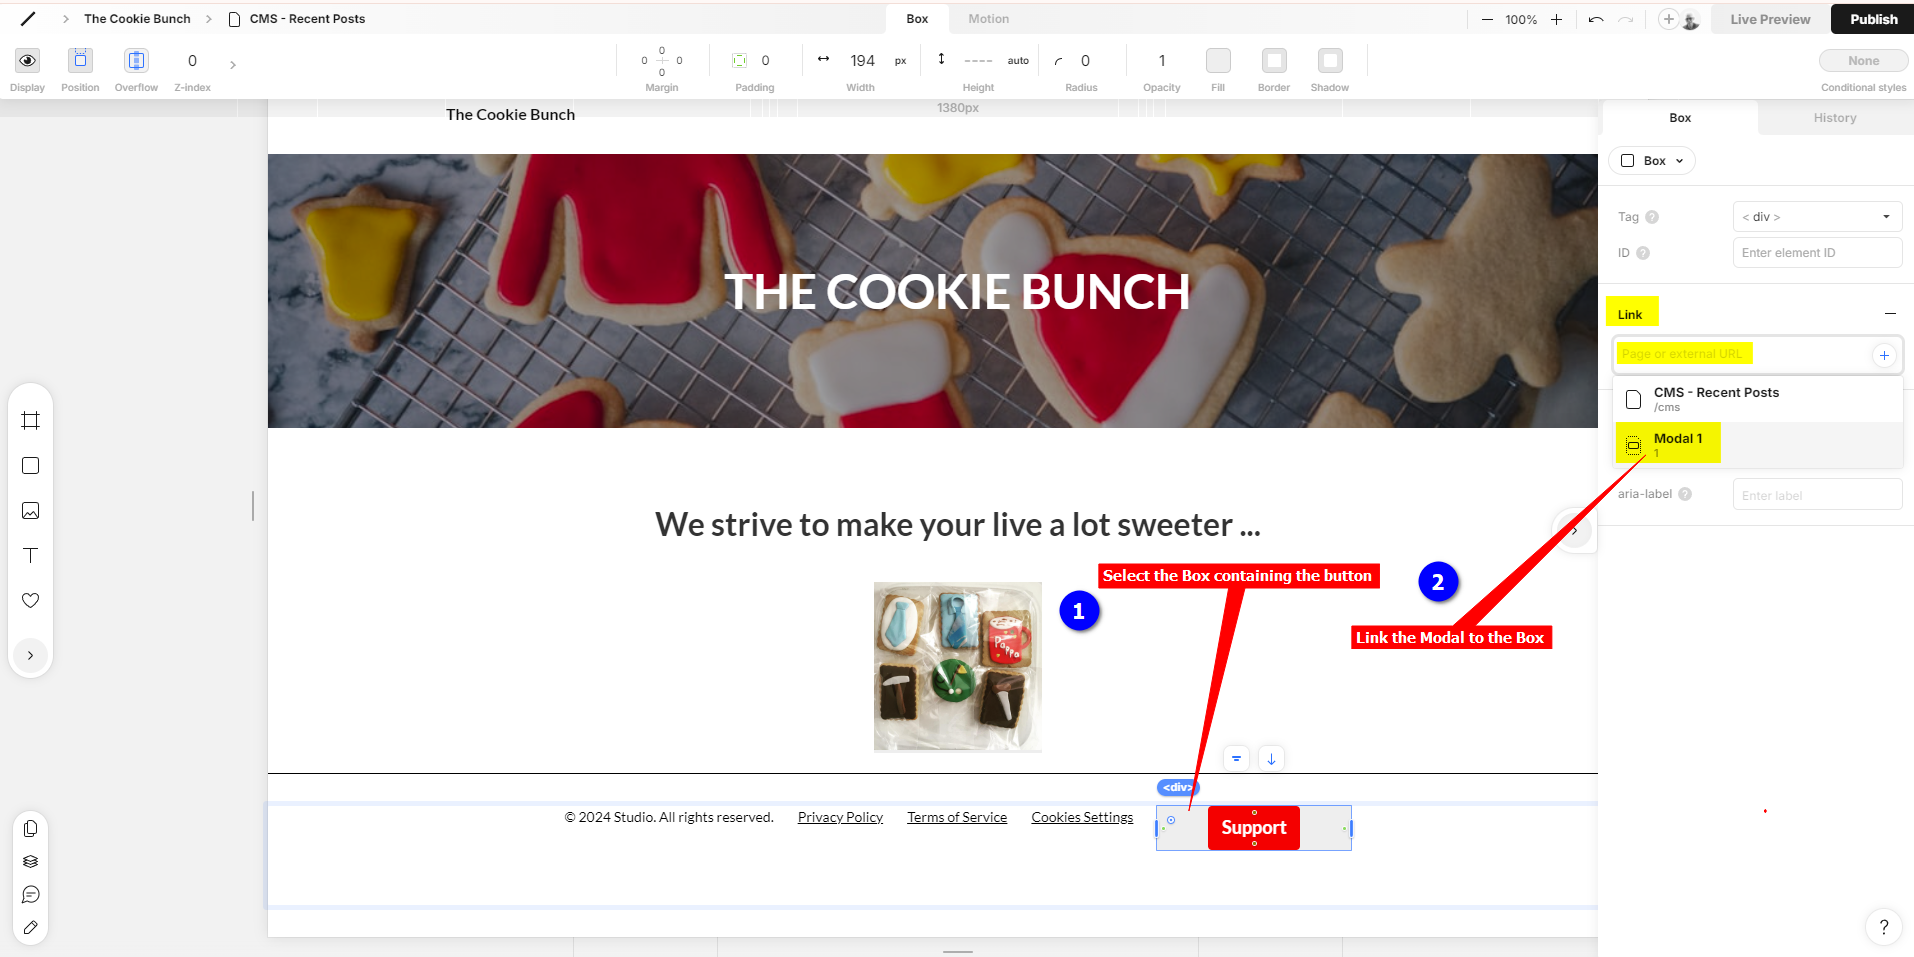
- To enable the Modal to be activated when clicking on your button, you must link the Modal you created to the Box containing the button
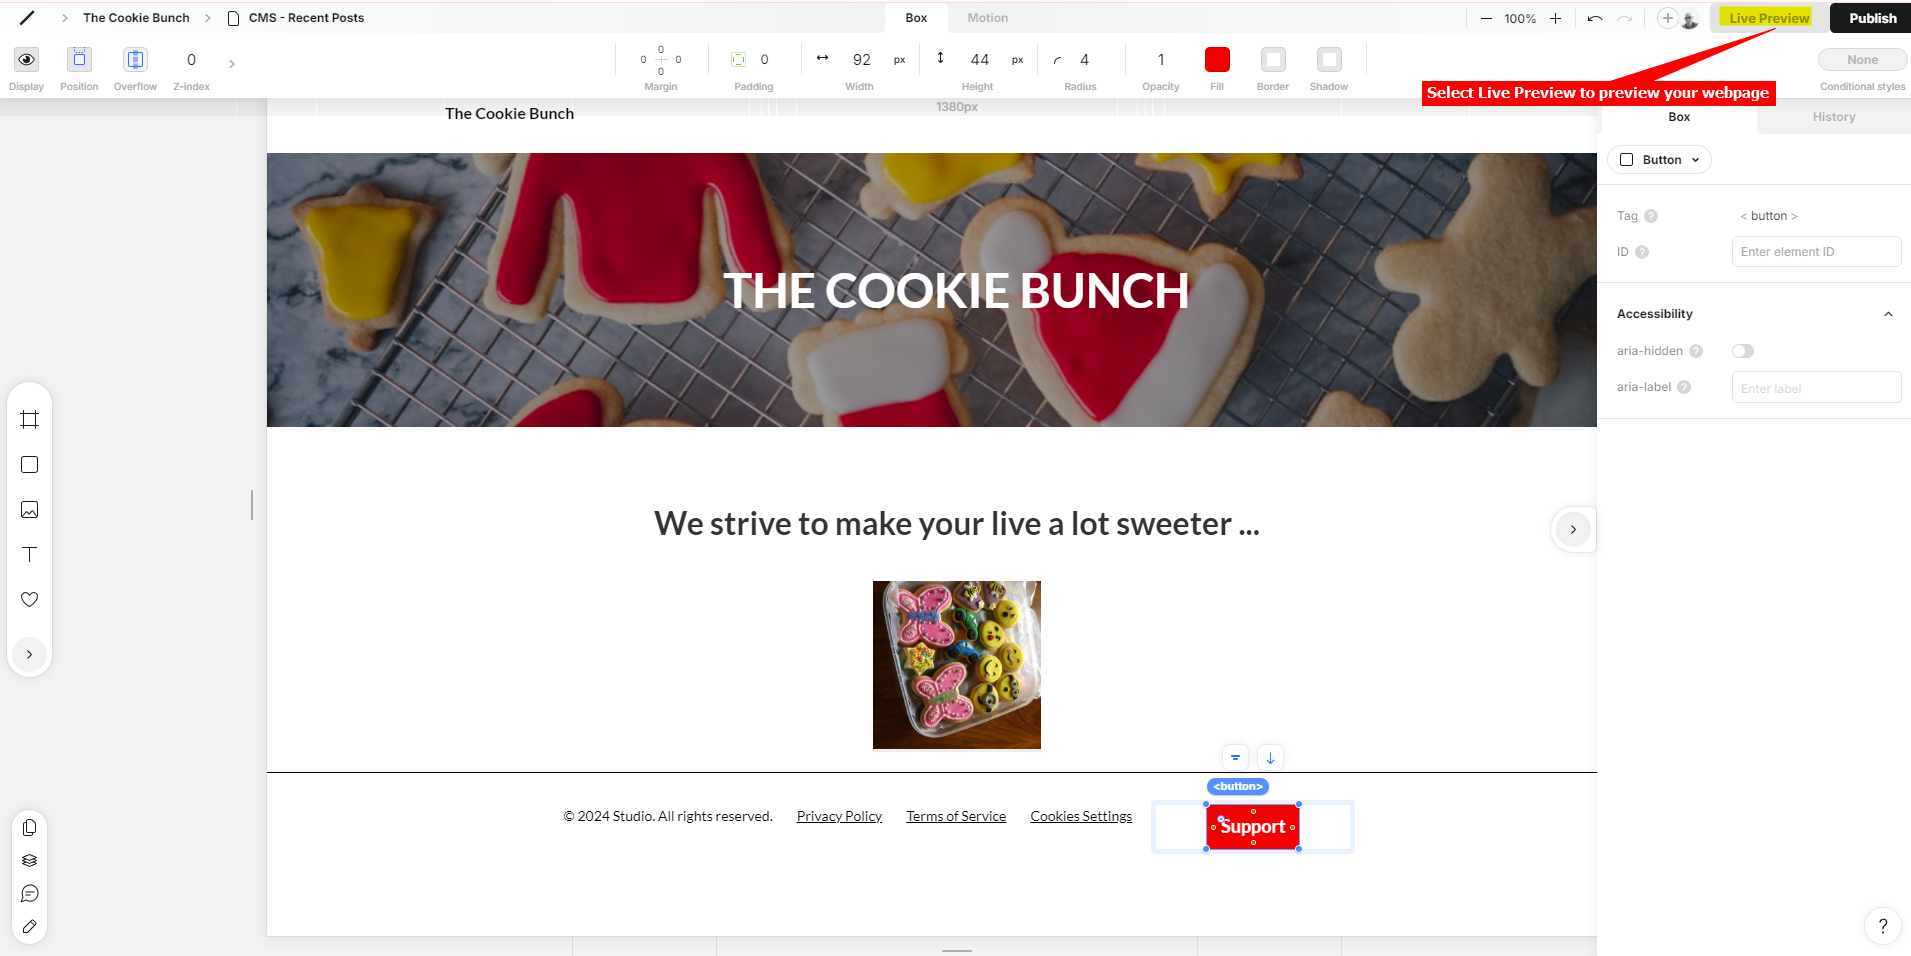
- Select Live Preview to preview view your webpage
- Voila! Here is your button on your live page!
- If you click on the button it will display the chatbot dialogue
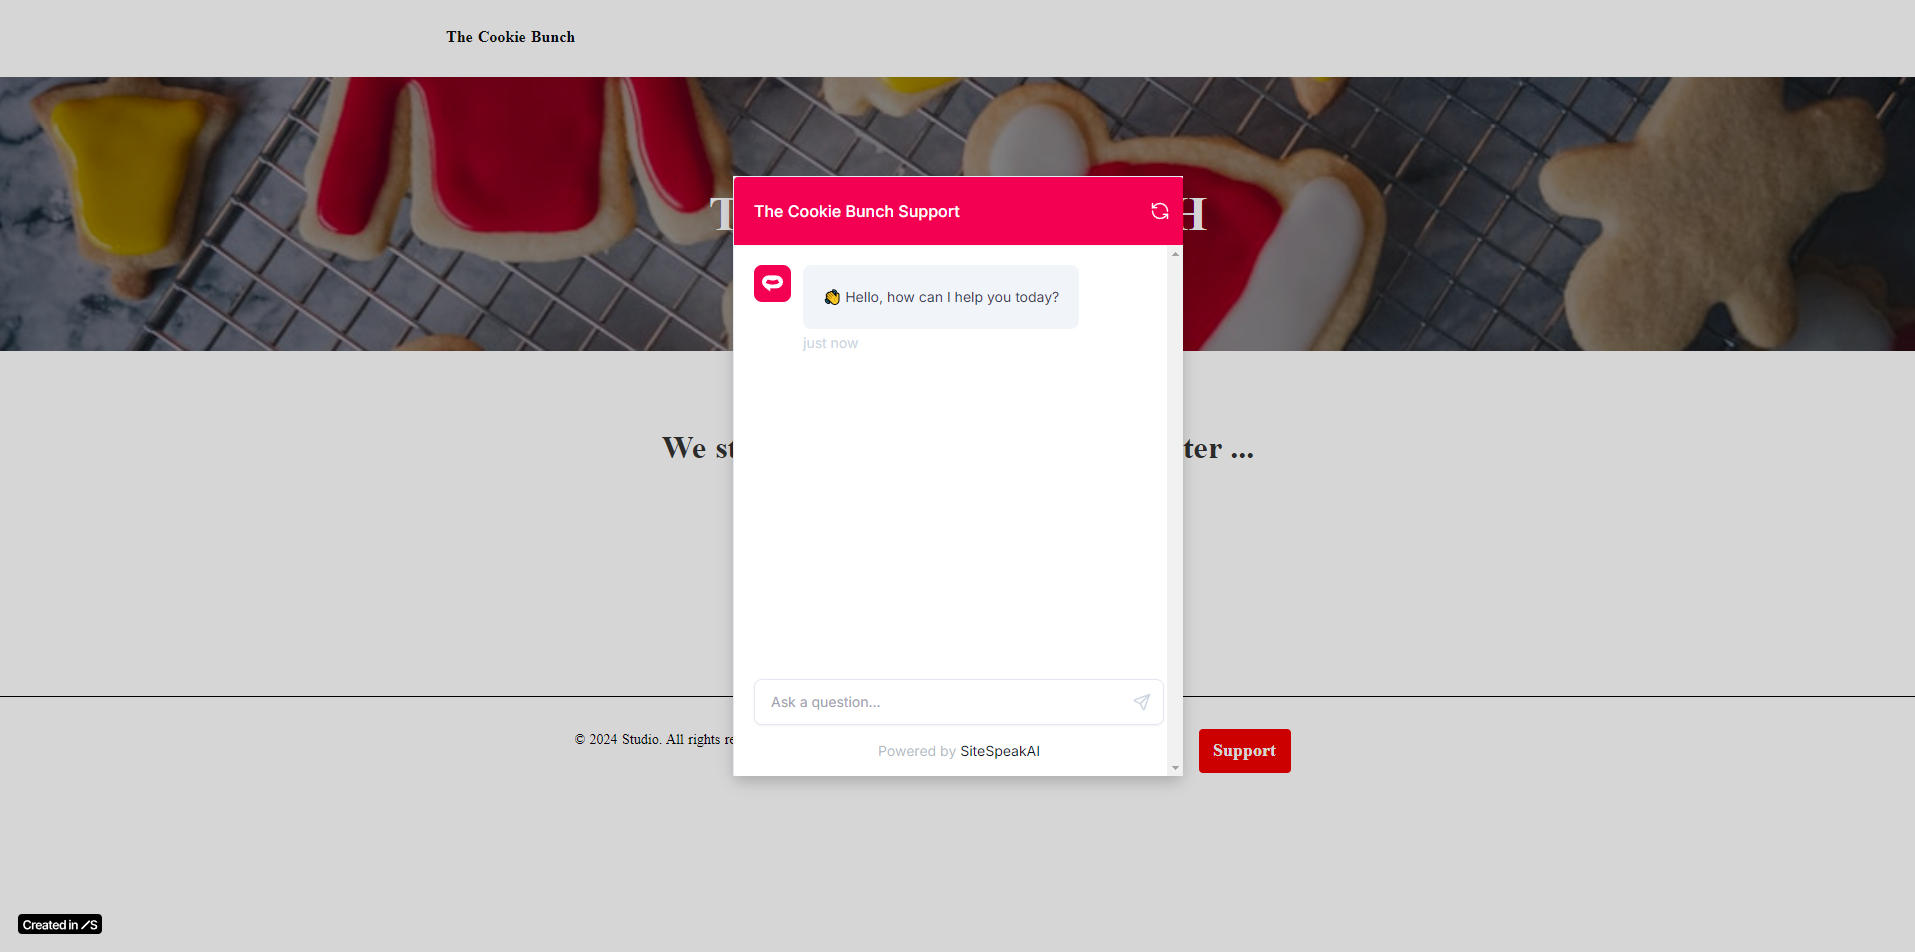 Your chatbot is now added to your Studio.Design website and your customers can start interacting with it!
Ready to automate your customer service with AI?
Join over 1000+ businesses, websites and startups automating their customer service and other tasks with a custom trained AI agent.