Video transcript
Video transcript
In this tutorial, I’ll show you how to add a ChatGPT AI support agent to your Webflow website. We’ll create and train it on your own content, then add it to your site so it can answer your visitors’ questions around the clock.Before you can add your agent to Webflow, you need to create and train it. After you log in to SiteSpeak, you land on the Get Started page, which walks you through it in five quick steps. First, give your agent a name. This is the name your visitors will see when they chat with it. Click Save and Continue to create the agent. Next, add the website you want your agent to learn from. For this example I’ll use snapwidget.com. Click Save and Continue, and SiteSpeak crawls the site to find pages it can train on. In a few seconds, it finds the main pages on the site. SiteSpeak selects those pages for you. Click Save and Continue to train your agent on them. SiteSpeak now trains your agent on that content automatically. Once it finishes, your agent is ready to answer questions about your site, and you can add it to your Webflow website.Once your agent is trained, open Install Agent in SiteSpeak and copy your JavaScript snippet. The quickest way is to log into your Webflow account, open the project where you want the agent, click the settings icon on the project card, and select Custom code from the left sidebar. Scroll to the Custom code section, add your snippet under Head code, save your changes, and publish your site. You can also add the snippet directly on a page using a Code Embed element. Open the site in the Webflow Designer, go to Pages and choose your page, then open the Navigator and select the Footer. Click Add Elements, scroll the elements list until you find Code Embed, and drag it into the footer. Add your snippet in the Code Embed Editor and click Save and Close, then click Publish to make your changes live.Your AI support agent button now appears on your live Webflow page. When a visitor clicks it, the chat dialogue opens, ready to help. And that’s it. Your ChatGPT AI support agent is now live on your Webflow site, trained on your content and ready to assist your visitors.
Add your AI support agent to your Webflow website
In SiteSpeakAI
Select your chatbot from the dropdown menu at the top, click on the Install Agent section in the sidebar, then click on the Copy Code button to copy your code snippet.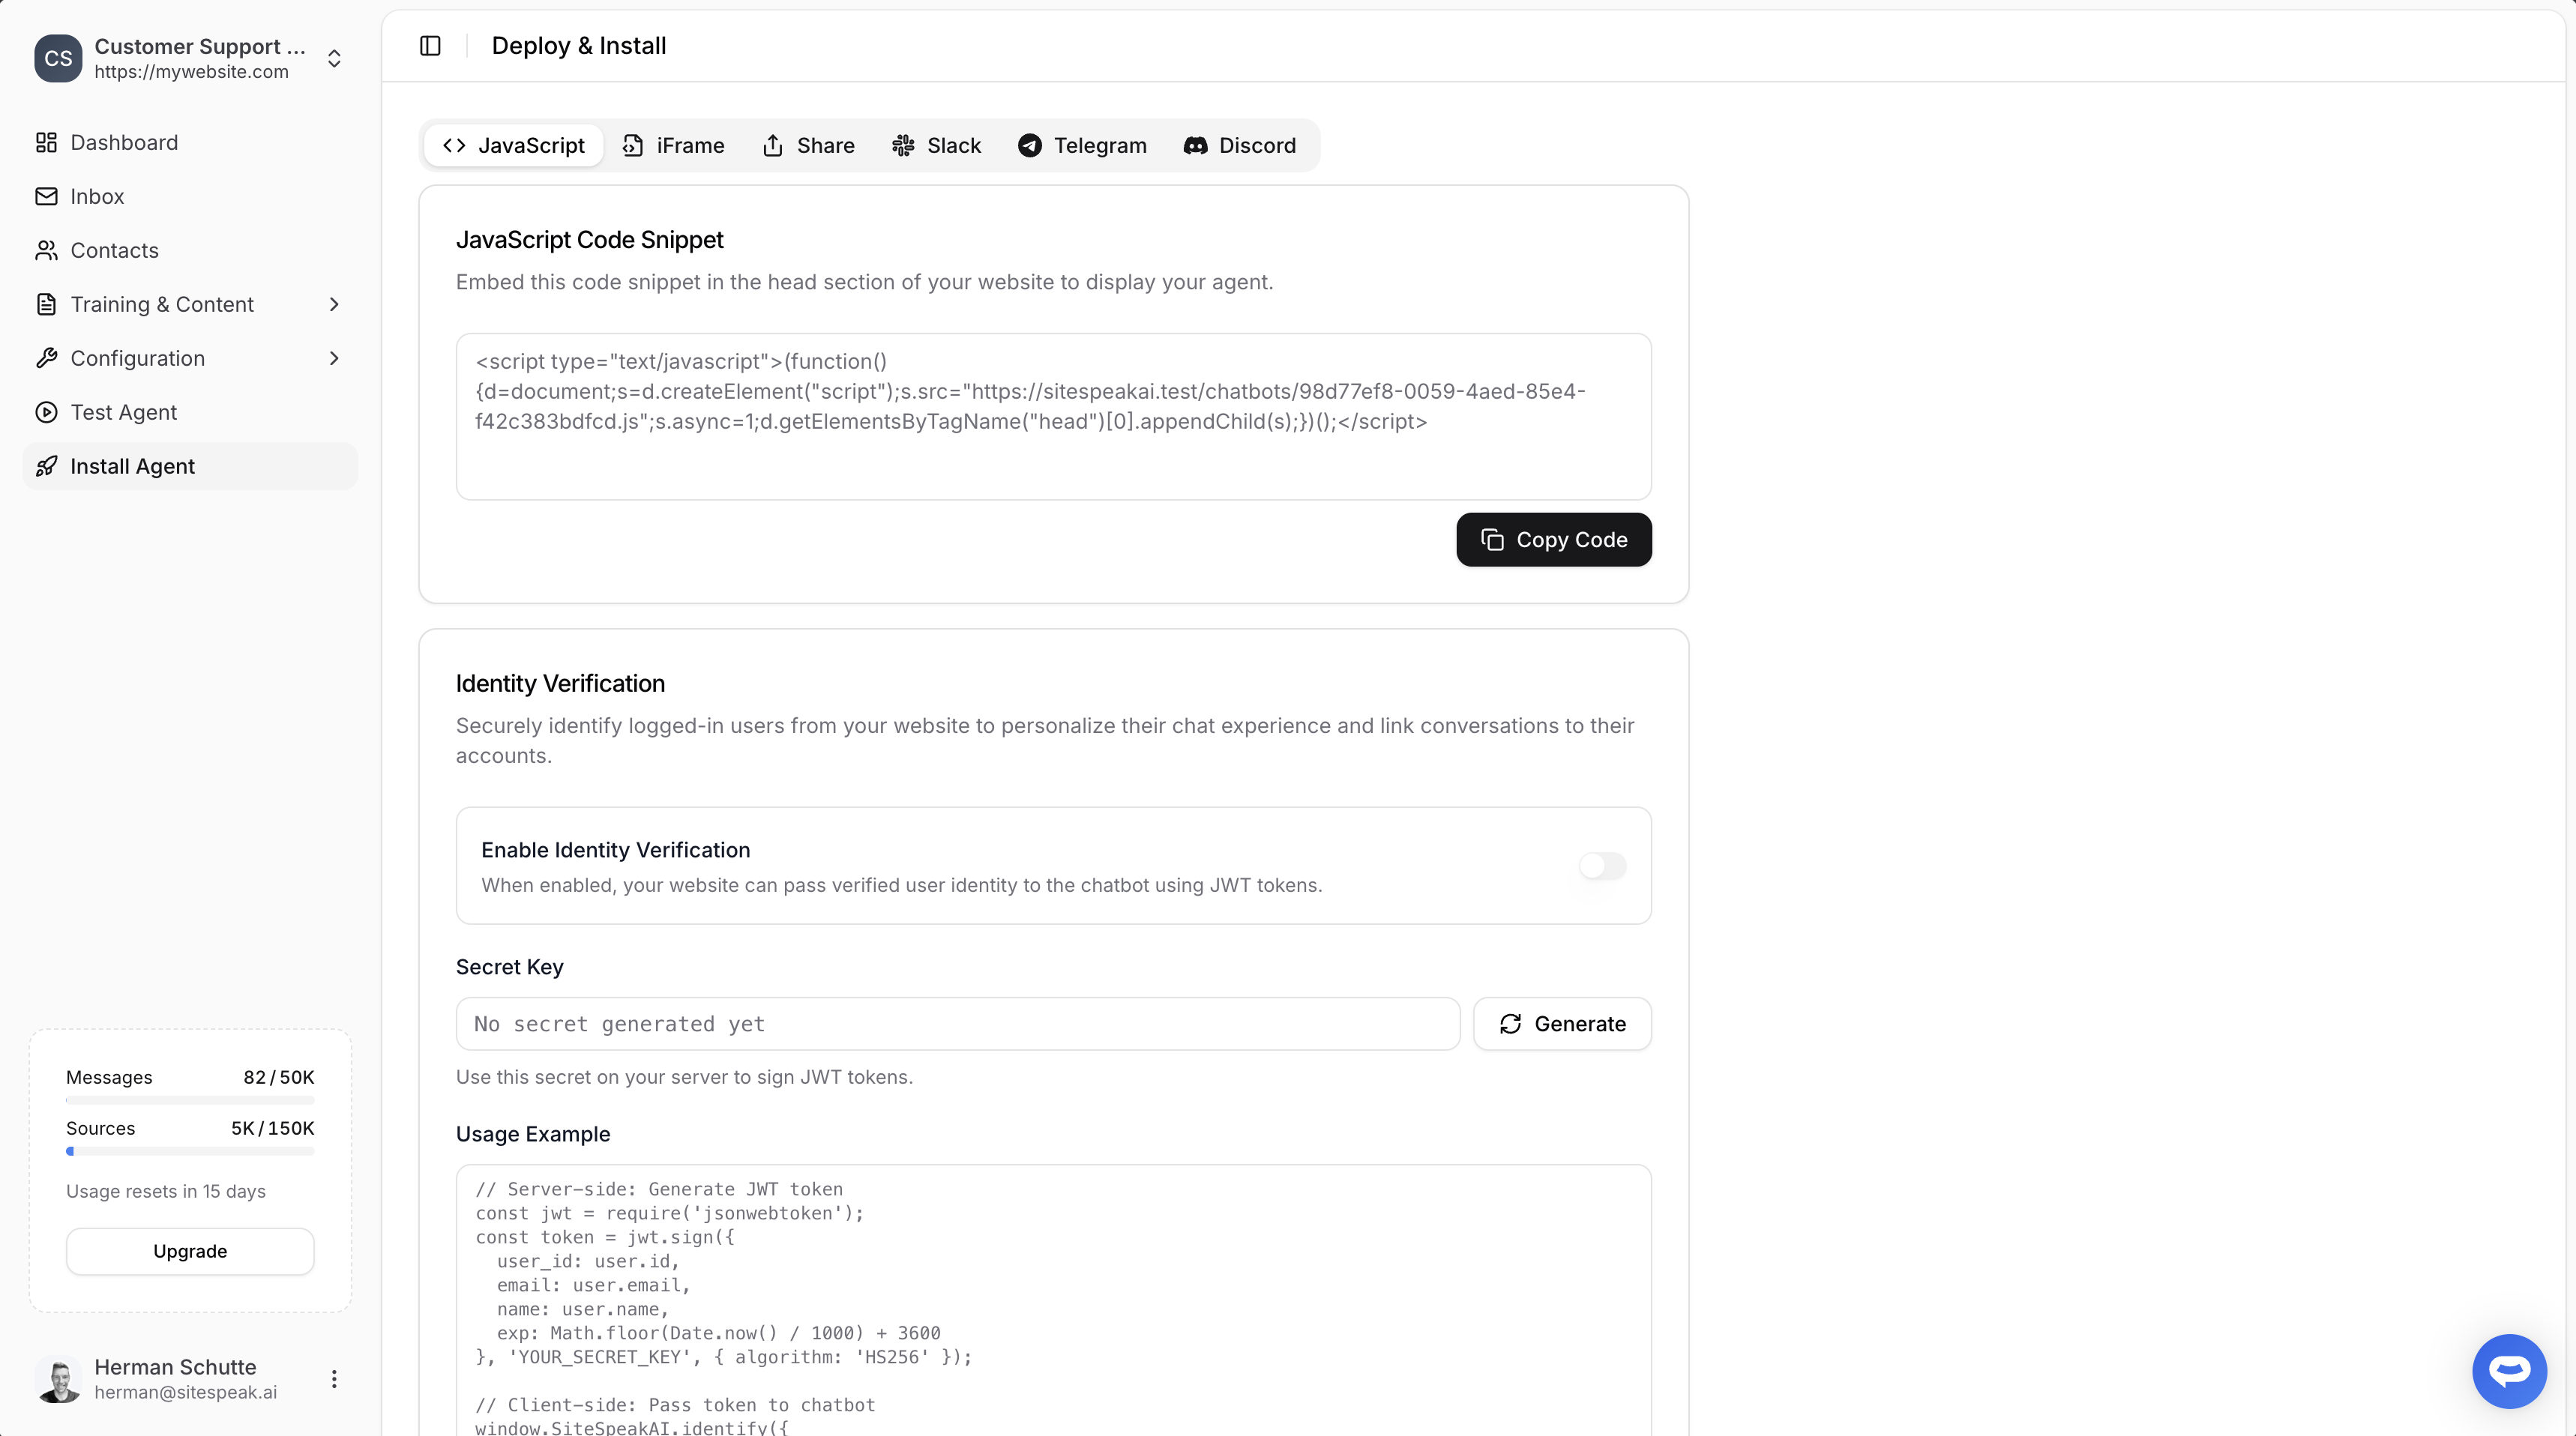
In Webflow
Please note! Adding your AI support agent to Webflow can be achieved in two ways, i.e. Globally (site-wide) or Page-specific. We will be looking at both options.A. Adding your AI support agent globally (site-wide)
-
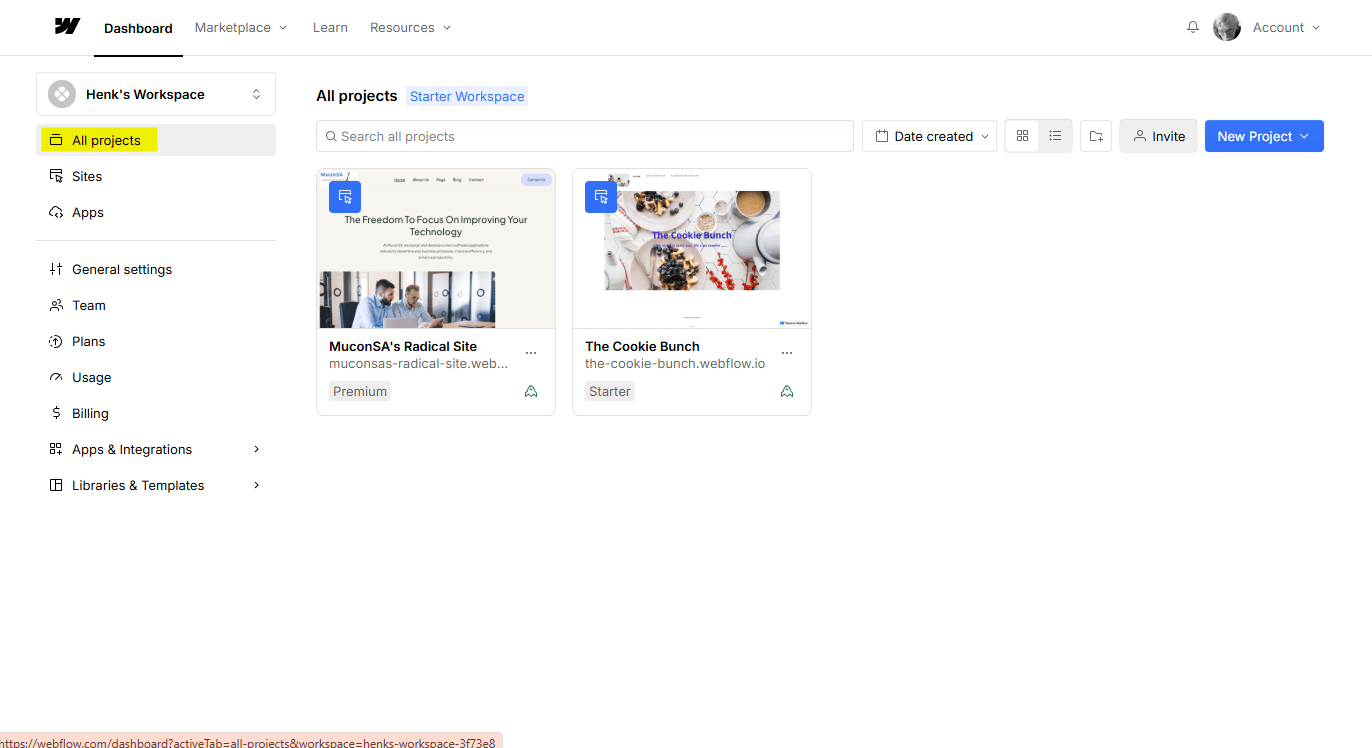
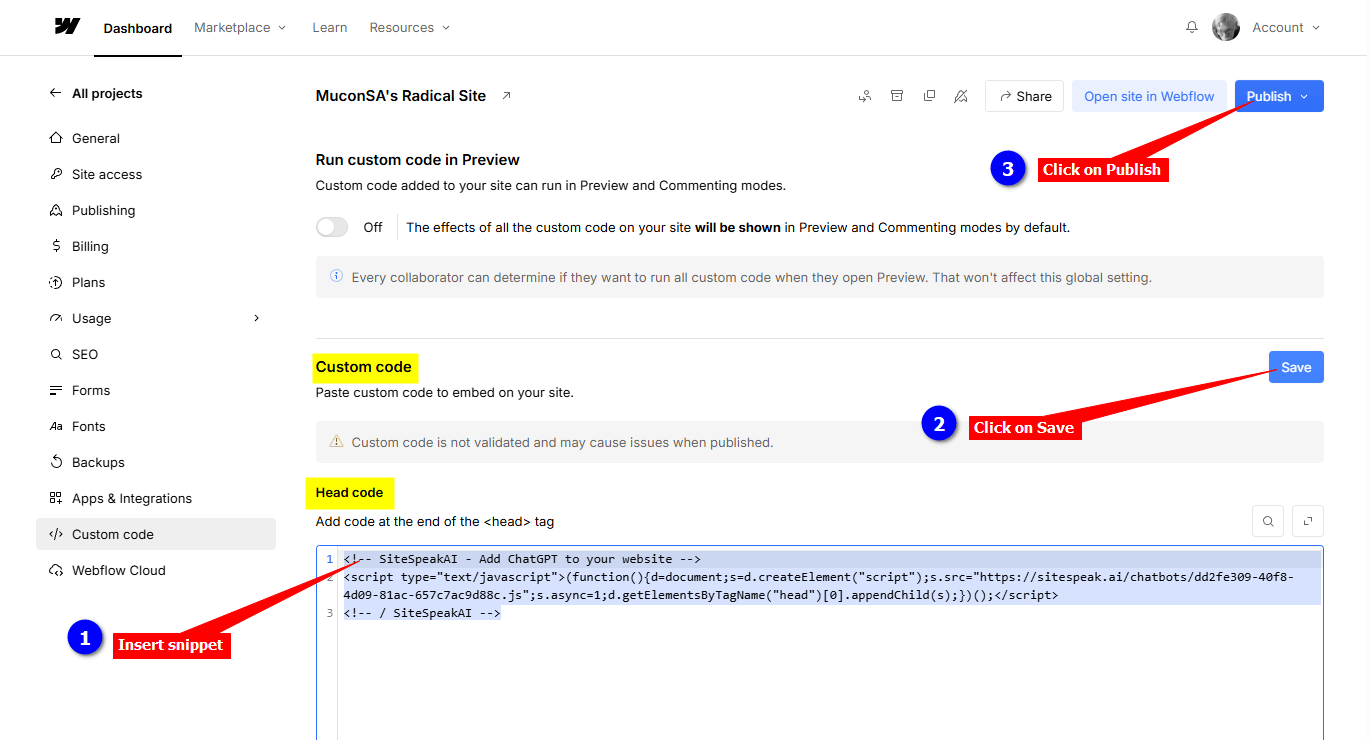
Log into your Webflow account and make sure All projects is selected
-
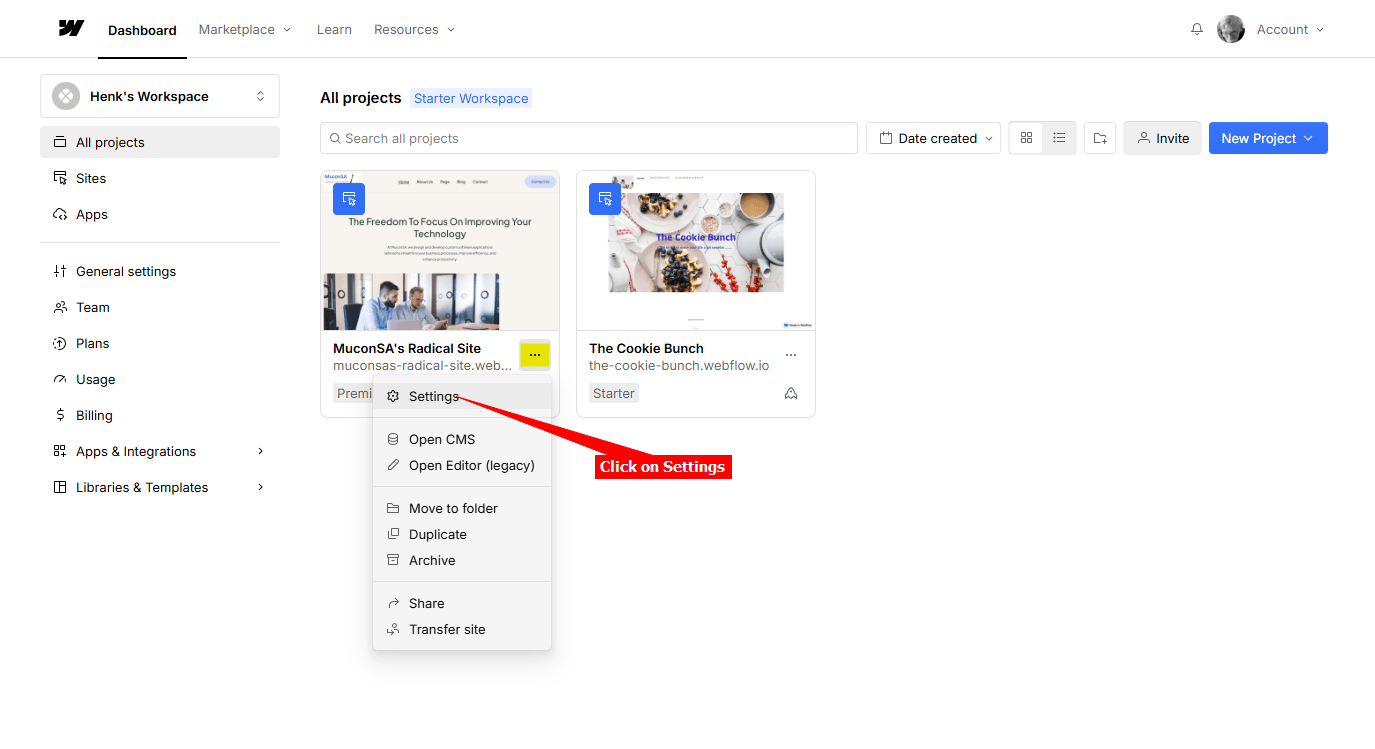
On the Project you want to add your agent to, select Settings on the Project card
-
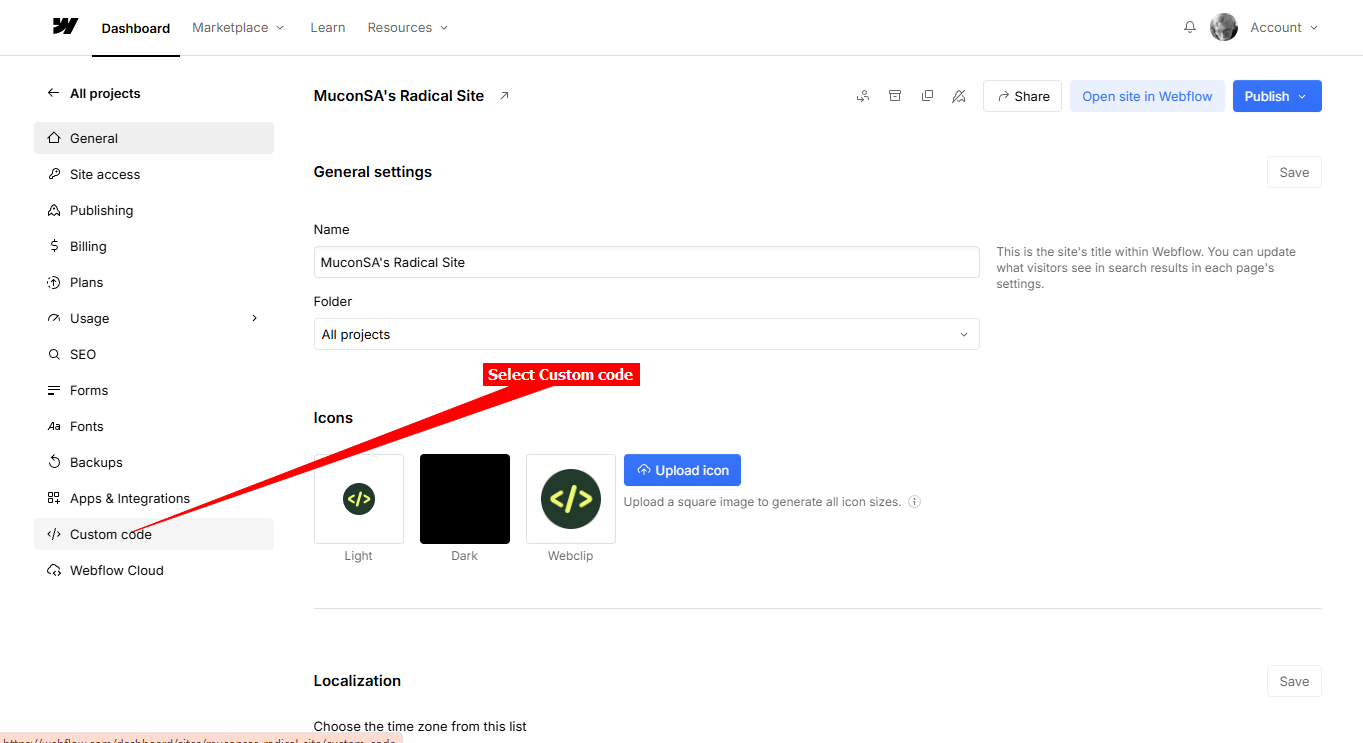
Select Custom code on the left side-bar
-
Scroll down to Custom code, insert your snippet under Head code , click on Save and then Publish to publish your website
B. Adding your AI support agent per page
-
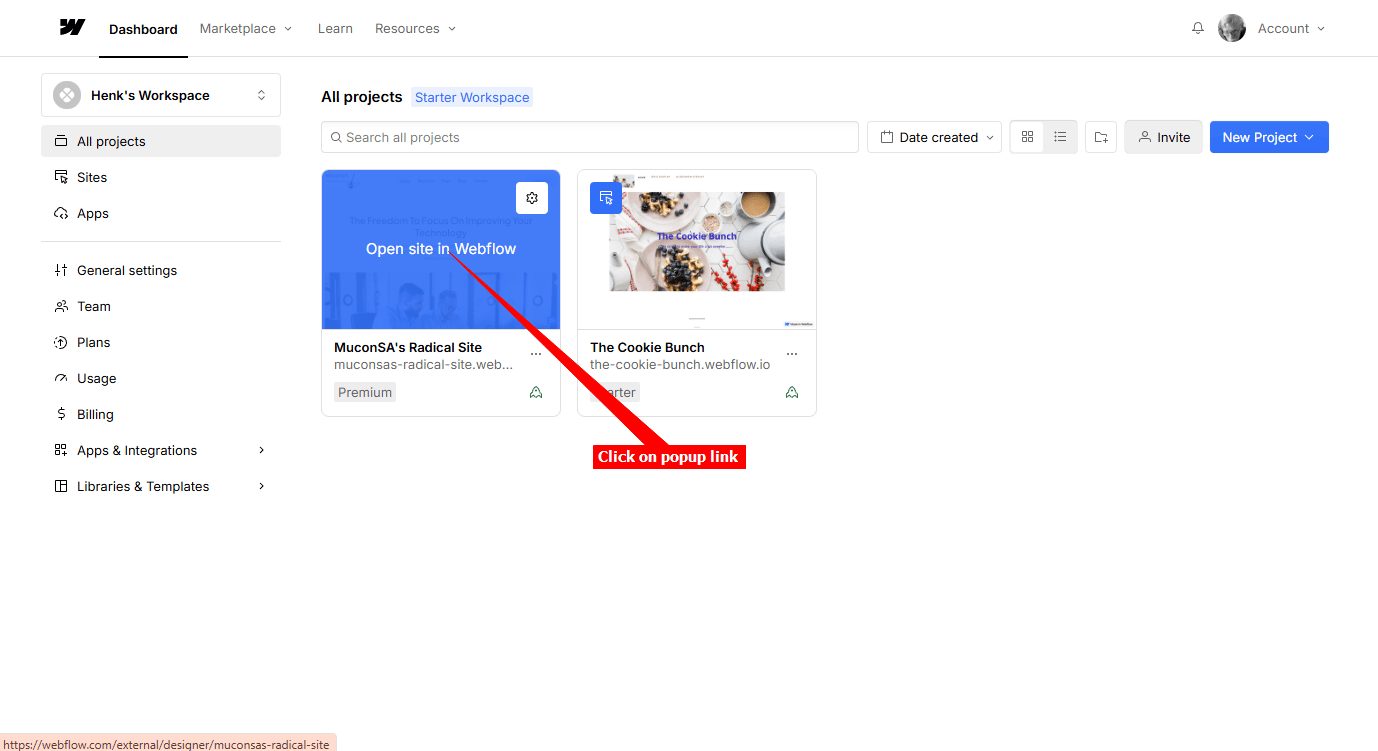
Log into your Webflow account and make sure All projects is selected
-
On the Project you want to add your agent to, move your mouse over the Project card and click on the Open site in Webflow popup link
-
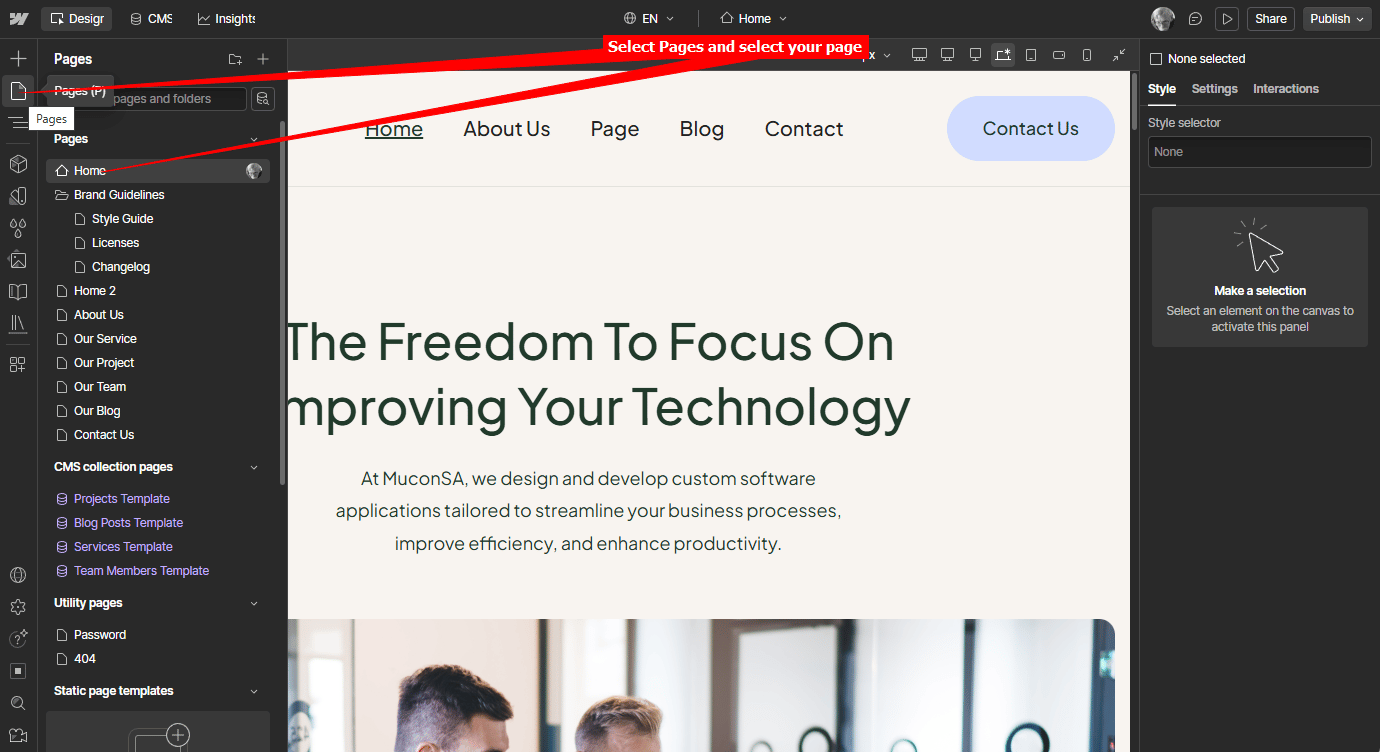
Under Pages, select the page you want to add your support agent to
-
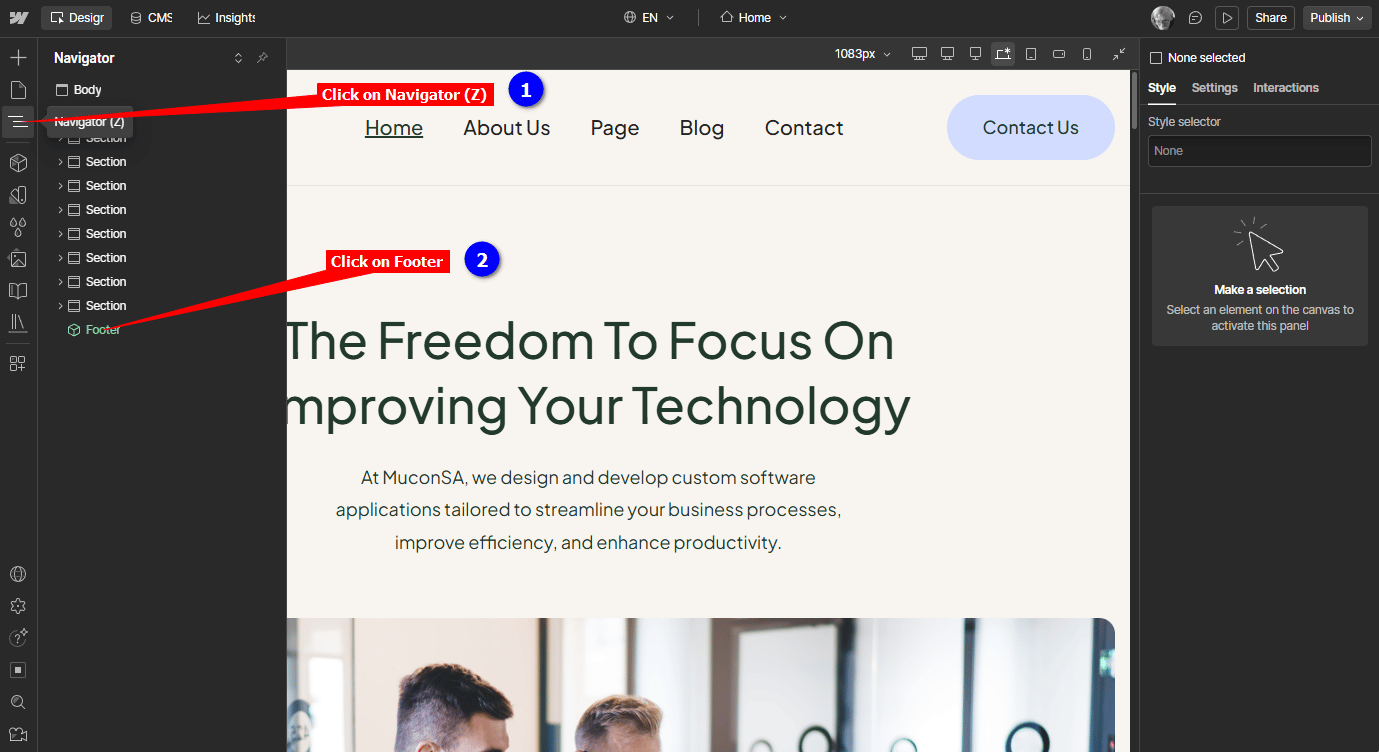
When page displays, click on Navigator (Z) and then click on Footer to display the Footer section of the page
-
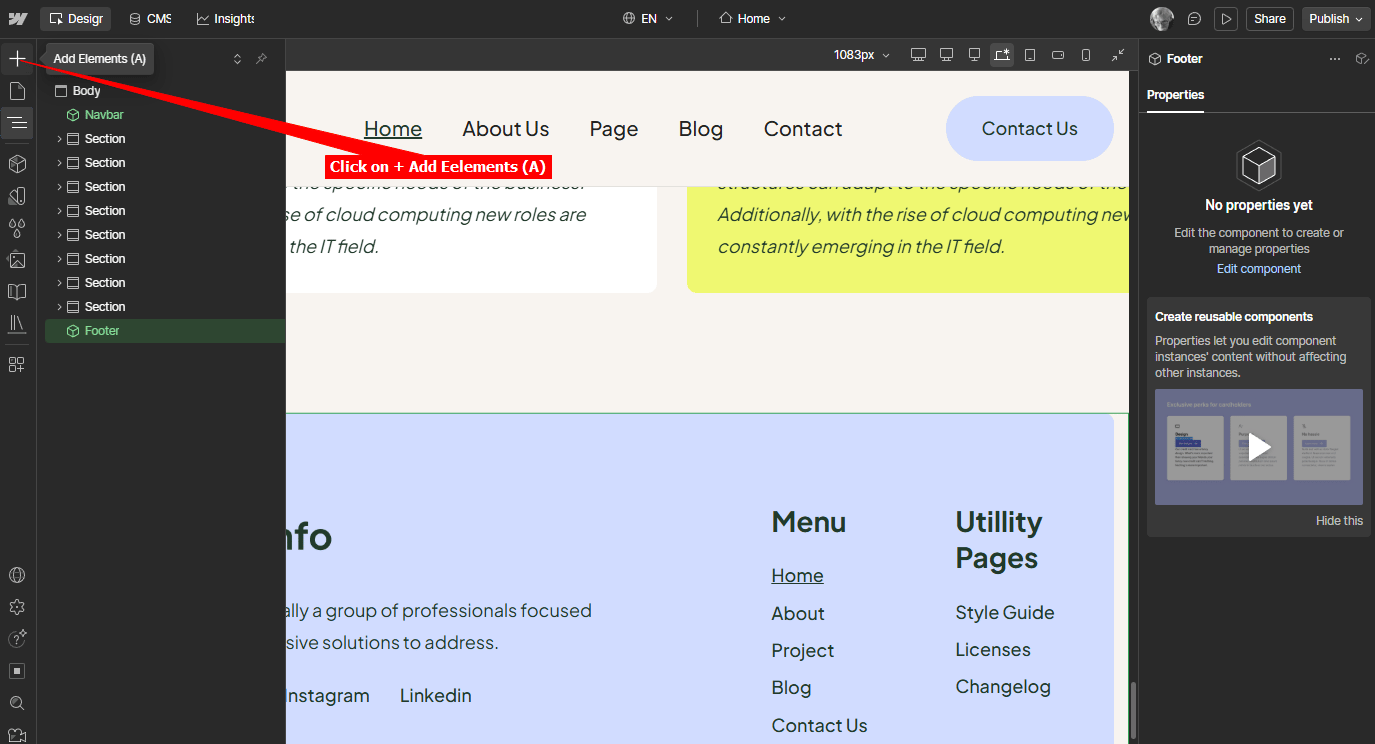
While the Footer section is visible, click on + Add Elements (A)
-
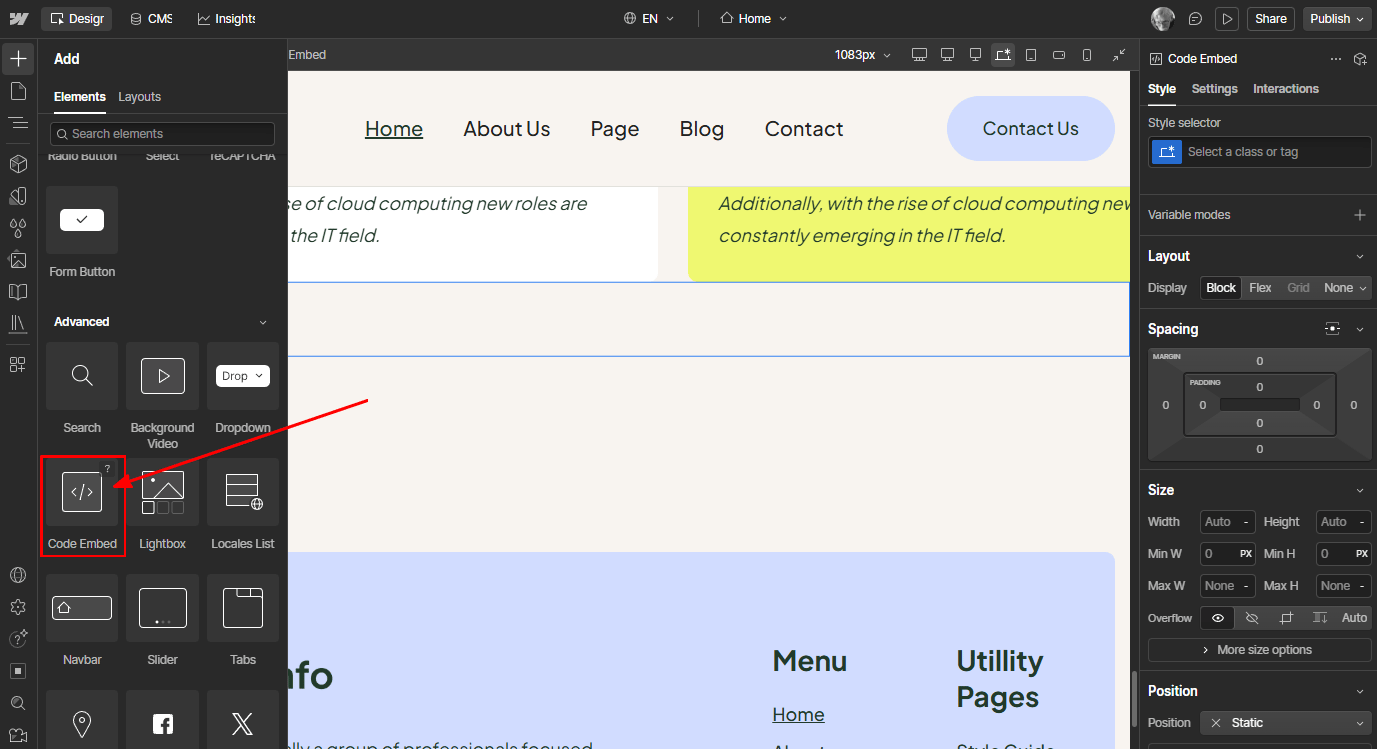
Scroll down on the list of Elements until you find Code Embed
-
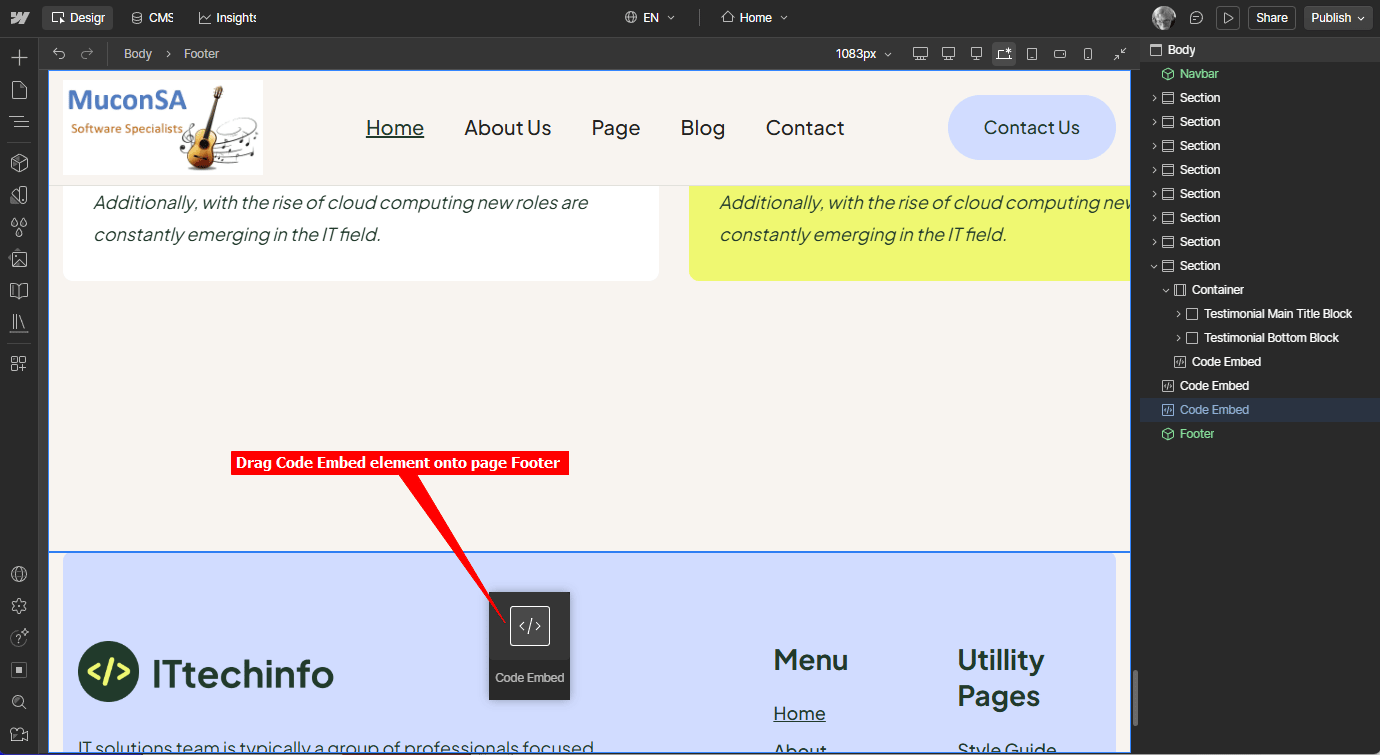
Drag the Code Embed element onto the page Footer
-
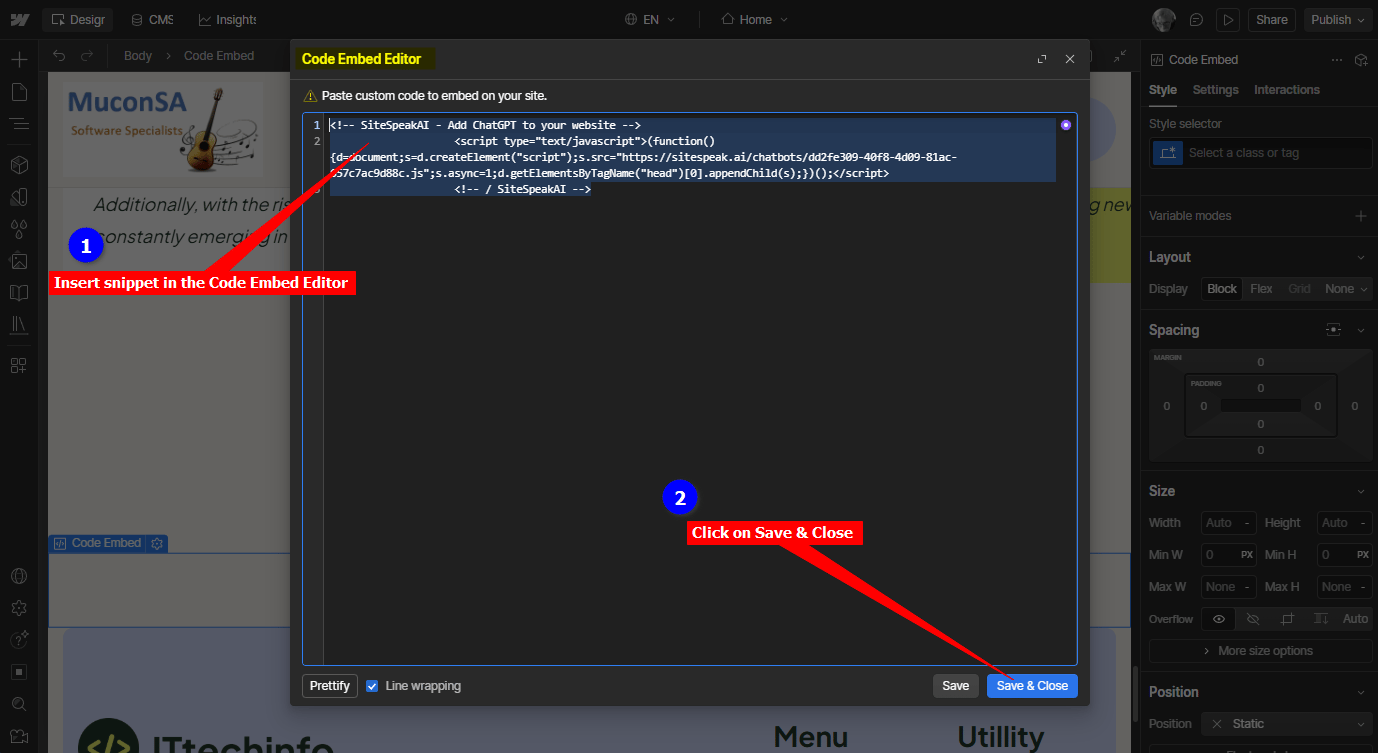
Insert snippet in the Code Embed Editor and click on Save & Close
-
Click on Publish
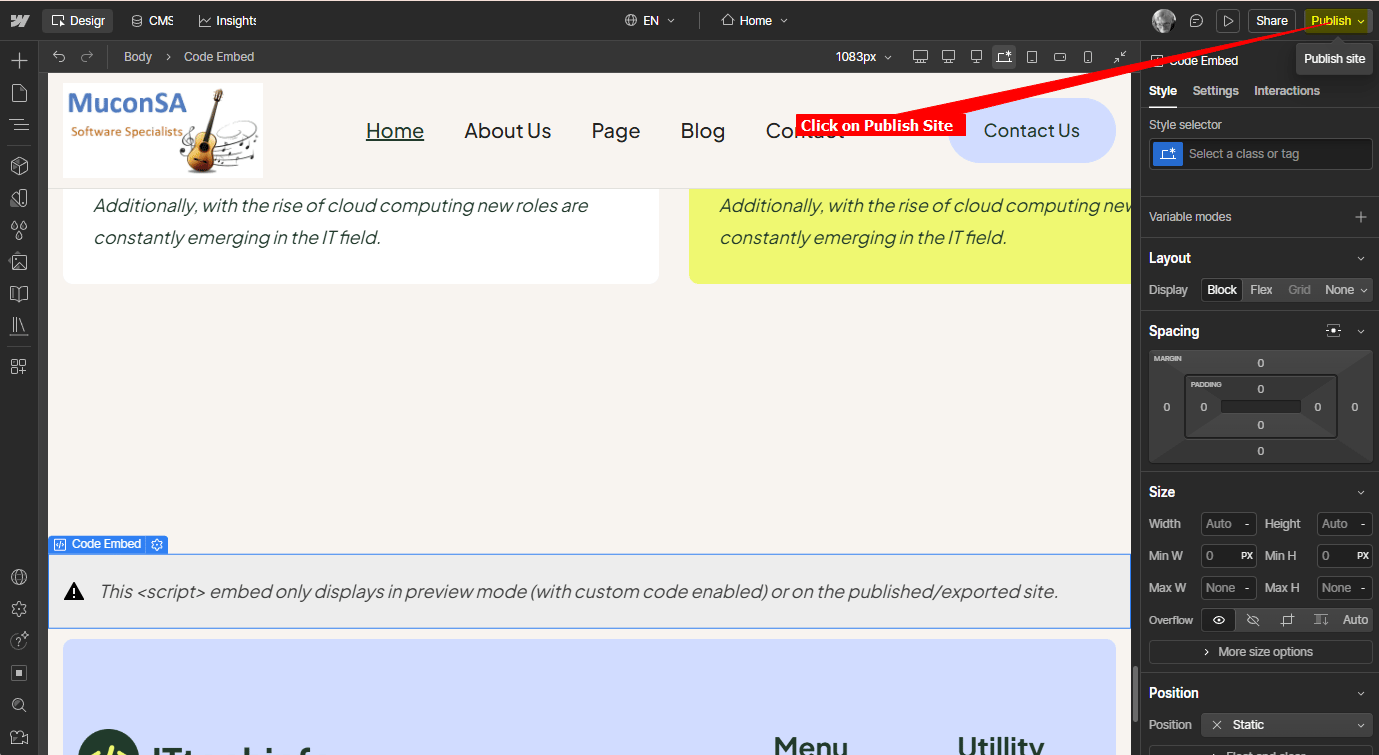
C. For both options
-
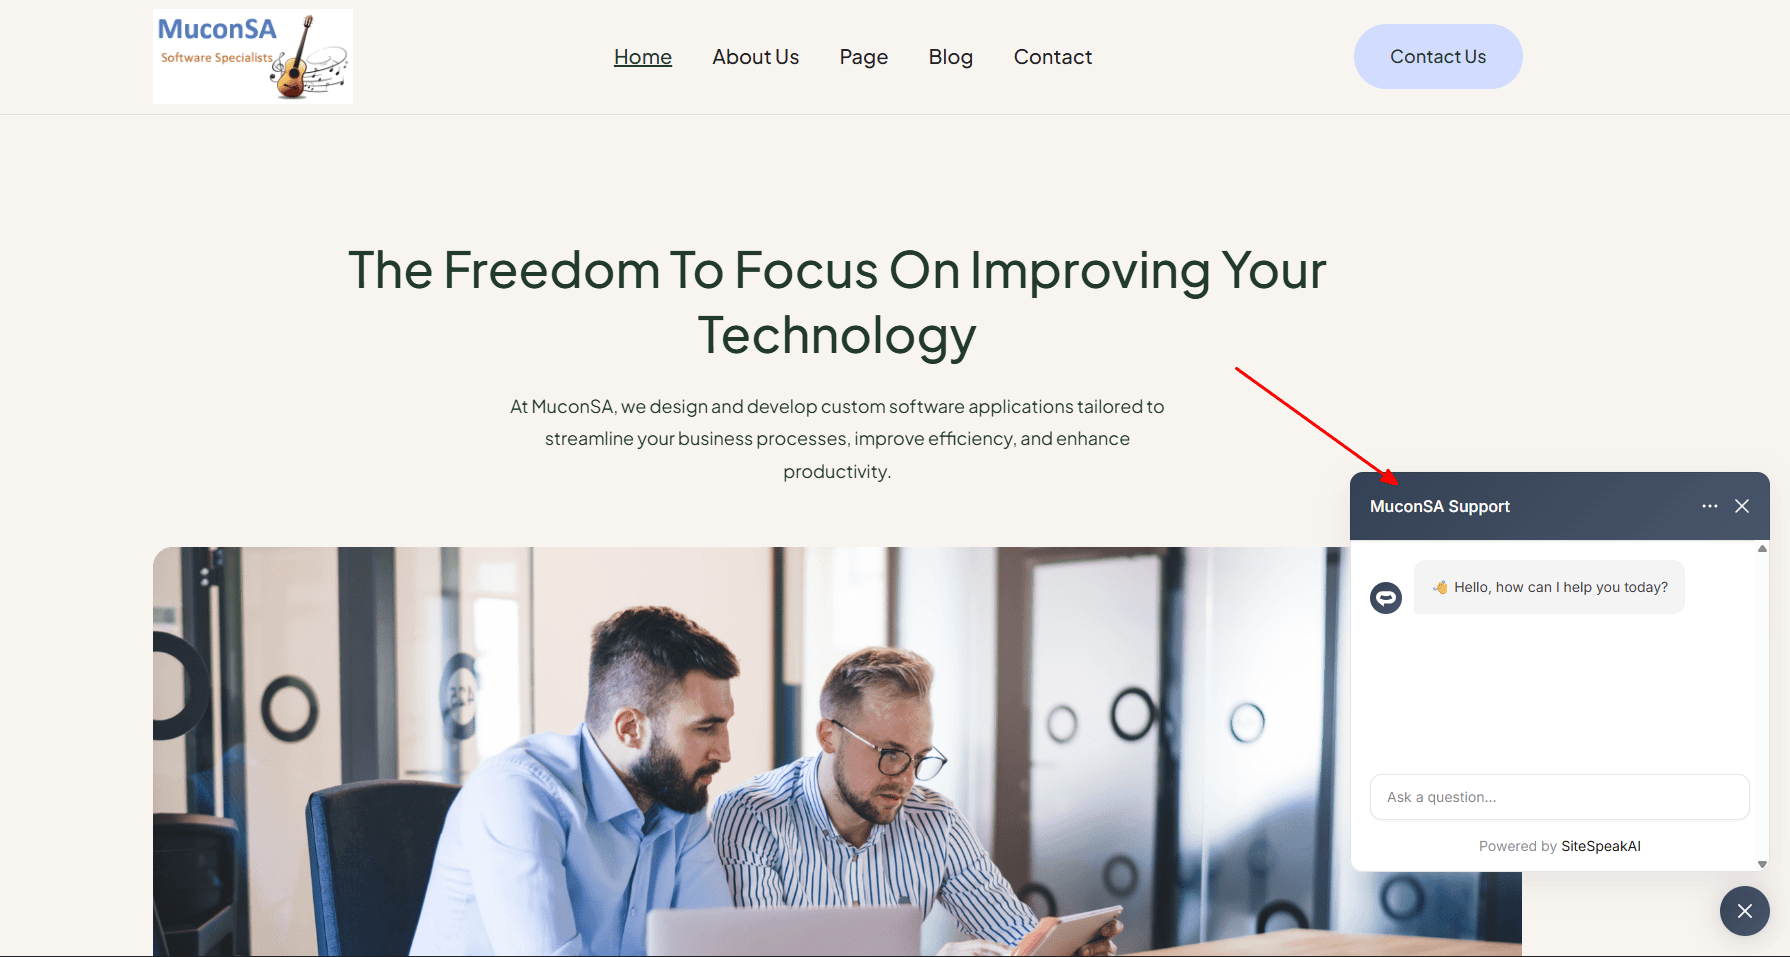
Your AI support agent button will now be displayed on your Webflow website page

-
If you click on the button it will display the AI support agent dialogue
Ready to automate your customer service with AI?
Join over 1000+ businesses, websites and startups automating their customer service and other tasks with a custom trained AI agent.